Have you ever wondered how some of the levels in Valgard are created? Well this is your chance to get some inner look at how we do it. My name is Pablo Amaral, level designer from Valgard and the Armor of Achilles and I'm going to be your guide through our creation process.
In case you don't know Valgard, I recommend you to check out the trailer before reading this article.
Gathering info
At the start of the project when we were creating the story for the game, we choose the path that Valgard would need to travel to reach his goal and with this, each place he would cross needed to make sense. At one point of his journey we choose that he needed to pass through the Gates of Hell, and the creation of this level is what I’m going to talk about in this post.
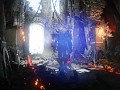
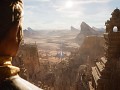
At this step of creation process we need a bunch of reference images showing how the scenario will look and this will influence both the level design and the look of the enemies from this scenario.
 Image from the internet we got as reference
Designing the actual Level
With an image like this as reference we define some basic structural things that this level should have, like lava rivers, bridges, if you can fall from this bridges and we also start designing the enemies, traps and their respective behaviors (which has material for a whole other post), but this a level design post, it’s time we start designing ours and our first step is to go to an image editor software like Photoshop and create a top-view blueprint of the level.
Since the Gates of Hell is the fifth level of the game, we already have a lot of rules established of what a level should and shouldn’t have, one major feature Valgard differs from others shoot 'em ups is that Valgard colliders with the level, so you need to bear this in mind when designing the level. Other concepts that we approved during the development of the other levels are that it’s important for the gameplay that our levels possess open areas, small corridors, places where the player needs to carefully control his movements and the mix of this traits summed with a variety of enemies creates a game that challenges the player. So here are what we came with, after a first pass designing this level.
 Level design from the full level
Level breakdown
As you can see the result is a huge image containing all the main features one level from Valgard requires, this image as a level represents about 450 meters of scenario from start to end, so now I will start explaining what each of these colors represents.
Blue – The blue lines involving the level is what the camera is able to see while in-game mode so anything out of this range cannot have any gameplay features, this is important so we don’t waste time creating content that won’t even appear in the game.
Yellow – The yellow part at the start is a free from enemy area where the game will let you familiarize with the new level, read its title so you can know where you are and get you ready to fight.
Orange – The orange areas are where the level is supposed to have lava rivers, very simple but it is important not to place a lot of rivers in Valgard, because he can’t fly, so if he falls in one of those lava pools he will melt.
White – The white areas are where Valgard will walk, so do you remember what I said about open areas and small corridors? This is the part where this knowledge will help, because you will need to balance all this types of areas to engage the player and keep him interested.

Level design from broke in pieces
Black – These parts are the opposite to the white, they are where the player can’t walk, they could be mountains, trees, pillars, walls or anything related to this level look.
Red – Bridges, that’s what the red parts are, they serve to connect two or more places, but more than that their main purpose is to put the player in a dangerous situation where he does only have a small room to walk and this added with incoming enemies may make him fall to death.
Green – Finally the green part, this is something all the levels must have, here you will face the boss battle, this part mainly needs to fill all the screen when the camera stops over it, but some of them have some peculiarities like falling floors.
Final thoughts
As sad before this is the first design for the level and it will change for sure, because after placing the enemies you will have another vision from the gameplay, and after making playtests it will change again, because making an engaging level that is challenging but not frustrating in a shoot 'em up is one of the toughest parts from developing a game in this genre, because the game needs to be difficult but each time the player dies he needs to know that it was his fault and not because the stupid game was poorly designed and if you manage to achieve this the player will die a bunch of times but will keep playing the game until the finally make that perfect playthrough.
Well, like said in the title, this is our process to create a level, there are many others, but this is what has been working for us.
Since this post will take longer than I expected I will stop by now and break it into pieces, this is the first time we post content of this kind, I hope you liked it, until next time.
If you want to keep up with our work, here are our links.
FACEBOOK: Facebook.com
TWITTER: Twitter.com
STEAM: Steamcommunity.com
WEBSITE: Revolver.gs