Now that our map is completely imported into the UDK, we can start on Part 2 of the map conversion process...
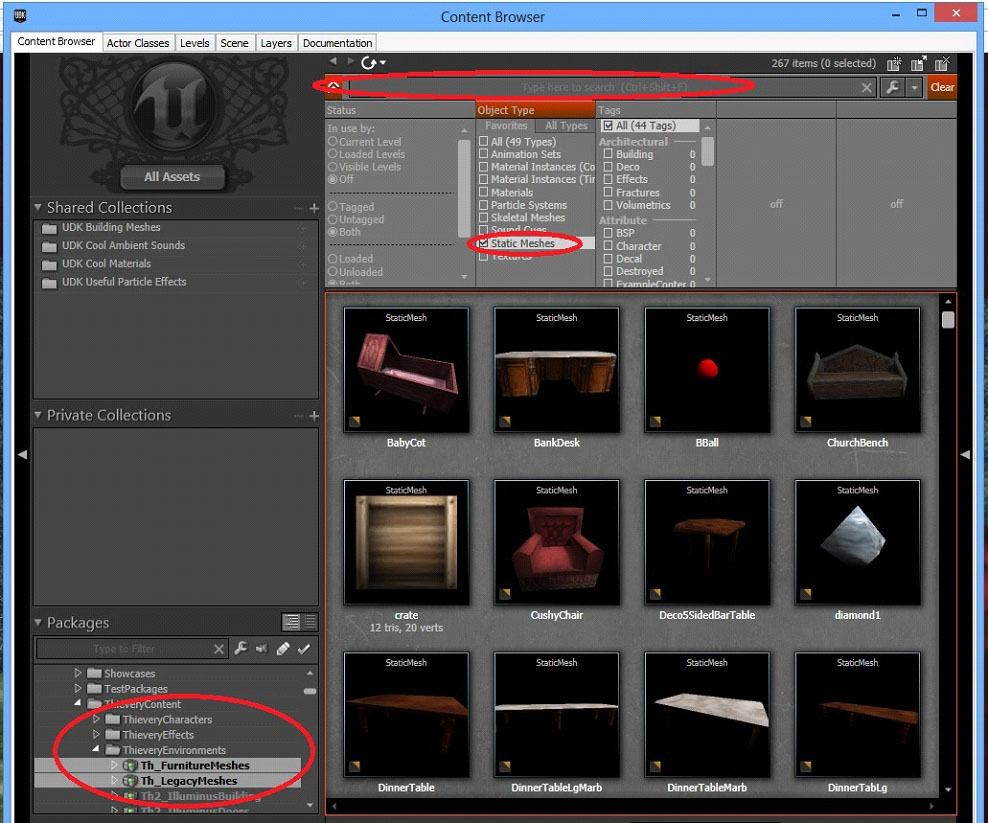
1) The first step is to go through your map looking at the brushes to see if there are any brushes (usually furniture) which you have that have static mesh versions. Below is an example from the developments team files (showing old tut content as you may have noticed) and warning you to only check relevent packages, and that your search field is clear. Finally, make life easier on yourself and select to only show static meshes:
2) Once you have gone through your map replacing any brushes with static meshes that you can find it's time to search out the checkered map textures...
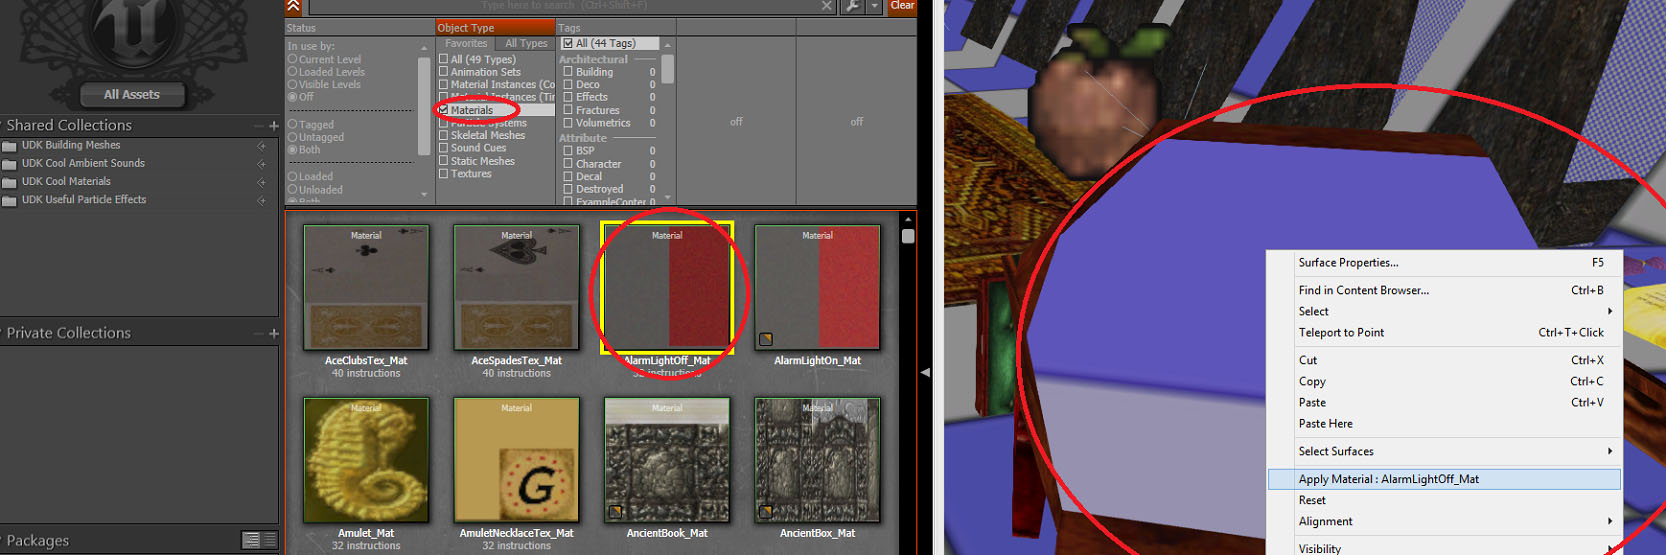
3) Make sure the brush in question is properly textured and has no missing materials (any blue/white checkbox material is bad). If it needs texturing, texture it using Materials.
To do so, select the correct material that suits the brush (usually this is obvious as other parts of the brush have the correct texture already applied). Right click on the surface that requires a texture and select to 'Apply Material'.
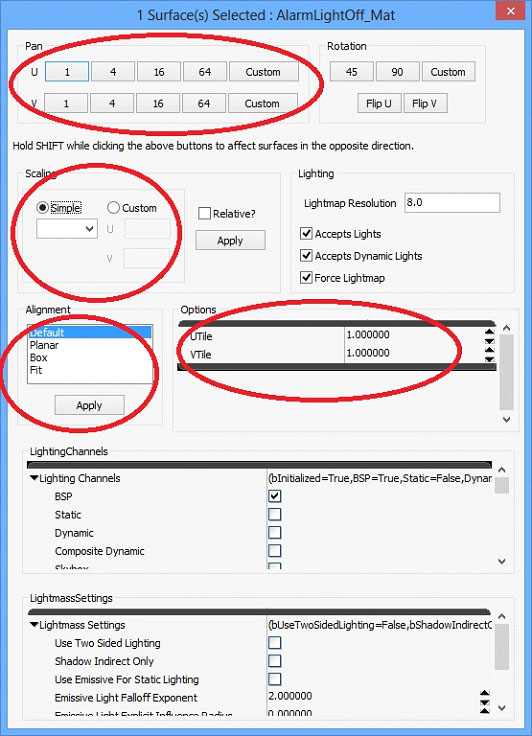
4) The material may not always look correct, therefore right click on the texture and choose 'Surface Properties'. Pan moves the texture in U and V co-ordinate space (up/down and left/right).
Scaling allows you to change how big the texture is (zoomed in/out) as does UTile and VTile.
Allignment lets you select how the surface should be applied in relation to a camera, for example a planar projection is looking straight at it (so the sides would have stretched textures) a box is like a crate with equal textures on all 6 sides.
There's no rule as to which settings require the tweaks, just change settings and see if they make an improvement and remember to ctrl+z to undo if required/if it works.
5) Once done it's a good idea to save your map just to be on the safe side. Also it helps if once you are finished texturing you build the geometery and save once it has completed. The build geometery button is shown below:

This completes Part 2 of the conversion guide.


ahhh, my favourite part ;)
that was actually me :P