Asset Creation Workflow
Hey everyone, how's it going? We're hard at work on Wayfarers: Call of Osiris here at ActaLogic, and we thought it'd be cool if we shared how we create levels, with focus on 3D assets.
Blockout
Before 3D artists start working on 3D models, textures and other assets, the storywriter, game designer, level designers and others first define the storyline, locations, events and so on.
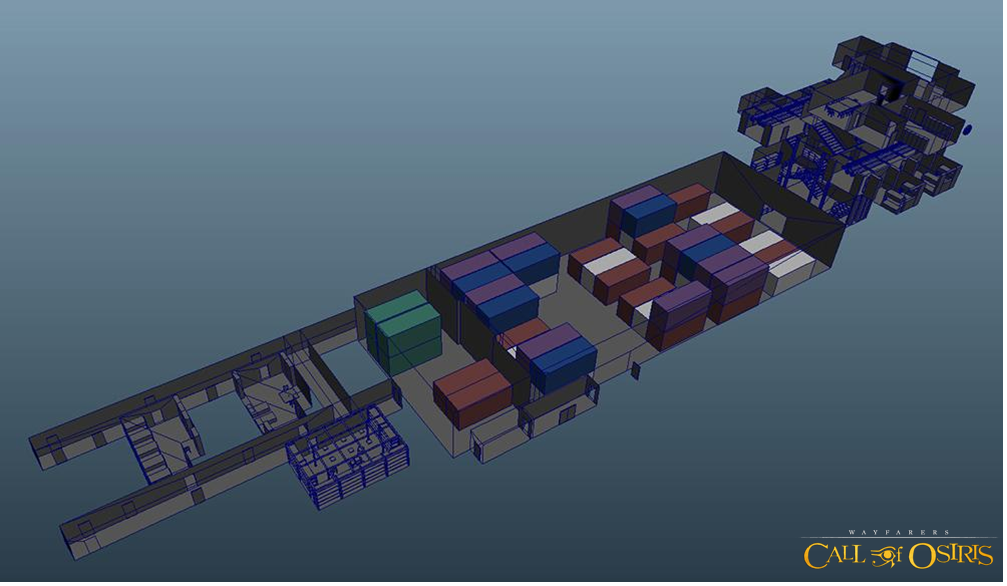
In case of this particular map, the basic idea was to have the player start on an old ship, repurposed for transporting containers. The player would need to slowly work their way to the deck, and get off.
Once this was decided upon, the level designer took over, and started making a blockout of the level with all of this in mind.
In this phase, we set rules to make things easier for everyone. For example, grid snapping was set to 0.1 m, which means that the measurements of all blockout meshes could be divided by 10. A wall section measured 1.1 m, not 1.12 m, and that made the whole process easier and faster. You can set the grid resolution in Unity, and just quickly snap to it.
An important thing to consider was that the map layout can always change, so the 3D artists need to approach 3D models in such a way that they can update the map layout without having to remodel half the scene every time. More on that in a moment.
References
The references were largely found before the blockout stage, so that the level designers had something to work with. But later, some additional references were needed in asset production.
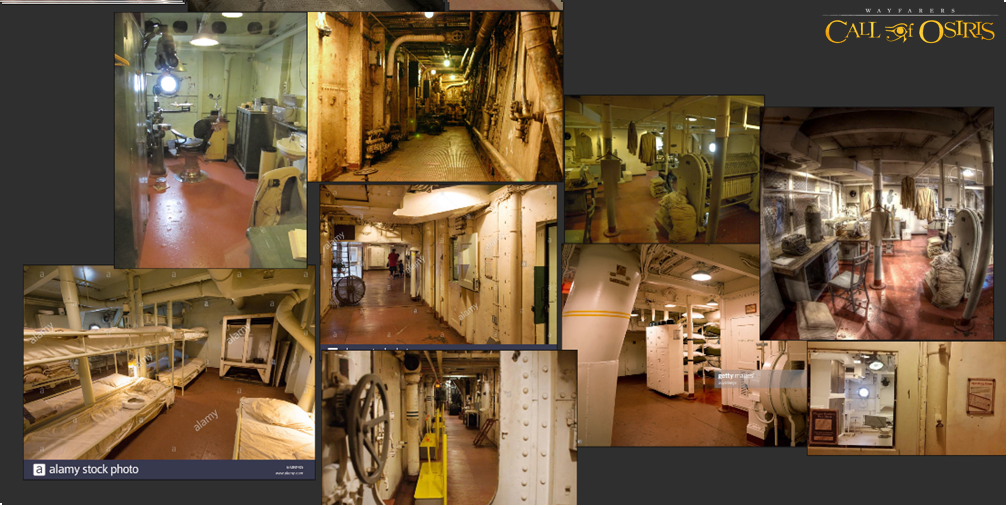
Based on the story we had for this map, we looked at a multitude of old ships. We eventually decided to take a closer look at USS Texas, launched in 1912, and use it for a rough reference. It had just the right 'old ship feel' that we sought.
The color pallette was already perfect, so we settled on something similar. We also made note of various elements like walls, floor, doors, cables and so on.
Modelling
Alright, so we had the blockout and the references. It was time to actually create all the models and textures.
The first important thing: the map layout may change later on, and to avoid having to remodel half the scene every time, we made the assets modular. Instead of making all the corridors inside the ship in one single large mesh, we split the meshes into modular parts.
So, for the walls, I created a mesh that was 3 m tall and 2 m wide. Then, I made several versions of it: one with a plain, empty wall, one with a door frame in it, one acting as a corner piece, etc.
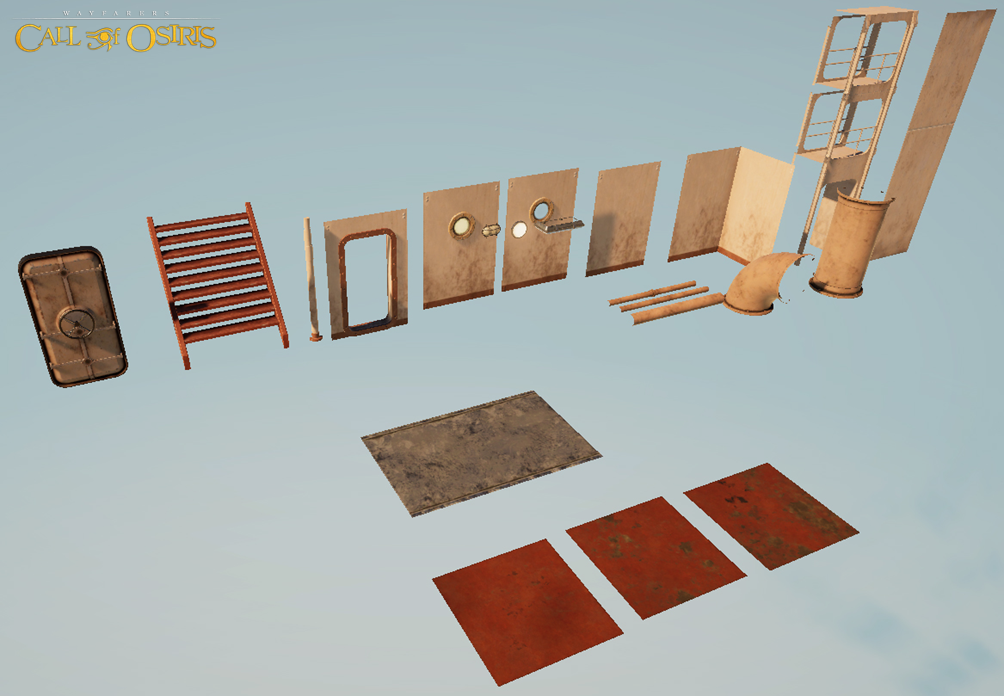
This way, we were able to quickly adjust the level layout on the fly. The process didn't even require 3D artists and it could be done by a level artist or even a level designer.
The actual modelling was mostly done in Maya, with occasional use of Blender.
Materials and Textures
We took several approaches to creating textures. Some were made purely by using Substance Source materials, and sometimes we used those same Source materials in Substance Painter to add extra layers and details. If the textures proved to be too specific, we made them either in Substance Designer or with both Zbrush and Designer.
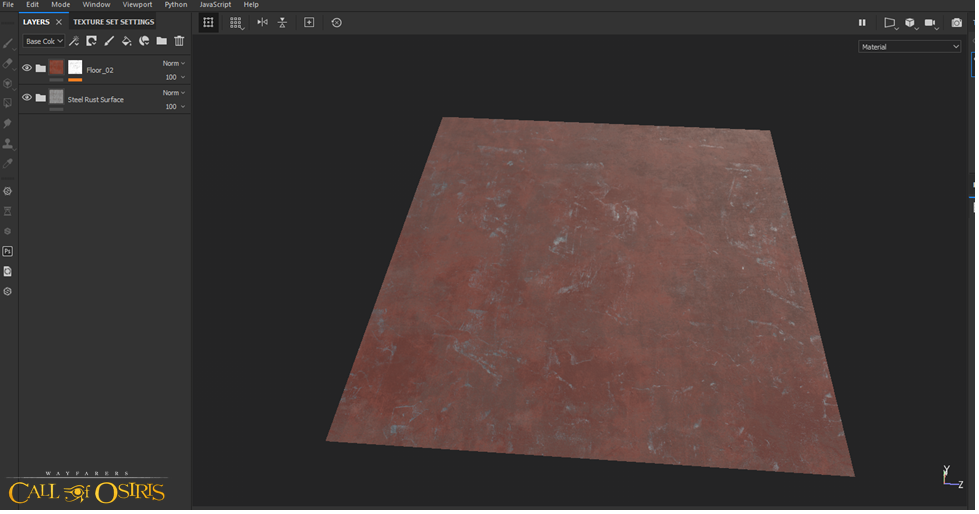
Here is an example of a floor tile. It’s basically two materials, red painted metal on top and steel on the bottom. We used various masks to blend between them. For this one, we mostly used multiple procedural masks for a more natural look, but the process was relatively fast.

The ship's hull was a slightly different case. It's large, so I decided to use tilable textures, but only horizontal and vertical ones, so that I could add details. For example, the hull would be slightly damaged and dirty at the bottom above the waterline.
I still layered various materials on top of each other, again using Substance Painter. But in addition to blending with procedural textures, I painted in some details manually, just to add a more natural feel. Once the material was done, I exported it into the engine. The final texture looked like this:
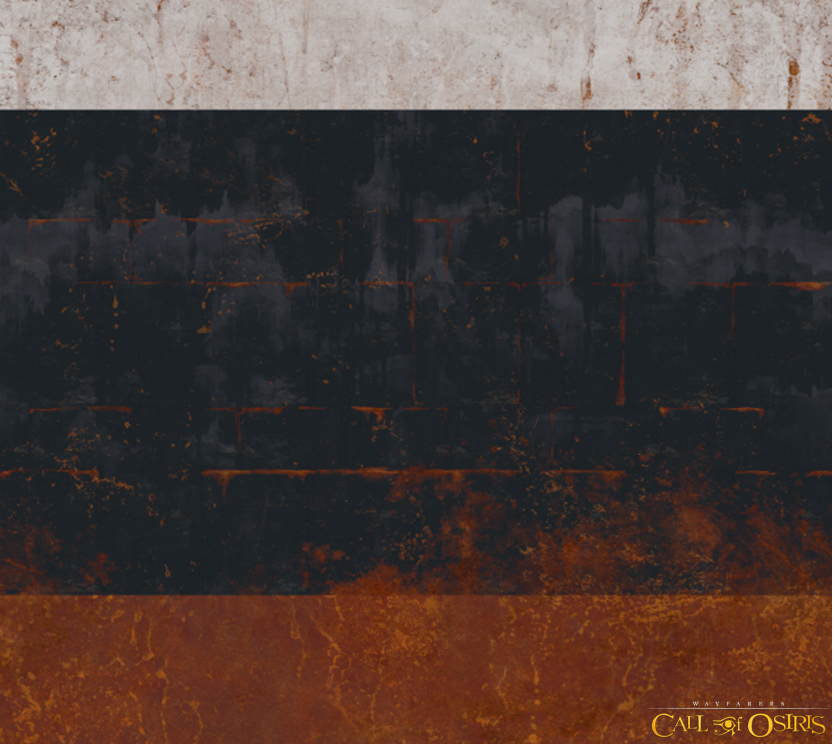
These are two examples of the so called “tilable” textures, meaning that they can be reused in various scenarios.
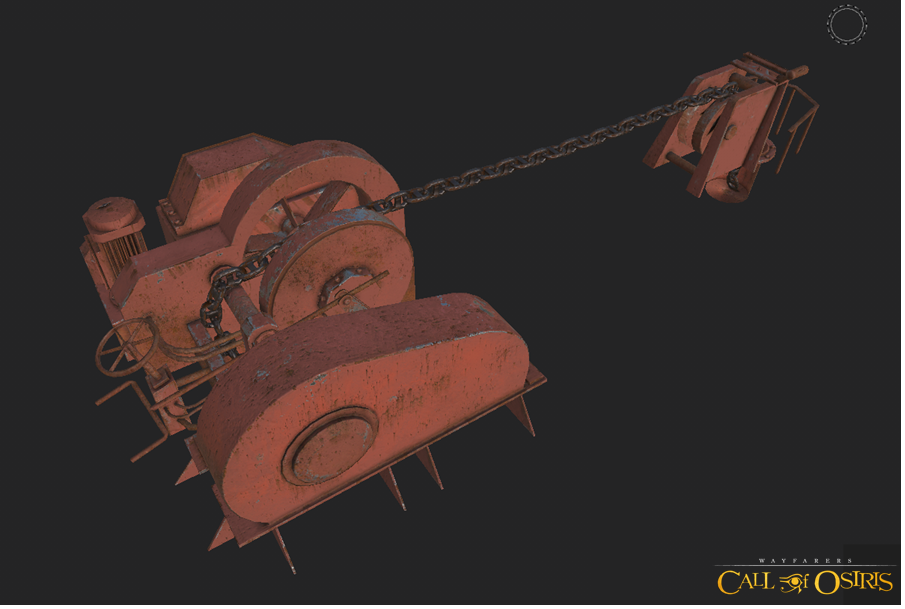
In some cases, however, a unique texture bake was required. This means that the texture in question can only be used with a particular model. In this way, unique localized details was added, like scratches on edges, rust on parts where you would expect them, etc. We usually add these to more complex meshes, like this one:
Propping
Once enough assets were created, the level designers and artists started to “dress up” the blockout.
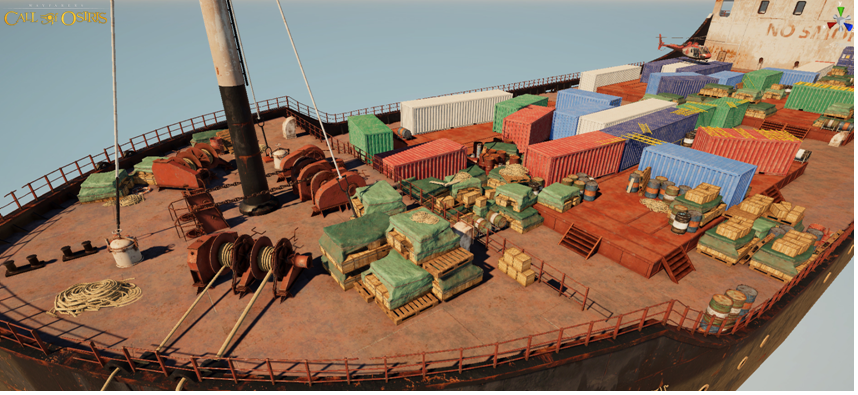
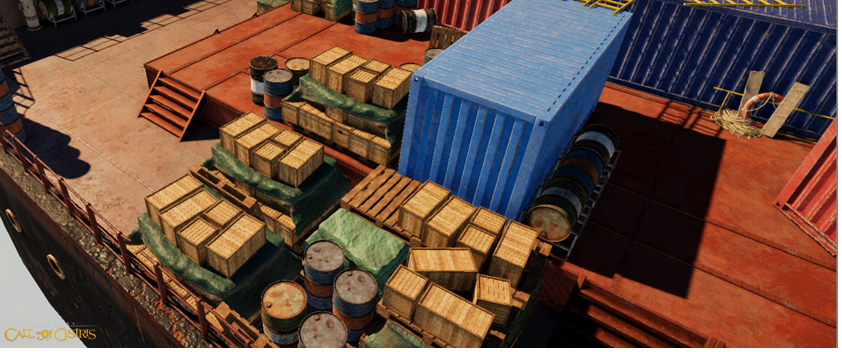
In this phase, we tried to use every asset available to 'pretty things up'. We needed to be careful not to place assets in such a way that they would hamper gameplay. We referred to the blockout or communicated with the level designers to make sure we were on the same page.
It was very important to place the assets properly. They needed to form interesting silhouettes and not just clutter the space, but also not to be distributed equally because the player could easily lose focus, and their eyes would have nowhere to rest.
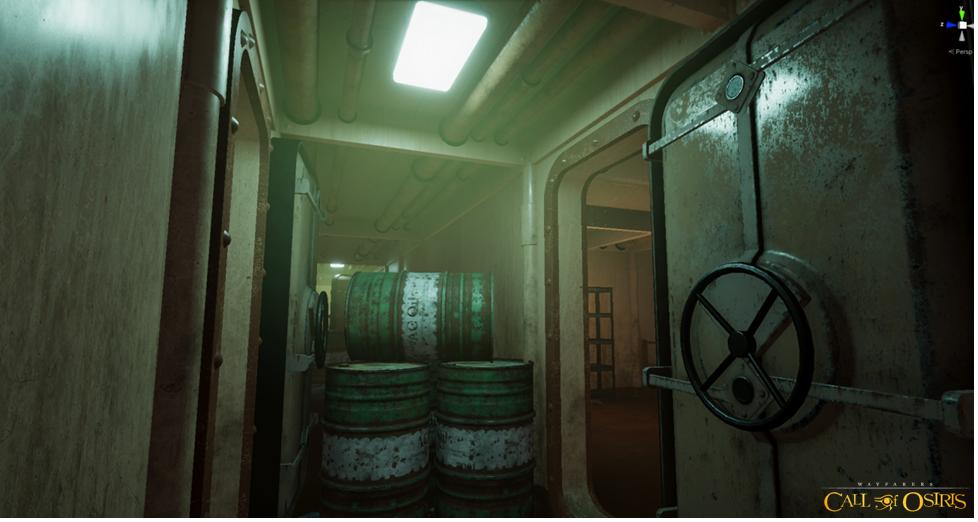
Lighting
Finally, it was time for the lighting pass!
The lighting artist took over and put lights around the map, set ups post-processing, and added fog and other effects. This greatly contributed to the overall atmopshere, and it also helped lead the player. A bright light at the end of the otherwise dark corridor will usually get their attention, and so on.
There’s more to it, of course, but this gives you a rough idea of how we approach level creation.
Zoran Petrović, 3D artist, ActaLogic
Please consider backing us on