Building the UI
The first step in any indie software development journey is to build a basic user interface.
There are lots of ways to go about doing this and plenty of open-source UI libraries to pick from.
However, I’m taking an old-school approach with Microsoft Windows Forms.
WinForms is built off the dot Net framework and specifically designed to build desktop applications.
It has a vast library of UI components, but since it’s based on the Win32 API, customisation and styling can be restrictive.
This is why alternative libraries like WPF have steadily gained popularity over the years.
Fortunately, the drawbacks of WinForms can easily be overcome by introducing Telerik UI.
Telerik solves the customisation and styling issues as well as adds even more components to work with.
And after spending some time whipping together a stylesheet, it took me less than 30 minutes to have a basic interface in place.
User Interface Design
A good user interface needs to be SIC – Simple, Intuitive, and Clear.
All too often, professional development tools like to show off their complexity by presenting users with a wallpaper of settings.
This not only creates confusion but makes the learning curve unnecessarily difficult.
Therefore, Bright Life’s UI is built up from just three main panels.
The Generator panel will contain the node tree that represents the plant being created.
The Properties panel will contain all the settings of the currently selected node.
And lastly, the Render panel will contain the 3D viewport, where the generated plant model will be displayed and updated in real-time.
The goal of this design is to ensure artists only see the settings that are relevant.
And by breaking down the properties panel into three distinct tabs, it’s possible to contain a vast number of settings without having giant lists to scroll through.
To cement this further, all settings within each tab will be searchable and sortable. That way, when an artist knows what they’re looking for, they can find it instantly.
Integrating OpenGL
With a basic user interface in place, it’s time to integrate OpenGL and the core of the PBR pipeline.
I’m going to need the help of a few more libraries to achieve this, starting with my Bright Engine SDK.
I’m also adding GLM to handle all the mathematics and calculations needed throughout this project.
These will do most of the heavy lifting for asset loading, memory management, and then rendering.
WinForms doesn’t have a pre-built OpenGL component. So, I’m forced to create my own.
This requires a bit of trickery using C. But after some finicking, OpenGL is up and running, displaying a red background.
Building A PBR Pipeline
At the heart of Physically-based rendering pipelines lies four textures – the Environment, Irradiance, PreFilter, and BRDF Maps.
These provide critical information about how objects within a scene should be lit from ambient sources, as well as how to handle static reflections.
In fact, these are the pillar stone of Unity’s Reflection Probe and Unreal Engine’s Reflection Capture objects.
The environment map is simple enough and can just be applied directly as a skybox texture.
But things get a bit more complicated with the others.
The irradiance map contains diffuse lighting information about a scene and can be calculated from the environment map.
The calculation is fairly complex and requires solving horrible-looking integrals through a mathematical process called convolution.
The Pre-filter map provides all the information needed when calculating a surface’s specular properties.
It’s computed in a similar fashion to irradiance maps, with the key difference being that surface roughness is now being taken into account.
Lastly, the BRDF texture or bidirectional reflective distribution function is the final piece of the puzzle, allowing for the calculation of the Fresnel effect.
Computing the BRDF map requires quite a few mathematical epiphanies.
But once calculated, we get this weird red-looking texture that serves as a look-up table when rendering PBR materials.
Luckily for me, these calculations are already embedded into my Bright Engine SDK, so I don’t have to deal with this mathematical nightmare again.
I still need to create a simple render function to convert the environment map into the Irradiance and PreFilter maps.
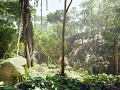
By default, Bright Life will have four HDRis representing dawn, day, dusk, and night lighting conditions. That way, artists can preview their plants’ appearance throughout the day.
In the future, I’m also planning to add an option to import custom HDRis so artists can see how their plants will look in specific environments.
Creating The Camera System
With a skybox in place, it’s time to introduce some basic camera controls.
Nothing particularly fancy is needed here. Artists will primarily focus on their plant models near the centre of the scene.
Therefore, the camera will simply orbit around the centre point with a left click and drag.
Calculating an orbital path in 3D space can be precarious. However, using some clever tricks with four-dimensional matrices, the math can be greatly simplified.
To complete the camera system, artists can easily zoom in and out with the mouse scroll wheel.
And a camera panning feature will likely be added in the future.
Finishing Up The 3D Viewport
To finish up the 3D viewport, I added a simple grid.
Beyond providing a sense of scale, it quickly eliminates the risk of accidentally making a mushroom taller than the size of a skyscraper.
Each large square has a length of 1 meter, while the smaller squares are 20cm.
Tidying Up The UI
With all the basic render preview features in place, it’s time to do some tidying up.
Since the goal is to keep the UI SIC, I moved the background colour selector into the drop-down list with the rest of the HDRis.
Artists can select which HDRi they want to use or swap to a flat colour. Clicking on the colour icon itself will open up a dialogue where a custom background colour can be selected.
I also added a toggle button so that artists can enable or disable the grid as needed.
Final Thoughts
Comment below with your thoughts on this project so far. And don’t forget to subscribe to secure your free copy of Bright Life once it’s finished.
Thanks for tuning in, and I’ll see you in the next one.