Unity – How to make a 2D Tank Game – Player Tank Part 1
This tutorial is based off the player-controlled tank for The Red Front which is currently in development.
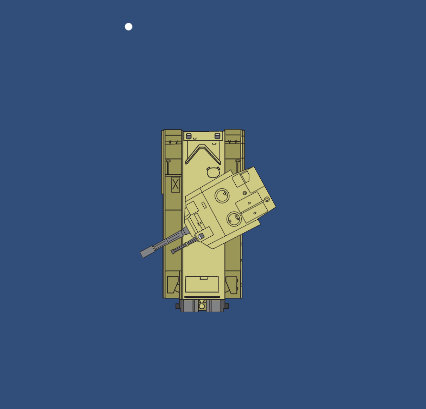
Arcade-Action games are a very popular Genre. By following this tutorial you’ll learn how to create a playable tank, make its turret rotate and follow the mouse. In a later tutorial, you will learn how to make the tank move and make it shoot.
You will need to create some basic art, one for the “body” of the tank and one for the “turret” of the tank. These two parts will move independently to each other so will be drawn in two segments.
This tutorial has been written for beginners and assumes basic knowledge of Unity and C# programming.
Skill Level: Beginner
Prepare the game objects and link reference sprites.
The tank we are building will comprise of two separate game objects. One object for the “body” of the tank and one game object for the tank turret. The turret will move independently to the tank body and will be set up to track the player mouse.
The basic setup required for this is as follows:
- Create two independent game objects in the unity hierarchy (Named TankBody and TankTurret).
- Add sprite-renderer components to each of the newly created game objects, link your tank body art and tank turret art to each applicable game object
- In the hierarchy view, drag and drop the TankTurret object onto the TankBody object. This will set the TankTurret object to be a child object of the TankBody object.
Following this, you will have the following hierarchy structure and objects created.
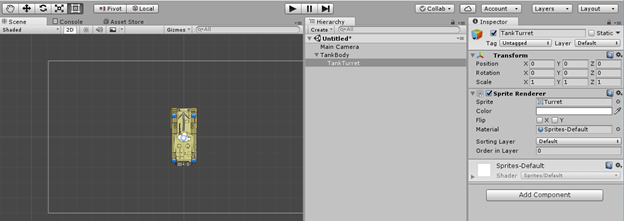
Note: If you have any issues with the turret appearing behind the tank body, select the TankTurret object and set the “order in layer” to 1.
Create a new C# script and attach it to the turret Game Object
The following stage will add a new C# script to the turret object which will cause the turret to track the player cursor.
- Select the TankTurret object and Select Add Component
- Click New Script, name it TurretTrack and make sure C# is selected for the language
- Once the script has been added to the object, right click the script from the inspector when you have the TankTurret object selected and click “Edit Script” and paste the following code:
public int rotationOffset = 0;    // This will offset the rotation of the object as it tracks the mouse. This is required to correctly set rotation values

void FixedUpdate() {
Vector3 difference = Camera.main.ScreenToWorldPoint (Input.mousePosition) - transform.position; // This will calculate the distance between the mouse in the game and the position of the tank turret
difference.Normalize ();    // This returns simplified values which makes it easier to work with


float angle = Mathf.Atan2(difference.y, difference.x) * Mathf.Rad2Deg;    // This calculates the angle between the mouse and the turret by using the values derives from the difference calculation.

transform.rotation = Quaternion.RotateTowards (transform.rotation, Quaternion.Euler (0f, 0f, angle + rotationOffset), 200 * Time.deltaTime); // This will rotate the turret towards the calculated angle over time. Tweaking the multiplication value will state how quickly or slowly it will rotate.
}- Build the script and you can then press the play button. The turret will now “almost” track the mouse
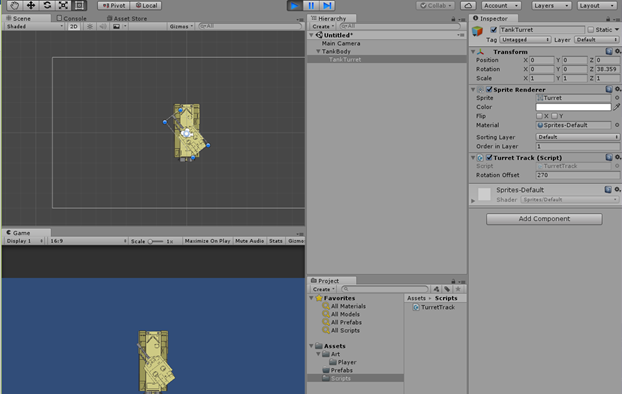
- To fix the tracking issue, select the turret object and expand the rotation script. In the Rotation Offset box, write “270” so the script will offset the rotation of the turret by 270 degrees.
- Press play again, you will now see the tank turret tracks the mouse properly.
Summary
You have now created your tank, created a moving turret and have it correctly following the mouse.
There may be some additional questions, so I have created a few example questions below:
- Why has the script been added under “fixed update”?
- The Fixed Update receives a dedicated cpu timeslot, the update section is susceptible to frame-rate issues. It’s a good idea to place critical updates for your game in fixed update rather than update. As the player tank turret is core to gameplay, this script has been included under a fixed update.
- I want the turret to follow something other than the mouse, is this hard to do?
- It’s fairly easy to do, you just need to reference another objects transform point and replace the screentoworldpoint method with the referenced objects transform (i.e. targetobject.transform.position)
- I have other issues with the script and hoping you can help?
- Contact us on social media or leave a comment here, we will do our best to reply as soon as we can.
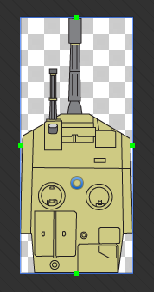
Bonus Segment, Sprite Rotation Point
If you would like your turret to rotate around a different central point, select the art piece that you have and click “sprite editor”. The central circle is the sprites rotation point, drag this to your desired location and hit “apply”. Everything else will magically just work!
About This Tutorial Series:
This tutorial series is being written by the developer of “The Red Front”, these tutorials are aimed at new unity users who are interested in getting involved in Game Development. These tutorials are real-world examples based off methods that are currently used in The Red Front. Visit us at www.theredfront.com


This comment is currently awaiting admin approval, join now to view.