Hello, everyone!
We have a long list of post processing techniques we want to implement to make the game look more awesome. As mentioned in the last Developer Summary, we have been working on a Light Bloom post processing effect and we are going to explain a bit about it in this blog post of Developer Delvings!
For a better format, read the blog post here!
What is Bloom?
In a very simplistic view, bloom originates from the fact that real lenses are imperfect and are never able to perfectly achieve focus. For most circumstances, the imperfections that originate from imperfect focusing are not noticeable. However, when a very intense light source is present, those imperfections are magnified and bloom can be seen. The light effect that bloom produces is characterized by light fringes extending from the bright light source into the borders of dark objects. Put differently, the camera or human eye is overwhelmed by the intense light.
Although our virtual camera do not suffer from imperfections found in real cameras, it is desirable to implement these imperfections since they provide the player with an experience closer to the real world.
A great example of Light Bloom can be seen in this shot from the movie Elephants Dream. Notice the bright light from the background leaking into the faces of Emo and Proog.
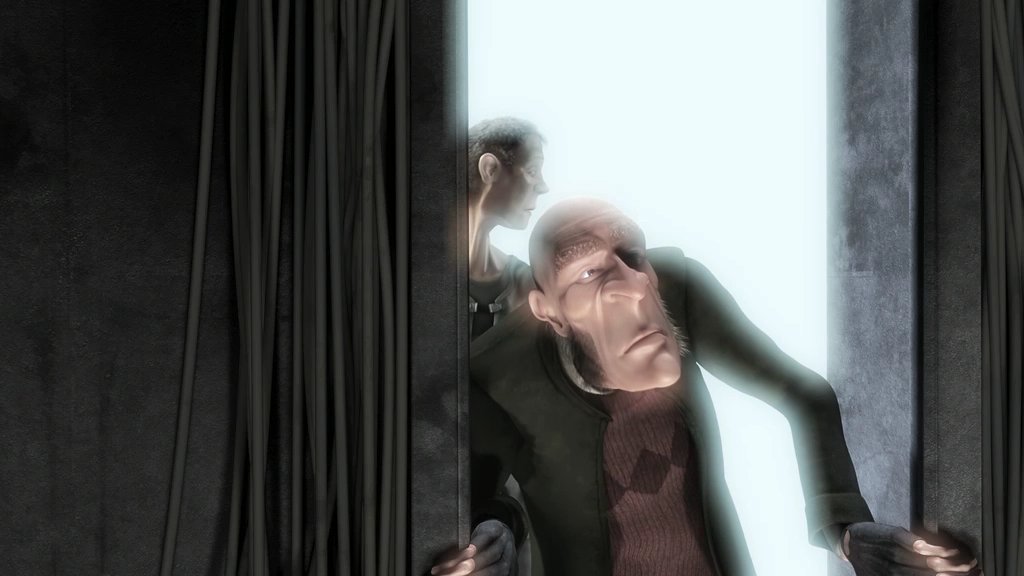
[Elephants Dream. Creative Commons Attribution 2.5]
Implementation
The idea behind the computer implementation of Bloom is quite simple. We are going to have three shading passes on the rendered scene in order to produce the desired result. First, we will extract from the image the brightest parts above a certain threshold and save it to a Framebuffer. The second pass and third pass will apply a Gaussian blur to the extracted bright parts and sum it to the original image.
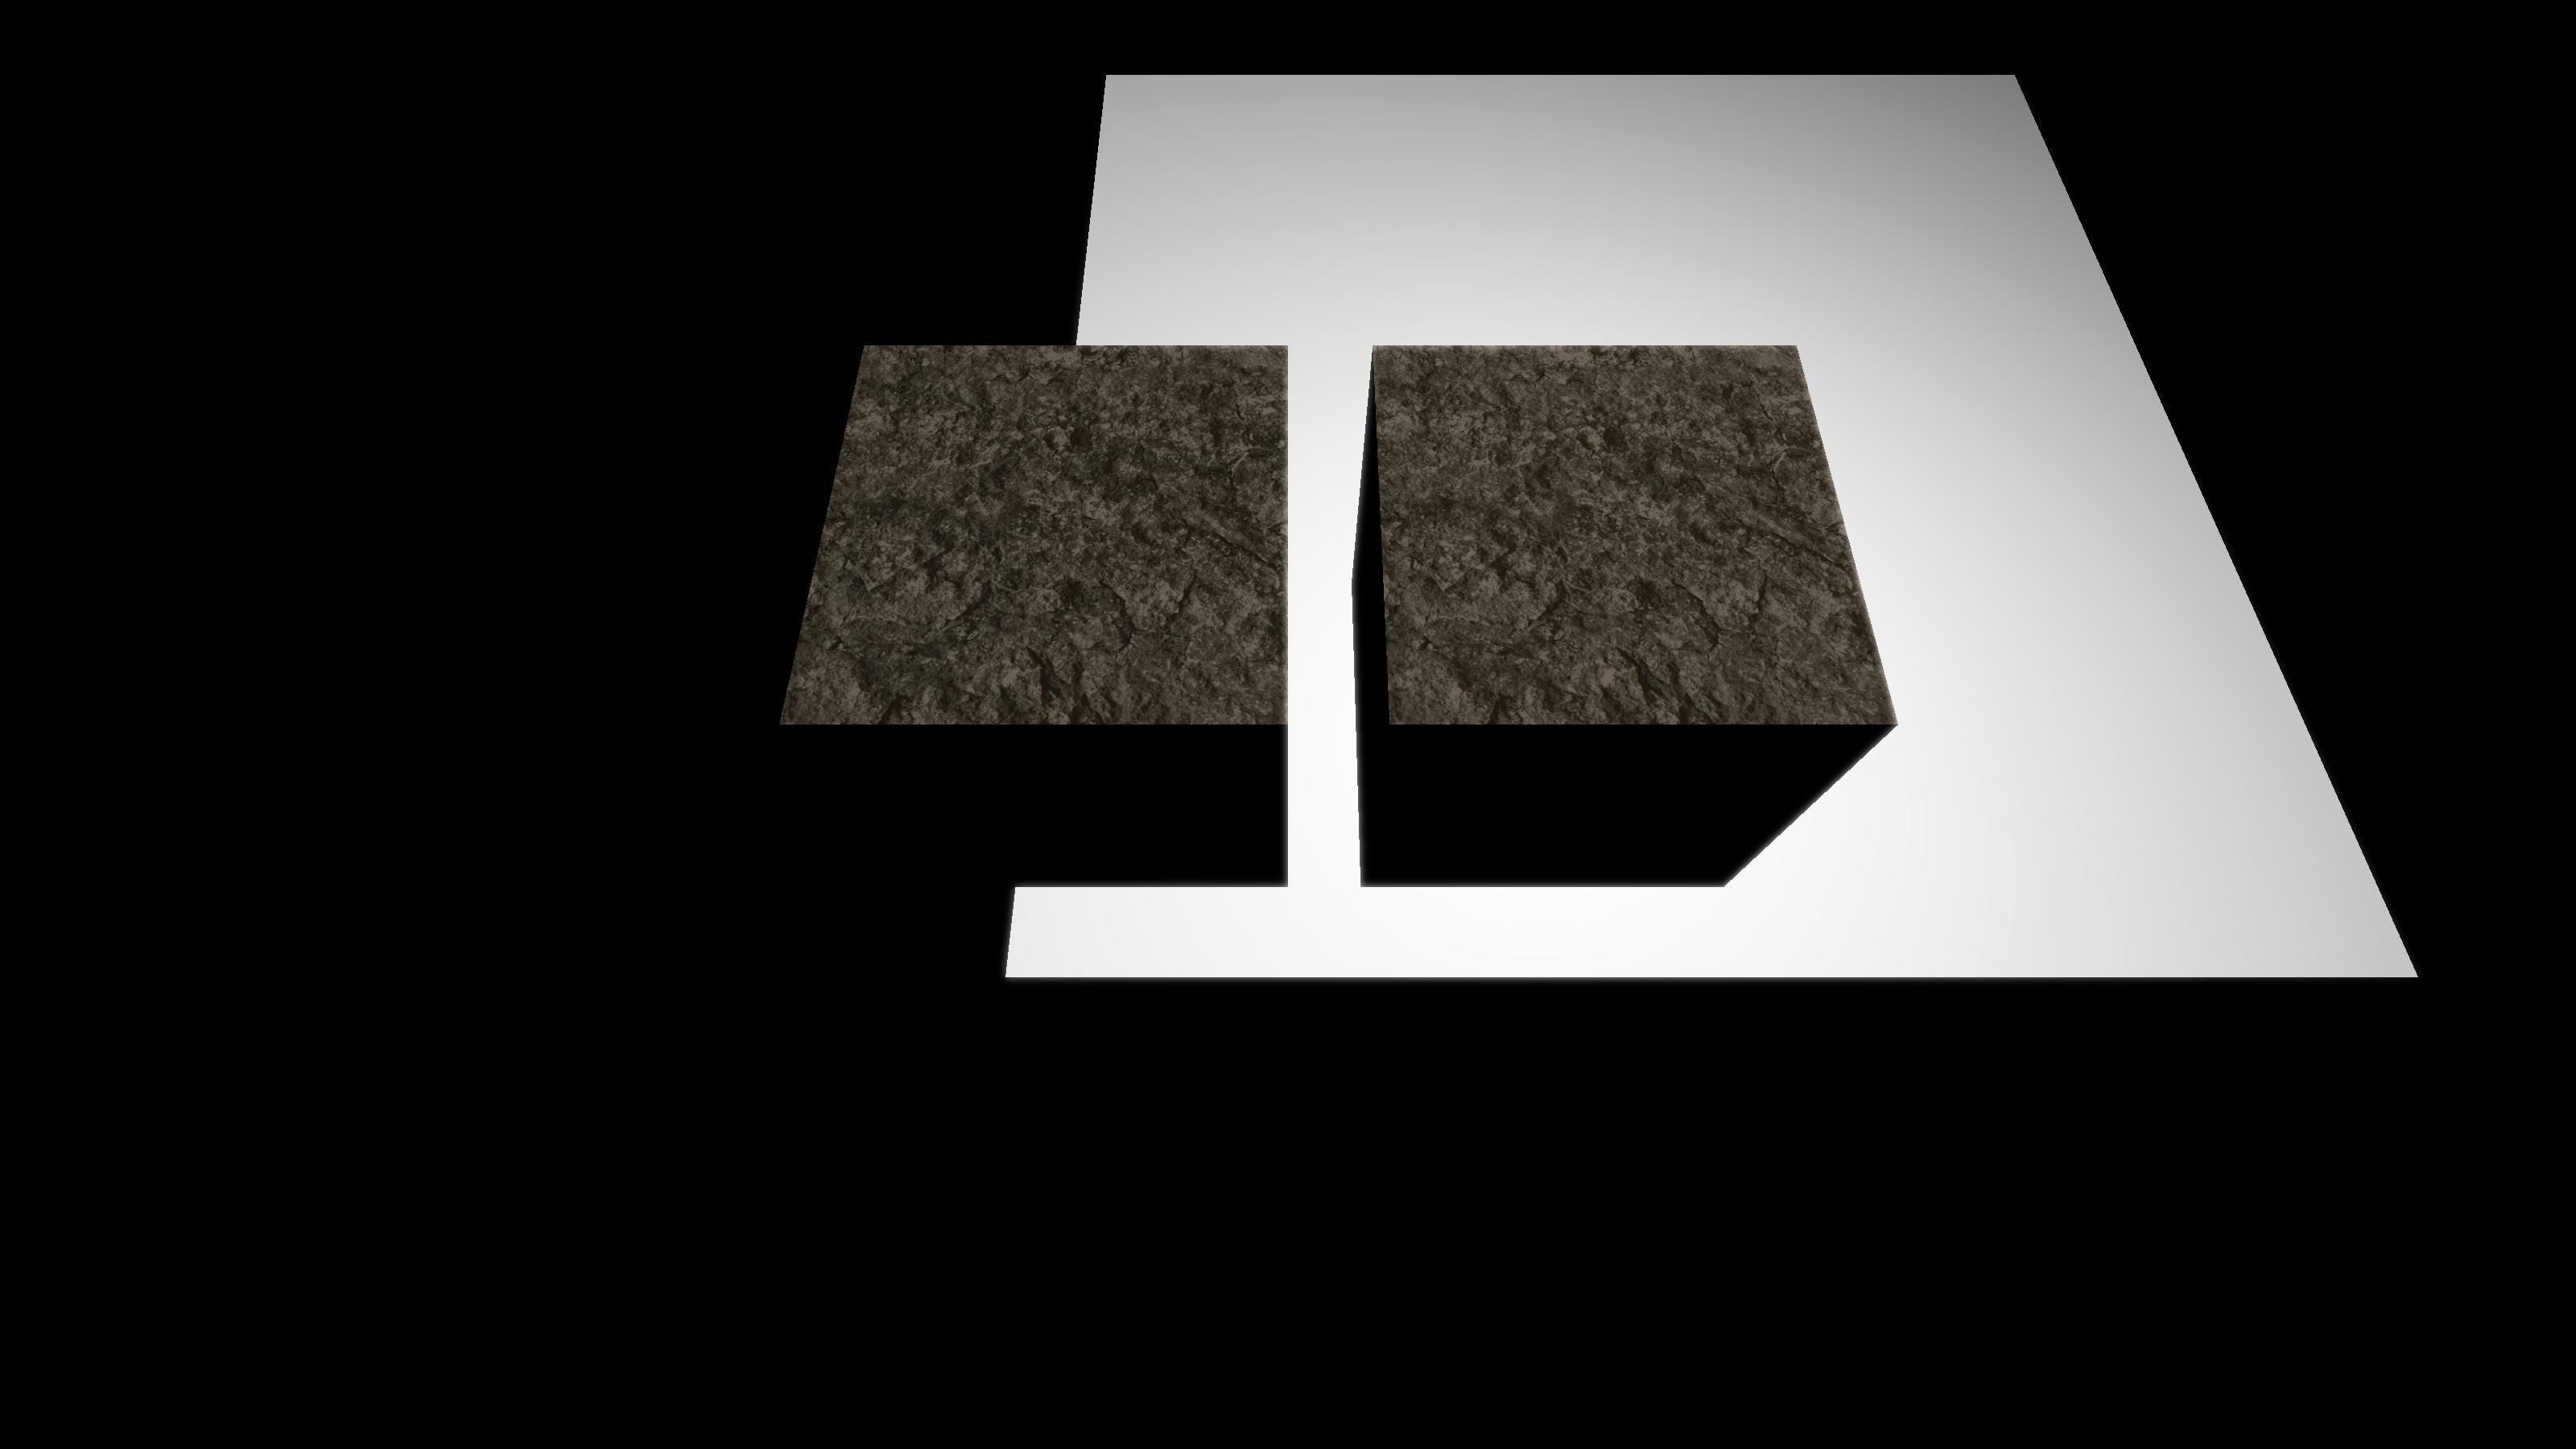
For testing the shaders, we will use a very simple Test Screen with a bright background and two cubes in front of it, in order to minimize external code interference and make it quick to test our shaders.

First Pass (Luma)
For the first pass, we calculate the pixel's luma in the fragment shader and if it is bigger than a certain threshold, unLumaThreshold, we multiply the pixel color vector by a factor and render it to a texture, call it lumaTex. Otherwise, we pass a null vector. Excerpts from the fragment shader can be seen below. As for every post processing effect, we are rendering a quad and using a pass-through vertex shader.
// returns the average brightness of a pixel
float luma(vec3 color) {
return 0.2126 * color.r + 0.7152 * color.g + 0.0722 * color.b;
}
void main() {
vec4 val = texture(unTexColor, fUV);
pColor = val * clamp( luma(val.rgb) - unLumaThresh, 0.0, 1.0 ) *
(1.0 / (1.0 - unLumaThresh));
}
The result rendered to our Framebuffer after the Luma pass with a threshold of 0.75 is shown below:

Second Pass (Gaussian Blur)
For the second pass, we will implement the first part of an efficient two-dimensional Gaussian blur. Since a two-dimensional Gaussian function is the product of two one-dimensional Gaussian functions, we can first compute the Gaussian blur in two passes: The first pass will compute the Gaussian blur over the y-axis and the next pass will compute it over the x-axis.
// first pass of gaussian blur, in the y direction
void main() {
float dy = 1.0 / float(unHeight);
vec4 sum = texture(unTexLuma, fUV) * unWeight[0];
for(int i=1; i<unGaussianN; i++) {
sum += texture( unTexLuma, fUV +
vec2(0.0, float(i)) * dy) * unWeight[i];
sum += texture( unTexLuma, fUV -
vec2(0.0, float(i)) * dy) * unWeight[i];
}
pColor = sum;
}
And the result after the first gaussian pass is:

Third Pass (Second Gaussian Blur)
The second Gaussian blur pass blurs our previous texture in the x-axis and sums it to the original rendered texture.
The relevant excerpt from the fragment shader can be seen below
// Blurs image on x-axis and sums into the original image
void main() {
float dx = 1.0 / float(unWidth);
vec4 val = texture(unTexColor, fUV);
vec4 sum = texture(unTexBlur, fUV) * unWeight[0];
for(int i=1; i<ungaussiann; i++) {
sum += texture( untexblur, fuv +
vec2(float(i), 0.0) * dx) * unweight[i];
sum += texture ( unTexBlur, fUV -
vec2(float(i), 0.0) * dx) * unWeight[i];
}
pColor = val + sum;
}
After the Gaussian blur of the brightest parts and summing to the original image, we obtain:
Although this demo is not very impressive, it demonstrates the Bloom effect functionality. Keep in mind that after the Bloom stage, color values fall beyond 255, so a HDR stage is needed to normalize the color values.
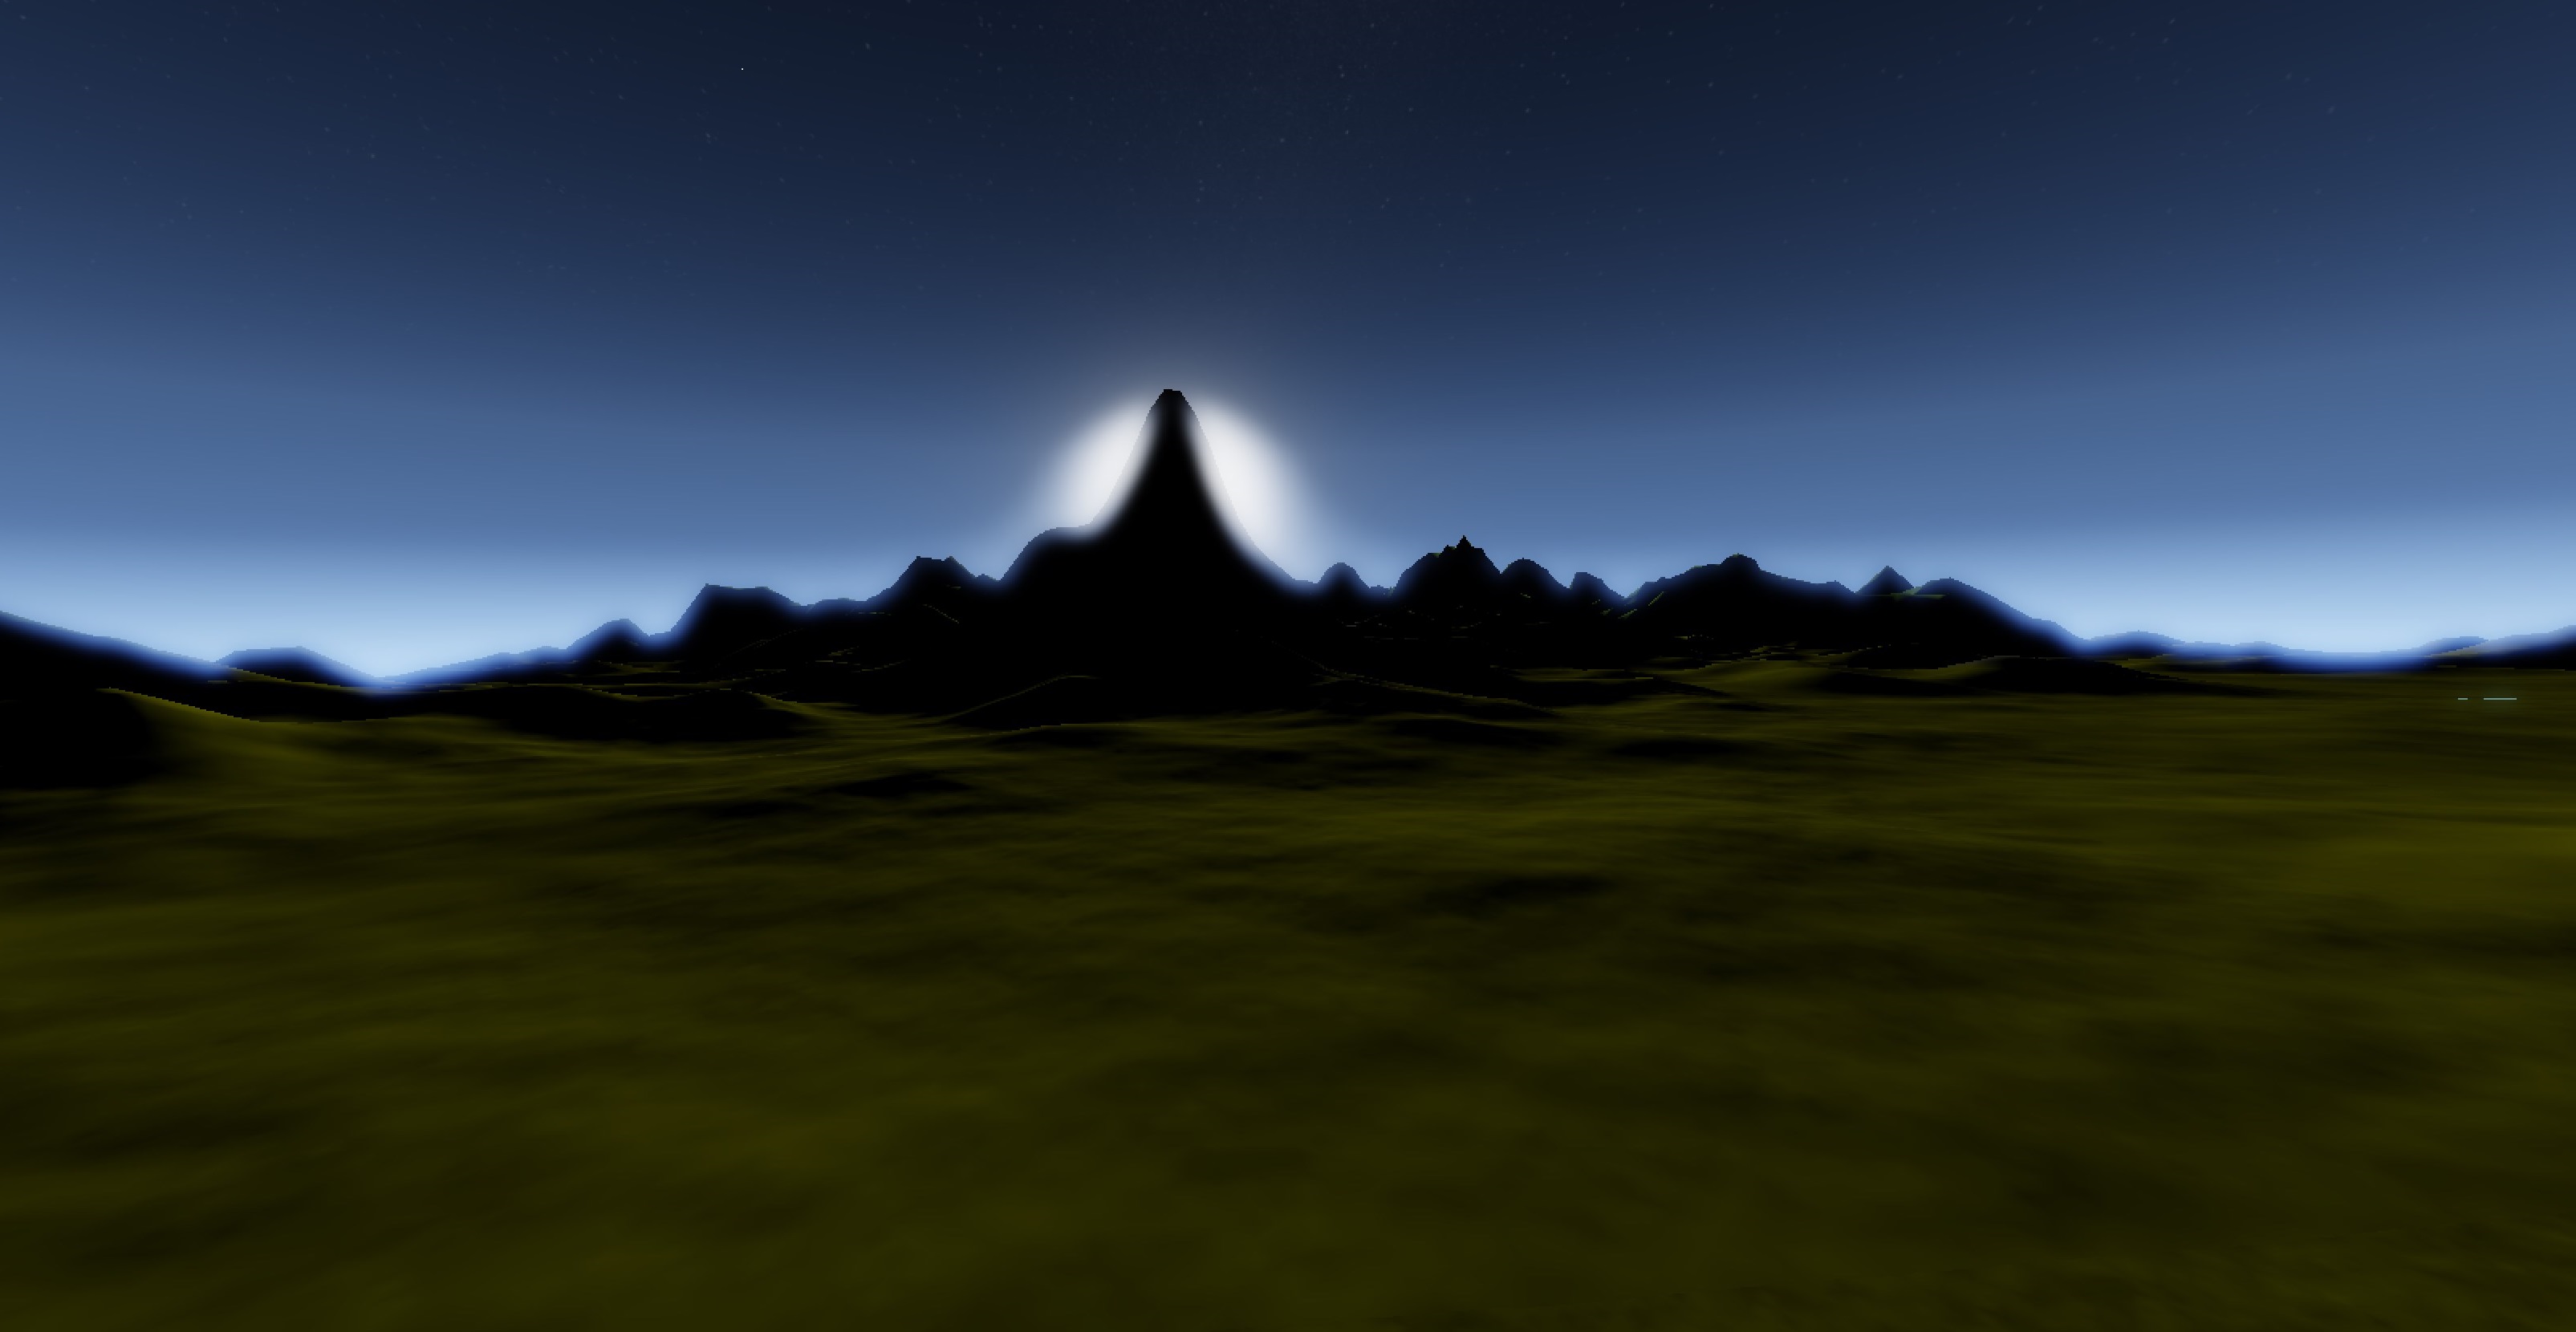
Here is a better screenshot showing the Bloom effect. Notice that light fringes leaking into the borders of the horizon.
Challenges
When incorporating the Bloom code into SoA as a Render Stage, we had a few problems given the huge dynamic range of our scenes. The biggest problem was when bloom was being applied to a scene with Trinity B present. Our Star has a immense brightness across its glow disk and bloom was causing it to overexpose as seen in the image below:
After discussing the problem with the programmers, we had a few ideas. Initially we tried to control the intensity of Bloom depending on the scene's average brightness. However, Trinity B's brightness is so intense that results were poor. We also tried other strategies, such as disabling Bloom when Trinity B was visible, which also did not give satisfactory results. Eventually, we had to rewrite part of the Renderer code to render bright stars' glow after the post processing effects have been rendered. We also took the opportunity to rewrite other parts, such as using the Geometry Buffer more extensively in our Renderer in order to prepare for Deferred Rendering, which is coming soon.
Compare the previous image of Trinity B with this one, which also has Bloom enabled.
Looking Forward
Although Bloom is working correctly, we still need to take the time and tweak all the parameters to make it look better - it is definitely too strong right now in many circumstances. Our specific vision when implementing bloom was using it to give life to a surreal forest of giant, glowing mushrooms during the night or illuminate a cave full of glowing crystals. Designing these beautiful environments is high on our list of tasks as other systems are developed to allow us to begin hand-designing the bodies of the Trinity star system!
We will, as always, share the progress of this with you guys. We'd like to know what you think about this and other post-process effects.