Hello everyone!
My name is Michael, and I am the Lead Environment Artist on The Maestros, a high action team-based RTS game. You can visit www.maestrosgame.com for more details.
Today I am going to walk you through my process of creating an environment asset from Concept to Final Product that is to be used in The Maestros.
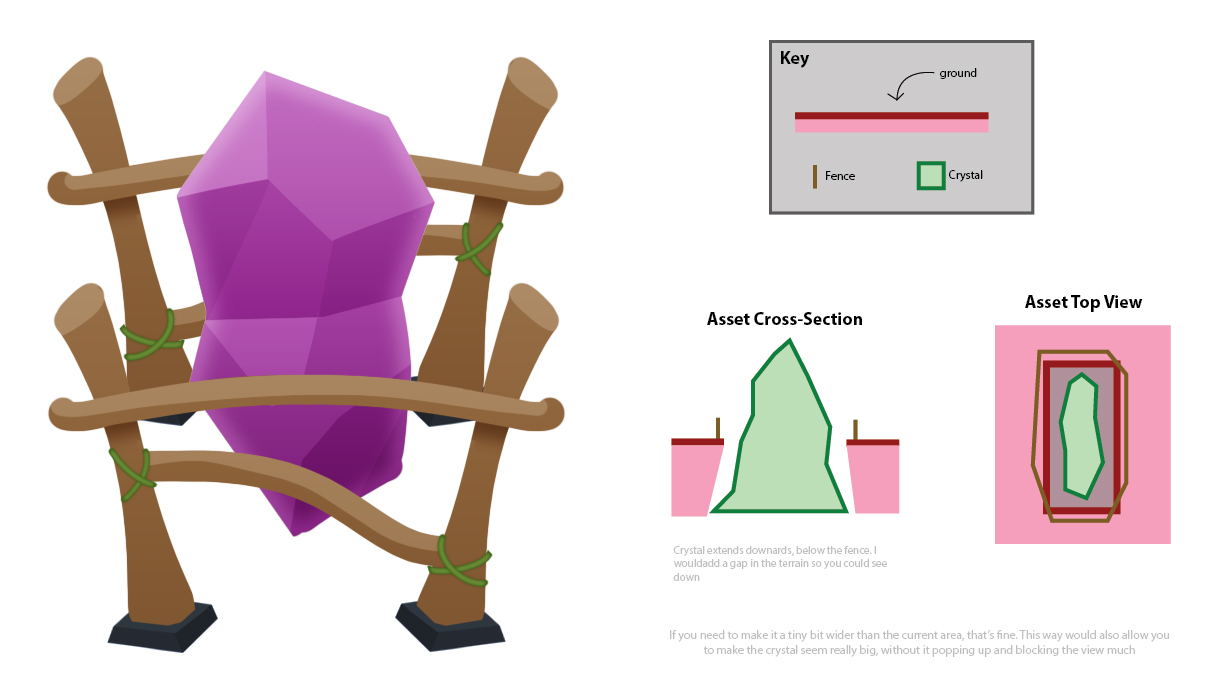
Step 1: Concept
Here is a drawing of a large arkanium crystal surrounded by a wooden fence. This asset is meant to be a major landmark in the center of our 1v1 map, Fissure. Alex, our Lead Designer, is involved with this step to make sure the asset follows certain constraints and is a good fit aesthetically.
Step 2: 3D Modeling
Once the concept is approved, I can start modeling the asset. There are a few things I always keep in mind during this step to help push the asset to its full potential and to help make things easier for myself down the pipeline.
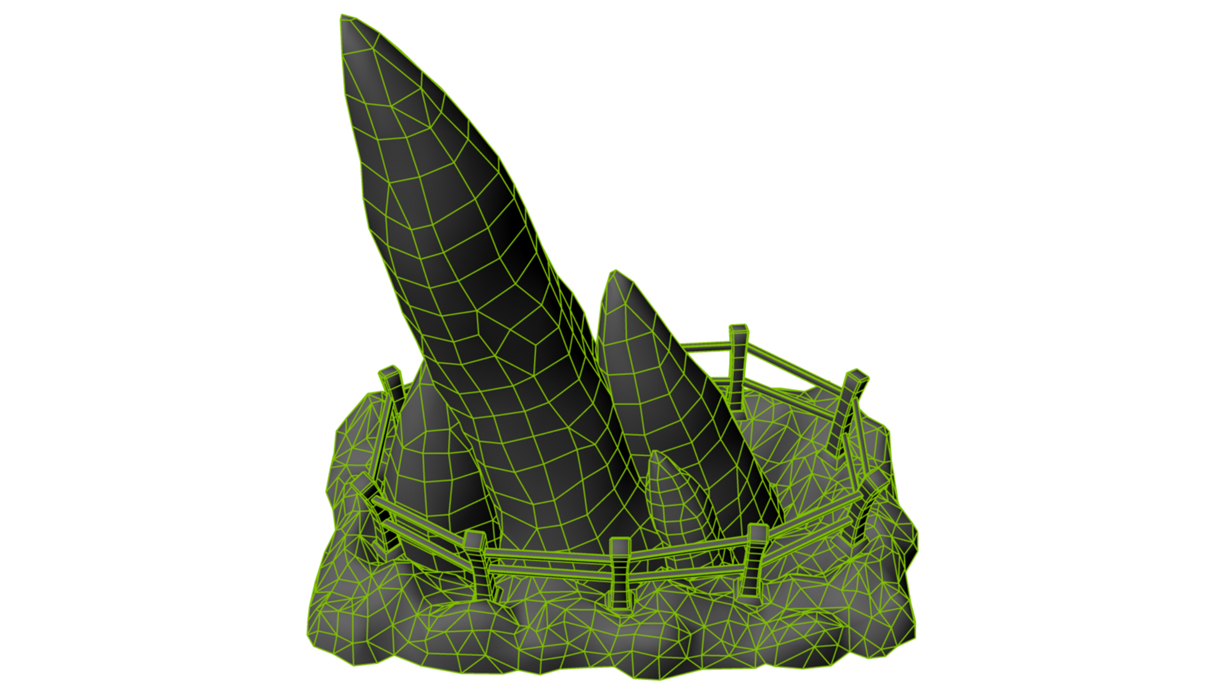
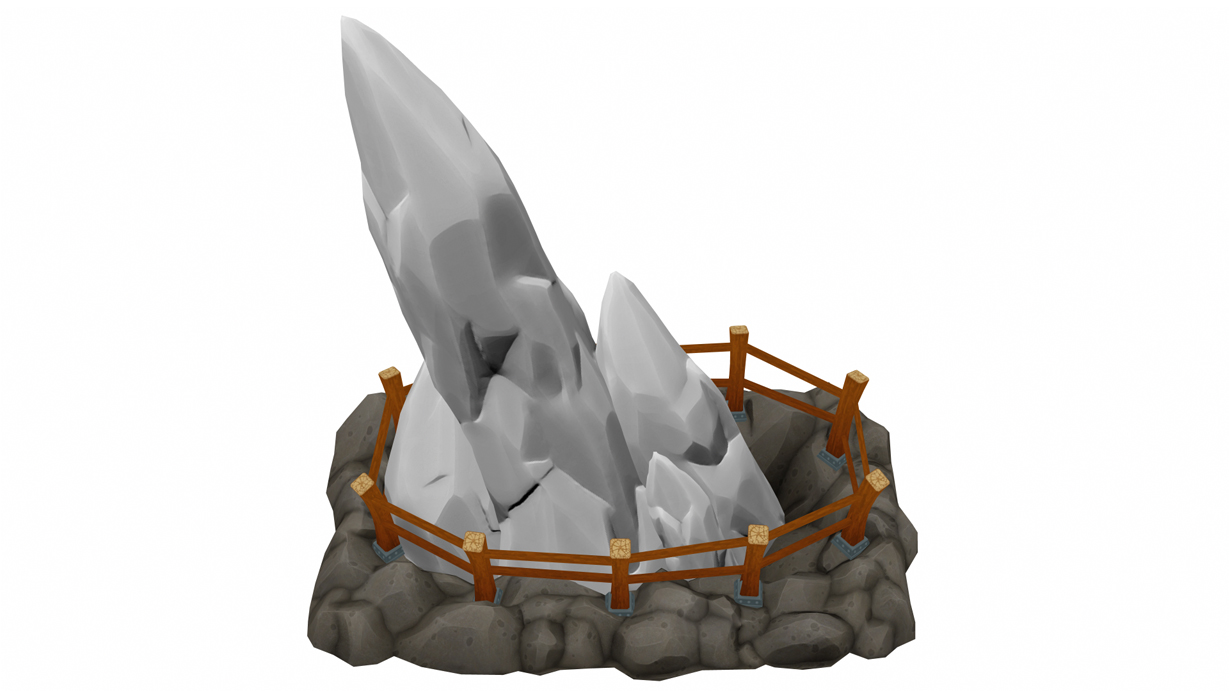
Silhouette
By applying a black shader, without any lighting, I can see the asset's silhouette. Using this technique I can see how interesting the overall shape is on its own. The camera in The Maestros
is in a Top Down view so we need our assets to be readable before we even apply textures to them. I can also see how stylized the overall shape is and can push the shape into a more or less of a “cartoon” direction.
Optimization
This is really important. If all of our assets exceeded their polygon count and texture size set out from our engineers, the game would run slow and ruin the player’s experience. Everyone on the team works towards a perfect balance of quality vs performance.
Polygon Count is something I always watch for. I want to get the polygon count as low as I possibly can without changing the silhouette. One technique that I use is to remove unseen faces. The camera in The Maestros is in a fixed position. The faces that will never be seen, usually the bottom and back, can be deleted. Not only does it save in polygons, it helps make UV Mapping much easier later on.
Step 3: Texturing
Here are the steps I follow while texturing assets for The Maestros.
- UV Mapping - Pixels are precious! I try to unwrap the model using as much uv space as possible. I overlap any sections that are being duplicated to help increase uv space
- Base Prep - This is where I assign flat colours to sections of the asset. I also overlay any bakes I have to help boost the overall look.
- Details - This step is where the magic happens. I paint in all of the details to make the model come to life.
- Other Maps - Normal, Specular, and Gloss maps are made from the final texture.
Note: I turn off any lighting to better see the texture
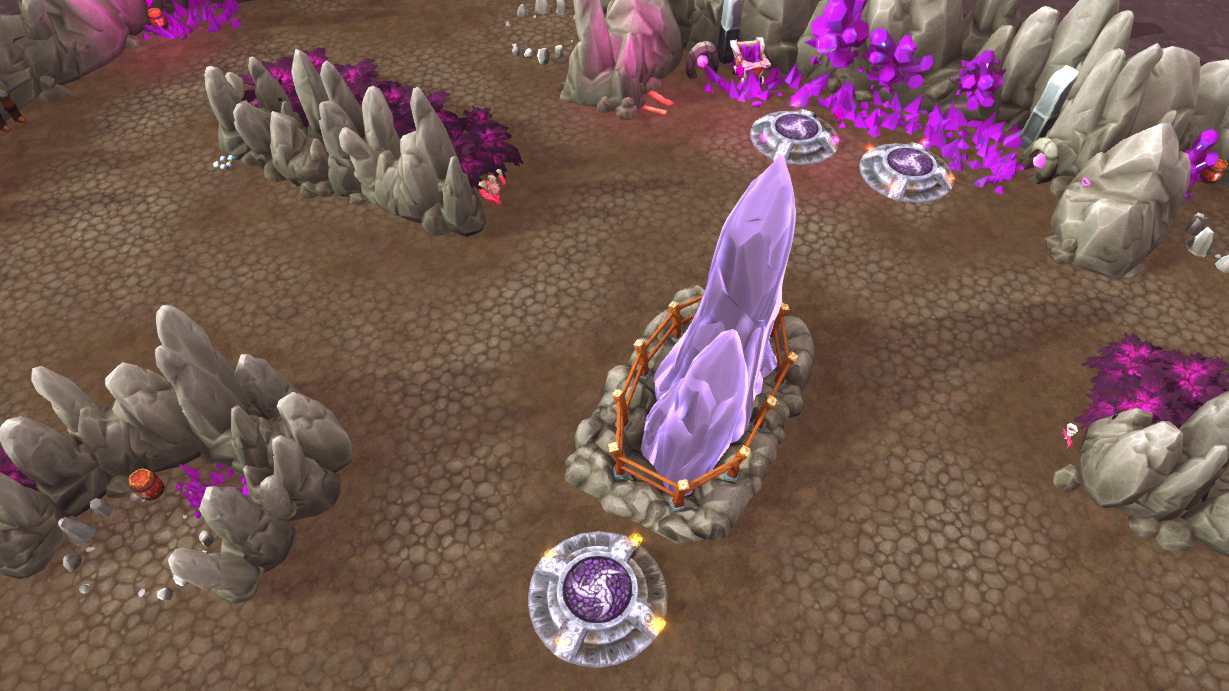
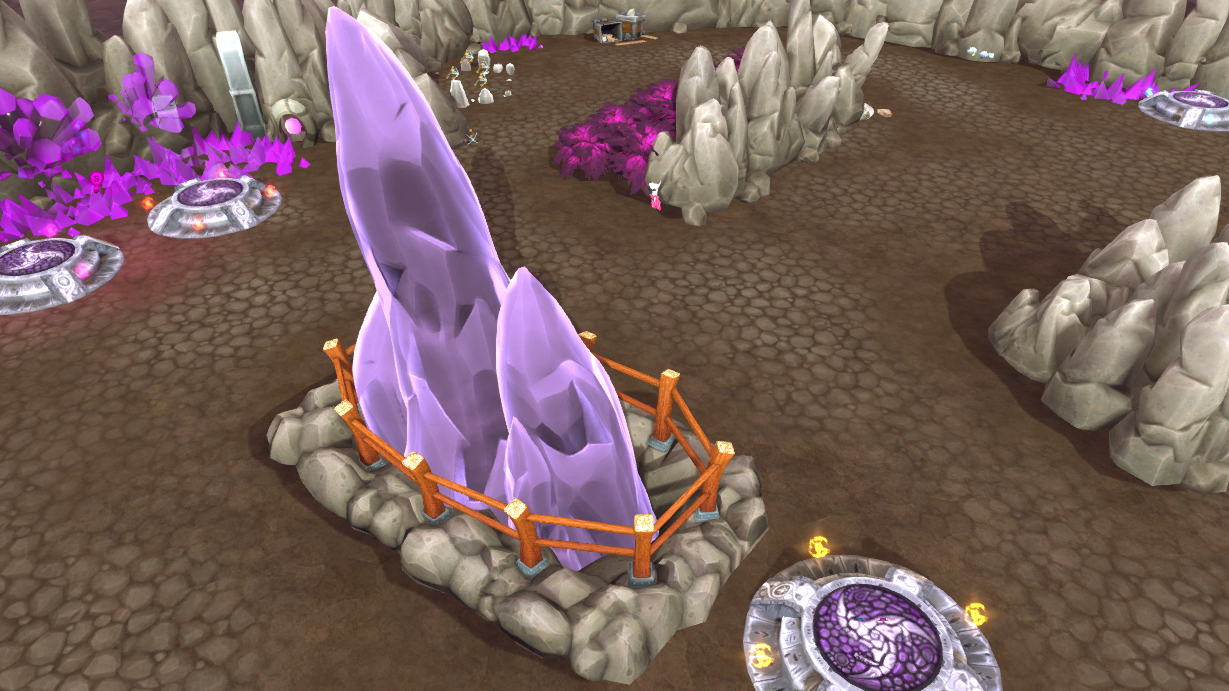
Step 4: Final Product
Here we see the final product inside the game. I created a custom material that uses the environment to make the arkanium reflective and glossy.
Closing
We have many maps with many different types of colourful terrain and unique pieces like this for you to see. I hope you enjoyed reading and maybe learned a thing or two about the art used in The Maestros. Thank you and be sure to look for our next Dev Log in the future.