Traditional 2D point and click adventure games have fixed camera angles picked by an artist. When you move from one room to another, you are presented with an entirely new background. This allows the artist to bend the rules a little when it comes to showing or hiding things the player might see. For example in the original Arrival in Hell there are a quite a few backgrounds where Eduardo has taken advantage of this in order to conceal the contents of the next room.
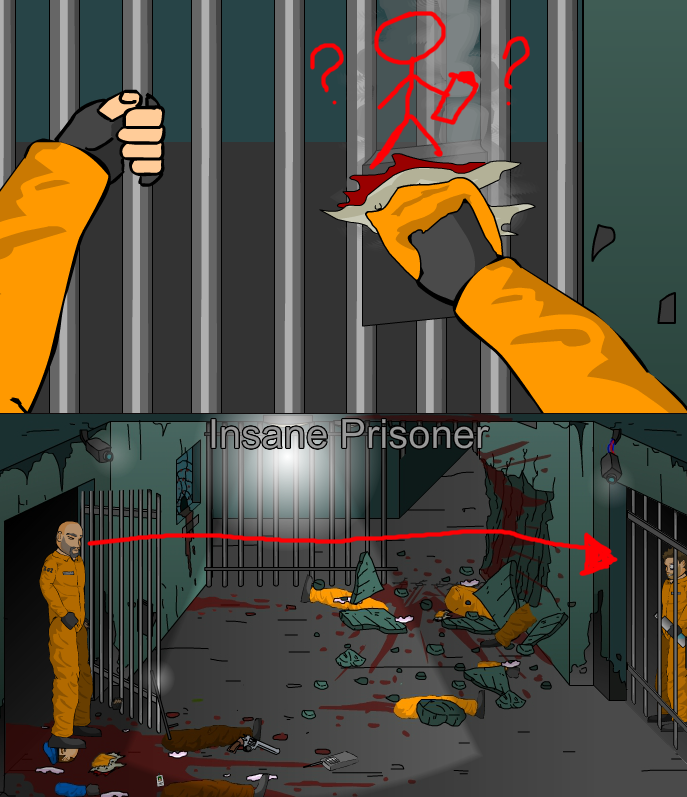
Where did Chuppo go?

The dead guard is not visible from the first corridor
This is a valuable trick as you can have whatever camera angle you want without spoiling the surprise of what’s in the next room. However, in our remake we decided early on that we’ll be using a true 3D environment. This means as you move from room to room the 3D models stay the same; only the camera can be moved. This, however, runs the risk of the player being able to see things up ahead, so we also needed a solution to control that. Before we address that though, I’ll explain how we achieve the camera changes.
Each ‘room’ has a floor collider and a camera. A ray is cast from the player downwards until it hits a floor. When a floor is hit, we know which room the player is in currently and the camera for that room is enabled.
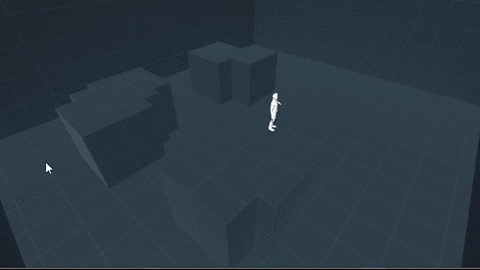
Simple camera switching added to last week’s Navigation example
The problem with this, which you can already see from this simple example, is that you can see all three ‘rooms’ more or less all the time. Seeing into other rooms from the one you’re currently in wouldn't work well for our point-and-click adventure as it would overload the player with unnecessary information, distract from the purpose of the room you’re currently in, and spoil any surprises waiting for you in the next room.
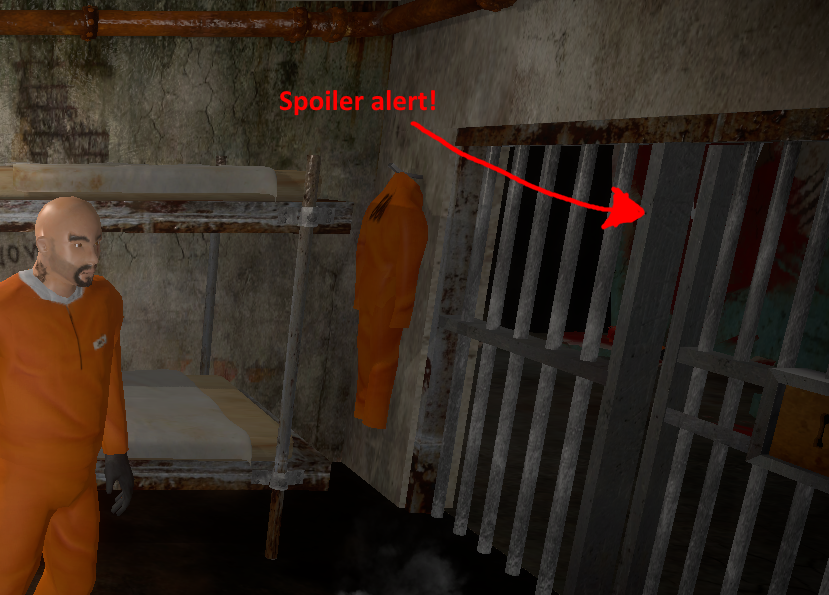
From this angle you can see what’s coming next

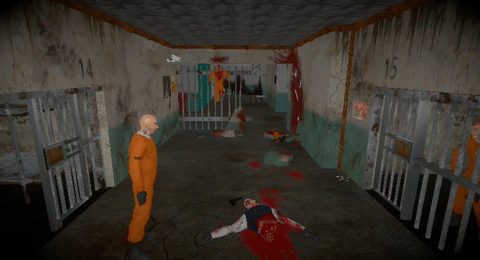
In this room you can see so far down the corridor you’re actually looking at 4 rooms in total!
We could have hid rooms with clever camera work, but this would severely limit the angles we could use. Instead we chose to turn the ambient light all the way down and make clever use of lighting to hide and show rooms. This way we are unrestricted when choosing camera angles, and it also gives the game a creepy ‘something is lurking in the shadows’ vibe.
That about wraps up how the cameras work in the game. The only exception to the camera work is during cut scenes, in this case the normal camera angle system is turned off and switched for a fixed camera. If anyone would like the source for the example seen above, you can find it here. I hope you enjoyed the article, next week I’ll be going over how the player movement is animated (no more weird floating!).

