In UDK, an event is a particular situation that you define, (obviously in Unreal Kismet) which brings consequences to game play or to other game elements. You can create events anywhere in a level, without limitations. You can divide them into three different groups: Pre-Compiled Events, Trigger Events or InterpActor Events. In this tutorial we’ll cover them all to give you a complete view of how an event is created and manipulated.
Step 1
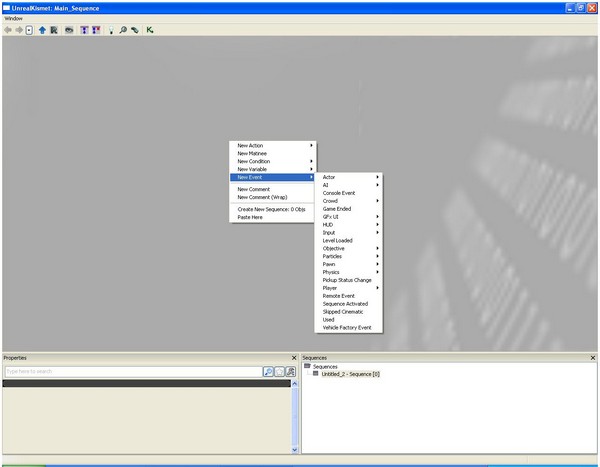
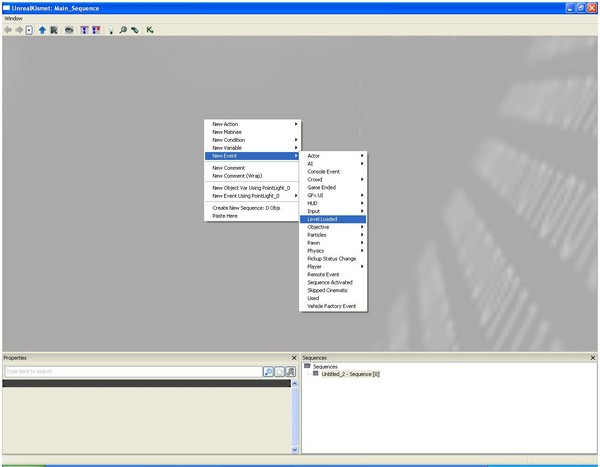
Pre-compiled events: If you open the Unreal Kismet (the green K on the top of the UDK window, near the Content browser’s icon and the Matinee icon) and right-click on a blank space of the Kismet window, and you go under “New Event”, you’ll see a lot of ready-to-use events grouped together as “Actor”, “AI” or “Pawn” for example. Actor, AI and Pawn are in this case, the triggering part of an event and without them, the event doesn’t start at all. So, an example: if you want an event to start when an enemy dies, you’ll have to go under “Pawn”, because an enemy is called a pawn, and choose Death.
Step 2
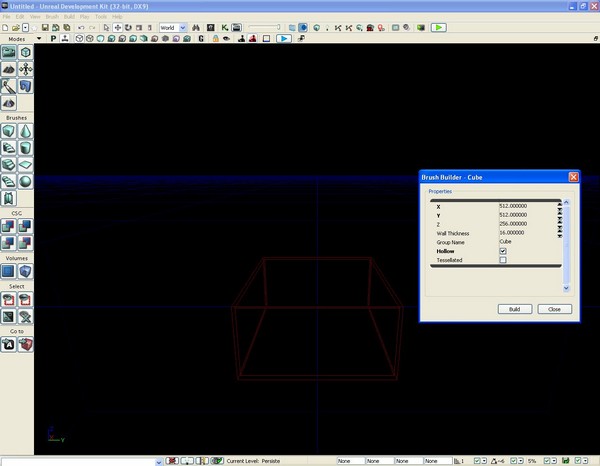
For our purpose, create a 512 x 512 x 256 Hollowed Cube.
Step 3
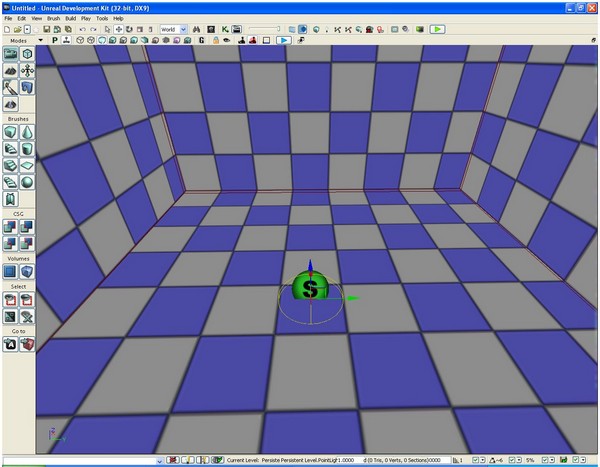
Now, add a Point-Light into the room by holding the L key on the keyboard, and then left-clicking in the room we just created (the Cube.)
Step 4
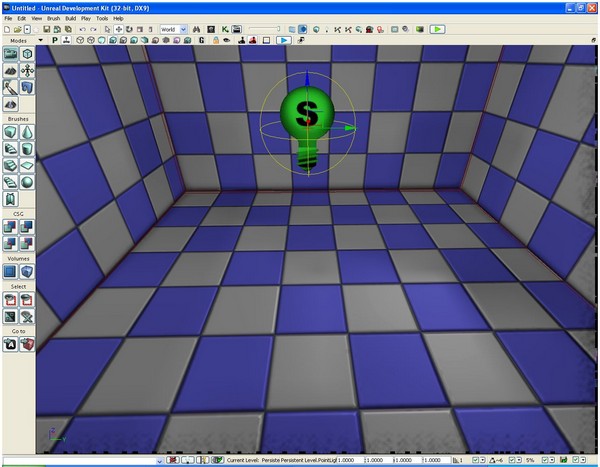
Move the light into the center of the room, and then rebuild the lighting (with or without Lightmass, it’s not important.)
Step 5
Done? Now, we can start with our first UDK event, a pre-compiled event in this case. The most common pre-compiled event used by a UDK coder is the “Level Loaded” event. As you can imagine, this event starts when the level is loaded. So, let’s start with this: Go to Unreal Kismet, right-click on a blank space and go to New Event>Level Loaded.
looking forward to part 2