Hello soldiers!
Benvenuti al fronte! Welcome to the first installment of the Isonzo development blog. Over the course of the following months we will release new content and updates that will give you more info about the game and all the exciting new gameplay features that are coming.
Last year we made a small road trip down to Italy for some on-site research. Three of us made the trip: series creative director Jos, together with producer Thomas and level designer Robin. While there, we made a few videos too...
Developer Jos on location in Italy, discussing the Sixth Battle of the Isonzo.
As you’ll see in the blogs, Italy is a stunning place with some amazingly varied scenery. One of the reasons we chose to make an Italian Front game was the range of different battlefields, from mountain peaks to river valleys and the distinctive Italian towns. We really lean into this diversity with the new Offensive game mode that takes center stage in Isonzo. So without further ado, let's dig in to what Offensives are all about!
Offensives
The Offensive game mode is a multi-map experience where success or failure in one battle will have an effect on future battles! In each map, one team is tasked with assaulting defensive positions and completing a number of objectives. The other team, as you would expect, will try to stop them. The battle progresses through multiple defensive lines: once the attackers complete all their current objectives, the defenders must fall back to the next line, which will have its own set of objectives.
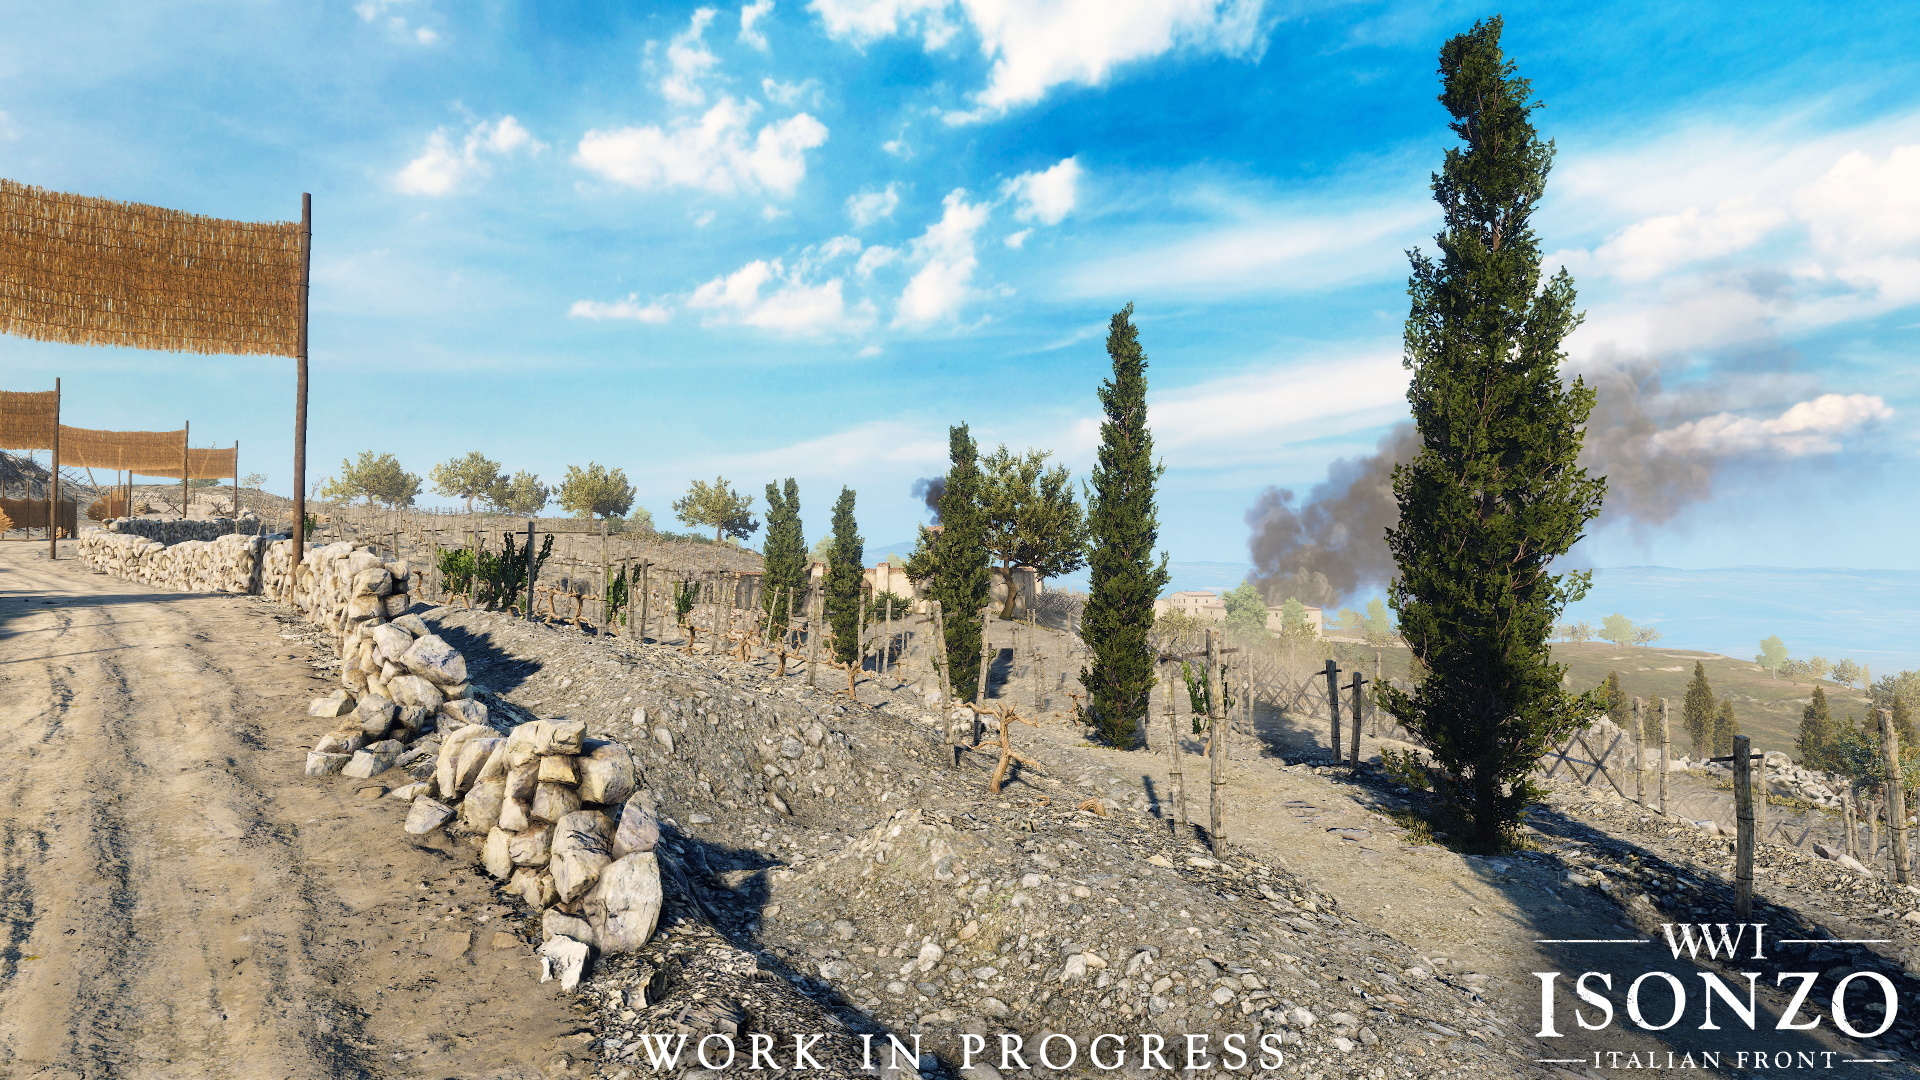

Part of the Mont San Michele battlefield.
For instance, the attackers might need to capture and hold three points to complete the first defensive line of a map, and then the second line might require them to sabotage a gun position and capture two points to progress to the next defensive line. The attackers win by defeating every defensive line - the defenders win by holding out long enough. We'll go into more detail about the kind of objectives you can expect and exactly how it all works in a future post!
The Sixth Battle of the Isonzo
Let’s illustrate with an example! The Sixth Battle of the Isonzo was was the first Battle of the Isonzo where the Italians actually gained some ground. There were breakthroughs in places and desperate stands by Austro-Hungarian defenders all along the southern Isonzo.
In-game, the Italian attackers are aiming to capture the city of Gorizia - and that assault is a single map and battle. However, to get there they first need to break through Austro-Hungarian positions at Monte Sabotino or Monte San Michele. Both of these are also individual battles. There are three ways the Offensive can go:
-
If the defenders can hold both Monte Sabotino and Monte San Michele, the Offensive fails and the Gorizia map isn’t even played.
-
If the attackers win one of the first two battles this means a breakthrough has been achieved, and Gorizia will be played. The winner of the Offensive comes down to who is victorious there.
-
Finally, if the attackers win both Monte Sabotino and Monte San Michele they have achieved a major breakthrough and will go to Gorizia with bonus reserves for the climactic battle!
A trench line on the heavily contested Monte San Michele.
As you can imagine, this approach has called for a lot of in-depth research to find historical battle maps, orders of battle, and accounts of how the battles progressed! It’s been a lot of work, but amazing to see how it all comes together to recreate key moments of the war on the Italian Front.
Specific Battles
So to sum up, unlike our previous games which aimed to capture the overall feel of different areas of the frontline, in Isonzo every map corresponds to a particular battle, on a particular date. These maps are then linked together to form an Offensive.
Let's see what an individual Offensive mode map looks like with a specific example: the Carso map, centered around the conquest of the Monte San Michele. As part of the Sixth Battle of the Isonzo Offensive, success here gives the attackers a route to Gorizia, and extra reserves for that final battle if they also capture Monte Sabotino when they play that map.

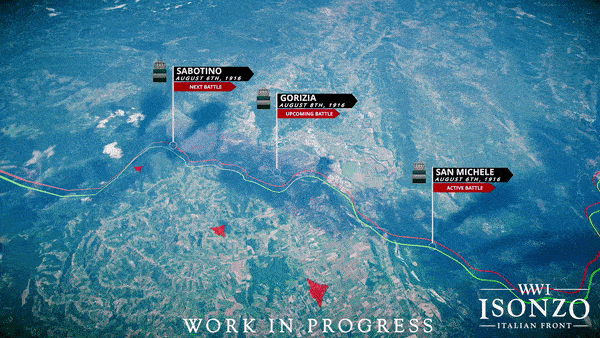
(Very!) WIP UI of the overview of the Sixth Battle of the Isonzo Offensive.
Monte San Michele (Carso)
The Monte San Michele was one of the most bloody locations on the entire Italian Front. From the very first battle the Italians needed to get a foothold on the Carso plateau. The Monte San Michele is not very tall (just 275m) compared to some of the Dolomite peaks, but it has a very commanding location overlooking the Gorizia valley. In the game you can actually see the other locations of the other two maps (Sabotino and Gorizia) in the distance from the top of Monte San Michele!
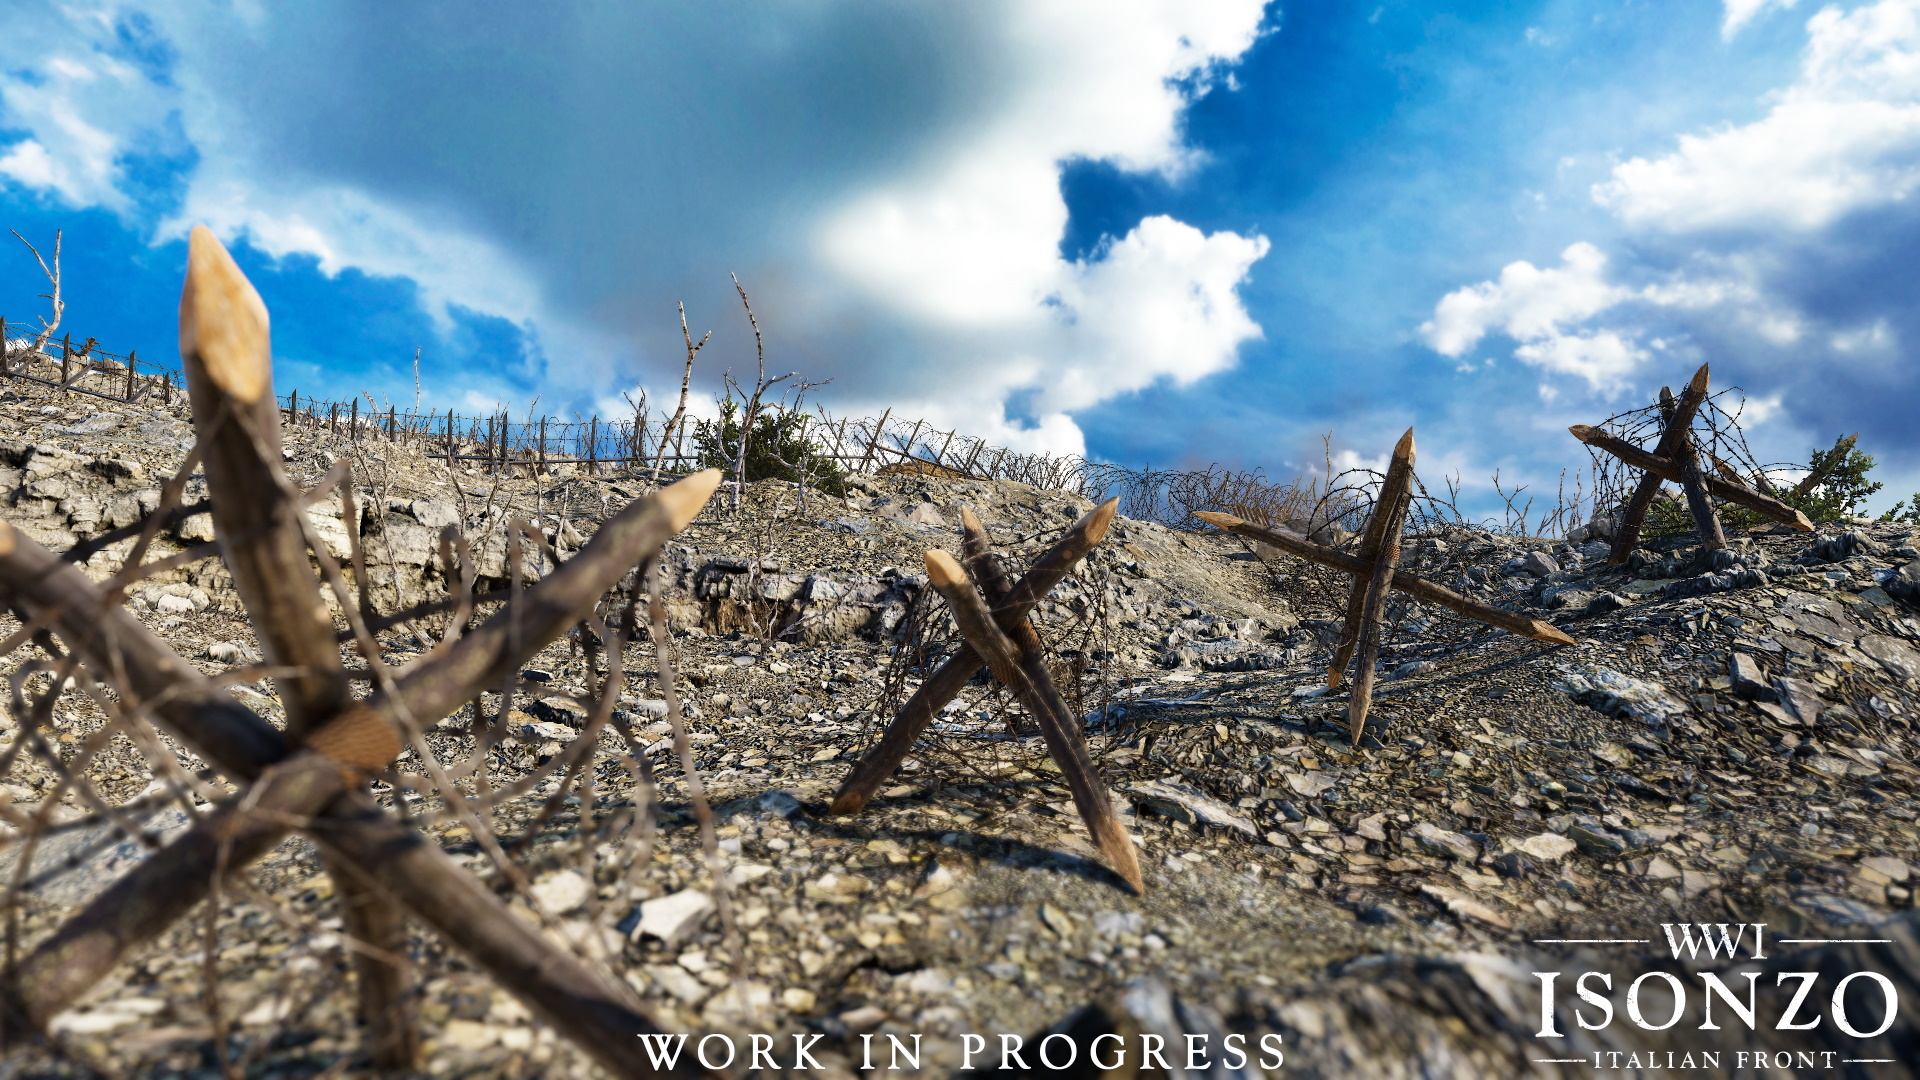
There are many significant features you’ll be fighting over in the course of the Monte San Michele battle. Establishing trenches in the rock of the Carso is no easy task, but it was done.

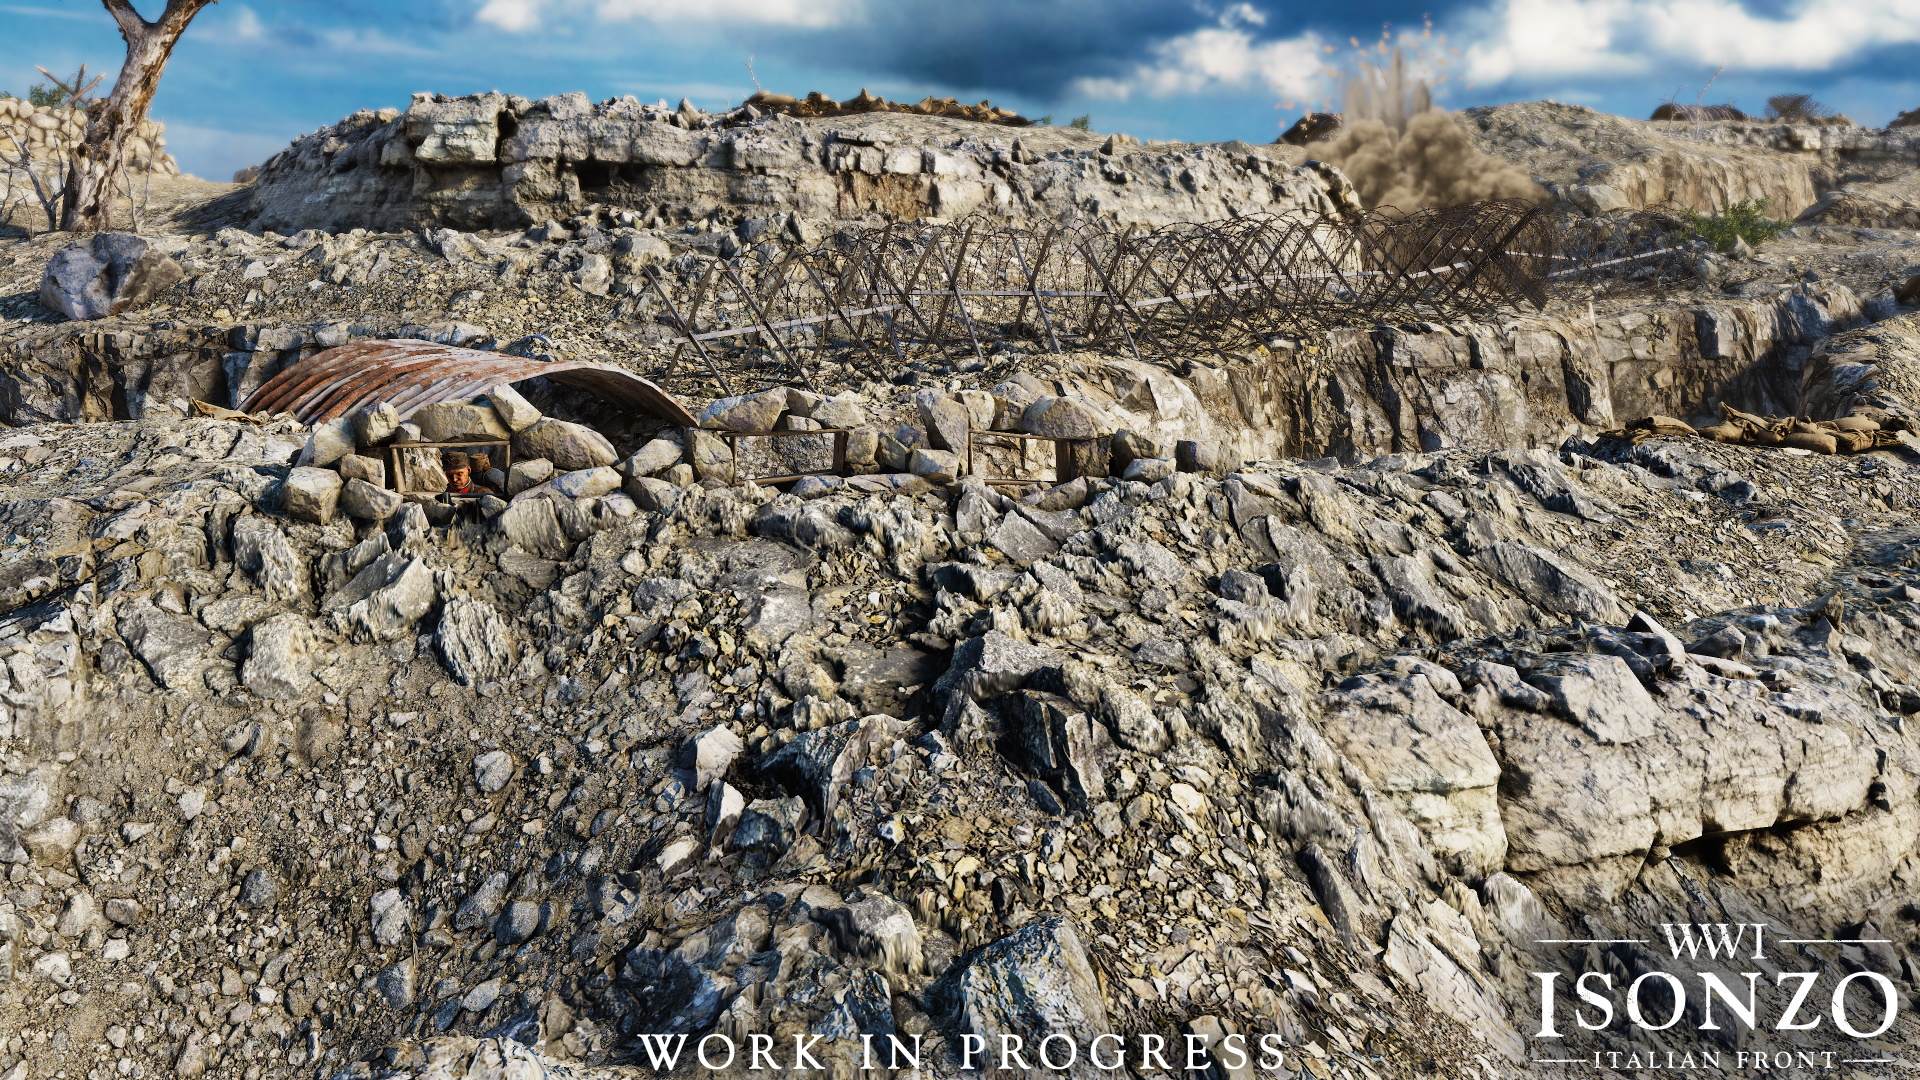
Part of a line of trenches that the Italian attackers will need to capture.
The Schönburg Tunnel entrance saw furious fighting. The tunnel was built by the Seventh Feldjager Battalion, started in 1915 and completed in 1916. It was named after General Alois von Schönburg Hartenstein - he was a major player in the Third Battle of the Isonzo. The tunnel cut through the entire mountain, providing a route for Austro-Hungarian reserves to reach the frontline, as well as serving as a shelter from artillery.

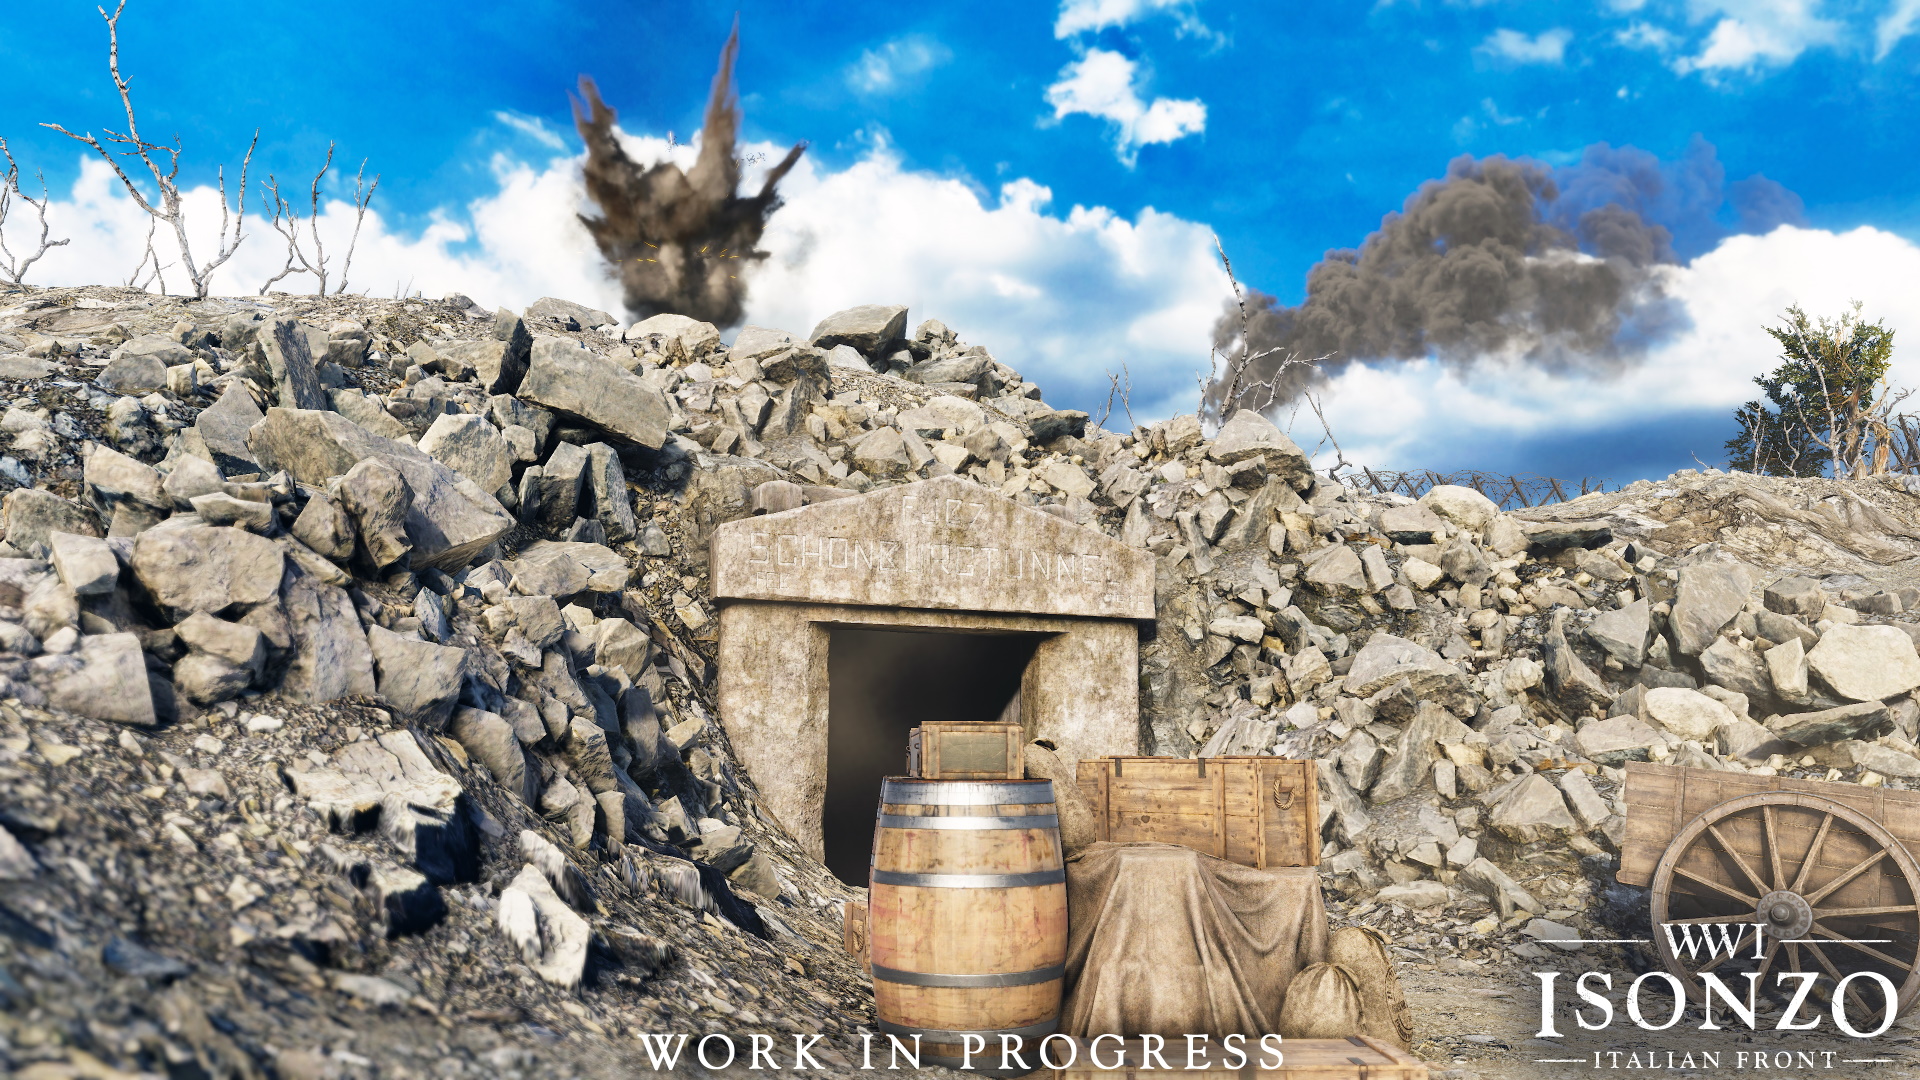
Our recreation of the Schönburg Tunnel entrance.
The town of San Martino del Carso is a key objective. The Italians actually did get this far in earlier battles, but were then forced back by Austro-Hungarian counterattacks. Ruined houses, debris and defences mark the effects of the earlier combat.

The town of San Martino del Carso.
Another tactically important feature of the terrain of the Carso are the ‘doline’ (sinkholes). These dips in the landscape are ideal for camps or artillery positions.

A doline camp.
That’s it for this week! We’re happy to share the progress of Isonzo with you! Though there is still a lot of things to do before we can deliver you the full game, we hope that the little insight sneak peaks excite you just as much as the announcement trailer did!
Stay tuned!