The game you are trying to view has ceased development and consequently been archived. If you are a member of this game, can demonstrate that it is being actively developed and will be able to keep this profile up to date with the latest news, images, videos and downloads, please contact us with all details and we will consider its re-activation.
Breath will be a 3D game focused on the life and death of teenagers’ purity in the current day by day situation. In this game nowadays youngsters are exposed to mass media advertising telling them what to use, wear and listen; some even fall over the media and start believing that the world is like the TV shows, beginning to think the same way their “Idols” do. This being represented in their tendencies… but there are those who oppose them, and live the negative part not mostly shown: Drugs, sex, violence and isolation.
In this game, we will be the opposition, the counterculture and ugly side of life tapped by most people. The role given to us is the one of a socially rejected teenager trying to survive a media and infested subculture society, presenting use and abuse of violence, sex and drugs in an explicit, non-censored realistic way.
Also, the game will not present you a “must-follow-story” instead you will be given a good number of PCs you can interact and then set up the plot. Every PC will have its own personality, likes, rivalries and agenda.
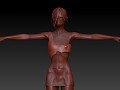
The main story focuses on the MC (Main Character who will named by the player) whose previous Colossus was destroyed by a bioterrorist attack, being one of the few survivors of the attack having most of his memories wiped out. As part of rehab, The MC was given fake memories (unknow to the player) and he now must face the new Colossus and the dangers that lurks within.
Game Features:
- Dark tuned story guided via PCs interactions making each experience different.
- Wide urban area set in a dystopian future, inspired by Brazil (Terry Gilliam's movie) and Blade Runner.
- Explore the Chasm, a world where the inner self is shown.
- Powered by Unreal Engine 3 (UDK)


Articles
0K! Boys and girls, this is a good tutorial for anybody interesting in human skinning in 3D Modeling without the use of photos, because almost all of us are poor bastards that can't afford buying some ref images and must make some juggling to get top-notch results.
So, first things first... human skin is matte, opaque, and its color depends of the blood. Yes, it depends of the blood, if you check out a dead body; you'll see the flesh is gray once the blood is over (Go to a med school for a visit, it's the best place to get started for organic modelers).
Now, why is this important? It is important because this way you'll be able to create a skin gamma color depending of the character you're skinning, if red, you know what kind of pigmentation it will have: from dark brown to dense beige, i.e.
Anyhow, let's get started, I'll cover the theory basis on the way.
I won't be covering UV mapping extraction, but I'll state this clear, when texturing, always use as a base a default gray (RGB 111) tone of a lightmap mixed with an Ambient Occlusion map on top on multiply. This way, you'll have a gray tone that will work for your starting point. If you'll use it for unlited purposes, just use the lightmap. In this case, I'll use the unlited version because I'm a bad boy.
1. Make sure your map is completely on a grayscale. But, do not use desaturate or grayscale mode to do it, because this will delete our color information, that indeed is something we don't want. For that, we'll use the Channel Mixer, just be sure to check monochrome. Adjust it to your belief. In this case, I used this setting.

2. Now, here comes the fun, create another layer on top, this one will be your Flood color layer (This means: name it flood you idiot!) and fill it with a color you find attractive to your needs, since this is a human girl. Set it to overlay. I used this gamma of colors.

3. Now, duplicate your grayscale layer and put it on top of your Flood layer. This layer will work as the Scattering color layer (name it, being organized is very useful, especially if your file can get very heavy on layers) and apply on every channel a Difference Clouds filter (Filters->Render->Difference Clouds) then set it to overlay.

4. In the Scattering layer. Adjust the curves as needed, generally Input 65 to 75 do the trick and Output 60 to 70. We're doing this, because we need the colors to be saturated at first, so we can get a glance of the colors themselves.

5. Then, set the Saturation to 60 (Press Ctrl+U)

6. Now, go to Adjustments->Brightness/Contrast and set the Brightness to 70 and Contrast to -85. This will make the weak colors blend with the background and the strong ones (especially red) to be softer, just how we wanted it. Now, this is why I call this one the Scattering layer, it simulates the Sub-surface Scattering method.

7. There are certain areas we don't want any red, so, we'll use the Dodge tool (midtones - exposure, depends of your tastes, but 50% is good enough) to make it go away. You can do this too to erase some dark areas if you want to. Or making other areas clearer in the Flood Layer, you know, for that effect of: "the sun doesn't touch you there"

8. Onto details, we have some really decent skin by now, Why not adding some shiny stuff? So, I'll cover how to add some hair. Create a new layer and paint the areas where you want hair in a tone of gray you want.

9. Apply a Noise Filter (Filters->Noise->Add Noise) be sure to keep it on Gaussian, and check monochrome.

10. Apply a Radial Blur Filter (Filters->Blur->Radial blur)

11. Set the Layer to Hard Light and then apply this settings on the curves (Ctrl+M)

12. And done! That's how concludes my tutorial, you can now begin to add details. For example, I created some vector art tattoos I added on the file on a normal mode. For detailing, now you can get into the net and search for the parts you need, for example wrinkles or freckles and apply them on hard light mode, or ink over it... the possibilities expands a lot! As I say, this way you have learned how to create a somewhat realistic skin without photos, detailing... well, that's up to you and your drawing skills. I may continue with tutorials regarding certain zones and how to detail them. Good luck y'all!

Final Result:

Post a comment
Profile
Icon
Platforms
WindowsDeveloper & Publisher
PowerNap GamesEngine
Unreal Development KitContact
Send MessageRelease date
Game watch
Follow
X
Tags
Embed Buttons
Link to Breath-archived by selecting a button and using the embed code provided more...


You may also like
Slender: The Nine Pages
First Person Shooter
BLOODWAVE - Enter The Hell
First Person Shooter

FUN
First Person Shooter
Slenderman's Shadow
First Person Shooter
Blood - Fan Revival
First Person Shooter
Painted In Blood
First Person Shooter
Holy ****. Tracking.
Don't forget to eat that chicken sandwich before it gets cold.
Id have to say im one of the ones who oppose the western culture is brain washin the youth it sucks. p.s your game look very interesting id be glad to see more from it
Sounds like a realy in depth Concept! Will be interesting to see if you guys can hold up to expectations ^^
I've removed a pic from the gallery, since it was from Oblivion, I thanks HounderKnight for letting me know.
The modeler took it as a reference pic, and I've uploaded it without notice that it was from that game. I've never played Oblivion, even so I apologize for the inconvenience and my error, I promise you it won't happen again and I'll be more careful when uploading the screenshots and renders of the other members in the staff.
I've removed that pic to avoid problems with copyright or fights like of "youfilthythief"
Once again: Sorry for the inconvenience.
Glad you finally made the moddb page fdslk, looking forward to the game :)
Go fdslk!
looking nice!
I really enjoy the look of the futuristic worlds in both Brazil and Blade Runner. Don't see many games on here listing them as inspiration. Looking forward to future updates.
"A dystopian world inspired by Brazil"
I lol'd. But tracking anyway.
Thxs :) and welcome to this humble place we call: Profile.
I changed that lol, I added that I was talking about the movie xD