Hello soldiers !
It’s almost time for the Caporetto Expansion! On December 5th, we’ll release this free expansion that will include several things, but most prominent will be the Caporetto map and the German Empire faction (along with their own weaponry)!
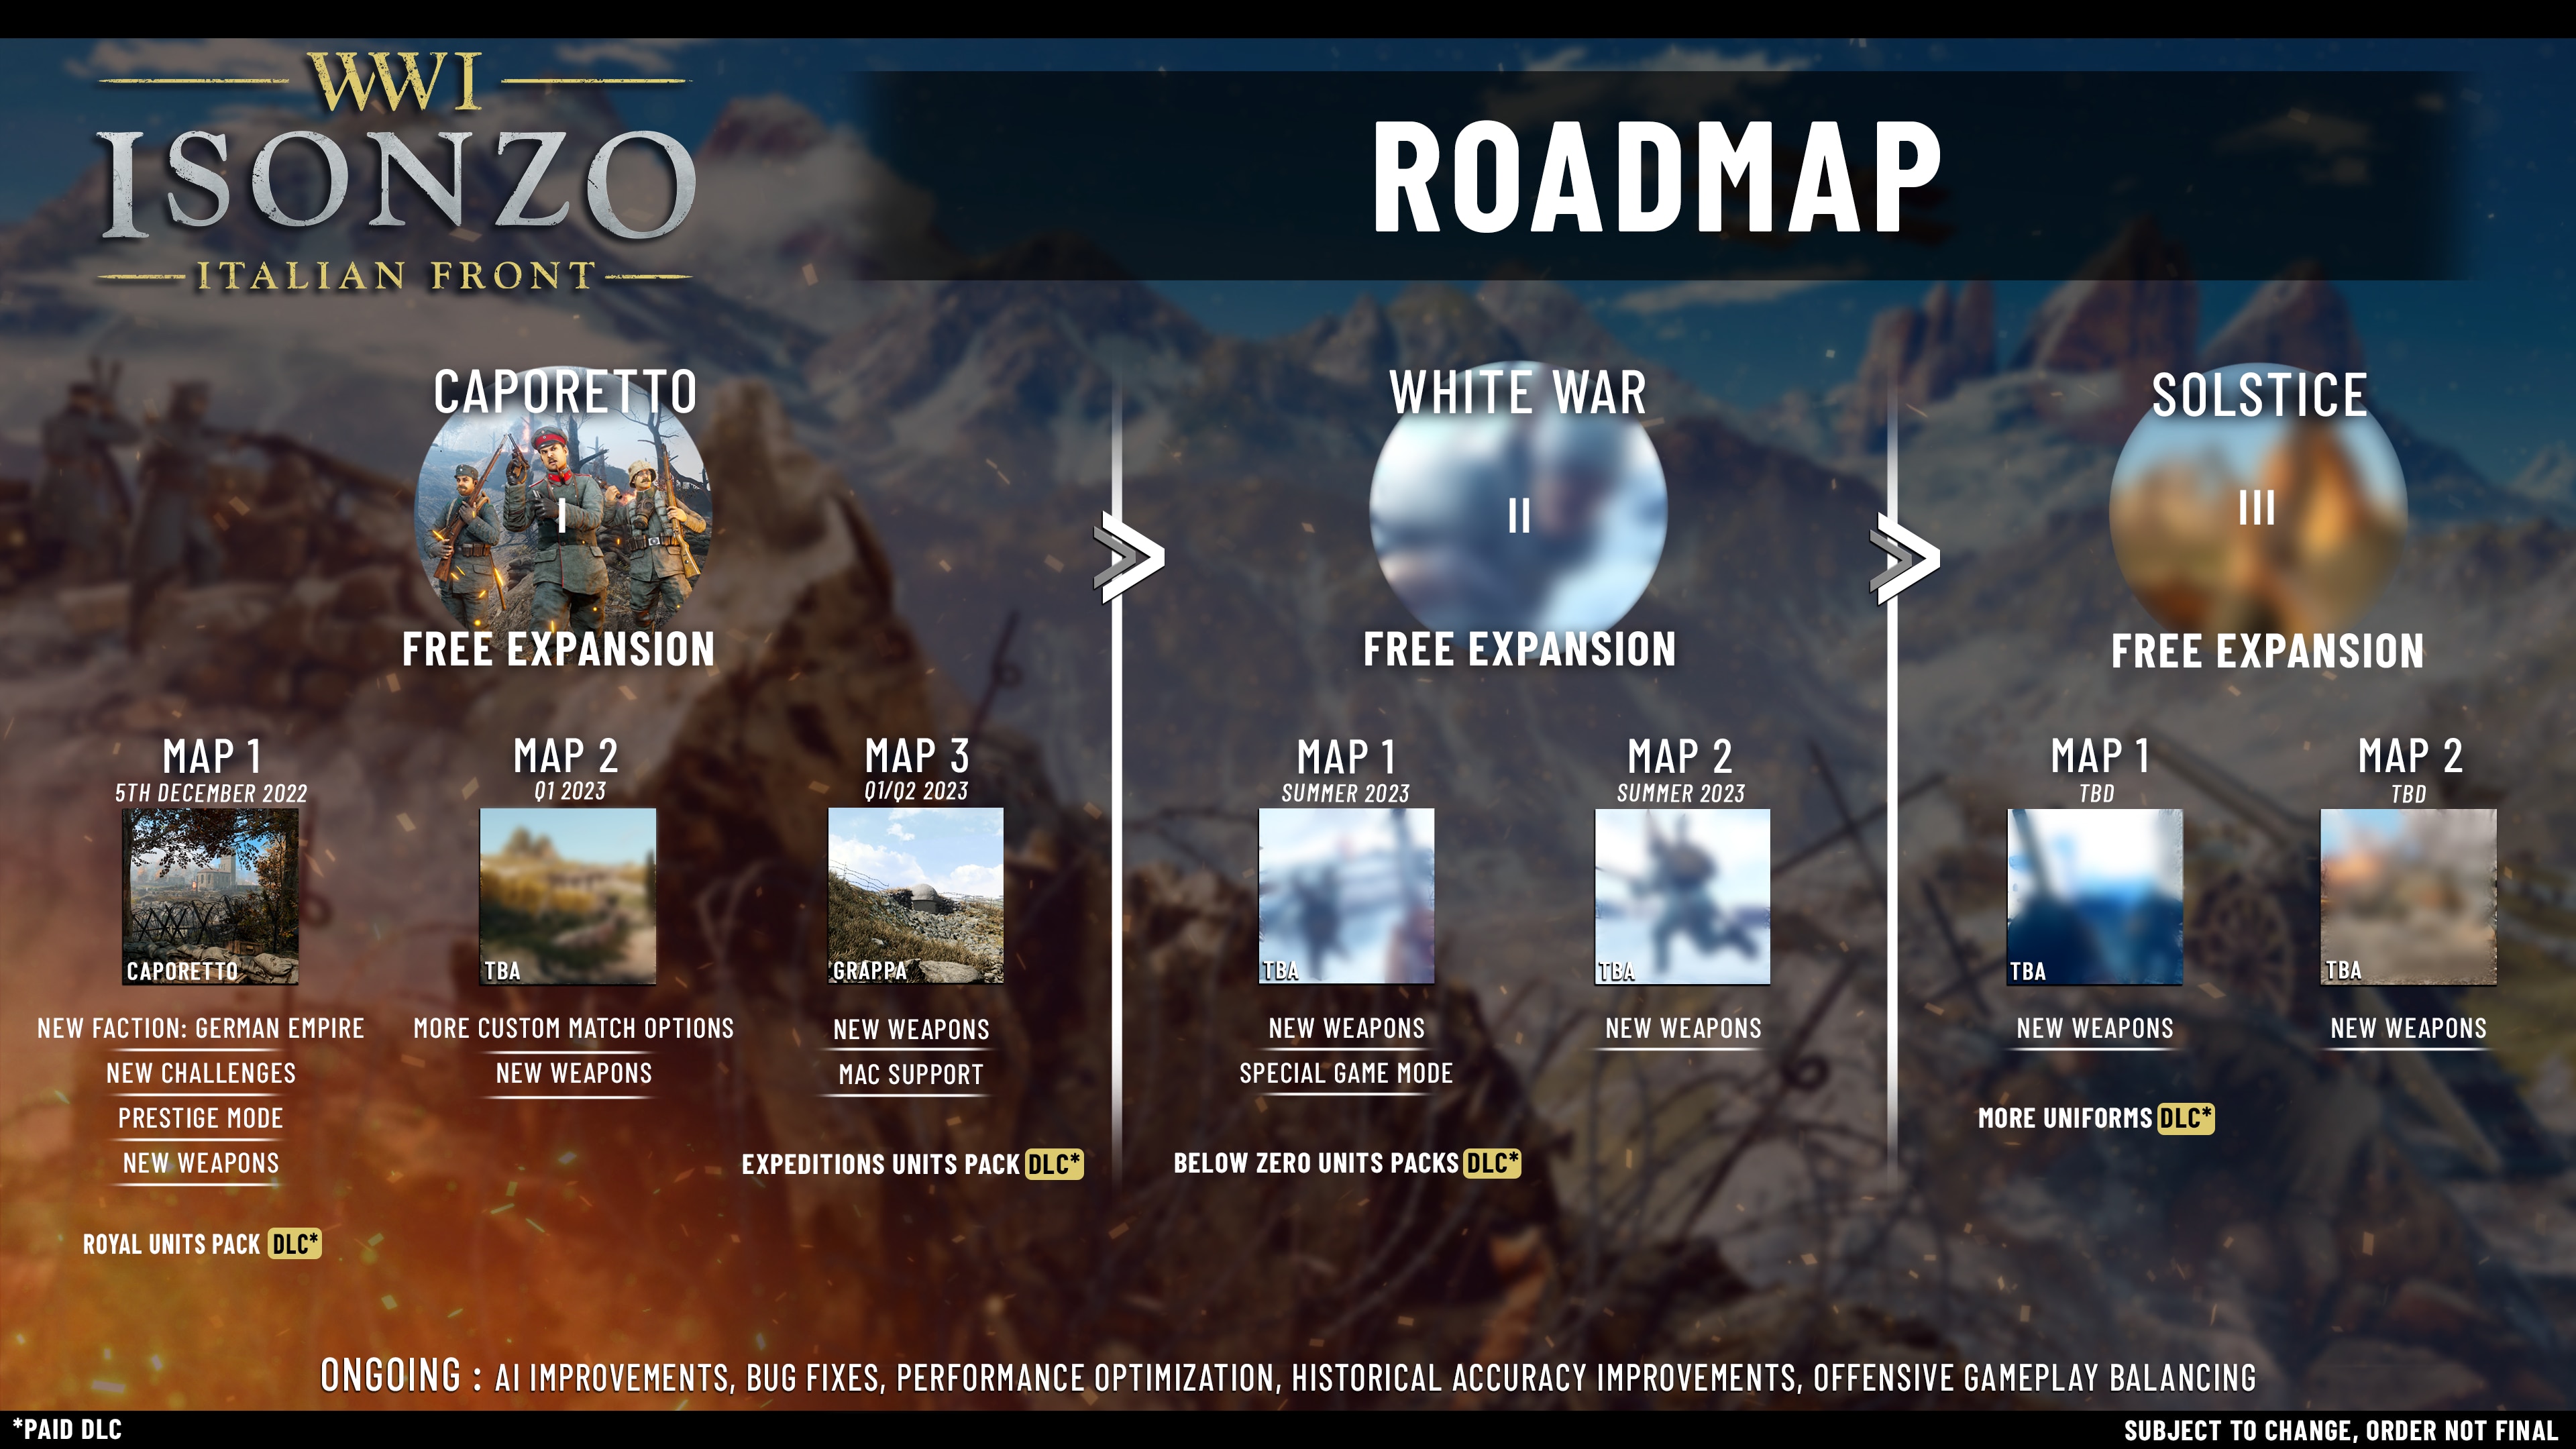
Since our announcement, we’ve updated our roadmap, so be sure to take a look to know when you can expect the other maps and additional content from this expansion and the upcoming ones!
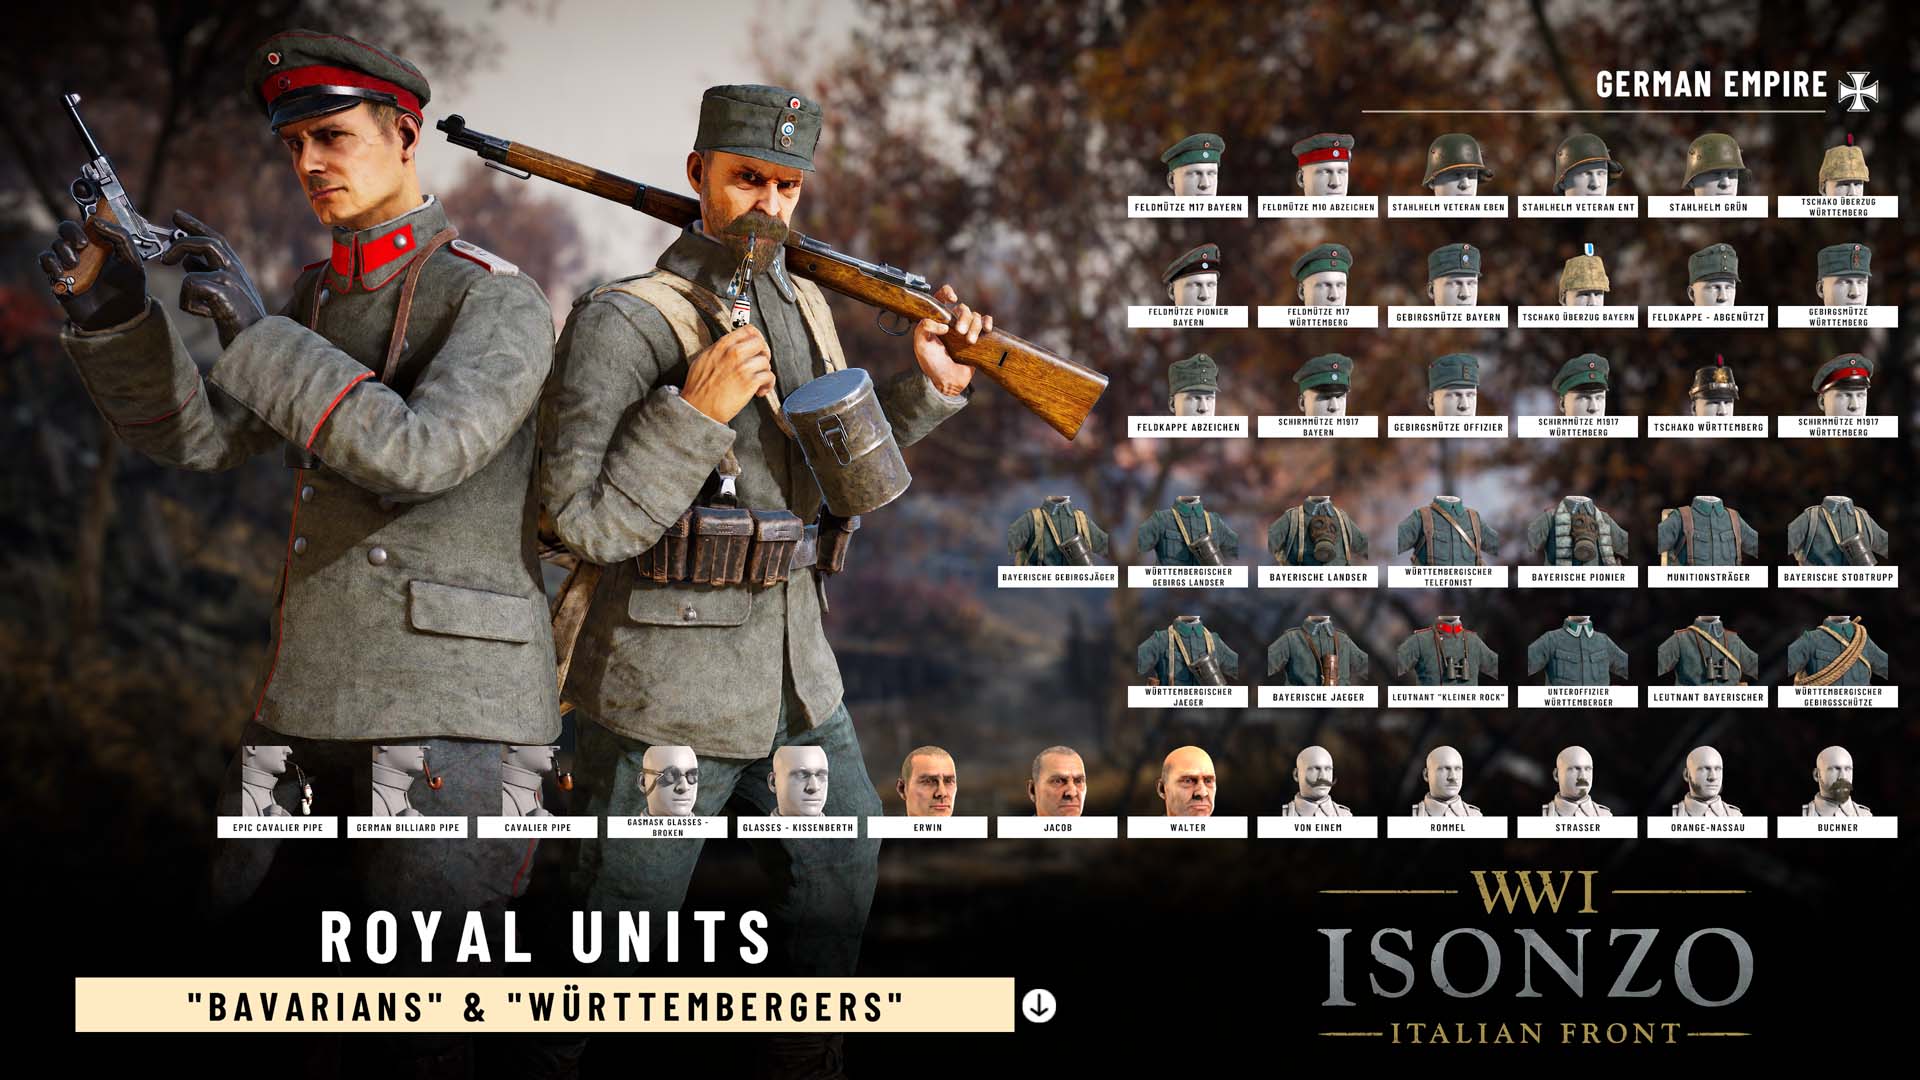
Additionally, the German Empire will have their own cosmetic DLC pack! The Royal Units pack will include over 40 cosmetic items that you can use to customise your soldier! Remember that this is only purely cosmetic and won’t give you any in-game advantage. The price will be $ 9.99. Not available for pre-order but you can wishlist it!
A dozen Isonzo Battles
“ Our hitherto silent artillery began its preparation at 0200, October 24, 1917. It was a dark and rainy night and in no time a thousand gun muzzles were flashing on both sides of Tolmein. In the enemy territory an uninterrupted bursting and banging thundered and re-echoed from the mountains as powerfully as the severest thunderstorm. We saw and heard this tremendous activity with amazement. The Italian searchlights tried vainly to pierce the rain, and the expected enemy interdiction fire on the area around Tolmein did not materialise as only a few hostile batteries answered the German fire. That was very reassuring and, half asleep, we retired to our cover and listened to the dying away of our own artillery fire.”
The Battle of Caporetto, also known as the 12th Battle of the Isonzo, took place from October 24 - November 19, 1917. Though the battle commenced in late October, preparations started in August. Paul von Hindenburg, who was a German field marshal and statesman, figured that if they wanted to keep the Austro-Hungarians in the war, Germany had to help them defeat the Italian army. Erich Ludendorff, General of the Infantry, was opposed to this but was overruled. The next month, three experts from the Imperial General Staff, led by chemist Otto Hahn, went to the Isonzo front to find a site suitable for a gas attack. The Caporetto sector was a proposed attacking area, as it had a good road that ran west through a mountain valley to the Venetian plain.
With this preparation and field research, the Austro-Hungarian Army Group Boroević, commanded by Svetozar Boroević, started to prepare for this offensive. Additionally, a new 14th Army was formed with nine Austrian and six German divisions, commanded by the German Otto von Below. It is said that the Italians inadvertently helped by providing weather information over their radio, which was intercepted.
“ At 06:41, 2,200 guns opened fire, many targeting the valley road along which reserves were advancing to plug the gap. At 08:00 two large mines were detonated under strong points on the heights bordering the valley and the infantry attacked. Soon they penetrated the almost undefended Italian fortifications in the valley, breaching the defensive line of the Italian Second Army between the IV and XXVII Corps. To protect the attackers' flanks, Alpine Troops infiltrated the strong points and batteries along the crests of the adjoining ridges, Matajur and Kolovrat, laying out their telephone lines as they advanced to maintain contact with their artillery. Specially-trained and equipped stormtrooper units led attacks, making good use of the new German model 08/15 Maxim light machine gun, light trench mortars, mountain guns, flamethrowers and hand grenades.”
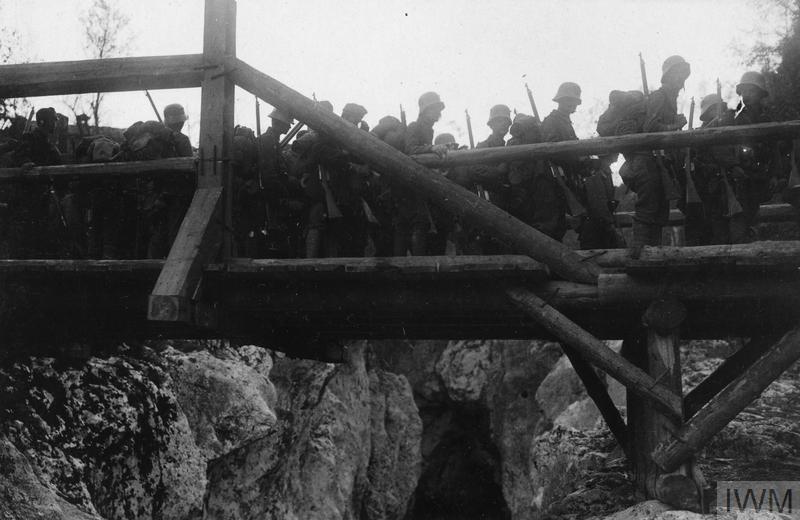
German troops advancing over a wooden bridge spanning a gorge during the operations near Tolmin.
Want to read more about the the Battle of Caporetto, read our previous dev blog.
Caporetto in Isonzo
Caporetto is a large five line battlefield based on the strategically important Monte Kolovrat - specifically the German advance from the town of Tolmin (Tolmino/Tolmein) all the way to Kolovrat Ridge. The first thing you’ll notice is the change of scenery and weather: overcast and rainy, in sharp contrast to the bright sunny days of most Isonzo maps.
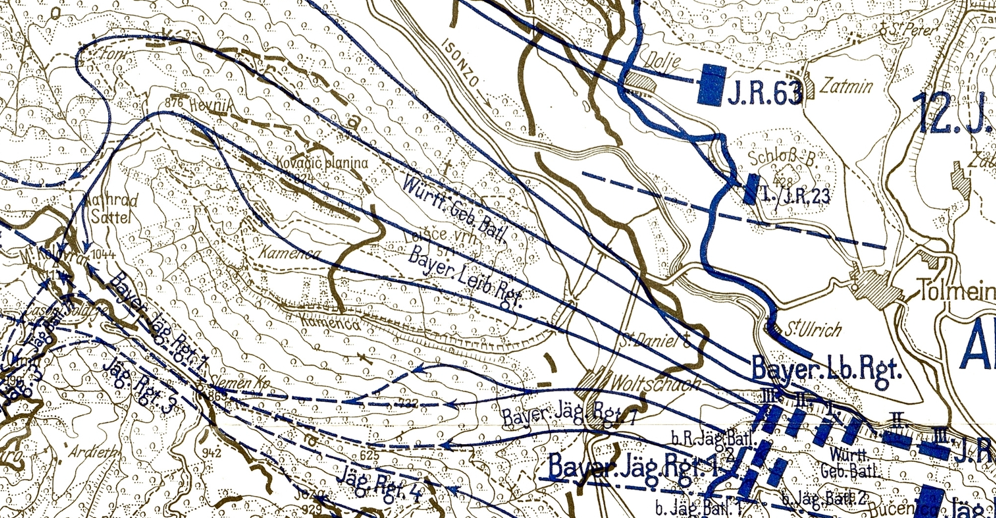
The scenario as depicted on the map.
The first line lies within the ruins of Tolmin, ruined by heavy shelling. The rubble provides plentiful cover for defenders and multiple routes to sneak forward for defenders. The town church still stands, however, and it’s a capture objective. The Italians have fortified it with multiple heavy machine gun positions and there is clear ground leading up to it, so the Germans will need to use smoke, gas, or flank it from the direction of the other objective - a sabotage point deeper in the town itself.
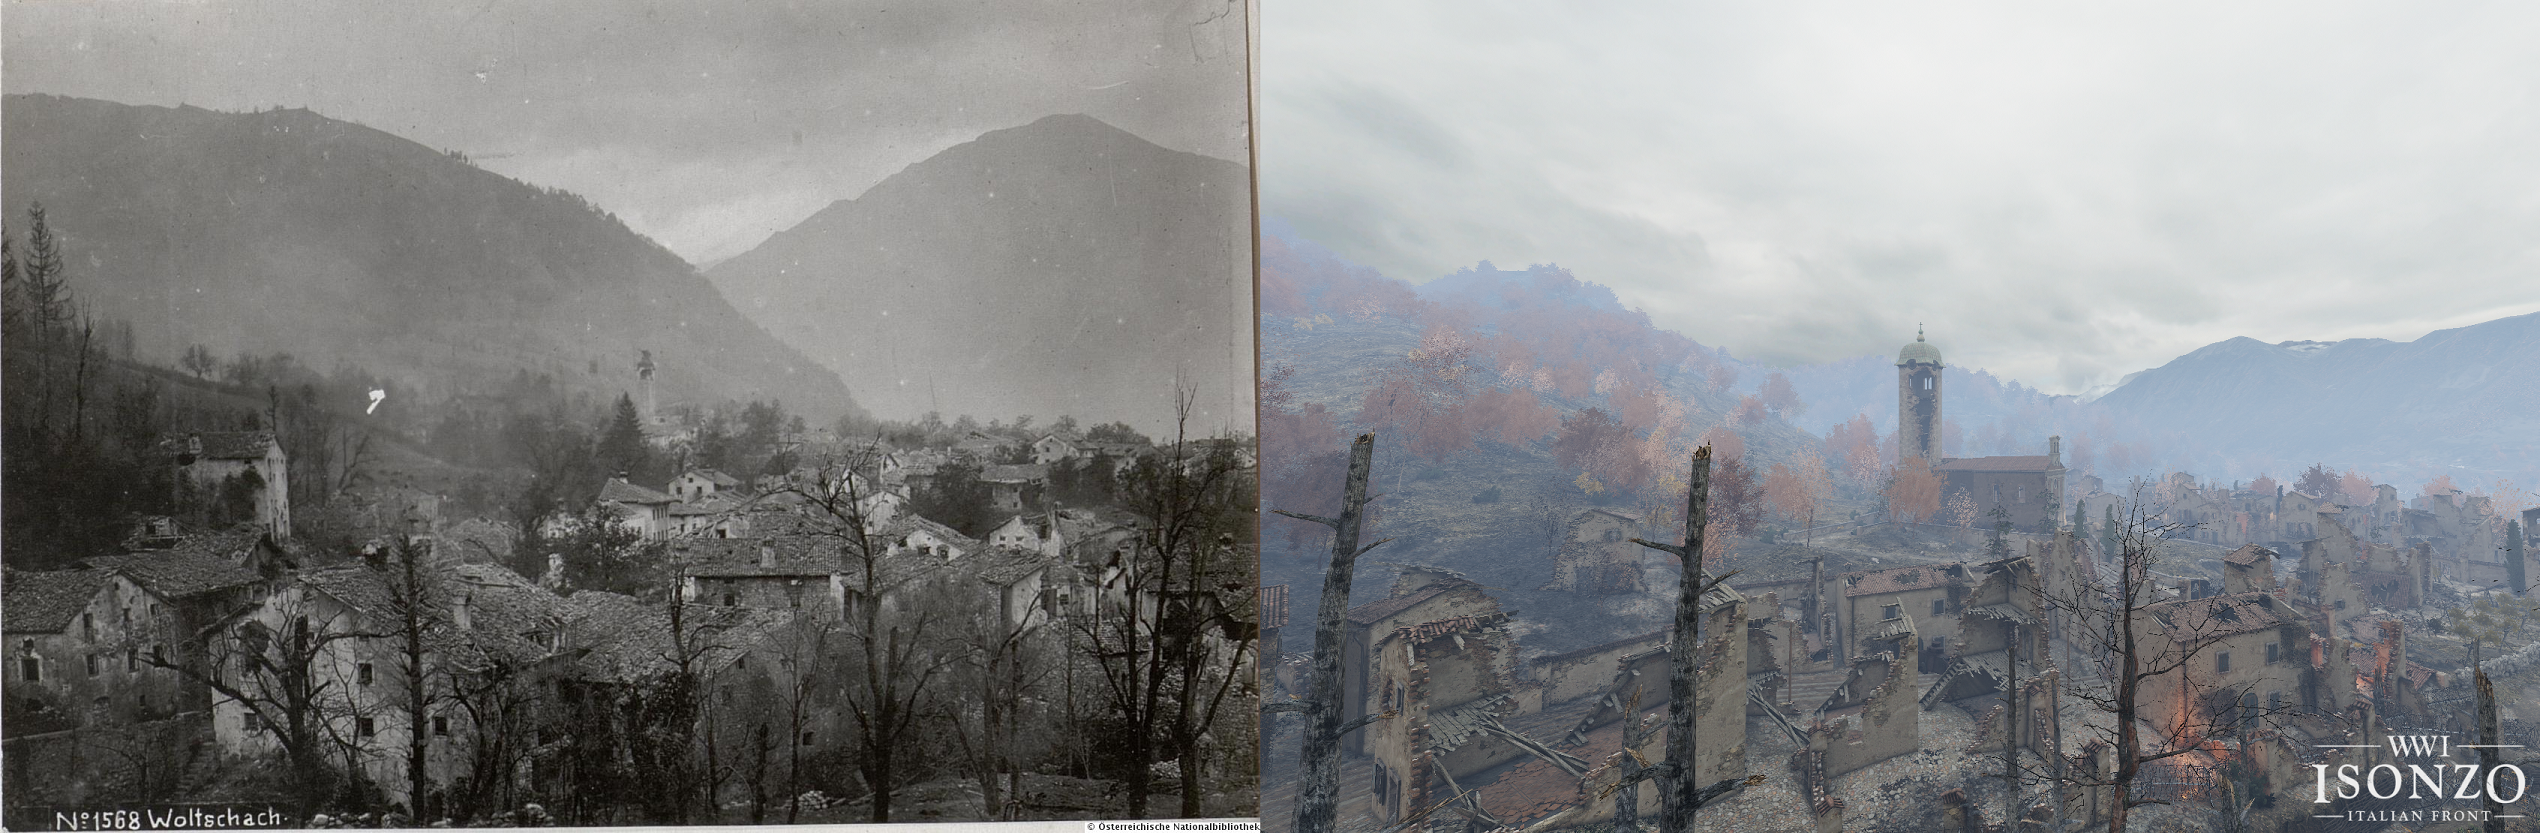
Reference vs. in-game.
After breaking through Tolmin, the road to victory for the attackers leads uphill. Two bunkers on a forested slope both need to be sabotaged to allow progress, and to reach them a dry riverbed must be crossed. Following that, the trees begin to thin out a little but the third line consists of trenches built with wood logs and utilizing pre-existing stone walls. To obtain this objective, the German soldiers will need to capture one trench position and sabotage another.
The fourth, penultimate defensive line is where the Italians have based some huge siege mortars, one of which must be dynamited! The other objective is a capture point within a cluster of shell blasted houses. All of this is still uphill fighting for the Germans - the siege mortars are in fact built into a kind of ‘stepped’ position rather than all being on the same height. The Italians are well dug in here, possibly smart-placed barbed wire from engineers could really make things tricky for the attackers.
And at last, following a road lined with destroyed trucks and rocky outcrops, the Germans reach Hill 1114! For this primary capture objective both sides will be attacking uphill, as Italian reinforcements deploy lower down on the other side of the peak. The defensive positions naturally favour the Italians, but counterattacking won’t be easy either, so it’s best for the Italians to try and hold the hill rather than trusting their ability to take it back. The hill is not as wide or as fortified as the peaks on some other Isonzo maps, and there is a second objective to deal with so it isn’t necessarily all about the peak. Be sure to strategize your deployment and focus on both objectives. It's better to divide and concur!
We would like to highlight a video of our great Indy Neidell, who has visited the area and the summit of the map.
Complete Overview
Hopefully you got a good understanding of what is waiting for you this monday ! Want to take it all in again? We got the complete flyover of the Caporetto map on our YouTube channel!
Play cat & maus(er)
To end this devblog with, we have a final weapon highlight before you can start using them yourself! This weapon is not unknown to many of you. This semi-automatic pistol design from Mauser and chambered in the high velocity 7.63x25mm cartridge, the Mauser pistol is about as iconic as they come.
An effective semi-automatic design, and commercially successful, it was widely used across almost every front of the Great War. While impressive at the trials, it would effectively lose the Army contract to the Luger P08. Still, the Mauser was pressed into service in many areas
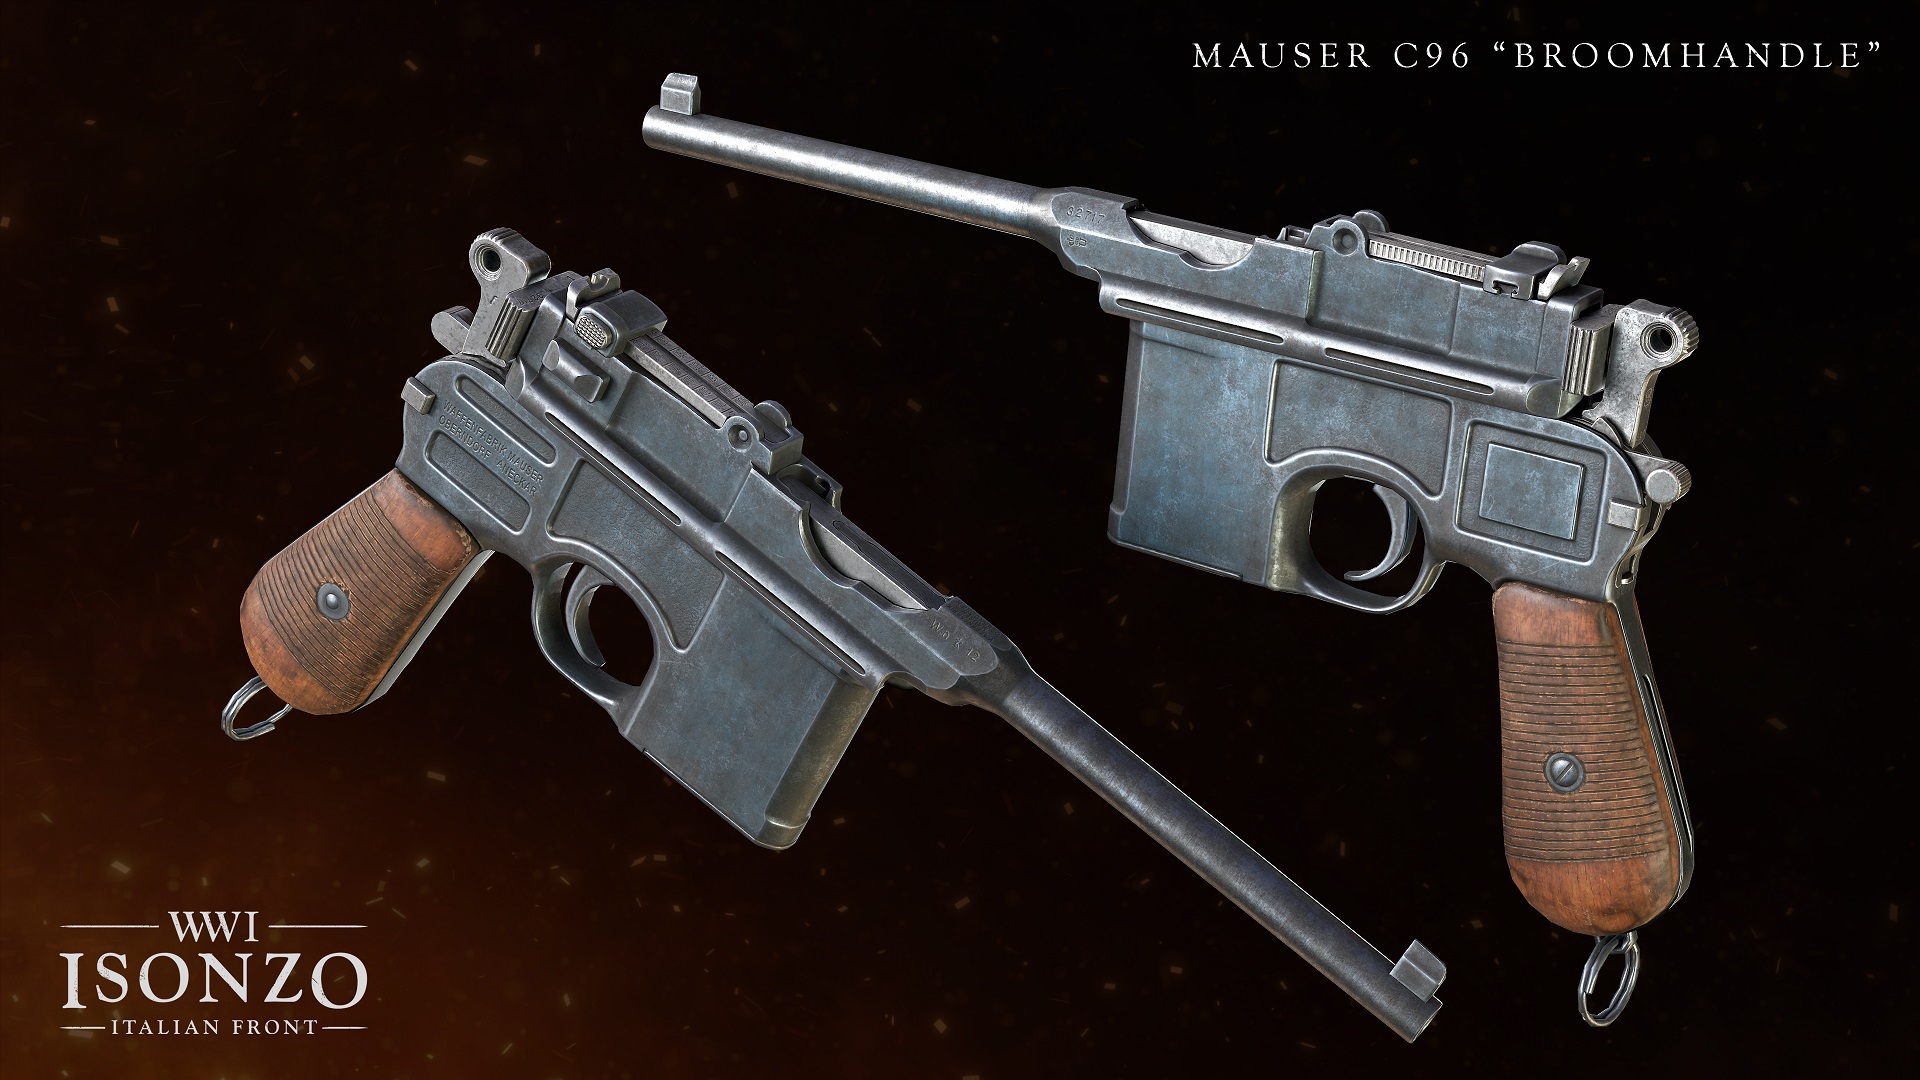
Sporting 10 rounds - this pistol provided a large capacity with an effective cartridge. Compared with the German’s current pistol, the Reichsrevolver, it was an improvement in nearly every necessary field. Though there’s no ‘perfect’ weapon and the Mauser faced some issues with jams and its weight. Another short falling, which many pistols at the time had, was the stripper clip - which wasn’t ideally against more common and faster reloading styles of magazines. A nice addition to the Mauser was an optimistic adjustable sight. This led to the ability to see up to 1000m.
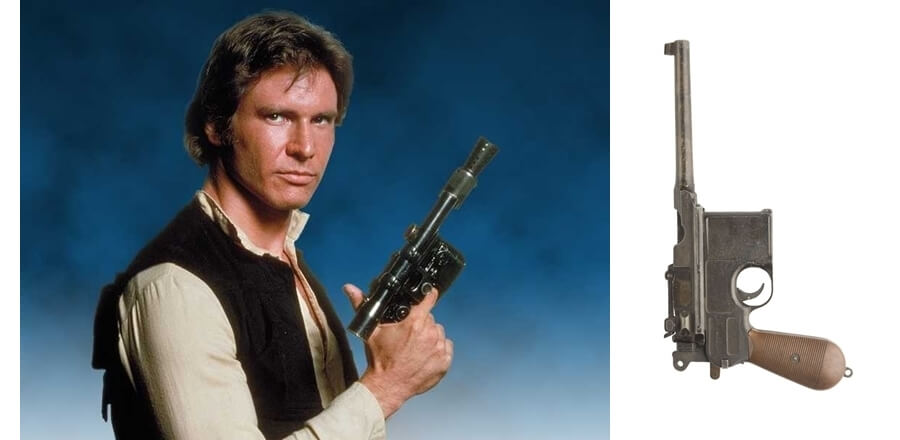
It was used extensively as a private purchase by many officers of different nations throughout the war, and by many famous historical figures, including Winston Churchill (who was fond of the pistol). The iconic design would also lend itself to Han Solo’s blaster in the Star Wars franchise. It would see further development towards the Second World War in the form of magazine design and automatic fire.
AMA with developers!
On December 7 at 9pm CET founder and creative director Jos (BlackMill Games) & producer Thomas will hold an AMA (ask me anything) on Steam! You can submit your question in our Discord in the ama channel. Be sure to join our server to send in your question and just chat with us in general while you’re there!
See you soon at Caporetto soldiers !