- Start the Game: by clicking on the Drox Operative Icon. It may take a little while to load everything the first time.
- Set Your Screen Resolution: The game's default is for a narrow monitor, so the game may look stretched if you have a widescreen monitor. To set the screen resolution, Click on "Options" and then "Graphic Options". Click on the down arrow to bring up the drop down box containing the list of available screen resolution modes. Pick a screen resolution that matches the monitor on which you are playing the game. For instance, if you are playing on a wide screen monitor, you might need to click on 1400 x 900 resolution at the bottom of the list. After choosing your screen resolution, click on "Apply". The screen will go blank for a few moments while the screen resolution mode is changed. If this mode doesn't work for you, try another. You can also choose to play full screen or in a window under Graphic Options. When you are finished, click on "Back" to return to the Main Menu.
- Begin the Game: Click on "Play" on the Main Menu, and then Click on "New Ship". Here you can pick which alien race or human ship that you want to be your ship during the game. Click on the race of your choice. Name your ship by typing a name (or nickname) of your choosing. Then click on "OK"
- Set Up Your Sector: On this next screen you will set up your sector. For now, we will just use the defaults, so just click on "Create New Sector".
- The Game Screen: Now your new ship will appear in a star system. The Help system window will appear explaining how the Help system works. You can turn it off, but it can certainly help you to get started playing. If you turn it off, but then decide you want it back on, press "Escape, Options, Game Options" and then click the button labeled "Reset all help topics". On the Game screen, you can place your mouse cursor over most things on the screen to recieve additional information!
- Ship Stash and Shared Stash: You will see on the screen 3 structures; your Ship Stash, Shared Stash, and a Jump Gate. A Stash is where you can store extra items you want to keep around for later use. Click on one of the Stashes, and it will open a window showing that the container is empty. You can not store items directly in the stash slots. You can only store items in a stash after placing an empty cargo bay into one of the slots. Once you've done that, you can open the cargo bay and place items into the cargo bay slots. Ship stash is where you can store items that will stay with this specific ship (your ship stash will come with that character to a new game). The Shared Stash items will be available to all new characters you create. So if you were playing a Human ship, then decide to start a new game with a Fringe ship; the Fringe ship will have access to all the items that were stored in the Shared Stash by the Human ship earlier. We'll talk about Jump Gastes later.
- Flying Around (Movement): Press down the Left Mouse Button to start flying around. You can also use left click to click on your stash bays, on planets you encounter, and many other items you encounter in the game. While thrusting (flying), your ship will always fly towards your mouse cursor.
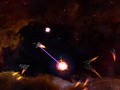
- Shooting Enemy Ships: Any ship with an icon above it belongs to a race and may be friendly. But all other ships are bad guys (monster alien ships) and need to be destroyed. Shoot enemy ships by placing your mouse cursor over the enemy ship and press the "1" key on your keyboard. Once an enemy ship has been targeted (a target icon will appear on it), you may not need to keep your cursor over it anymore to shoot it. If you are close enough (in range) your ship's laser will shoot the enemy ship. It may take one or more shots to destroy the ship.
- Another (better?) way to move around: This is my favorite way to fly around. Press "Escape" to bring up the In-Game menu, then select "Options" and then "Game Options". Near the bottom of the list, click on "Thrusters Toggle", "Thrusters Disengage", and "Thrusters Cursor" so the each one has a green checkmark in front of them. Click "Apply". Now you have what I call "Auto-thrust" enabled. You can now start flying by pressing the "w" key just once on your keyboard (you no longer need to hold down the left mouse button to fly around). To stop thrusting, just left click anywhere on the screen (you can also press "s" to stop thrusting). To start thrusting again, press "w". Your ship will, again, always fly towards your mouse cursor while flying. This has really saved my index finger!! :)
- Shields, Armor, Structure, and Energy: At the top left of the screen (and above your ship), you will see bars indicating the status of your ship. Each time you shoot, you will lose some energy (indicated by the yellow bar). It will regenerate pretty quickly, but if you shoot too often and too quickly, you may run out. So be careful of this. Each time you get shot by an alien ship (or encounter some other damaging force) first your ship's Shields, then your Armor (and you may not have any armor yet), and finally your Structure will be decreased. If your ship's Structure (the green bar) reaches zero, your ship will be destroyed.
- Recharge Stations: Occasionally while flying around, you will encounter a Recharge Station. if you click on one, your energy and shields will be replenished over a short period of time.
- Loot: Destroyed enemy ships may drop items that you can collect or use yourself. Just click on the item's name tag to pick it up if you have room in your cargo bay. You can sell these items for credits (money) to planets that are occupied by a race if they have enough money to buy them from you. You'll want to collect as many credits as you can. You may need this money later to buy items to enhance your ship or buy the friendship of an alien race.
- Cargo Bays: You start with only one cargo bay which can hold 16 items. Press "I" (or click on the "boxes" icon on the bottom of the screen) to bring up your ship components and cargo bay. You can also bring up just your cargo bays by clicking on the up arrow next to you Cargo indicator in the menu bar at the bottom of your screen. Your cargo bay will appear near the bottom right of the screen, and this is where any components you pick up will be stored. At the bottom of your Ship Components screen you will see slots for an additional three (3) cargo bays. You can either buy cargo bays at a colonized planet (if they have any), or find them while exploring the galaxy. Any items you want to keep must be stored in cargo bays! You must first put an empty cargo bay into a cargo bay slot, and then you can open the cargo bay and put items into the new cargo bay's slots. Cargo bays cannot be moved or sold unless they are empty!
- Using items for your ship: Your Ship Components screen (press "I" if it's not already displayed) shows the items your ship is currently using. It has three levels of items: Light, Medium, and Heavy components. Each item has color-coded corners to help you identify which type it is. In addition, when you pick up an item by clicking on it, the type of component it is will highlight with a green border. So if you pick up a laser, a heavy component, the laser and all of your heavy compoment slots will display a bright green border. This makes each type of item easy to identify. If you want to use a component, you can place it into a slot on your Ship Components screen. You will want to make your ship as powerful as you can by combining the best set of components within your power load budget.
- Using New Weapons and Items - The Skills Bar: If you add a new weapon, such as an EMP (medium component), to your Ship Components, you'll need set it up to be used in battle. After placing the EMP into a medium component slot in your Ship Components, click on the Emp icon on your Ship Components screen to pick it up. Now move it to the bottom of the screen and click it into empty slot 2 next to the laser in slot 1. Now you will be able to use the EMP in battle by pressing the "2" key on your keyboard. You can put weapons and other items such as energy spikes in any of the 10 empty slots at the bottom of the screen. If the weapon/item is in slot 5, you press "5" to use it. Weapons/items can also be placed into "Right Click" slots.
- Right Click Slots: In addition to placing weapons in the main skills bar at the bottom of the screen, you can also place them into one of the 3 right click slots at the bottom right of the screen. Then to use that weapon, you just click the Right Mouse Button. Only the bottom weapon/item will be active when you right click. If you have several items in right click slots, you can cycle through them with the arrow keys next to the bottom slot.
- Power Load: This is critically important! Many of the items you use for your ship consume additional power. At the bottom of your Ship Components screen, you will see a green bar reflecting how much power your ship is consuming. For instance, if you add additional shields to your ship components that you find or buy, it will require more power. As you approach your power limit, the green bar will change to yellow. If you go above your power limit, the bar will then change to a flashing red color; and you will be penalized!!! The penalty is based on how much over your limit you are, and will be displayed by icons in the upper left of the screen. Penalties are a 20% reduction in regeneration and thrusters (movement) for every 5 units of overload. If this happens, it might be best to remove that component from your ship components until you can acquire something that gives you additional power (such as a nuclear power plant or solar array). Later you can add the other component if you have enough energy and an open slot. You can play the game with an overload situation, but your ship will be slow and vulnerable.
- Finding an Alien Race: Winning the game is based on being allied with the winning race(s). Races will battle for supremacy during each game. You need to interact with them during the game to buy and sell, for diplomatic reasons, etc. So the first thing you need to do is explore the star systems and make contact with as many races as you can. One thing to which you'll often need to refer is the Star System and Galaxy Maps.
- The Star System Map: To determine where you've been and (eventually) how to get somewhere you want to go, you will often need to refer to your two maps. Press "M" to bring up the map of the star system that you are currently in. You will see a square-like area where you are likely to find planets (some may be occupied by alien races). As you explore, some of the gray areas will turn black revealing a circular area representing the edges of the star system. When you explore the areas near the edges of the circular area, you will often find gates to other star systems. Once you identify a gate by clicking on it, it will appear on your star system map for future reference. Many other things that you discover in a star system will show on this map as well (like planets and Jump Gates). Once you find a gate to another system (a star lane or a wormhole), click on it to travel to a new star system. Now you'll want to check your Galaxy Map.
- The Galaxy Map: Once you're in a new star system, press "M" to bring up your star system map. If you've just arrived for the first time, most of the map will be gray. At the bottom right of the screen, click on the button marked "To Galaxy Map". Your screen will switch to a starfield that will show the two (or more) star systems that you've been to and how those two systems are connected. Once you've discovered many systems, you'll need to refer to this galaxy map to see where you are in relation to the other star systems. For example, if you've accepted quests that are in the "Sol" star system, you can refer to your galaxy map to get an idea of how to get to that system so you can complete those quests.
- Quests: Your first quest of the game will be to discover another race. Simply explore until you locate one. After discovering a new race (or races), they may offer you additional quests. If you complete that quest for them, you will gain favor with that race. You will also gain experience and often be paid money. However, another race may or may not like you helping them depending on whether they like that other race. If you help a race they dislike, you'll suffer poorer relations with that now angry race. After completing a quest, you'll need to solve it. You can solve a quest by going to any of that race's planets, or (better yet) go to the Relations Screen to solve it.
- The Relations Screen: After you've met one or more alien races, you can observe each race's progress, see what they think of you, and even negotiate with them using the Relations Screens. Having met at least one race, press "R" (or click on the shaking hands icon) to bring up the Relations Screen. You will see some icons in a circular area. The line between you (Drox Operatives) and that race is color coded. The key on the left tells you what each color means. Also, on the left it shows you the Power rankings of each race you've discovered. If you place you cursor over the icon for a race on the screen, you will see a description of that race as well as what your relationship is with them. You can interact with that race by clicking on their icon on the Relations Screen. You can get and solve most quests here as well.
- Relations - Trade Screen: If you click on a race's icon on the main relations screen, and then click on Trade; you can interact with that race. You can offer or demand money, offer treaties, declare war, sell technology/information by negotiating a price, share knowledge, and share contacts. For instance, if you wanted to give money to a race so they would like you more (and they would like that), you would click on your money (credits) in the upper left of your screen. A dialog box would come up asking you for the amount you want to designate. After entering the amount you want to offer and clicking "OK", you'll see if that race is aggreable to your offer (yes, they love money!). Then you'd need to click on "Offer Trade" to finalize the deal. If they accepted the deal, your relations with that race will improve. The better the offers, the better your relations with that race will be. As another example, you can also demand money from them by clicking on their money (credits), entering the amount, and then clicking on "Demand". Not one race has ever conceded to my demand for money. ...Oh well...
- Leveling Up: As you explore a star system, you will encounter and destroy enemy ships. You will gain experience, which is shown by the blue bar above your menu bar at the bottom of the screen, each time you destroy an enemy ship. You also recieve experience by solving quests and in other ways. Once you have obtained enough experience, you will "Level Up" which will give you 5 crew points that you can use to improve your ship by allocating those points in the Character Menu.
- The Character Menu: Once you Level Up, bring up the Character Menu by pressing "C" or clicking on the pilot icon. You will see your ship's name and various information about your ship's condition and capabilities. At the middle right you will see your 5 crew points highlighted in green. Above that are categories to which you may allocate these points by clicking on the red "+" signs next to each category. For example, if you found a weapon that shows in it's description that it requires you have 6 tactical points, you will not be able to use that weapon until you increase your tactical points from 5 up to 6 on the Character screen. So after you click once on the "plus" sign next to tactical, you can then place that weapon in your Heavy Ship Components slot and use it in the game. This is one example of how you improve the capabilities and fighting power of your ship. Different ship components require points in different categories. It's up to you to choose what weapons, shields, power plants, thrusters, etc. you want to use, and then allocate the points appropriately to equip your ship however you chose. You can place any weapon into a slot, but if you don't have the required points to use it, it will not work during battle. You can even get a bigger ship by allocating points to the Command category.
- The Command Category: On the Character menu (press "C"), there is a category listed as Command. By allocating points to Command, you can upgrade your ship to the next level. Often upgrading your ship will give you an additional slot in your ship components so that you can use another component. However, each ship is heavier than the last, so you'll need to improve your thrust components if you want to go as fast as you did before. I'd advise not upgrading your ship until you have a lot of thrust (at least 60+), or you'll be unhappy. So be warned!
- Starlanes and Wormholes: Each sector of the galaxy is made up of many star systems. You can't fly directly between star systems as it would take too long. However, there are several ways to get from one star system to another. When you encounter a Starlane, you can click on it to be transported to another star system. There are also Wormholes which do the same. There are also Jump Gates which can transport you as well, but you must first find another Jump Gate in another system before you can jump from one to another for a price. If you have many Jump Gates activated you might be able to jump clear across the galaxy!
- Buying and Selling: When you click on a colonized planet, you can click on "Trade" to sell your excess inventory from your cargo bays to them or buy needed items (if you both can afford it). The planet's inventory is shown on the left. You can sell an item from your cargo bay by placing your cursor over that item and pressing "spacebar". You'll then recieve credits (money) in exchange. Likewise, you can buy an item from the colony in the same fashion. If you don't have enough money to buy an item that you want, you can place into one of the 2 "Held items" slots near the bottom of the vendor's list of items, and it will be held in lay-away for you until you return. However, you cannot trade with a race with whom you are at war!!
- WAR!! Alien races don't always get along. After all, each is trying to dominate the galaxy! On the Relations Screen (press "R") you can see how each race is relating to one another as well as with you (Drox Operatives). If you let your relations sour badly enough with a certain race, they may declare war on you! Not only won't you be able to trade with a race with whom you are at war, but they will attack you on sight! Alien races are more powerful than most monster ships, so be careful or you will be quickly destroyed. It requires time and strategy to defeat another race. It's probably often best to avoid war, but sometimes it can't be avoided. Sometimes, you can make peace with a warring race if you have enough money to pay them off. You do this by going to the Relations Screen, clicking on that race's icon, then click on Trade. Then click on "Peace treaty". They will probably decline. So then you can click on the button which says,"What would make this trade possible?". The race may then define an amount of money you can pay them to obtain a peace treaty; or, if they are mad enough, they may say it's impossible. Also, and this is very important, if all races are at war with you, you lose the game!!!
Drox Operative Tutorial and Walkthrough
This is an informative Guide to assist gamers in playing Soldak's latest game, Drox Operative. Drox Operative is a starship action RPG with warring alien races, fierce space battles, a dynamic evolving galaxy, and co-op multiplayer for Windows and Mac. The goal of the game is to pick the winning alien race and maybe even help them conquer the galaxy if you're being nice, ...well that and build the coolest, deadliest ship in the known universe.
Posted by RPGKnight on - Basic Other


I'm one of Drox Operative's developers, and I created this tutorial/walkthrough to aid new players when Drox operative is released. I hope you will find it helpful in playing the game. :)
Thank you, I believe this will be very helpful once the game is released. I have been following Drox Operative for months and I can't wait to play it. Keep up the fantastic work!