Let’s start 2014 with some explanations about how we make the Coral Cave’s art.
I - Backgrounds
Every background starts as a very small sketch, like those:

This is how the game looks like at the very very beginning.The puzzles and the backgrounds are created at the same time as well as the viewpoint, the lighting and the main atmosphere of the scene.
Because of their very small scale, those drawings help us to see the structure of the scene.
When we are happy with both the scene’s atmosphere and the distribution of the puzzles in the space, we start drawing the final sketch.
Here is Mizuka’s room, just before we color it :
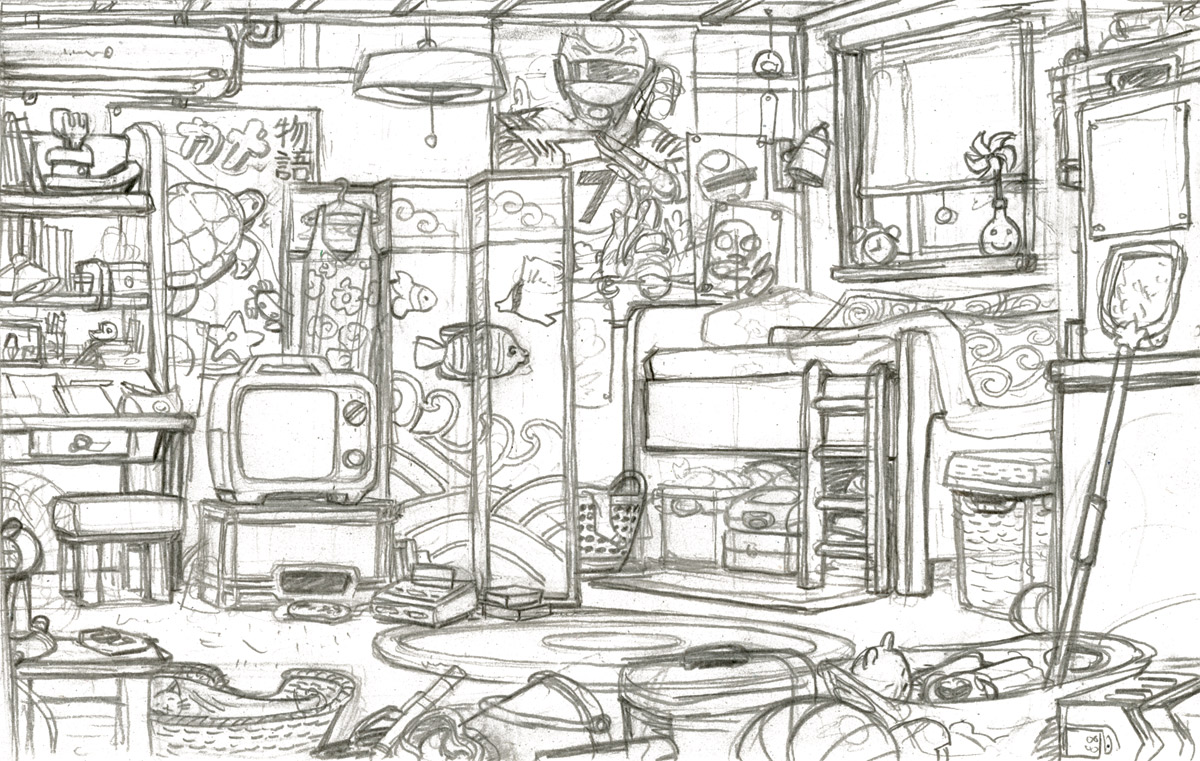
This step is very important: we scan it, put it in the game engine and see if everything is OK.
The perspective is the most important: Is the character at the good size everywhere in the scene?
Sometimes, we have to redraw a part of the scene because, when the character walks to the distance, she happens to be taller than the door she supposed to open!
Here is another exemple of a final drawing:
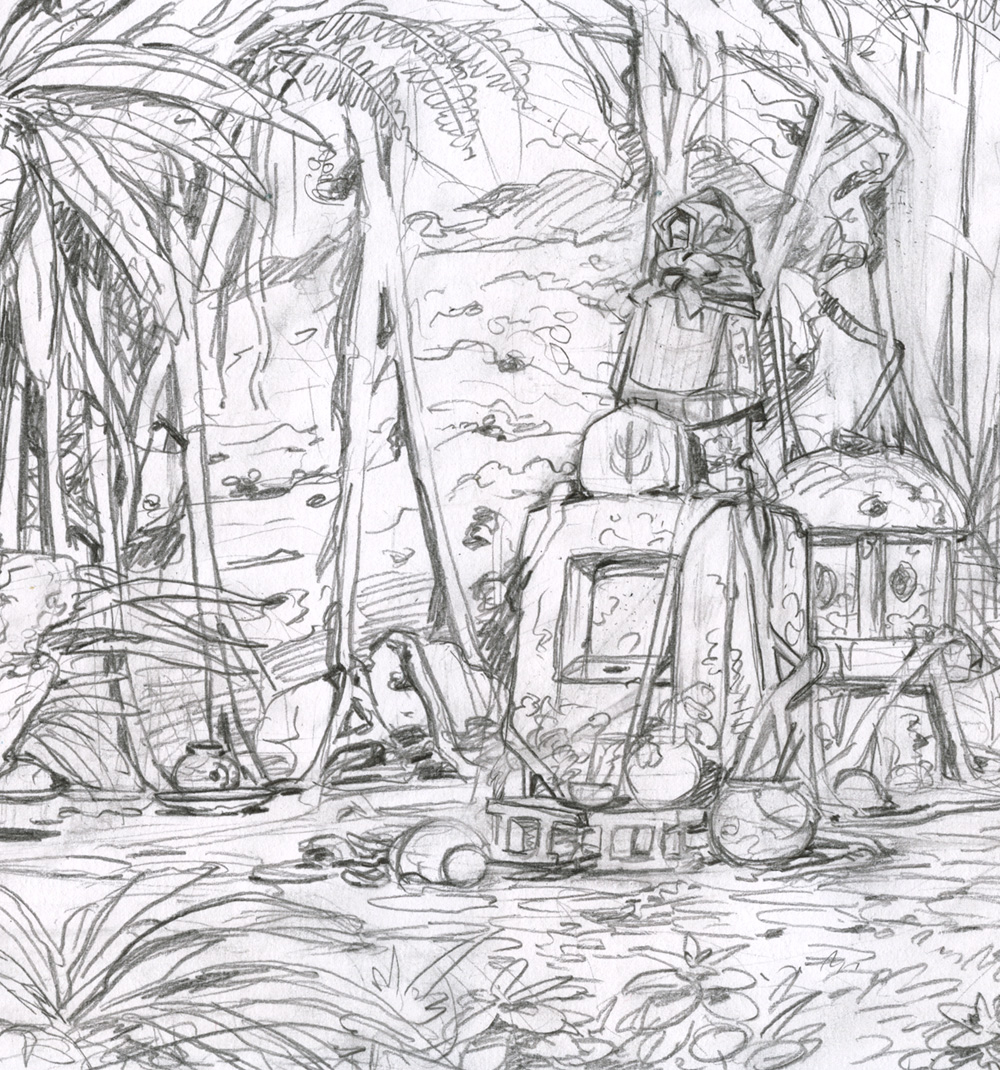
You can see it’s very detailled. We create every scene of the game using those sketches.
All the events, the puzzles, are coded using those sketches.
Then we play the game.
If something doesn’t work (or is disapointing), it’s easier to redraw a sketch than a fully painted watercolor!When everything is OK, it’s time to color the background.
Here is a timelapse video showing how we color a background from the beginning to the end:
II - Characters
The difficulty when coloring an animation using watercolor is: every frame has a color slightly different and the character seems to flicker when he moves.
In order to get exactly the same colors on all the frames of the character in all the animations, we use a little trick.
Cécile paints areas of colors on several sheets: one for the skin, one for the pajama top, one for the pajama bottom…
On another sheet, using a pencil, she draws the different frames of the character.
Then we scan everything and, on the computer, she adds the colors to the lineart. This way, the same colors can be used in all the animations without loosing the handpainted feel.
Here is a little video showing how we color our main character:
III - Interactive objects
Interactive objects are difficult: they can’t be done in one drawing. The player will activate/open/close/move them. So we have to plan all those states and draw them separately.Here is an example: an electric box.
On the paper, it looks like that:
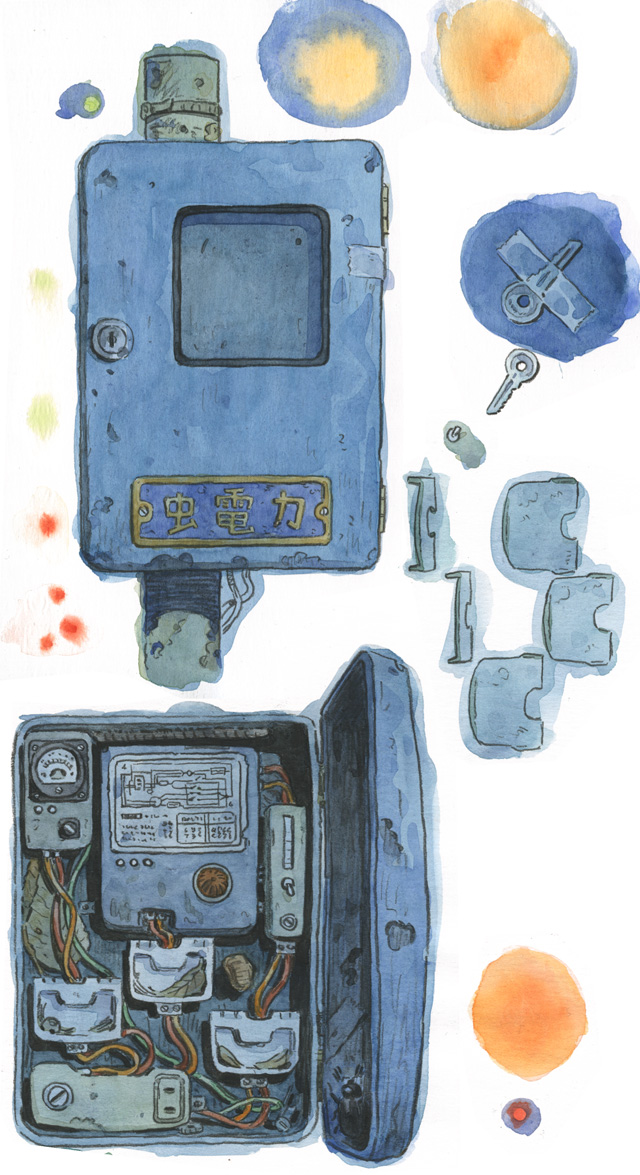
We draw the box closed, then opened.The interactive parts (the plugs per example) are drawn separately. The color circles will be used later to create lights on some devices of the box.
Here is the finished box:
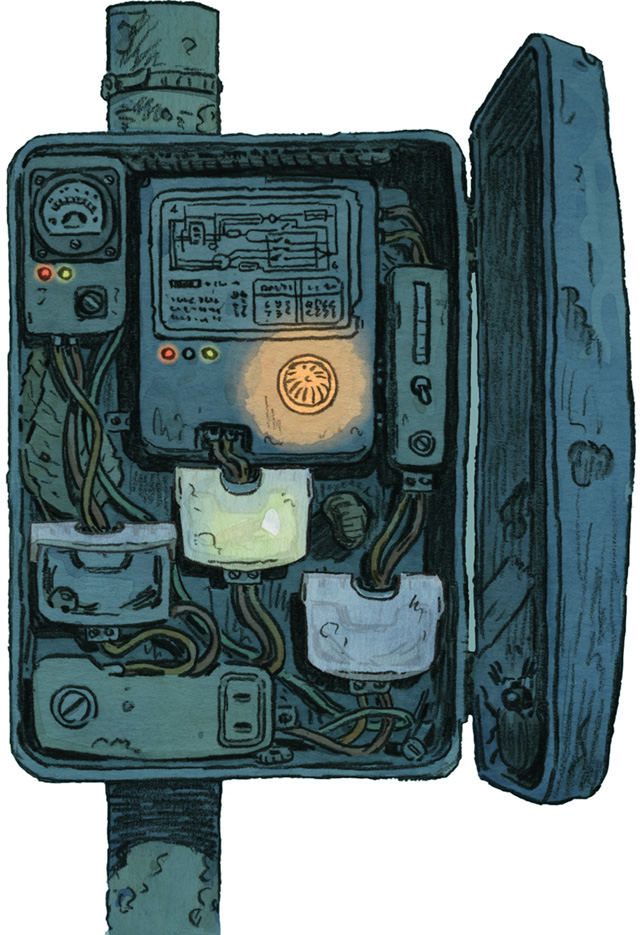
Now, the player can interact with the box: he can open it with a key, click on the switches, light the diodes…It wouldn’t be possible to create it with only one drawing.
So we have to draw all the parts of the object several times, in different positions, and be sure they will match together perfectly in the end.
It takes time… but it’s a fun job!
Thank you for reading and feel free to write if you have any question!

Looks beautiful!
Indeed! I liked watching those videos. Keep them coming!
great process!
Very interesting, always loved the games that uses traditional medium. Tracking :)