Darkfires
joined
The Man Who Sold The World
My Blogs
My HPL2 commissions are open!
- import and create edit custom assets (3D and 2D) or edit existing ones
- make simple models from scratch
- optimise and detail maps
- and more!
Important! I will be trying to stop spending so much time on ModDB from now on. If you need to contact me, use Discord (see the contact section on my profile for the tag).
I wanted to have some general rules of comparing the mods which I review, so here's my scale:
1 - Bismal waste of time with game-breaking bugs.
2 - An annoying time sink, potentially with game-breaking bugs.
3 - A broken or frustrating mess. Not fun.
4 - A bearable mod, but nothing more.
5 - An okay mod with prominent issues.
6 - An okay mod with prominent issues, but has redeeming qualities.
7 - A good mod with noticeable issues.
8 - A great mod with minor issues.
9 - A fantastic mod worth your time.
10 - A modding masterpiece and a must-play.
Also keep in mind that if I give some modder advice, their response and whether they try to apply it can influence my score.
Please bear in mind, that if I write a long review which lists many negative things, it's usually because I want to give you feedback on how to improve you mod, and not to put it down.

Hello everyone!
I have been asked about making a custom story many, many times. I also have seen many... highly unpolished ones.
Usually I link Mudbill's tutorials [CLICK], which explain the basics of modding;
However, they don't really explain how to avoid many mapping and scripting pitfalls.
Hence, I'd like to teach you how to make a proper map in Amnesia.
For this tutorial you must at least know the basics of using the LevelEditor and have the modding tools installed.
In Amnesia, there are separate asset packs, named "-base", e.g. mansionbase. These shouldn't be mixed unless you absolutely know what you're doing; therefore, we will be picking one and sticking with it.
Since many beginner modders make mostly mansionbase maps, I will use it in my example.
Let's start with making a basic room: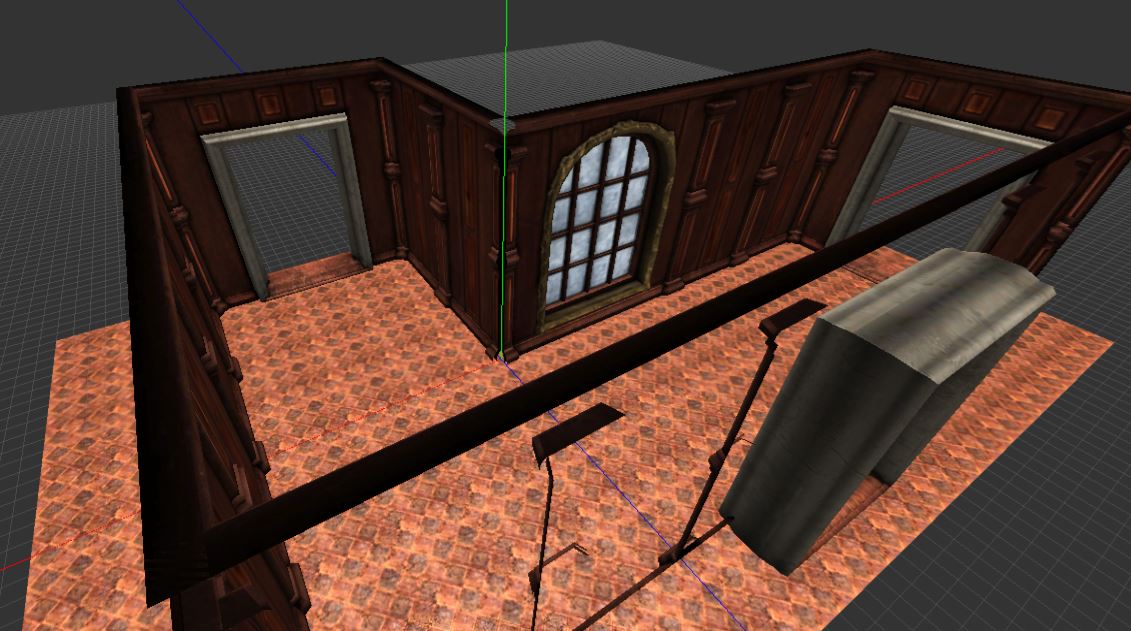
Remember to use both convex and concave welders in corners: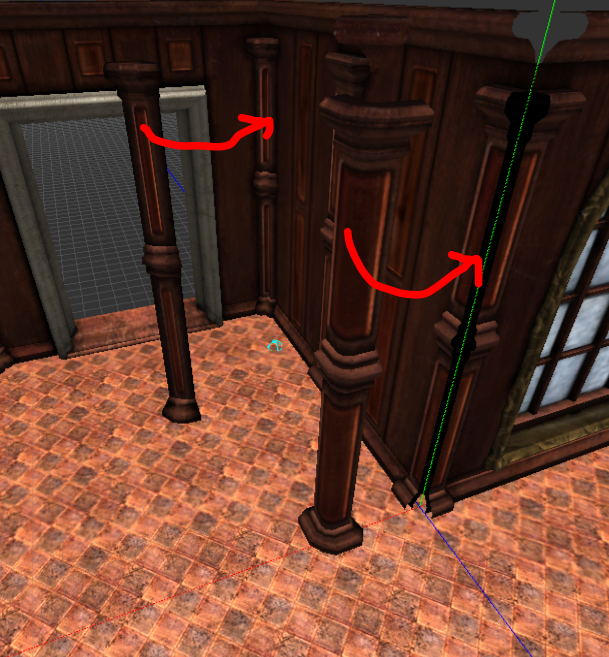
Don't forget that you can get creative vertically. Amnesia has dedicated assets for this, usually in the ceiling section:
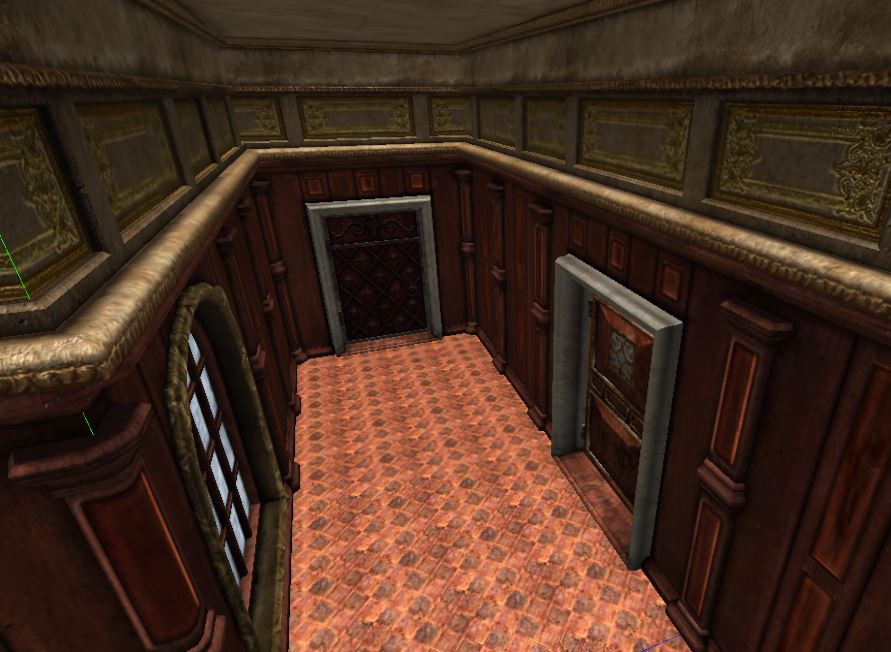
I also added doors - remember that they should also match the asset base you're using.
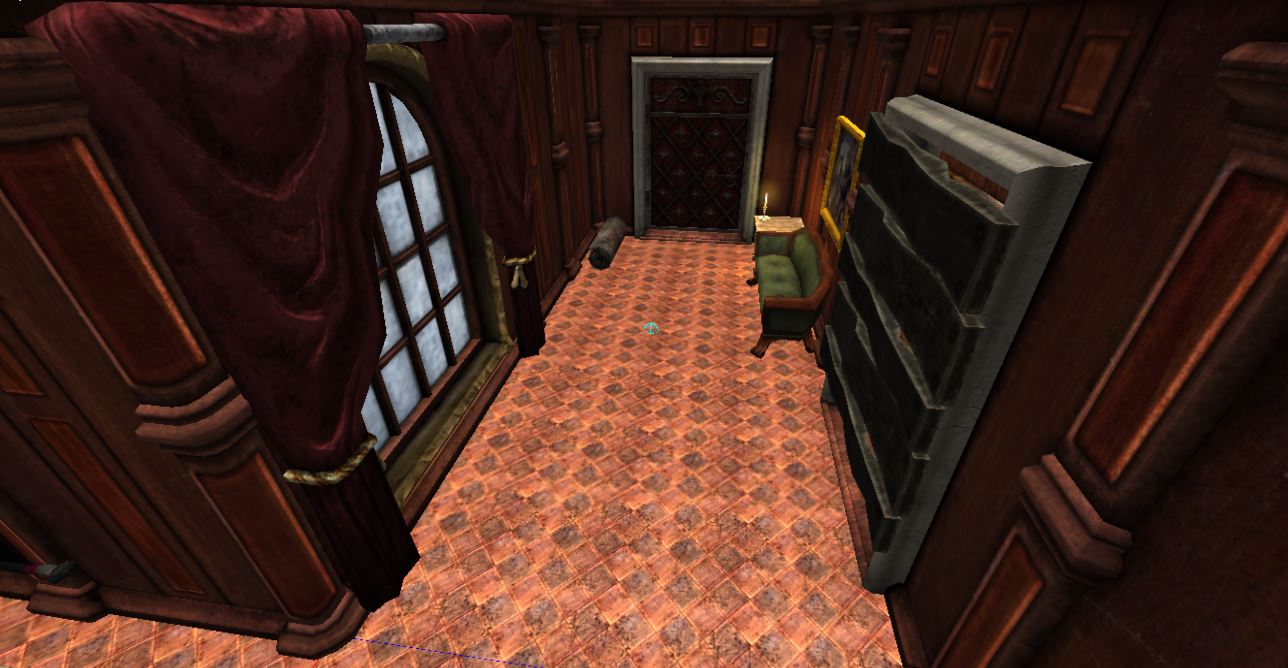
2. Decorating the roomNow that we have a framework, we can start adding onto it. When adding furniture and other objects, always have the rooms purpose in mind; for example, my map is pretty much a corridor, so it doesn't make sense to be placing much furniture in it, and neither does putting anything which would block the way in the middle.
I put some planks on the door; It's not for gameplay reasons, but to give the player a feeling that the place is bigger than it really is. When making something out of repeating models, remember to do slight variations of the them; rotate and scale them slightly. Here, I also rotated some of the planks by 180 degrees to fake having more than one model on hand.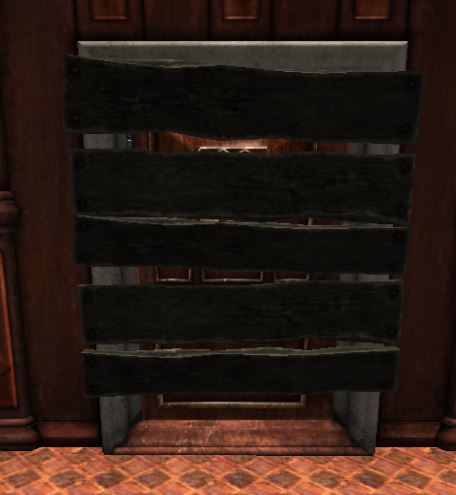
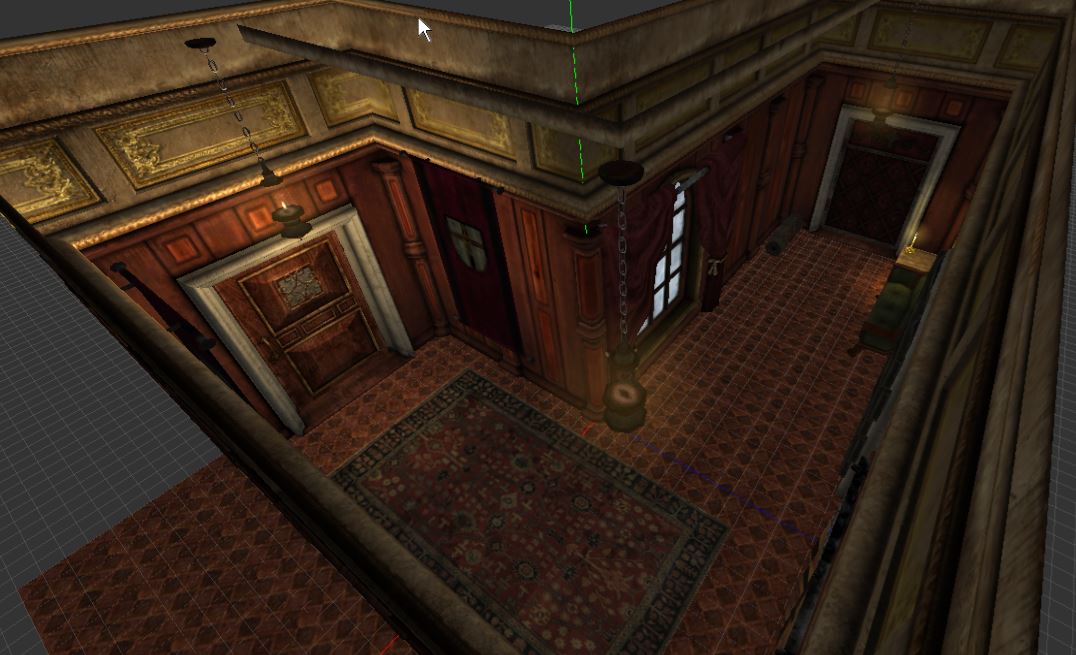
I also added some lamps, and turned some of them off, which is for the sake of making the level darker, and showing you how to do proper lighting - because one thing you need to now is that the lamp entities aren't enough to light your map!
To see how the level will look in the game, turn off the ambient lights in the editor:
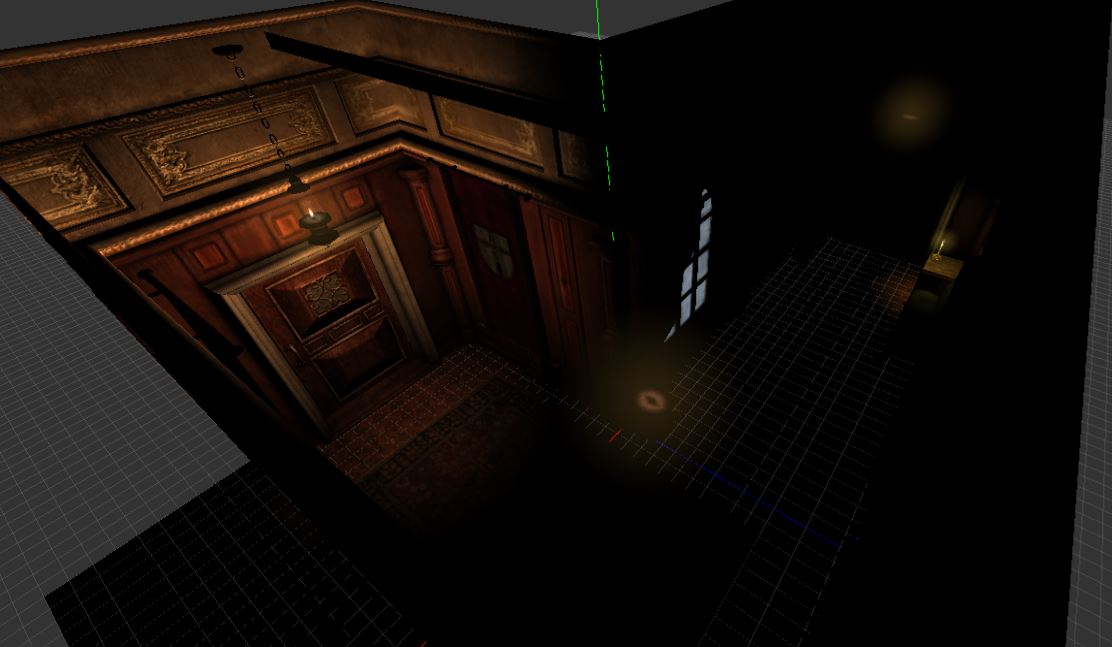
I hope you can see that this isn't the way to make the level dark; we will tackle this problem in the next section. Even a dark level needs some light, otherwise the player won't see anything, and believe me, it isn't what you want.
3. Lighting
Let's start by adding some pointlights: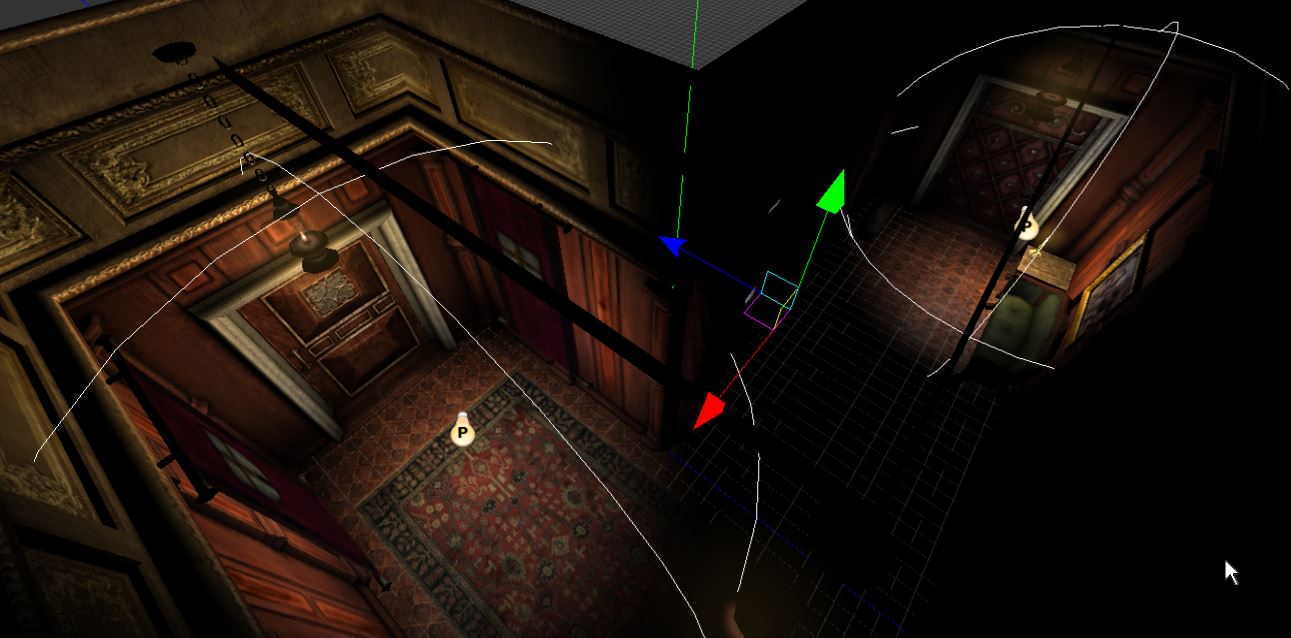
We can use a trick to make them synchronized with the nearby lamps; You need to put it's name into the lantern entity. Also make sure that the light's color is almost black (0.1, 0.1, 0.1), otherwise it will be very bright in the game.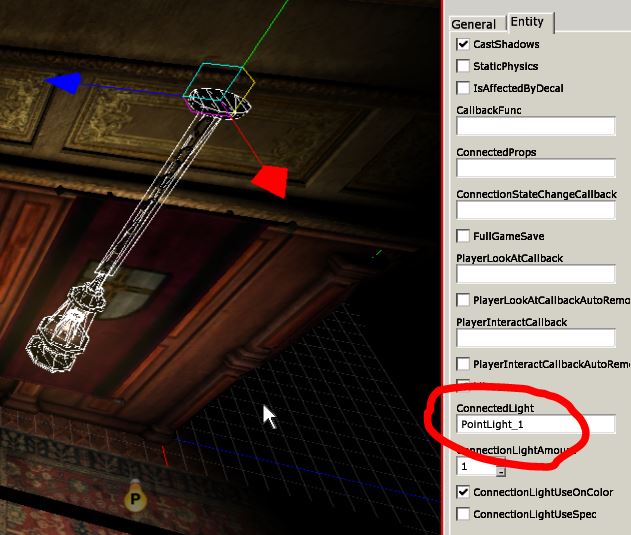
It doesn't change the light in the editor, but the effect in the game is pretty sweet.
By the way: Always remember to adjust your gamma settings before testing the map in the game! This is the only way to know how the map will look for your players.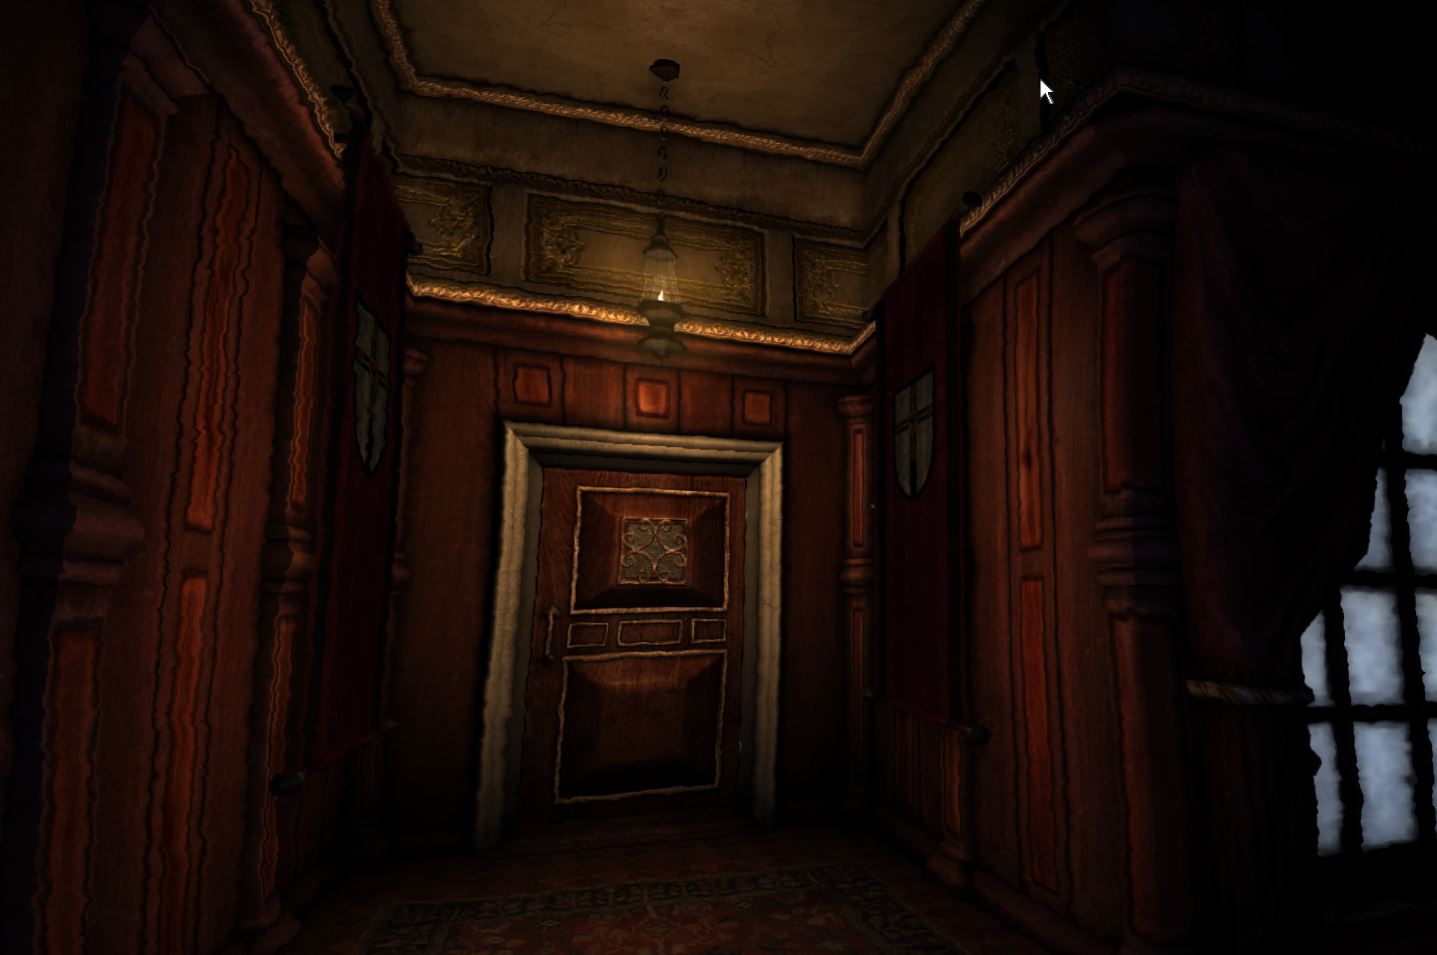
As you can see, the corners are unnaturally dark (in reality, light bounces off surfaces and spreads quite evenly around rooms). To battle this, we need to use a Boxlight. There are some rules to using them:
-Boxlights are for general light ambience of the level.
-Use only one BoxLight for the whole map (for the sake of unity).
-The boxlight should cover the whole map (going out of a boxlight looks very bad)
-The boxlight has to be quite dark.
Having that in mind, I made the following: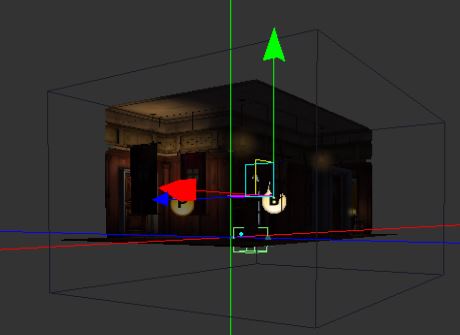
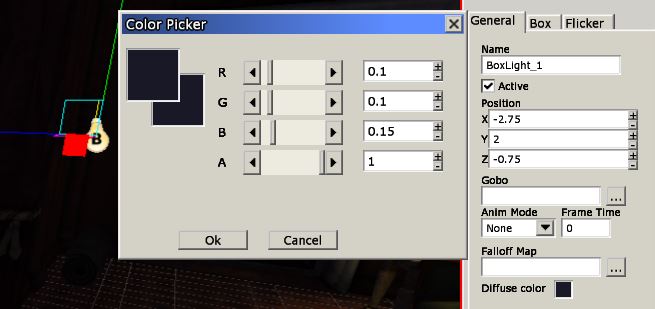
I made the BoxLight ever-so-slightly blue, because I will be adding moonlight in a moment.
Unfortunately, I can't show you how the boxlight affects the in-game look, because screenshots don't catch the gamma settings, and this subtle effect simply isn't visible in them. Keep in mind that it can still make a huge difference in the actual game!
Anyway;
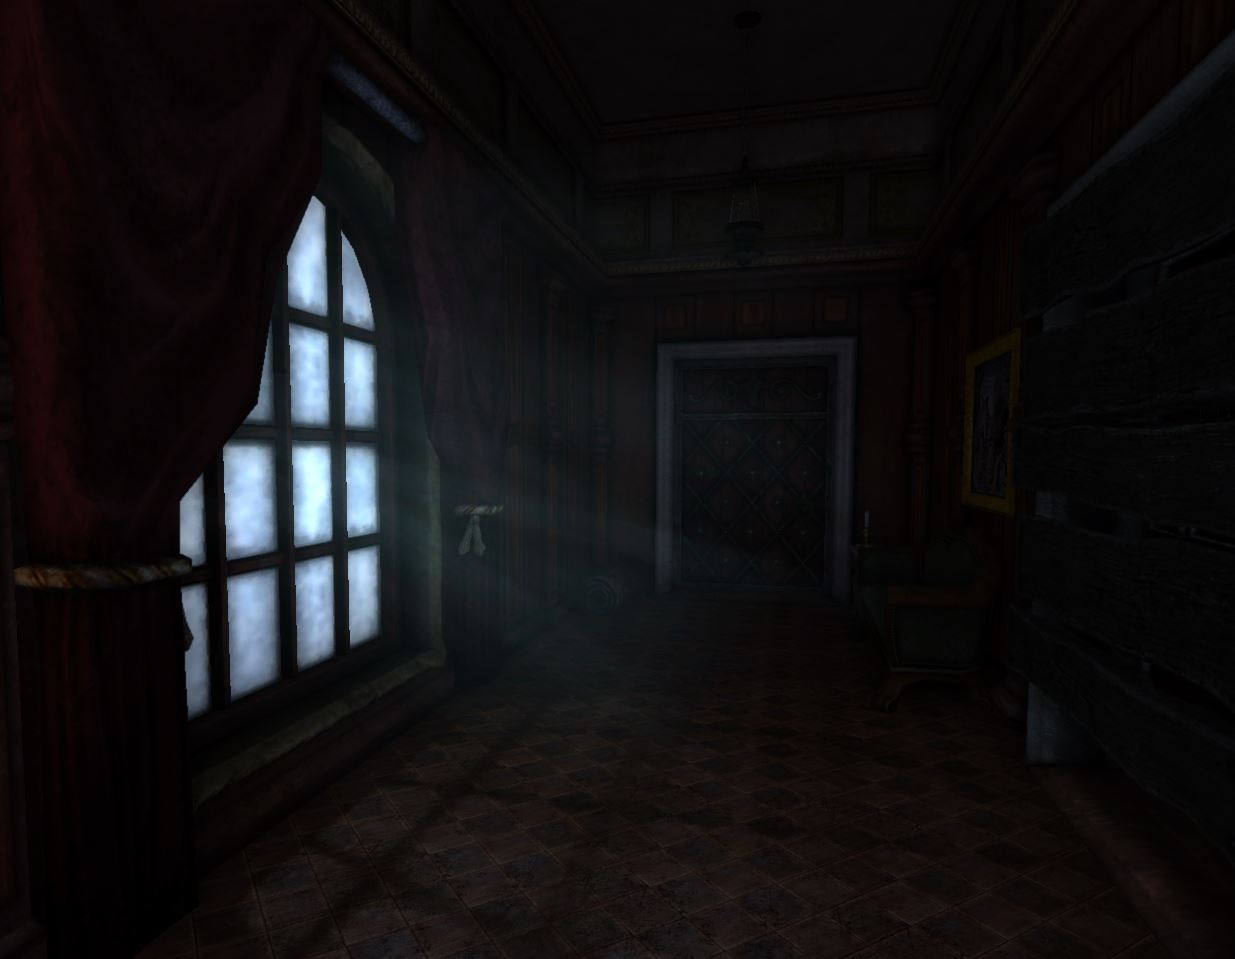
As I mentioned, we will take care of the moonlight now. I'll be making this similarly to how Frictional did it in the main game.
I added a faint, blueish poitlight in front of the window: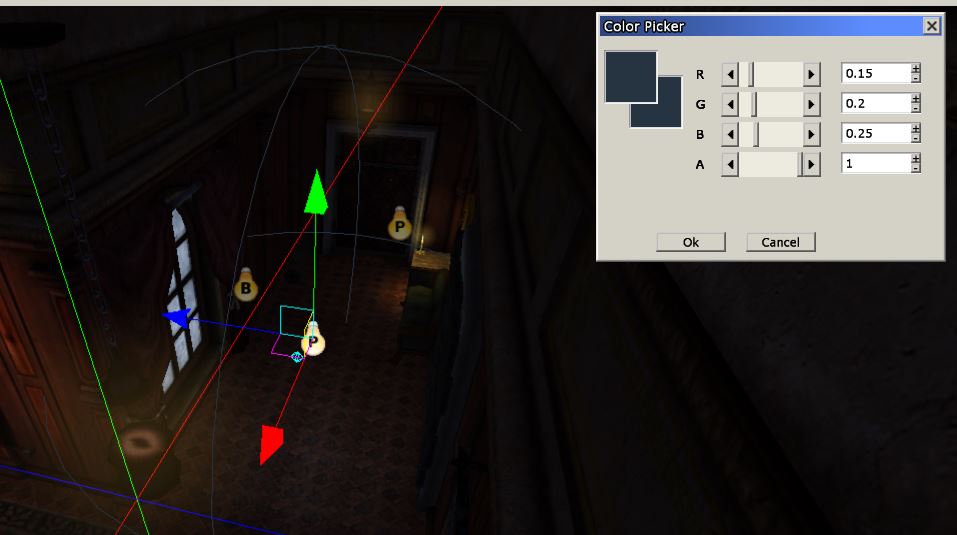
And a SpotLight of the same color, which needs to go inside the room. I also added a fitting Gobo, which is a texture map which simulates shadows - the shadows actually casted by the window aren't good at all.
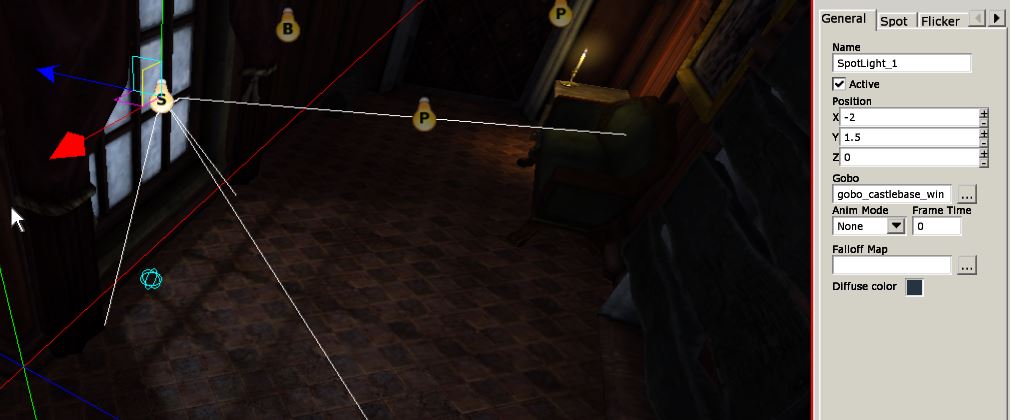
I also noticed that the candle kind of interferes with the moonlight, so I'm turning off the candle for now.
And that about does it for the lighting in this scene!
4. Billboards
Billboards are semi-transparent texures which imitate certain light effects; god rays, halos etc.
To be honest, they are very hard to use correctly; I'll give you some general rules, but I'll be using the billboards from the original game later on.
Basically, to even have a chance of getting the billboards right, you need to:
-Make them very dark (more or less 0.1 in every RGB value)
-Vary them in location and rotation
Another tip; when you select the billboard, a white arrow appears: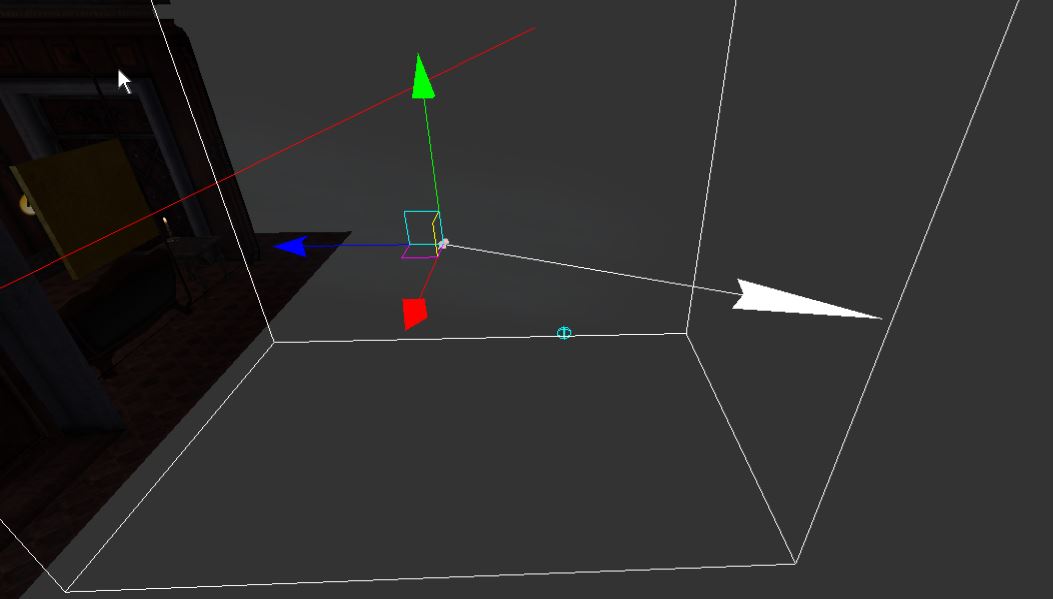
You can use the arrow to rotate the billboard towards the source of light or towards where the light will be cast.
However, when it comes to god rays, FG did a great job with it, and we will be just copying those for now. Open e.g. 03_archives.map in the LevelEditor and locate a window with billboards. Select them all and press Files->Export Selection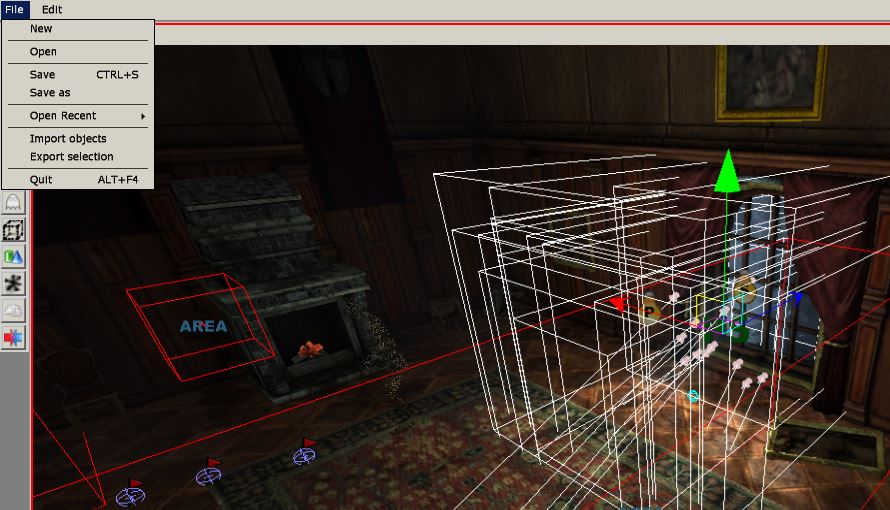
Save the file somewhere where you can find it. Open your map and use File->Import objects. All the selected objects should appear in your map. However, they will appear in their original location, meaning that you might need to locate them. To move and rotate them together, press 'B' to make a compound out of them: now they will act as a singular object. Place them at the window and place 'B' again - this will separate the billboards. This is what we have so far:
5. Particle systems
Particles are used for all sorts of effects and things floating in the air; flowing water, dust, fire...
When it comes to mapping, we will be using ps_light_dust.ps (place it in front of the window) and ps_area_fog.ps (place it in the middle of the corridor every couple of meters). I made the dust particles quite dark (0.5) because they are too on-the-nose in my opinion; making them darker makes them less visible, and therefore, more subtle.
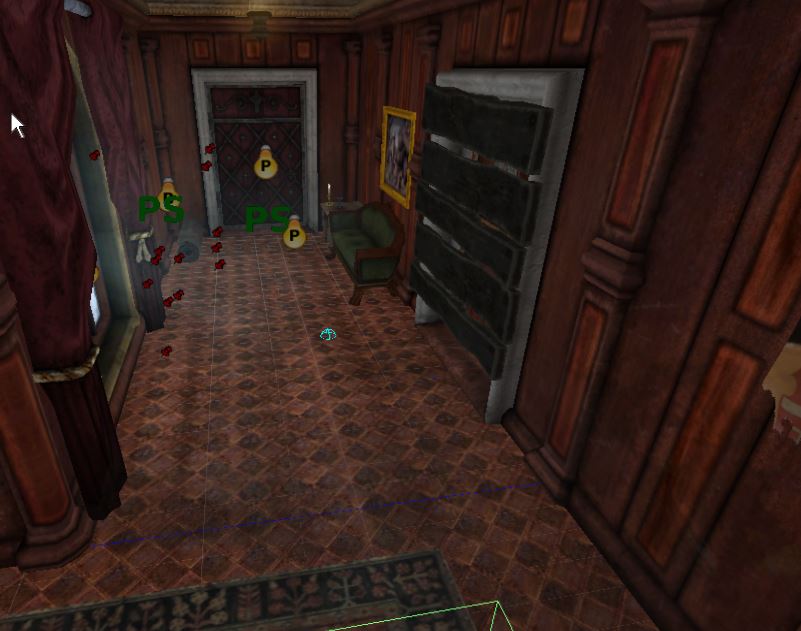
You can see the light dust particle here:
(the white dots)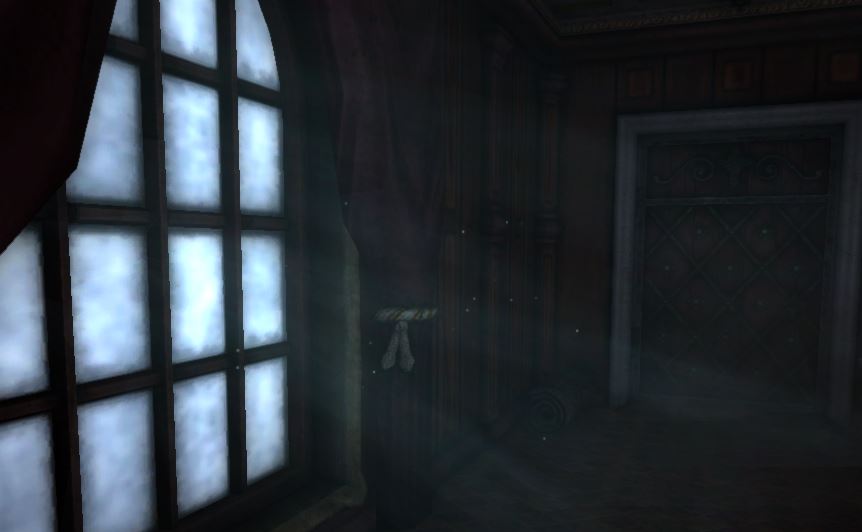
6. Decals
Decals are textures which stick on models. They're mostly for diversifying repetitive textures and various other effects. Some of them have a static_object versions. E.g, I'm using this static object decal for spilled wine: 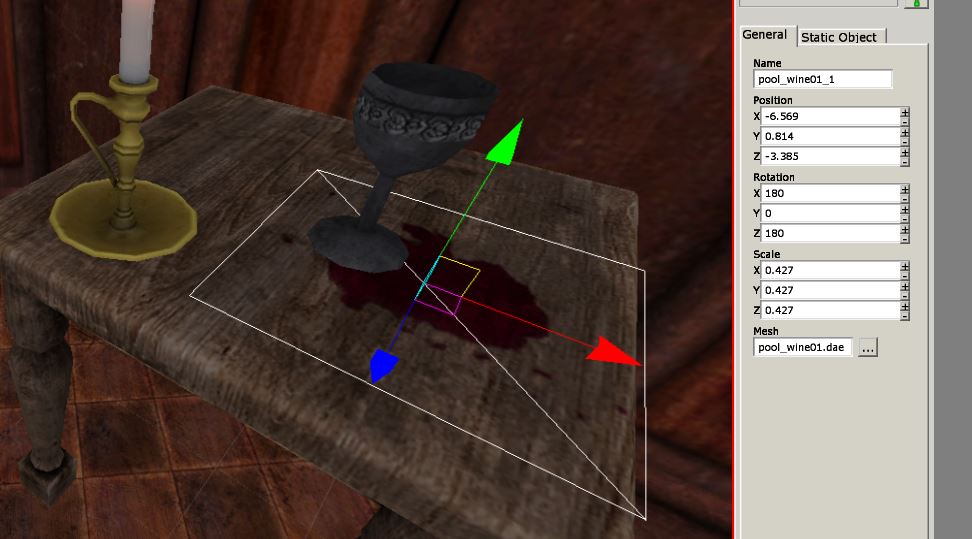
And one of my favourite decals - dirt_stain_large.mat - to fill the empty space on the floor and on the walls. Make sure to set the color to white, but change the alpha setting to a low one (I used 0.3 here). Otherwise the decal will just look too on-the-nose (ugly, if you will).
Then I basically slap it here and there with the random settings on: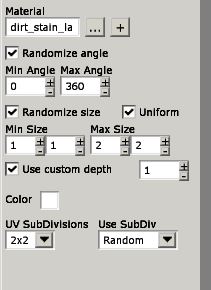
You can't see them clearly, but that's the point - they shouldn't be noticable at first sight, but they will still diversify the repetitive textures. Here's where I placed them: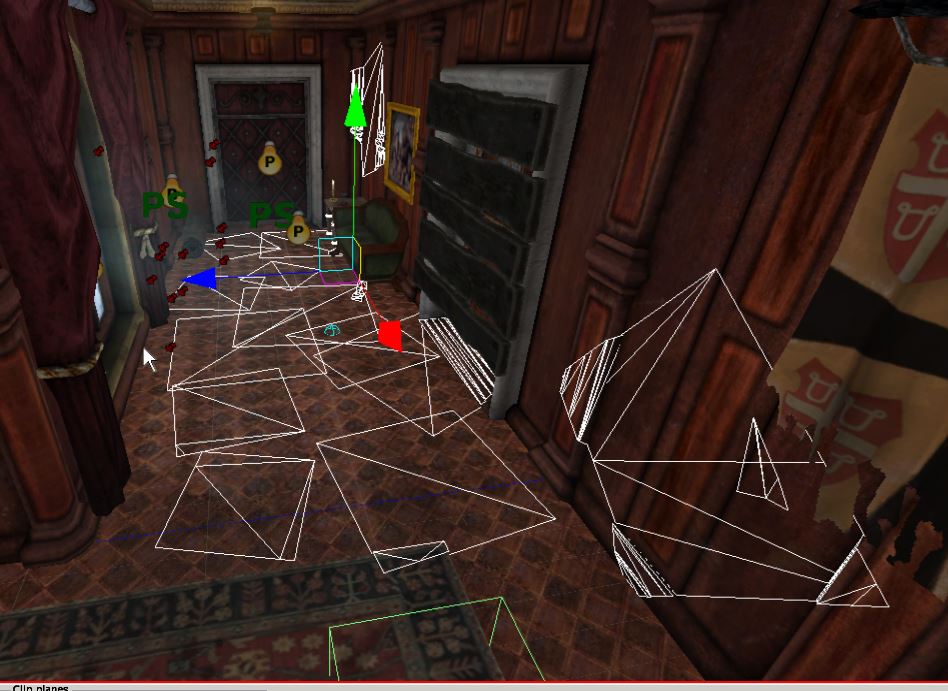
7. Other details
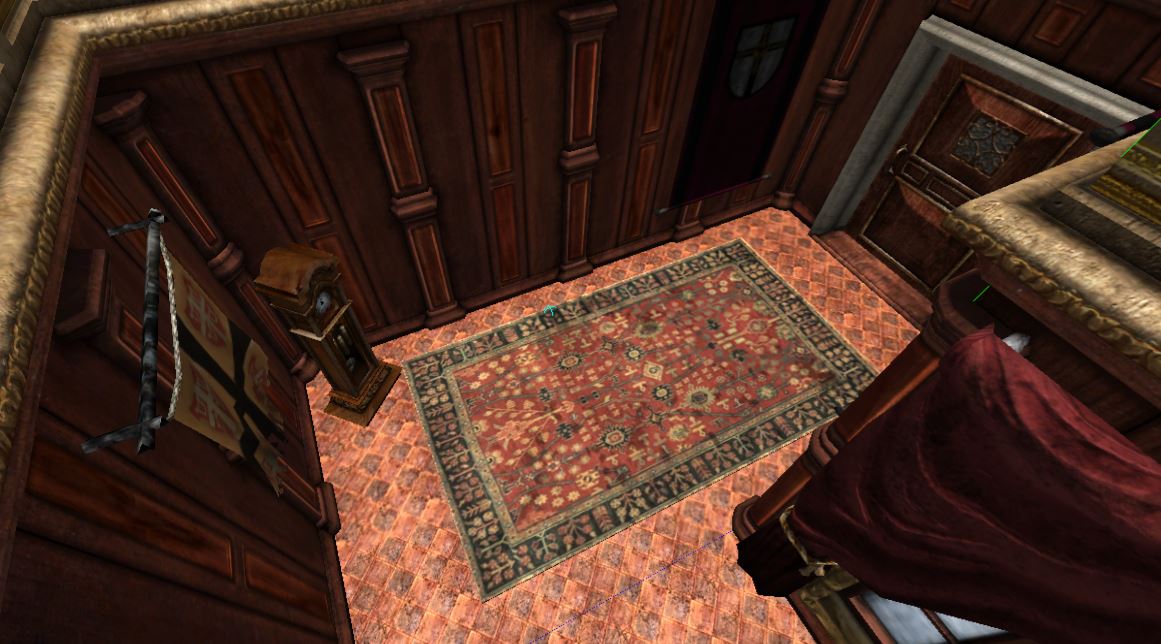
You can also use sound entities, which are basically just objects which play sounds in a certain area, and fog areas, which do exactly what they say. They're not very crucial however, so I think that's about it for the tutorial! You can also add more entities to make your map more detailed - e.g. I added a couple of more entities around the couch: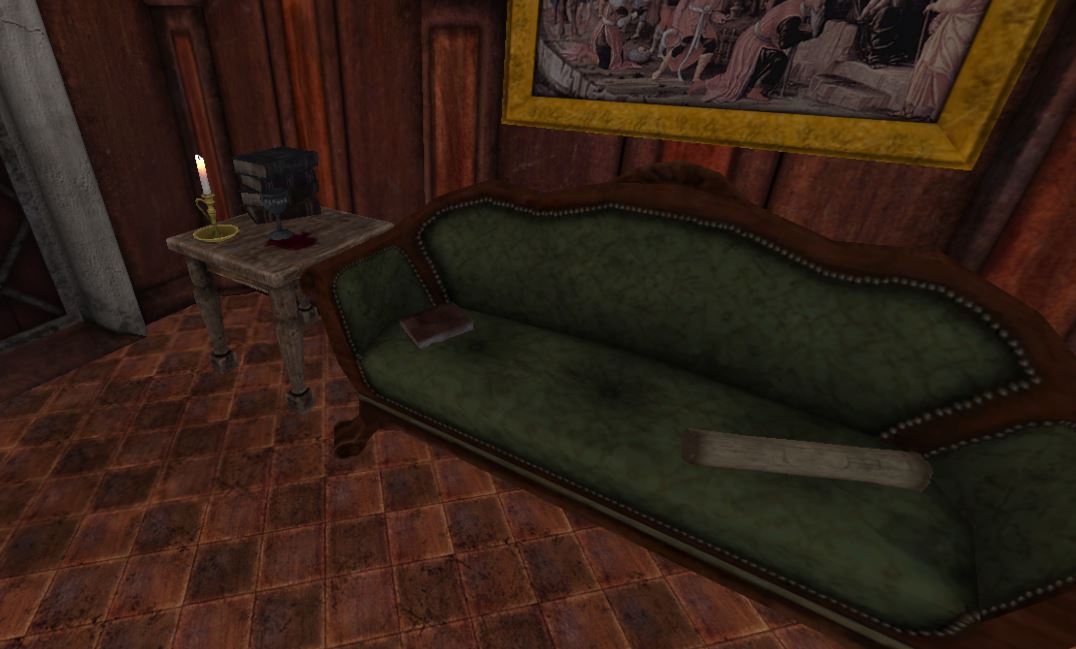
Final results:
8. Closing statements
Obviously this map isn't the most interesting nor original, but it's decent enough to use in a Custom Story, and if you use the principles which I showed you in this tutorial, you might create something worthwhile!
Thanks for reading!
~Darkfire
Hi!
I'm an Amnesia mod developer. I have made 3 full-length mods (additional content, to be precise) for the game, as well as written and designed "Life Freezes Over" - a SOMA mod.
I'd be delighted if you checked them out and maybe even shared your opinion on them!
Life Freezes Over mod - Mod DB
Eldritch Cove [DEMO AVAILABLE] mod - Mod DB
Amnesia: Chromanin [RELEASED] mod - Mod DB
Thanks for checking out my creations!
~Darkfire
Profile
