Nord_Licht
NordLicht joined
Hello there. Somehow I became a hobby technical artist with the help of some friends... to achieving their wacky imaginations on some decade-old RTS game engine. Because why not?
My Blogs
When creating your purely original 3D arts to mod older games (like Red Alert 3, the main example of this tutorial) although the creative freedom is way more versatile than patchworking vanilla art assets, they are often limited by the different workflow and cannot completely reproduce the original style, or take a really long time, or even fail to satisfy the basic aesthetic requirements in those old game engines (which are designed before modern PBR render pipelines) thus not very commonly used.
This article tries to describe a batch texturing technique through Photoshop and 3DSMAX scripts, as easy as possible, on the basis of limited workload (for me, within an hour) while meeting the aesthetic requirements of these old games such as Red Alert 3, or easily surpass vanilla quality if you want.
The fundamental logic behind this method is to map some feature information of the 3D geometry onto a flat surface and process them together as images. The reason I recommend this method is that it combines the advantages of easy-to-learn, batch processing which skips the majority of older workflows, increased detail, unified texture style, and it works the best when you need to create a whole new faction. Mainly thanks to the surface curvature sampling tools provided by MAX2021 update, which has not yet appeared in any of the similar workflows already known to the community. (Although its performance on complex curved surfaces is still a bit limited, minor problems like this can be overcome, as explained near the end of this article)
This article assumes that readers already have a basic understanding of the games you want to mod, in this case Red Alert 3, as well as the basic operation of the software mentioned: 3DSMAX, photoshop (or GIMP, SAI, any other drawing software with layer functionality can be used instead)
Now let's practice with an example.
(Example model provided by my friend Red Maple used in his latest work, a RA3 MOD called imperial instinct)
0, prepare the required software:
>>3DSMAX, version 2021, or higher. (Older versions do not have the API required for this plugin.)
>>Batch baking script, download link Cganimator.com
>>Any drawing software with layers, here we take Photoshop and GIMP as examples. But programs like SAI or KRITA are also usable.
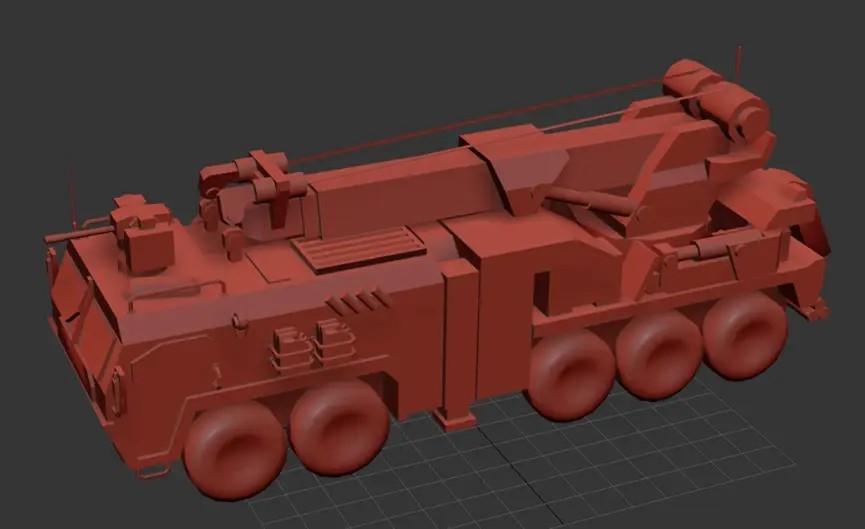
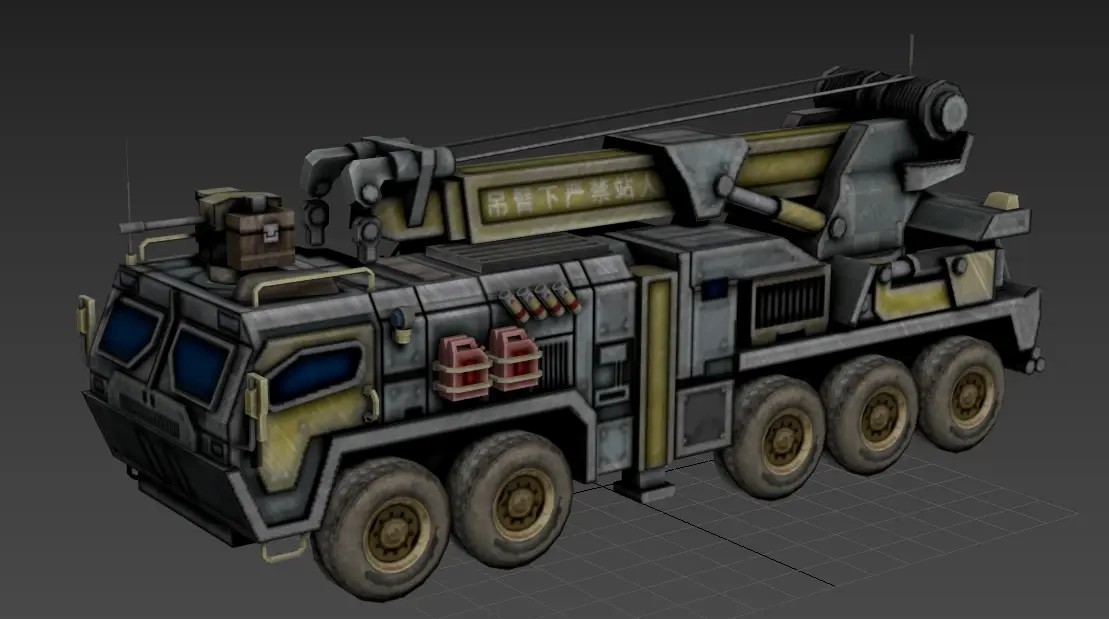
1, modeling, or find a usable model
In the modeling process, in order to make the following edge curvature calculation more significant, I tend to make the edges harder, with fewer unnecessary chamfer or subdivision. Therefore, the overall painting style is close to realistic or old sci-fi style. Of course, readers can adjust according to their own needs. (You can also use the vanilla model directly, but pay attention to welding the vertices, fix the smoothing groups and rearrange UV unwrap.)
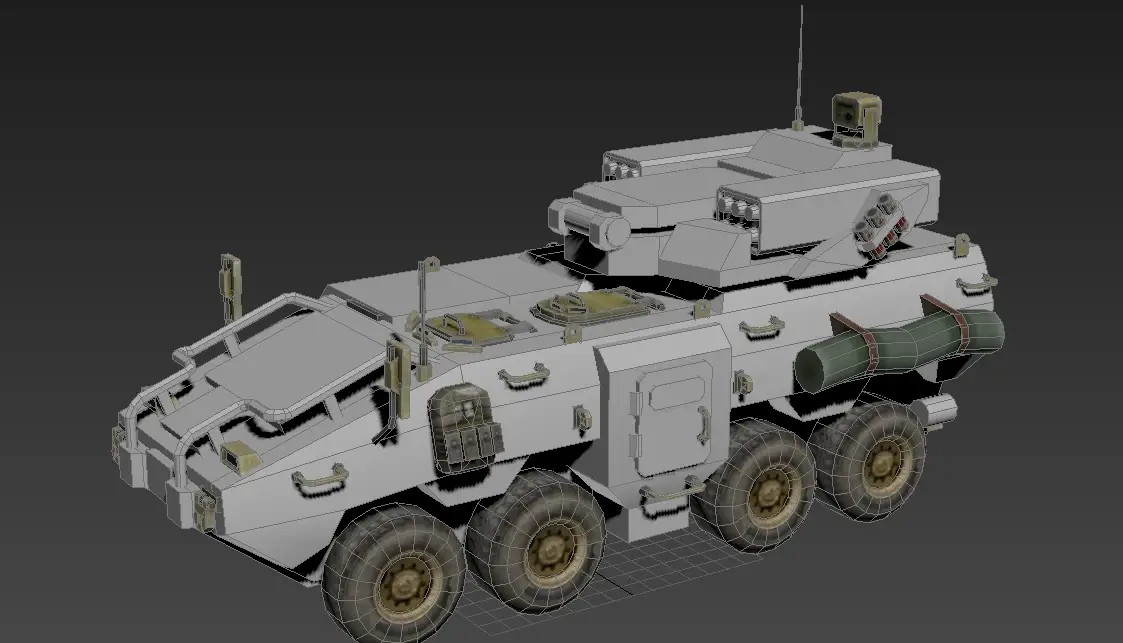
It's worth noting that a certain amount of "patchwork" with prefabricated parts can also do more good than harm. For example, we could prepare the model and textures of some generic parts in advance (e.g. wheels, lights, hooks, smoke grenades, antennae, optic-electronic sights, mirrors) and consolidate them into a single mesh with single material, which could then be copy-pasted directly in the creation of each new unit. This also significantly simplifies the UV unwrapping step for each new unit, saving texture area and helping to create a sense of stylistic unity in the series. Compared to this convenience, raising the total mesh count by one or two per model is acceptable.
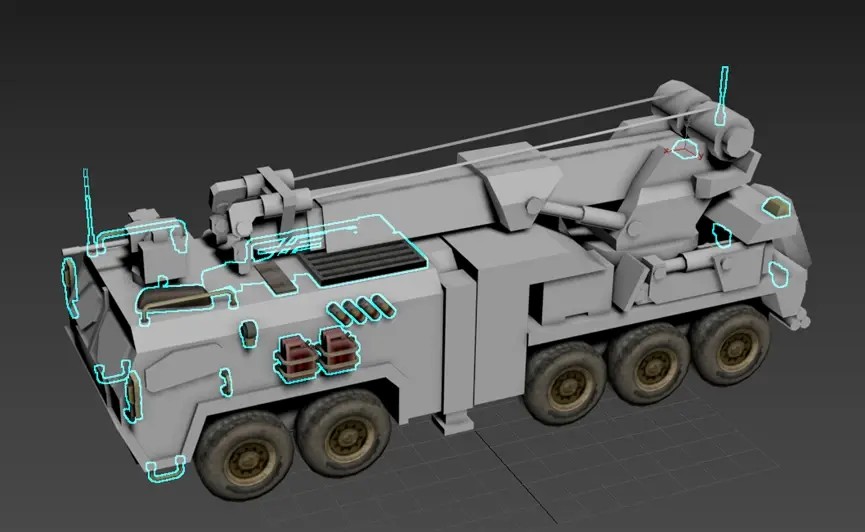


Next step is symmetrical segmentation. Due to the working principle of UVW, rough "cut by half" is not recommended for parts expected to have content which cannot be mirrored (such as text, logos, or camouflage on the top). Of course, if you just want to save time, these are all forgivable.
In addition, for the purpose of performance optimization, completely invisible faces should be deleted at the end of this step, in order to reduce unnecessary performance cost. (most RA3 vehicle model has approx. 3000 to 8000 triangles each)
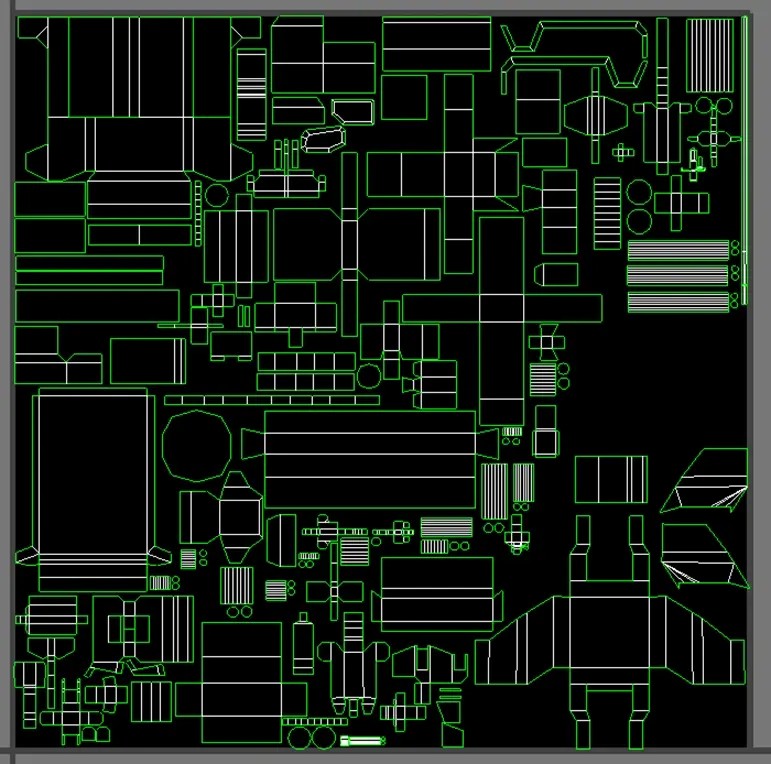
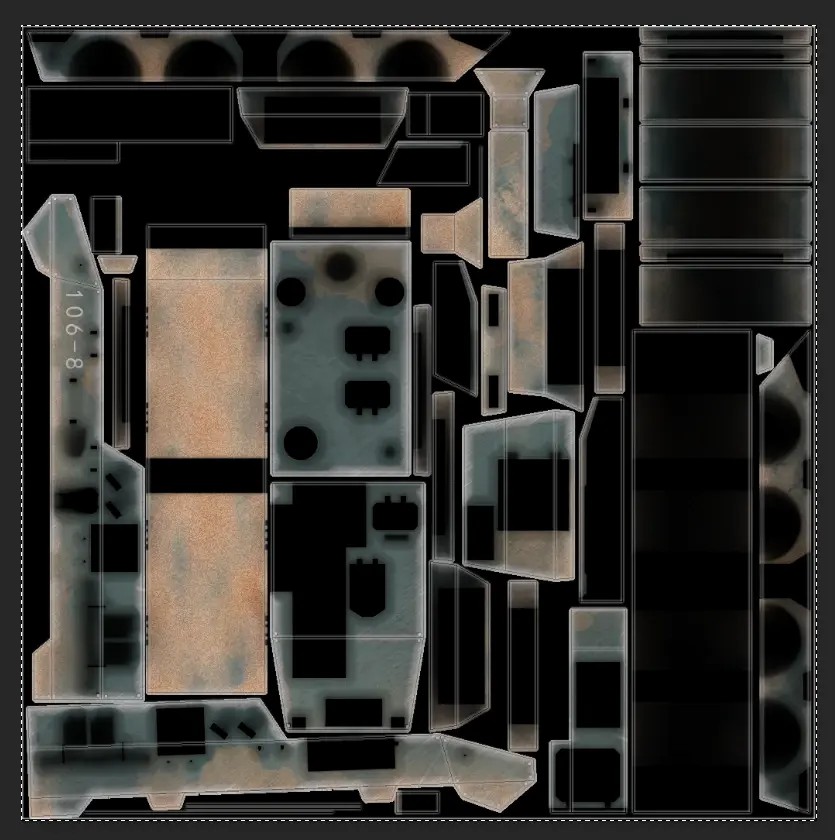
2. UVW unfold and arrangement
I assume you've learned the basics of UVW unfold, 3DSMAX provides a large set of automated tools for you to choose, no matter how lazy you are there's always a suitable one. But the following should be noticed:
>> make sure you've already set smooth groups for your whole model. Auto-smooth 30 degree should be enough. Some tools will read the smooth groups to decide where to unfold.
>> the surfaces that cannot be seen (such as bottom of the vehicle, between turret and chasis) can be shrink down to reduce unnecessary area occupation and VRAM waste.
>> It is recommended that the orientation of specific surfaces be as organized as possible to facilitate subsequent drawing. It is also best to place UVs horizontally/vertically to avoid pixel jaggedness when drawing "steel plate seams" and other strip textures (UV editor also has a function that can automatically do this)
>> Connect the surfaces that can be connected as much as possible, to enhance texture continuity around edges. The tearing between UV clusters will cause the smoothing group to be also torn apart in the game, so the green edge of the divided UV block should be on a sharp edge that does not need to be smoothed, such as the boundary between smoothing groups, or downward invisible edges.
>>Excessively fragmented UV clusters do not need to be separated, they can be retracted to a corner after using auto-unfold.
>>Do not overlap different UV surfaces (overlapping symmertric faces should be done later, when you copy-mirror the other half of the model) and do not let the edges of different UV blocks be too close, otherwise it is easy to mix color unexpectedly. In the lower right corner of the UV editor, you can adjust the padding during automatic arrangement (try 0.01-0.1). Depending on the intended texture size, ultimately it will be enough to ensure that there is at least 4 empty pixels between any different UV clusters on the finished template.
3. Automated bake to texture
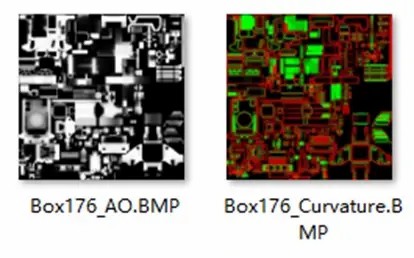
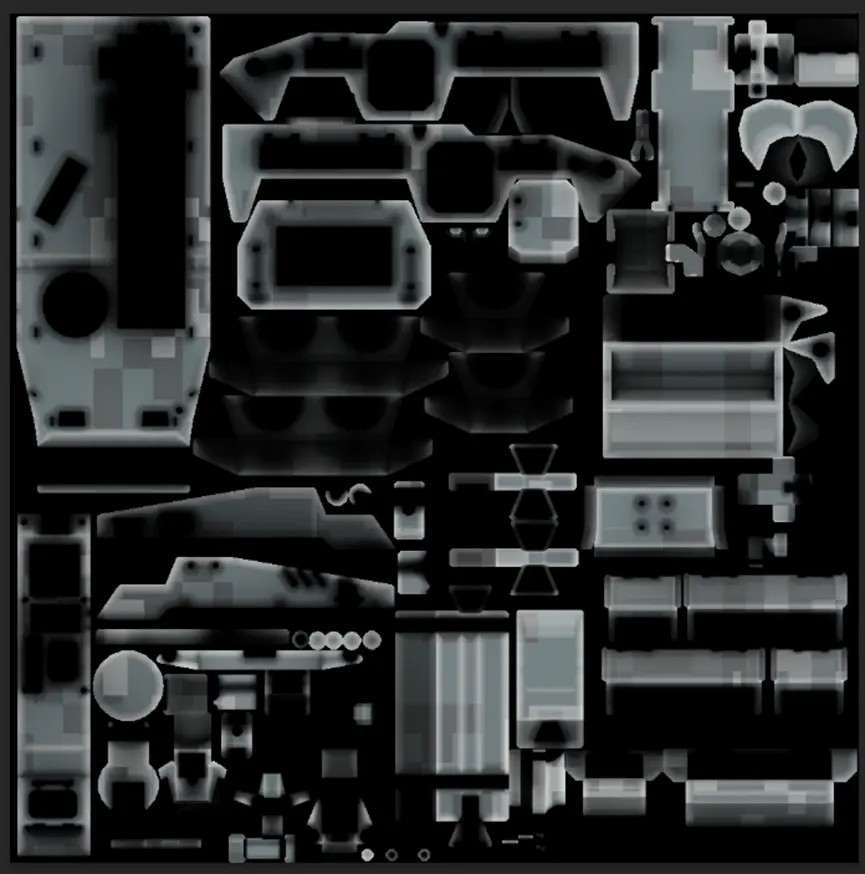
At this step, we have segmented the UVW coordinates of the target model to reasonable requirements. Baking in this article specifically refers to the act of drawing some attributes of the model onto a plane map of a given size in the form of a bitmap according to UVW coordinates. The main purpose of this step is to simulate ambient lighting through a specific algorithm and draw AO, and surface curvature information around edges, directly onto the bitmap, reducing the workload of hand-painting and making it easier to add details in batches.
In 3DSMAX 2021 and later versions, the automatic table introduces a more advanced "baked to material" API, as explained here:Cganimator.com
Get the Simple Map Baker script for this purpose.
Also, parts that are expected to rotate or move, need to be properly separated from other parts to avoid algorithm from thinking that the two are directly connected, resulting in excessively dark paintings appear where they should not. For example, between the turret and the chassis, variable sweep wings, etc.
(Whether you add a floor to the scene to darken the vehicle chassis and the downward-facing part depends on your needs. Some creators do not recommend this because when the car is turned over its bottom should not be too dark. Some creators believe that the ground and the sides of the car will still form an obvious AO effect, and adding the floor can significantly improve the realism. Putting a distance between the floor and the bottom of the car may be the best of both. But for buildings, a ground plane should always be used)
Click on the required model. You can select multiple items. Do not include pasted prefabs. Different materials (usually divided into matte paint, metal, and glass parts on the same unit) are recommended to be divided into different MESH. They will be automatically divided into different pictures during baking, making it easy to process them separately in photoshop.
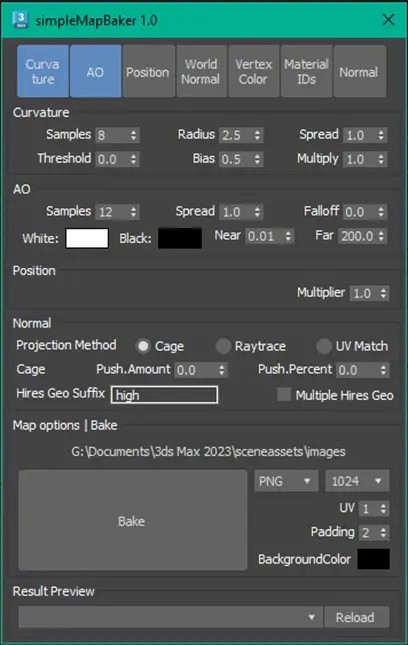
After starting the script, you need to press the X key and search for the script name to evoke the main operation window.
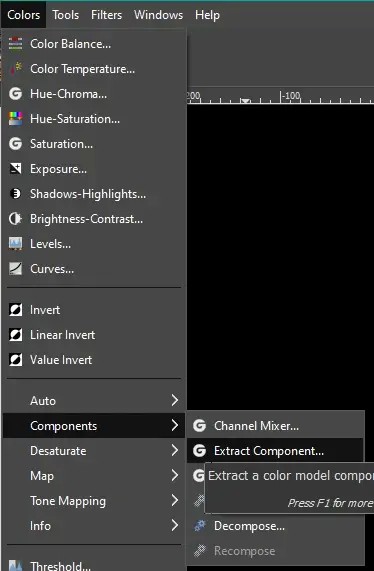
According to the recommended values as shown in the picture (or other values that suit you), select the required baking items in the first row, here click "Curvature Map" and "Ambient Occlusion" . If you want to challenge some more creative tricks, the following article will introduce the functions of "world coordinate position", "world normal direction" and so on. You can also click them together here.
Click the largest Bake button to bake. After the window automatically closes, the required bitmap will appear by default in C:\Users\USERNAME\Documents\3ds Max 2023\sceneassets\images
4, process the textures further
At this step, we have obtained several bitmaps with specific geometric information, let's open the graphics processing software, integrate these bitmaps, and draw them manually to express specific details. If there were different meshes based on materials before, then each mesh would have a set of such pictures.
In this article, we will use photoshop and GIMP software as examples to illustrate. SAI, KRITA and other similar software can also be used and achieve the same results.
In RA3, taking the most used vehicle shader as an example, we need to draw at least three maps for a unit to achieve basic performance needs: diffuse , SPM, and NRM.
The diffuse map is the base color (the color of the surface material multiplied by AO), and the NRM map is the normal map (I don't recommend using it)
SPM is a more tricky one. The R channel specifies the intensity of the reflected highlight (similar to the smoothness of material). The G channel has no practical use in vanilla game (but there are also modders who make it work by modding the shader. I changed it to Luminous, I will also post an tutorial too in the future) The B channel indicates the density of how faction color is mixed.
All three are finally stored in the game in the form of DDS textures. Due to the compression algorithm and video memory allocation, square textures with powers of 2 as the side length allowed, such as 512x512 or 1024x1024
This time we mainly draw diffuse and SPM maps. We just slack off on NRM since they don't work very well in RA3 anyway.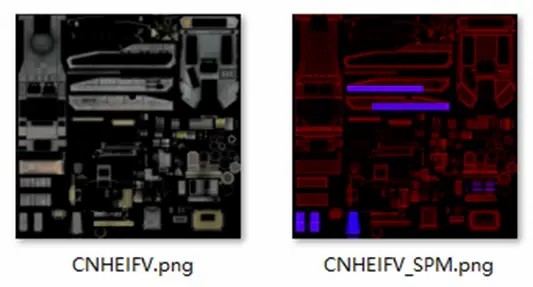
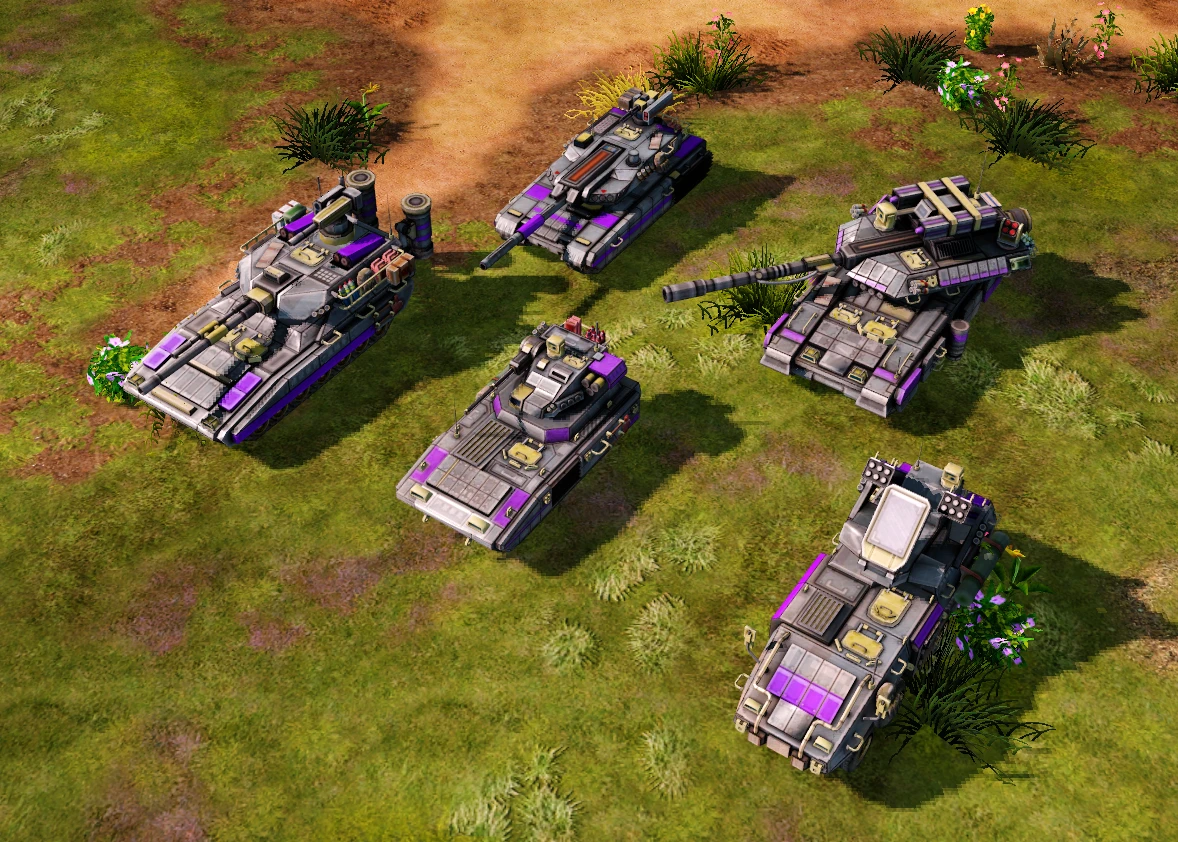
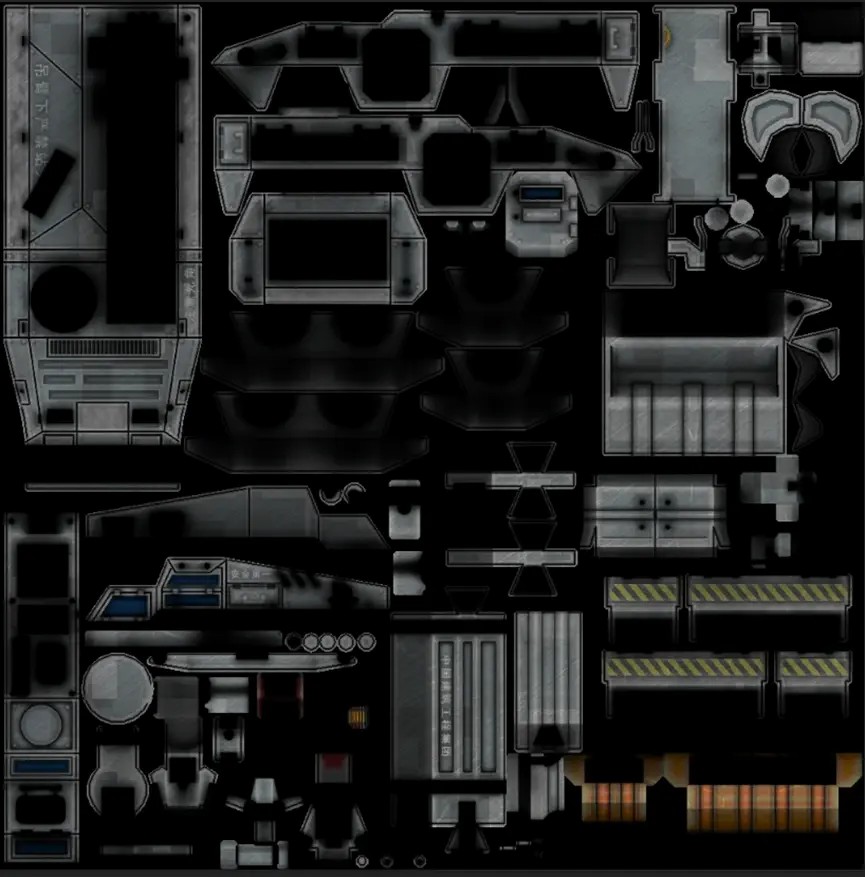
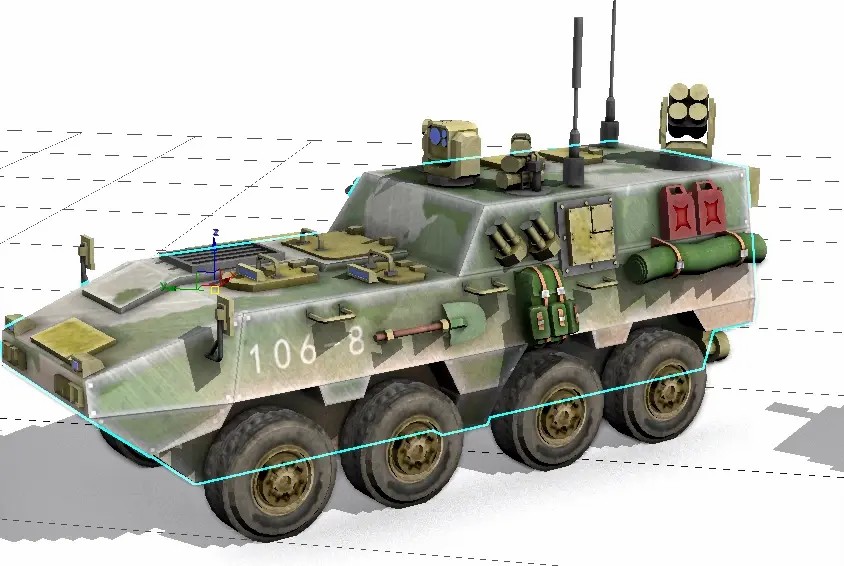
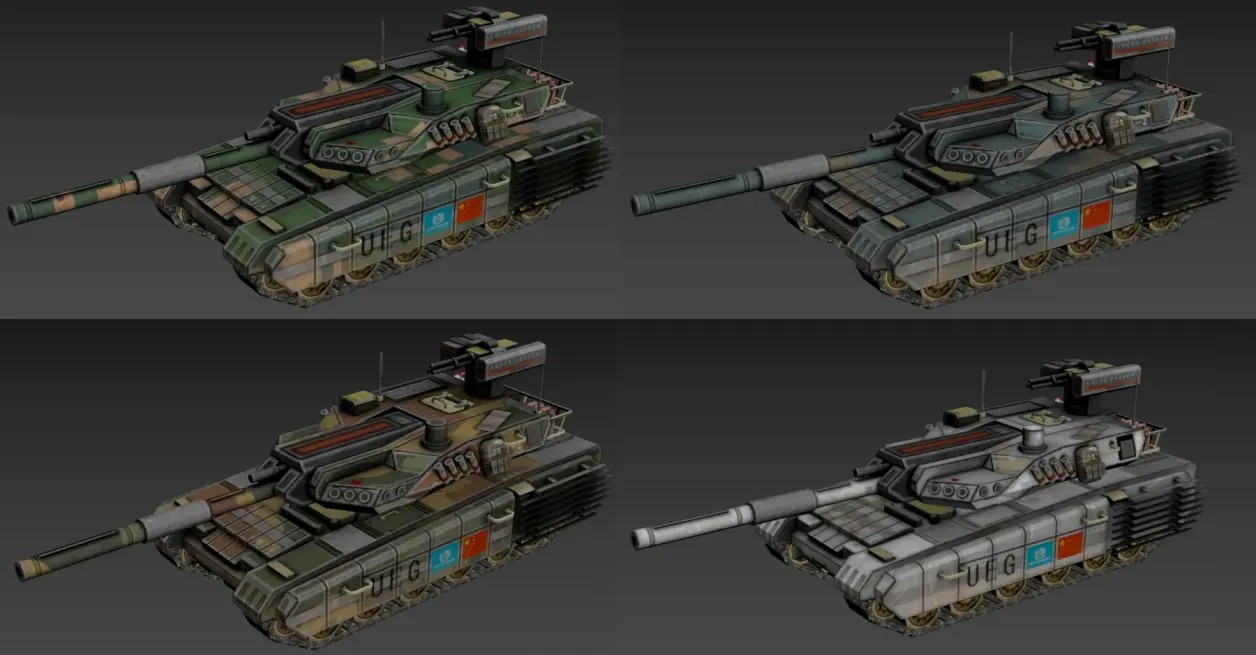
First, consider the background color of this model. In RA3, Allied use metallic blue, USSR is green, and Empire is light grey. The details can be determined according to your own requirements. The "background color" can also be camouflage or other painting. In this example we use digital camouflage to cover the entire image. (Actually, the in-game perspective is not suitable for camouflage with too high contrast. Reducing a model's recognition will make you uncomfortable when playing. This example is purely for aesthetics)
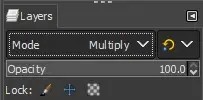
Put the AO image on top layer and multiply it with background color. This step provides the basic light and shadow relationship and ambient occlusion effect for the texture, while blocking out unnecessary areas of the texture to make it clearer where you need to draw.
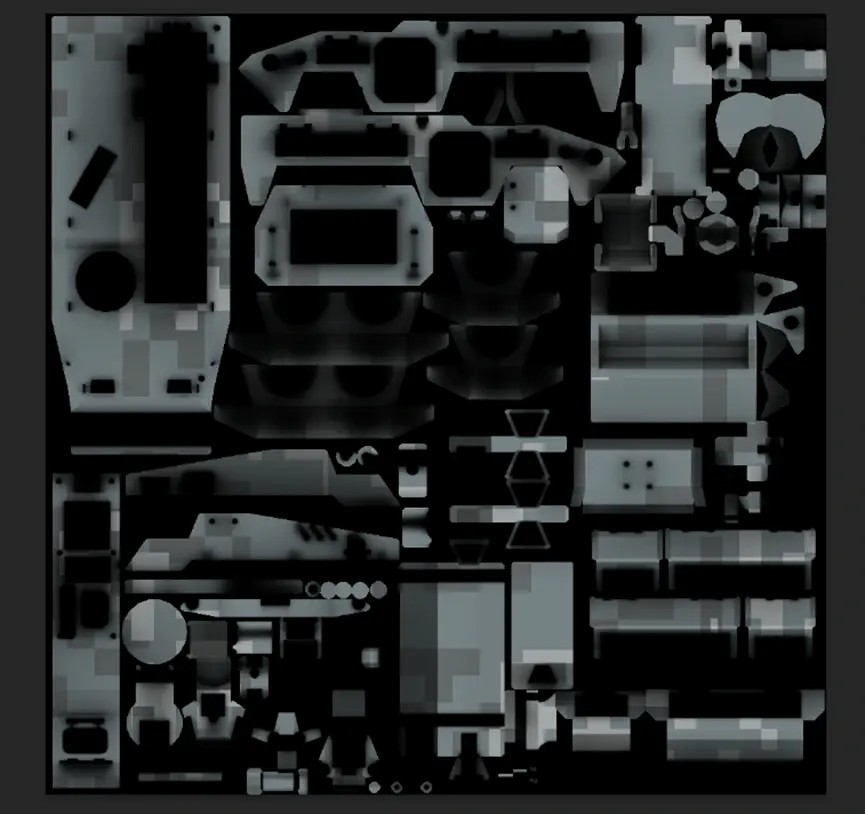
Open the curvature map separately and disassemble the channels. The red channel is the convex angular part, and the green channel is the concave part. There is no information in the blue channel. The black area means flat surface without bumps. Brighter colors represent sharper angles of ridges and depressions.
Copy the red and green channels respectively in grayscale form, paste between the AO layer and base color layer. The blending mode depends on the needs, but here is one commonly used by most stylized games:
The edge wear is white and the grooves are black.
This color scheme best emphasizes the 3D shapes under the intricate lighting in the game.
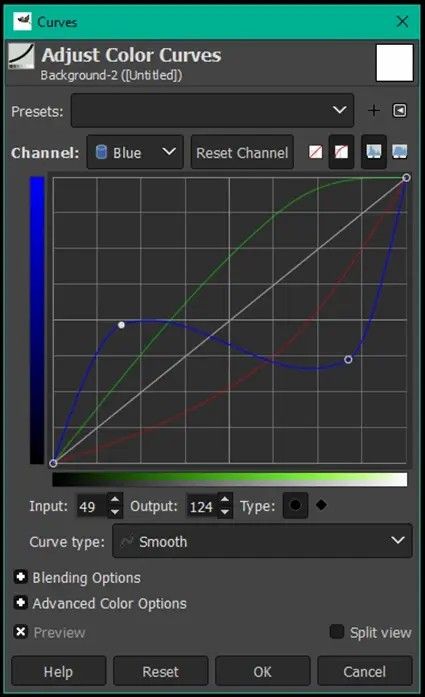
Use the "Lighten Only" or "Additive" blending methods for the convex layer. Using "Subtract" or "invert multiply" on the concave layer. If the color transition is not soft or sharp enough, you can adjust the brightness curve until you are satisfied.
(Of course, if you want the style to be more realistic and diverse, such as brown rust on the edges and corners, etc., you can try to directly set the bump layer to an alpha mask, and then use a completely different material images to blend them. You can also add a noise map or use a random brush to draw some strokes at will to make the wear and tear look more random and natural. This is an advanced trick similar to smart material)
At this point, we have obtained a basic diffuse reflection map with light and shadow relationships + edge enhancement. If you have enough time, more details and Easter eggs can be drawn manually according to your own requirements, so I won’t go into details here.
After the diffuse reflection map is created, we can create an SPM map based on the same images.
Let's create a new layer (or a new image) of the same size and fill it with dark red (how bright the red is depends on how reflective you want the surface to be. Here the color value is 40.0.0, which is about the same as matte paint, 150.0.0 if polished metal).
Copy the AO and two curvature bump layers,
AO is still multiply
Add a color overlay to the curvature's bump layer, with the blending mode depending on your needs. The idea behind the example here is that when the matte paint on the edge is worn away, a more reflective metal material is exposed, so the reflectivity on the edges should increase. (Of course, it is also possible that the polished metal is worn, resulting in reduced reflectivity. You should choose the color mixing method as you need)
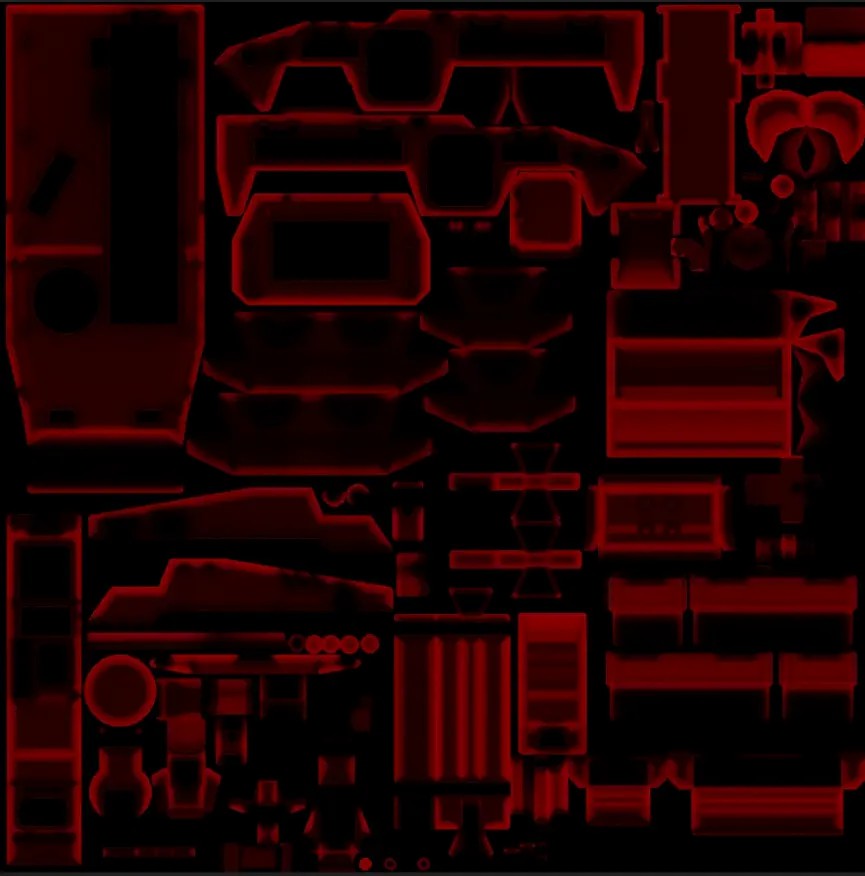
In this way, we obtain a reflection intensity map with edge enhancement.
In addition, painting pure red on the glass, black on the seams, slightly brighter red on both sides of the seams, and lowering the red on text and logos can also enhance details. The seam details can be taken directly from the score lines and other layers used for diffuse reflection in the previous step. If you don't have enough time, just deal with the glass part and forget about the rest.
Team color (also known as house color): Draw blue in the required parts.
Generally, camp colors are also considered matte paints, so the reflectivity in this area can be appropriately reduced. In addition, since the team color mixing algorithm is Linear interpolation between "team color x diffuse x 2" and diffuse (the interpolation weight is the SPM blue value), the spm blue channel should never have AO. There is no need to cancel the team color in dark parts such as seam textures, because if the diffuse reflection in this area is dark, it will still be calculated as black. It is recommended to cover the team color area as a separate layer on top of the AO layer.
Of course, the team color matte paint will also be affected by edge wear. You can use the convex layer (the red channel of the curvature map mentioned before) to subtract the blue and create a fading effect of the team color coating at the edges.
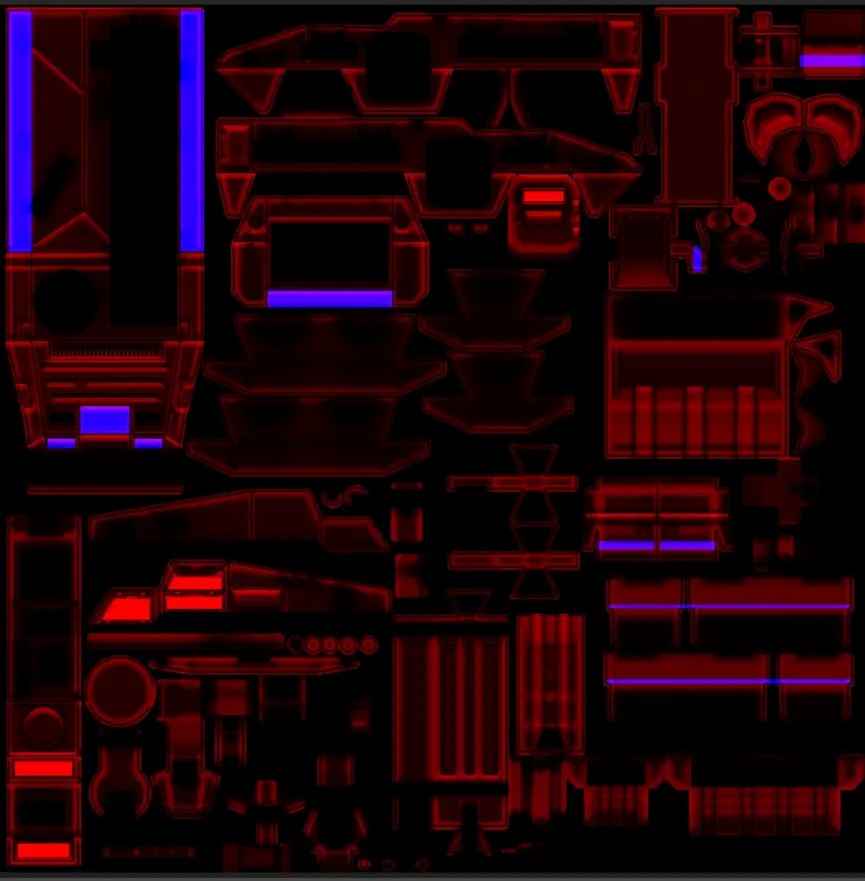
At this point, we have successfully obtained the SPM map paired with the diffuse reflection map.
NRM: Create a new file with a size of 16x16 and ONLY fill it with light blue (127, 127, 255). This is of course a lazy approach, but the in-game effects are still neat.
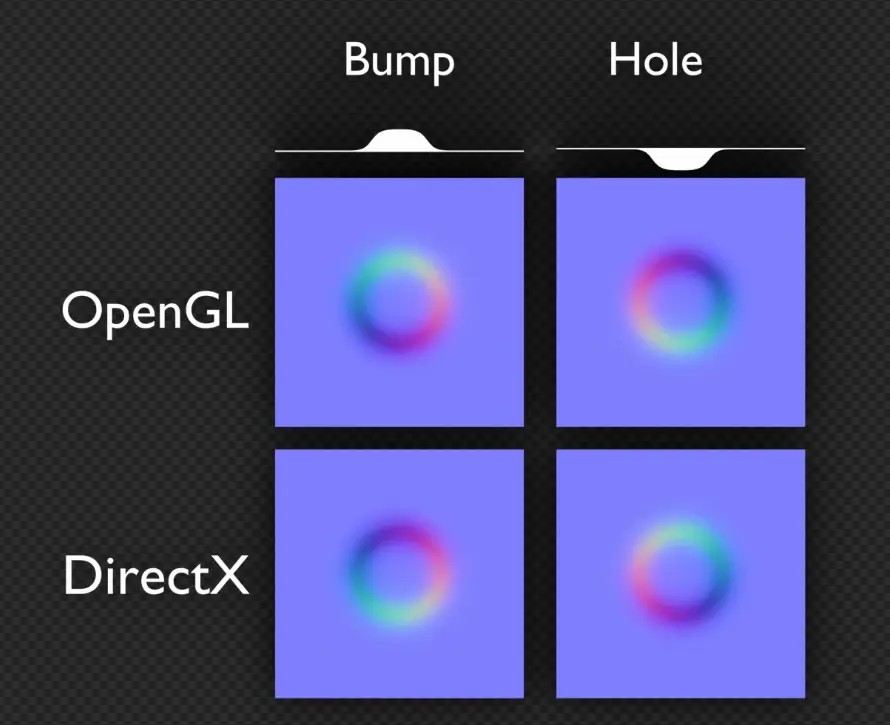
(It is strongly NOT recommended to take the main map and add that nvidia filter. This method is often abused by beginners but the effect is very chaotic. If you want to make a REAL normal map, try high-poly baking or engraved filtering. There are also special requirements for the compression of normal maps. For example, the blue channel must be filled with 255 to avoid strange blocks appearing during compression. unfortunately, RA3 does not support the DXT5NM format. If you want to transfer textures from other games, please make sure if they use openGL, note that the green channel may be reversed. RA3 uses DIRECT X.)
At this point, the texture drawing is completed and it can be exported to the game according to the general process. Don’t forget to merge the symmetrically copied models.
5. Advanced tricks
(optional, try only if you want)
In the operation panel of simple map baker, you can see other baking options such as "world coordinate position" and "material ID".
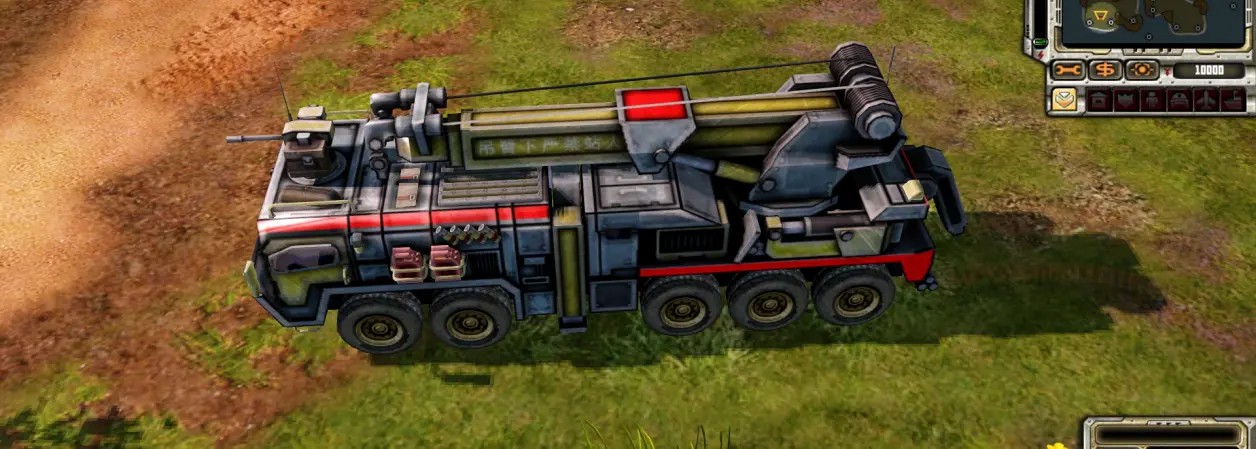
>> "World coordinate position" can treat each pixel on the map as a point in the 3D space of the corresponding model, calculate the XYZ position of this point, and record it as an RGB color and redraw it on the map. Through this, we can easily select the part of "a certain coordinate interval" in PS. For example, the darker blue part represents the lower Z coordinate, which is the position where the vehicle is close to the ground. In this area, you can paste a sand and dirt material (pay attention to gradient fusion) gives this tank a battle-hardened look. If it is an amphibious unit or ship, red anti-rust paint and water stains can be applied at different heights. (The picture below shows a car with only lower part covered in sand)
>> "Material ID" will divide the areas in MAX that already have materials into RGB according to the material type (unfortunately, it can only be divided into three types at a time). The advantage is that compared to directly disassembling meshes, this method allows the geometry of different materials to be fused and interspersed.
>> "World normal" is the surface orientation of each texture pixel at the corresponding position of the 3D model (friends who have done RA2 VXL should be familiar with it). Using this picture, we can easily select "all areas approximate a certain angle" in PS. This is an ideal method if you want to make a snow map for a building and want to select all the "upward and approximately upward" areas on the model in PS to paint them white.
>> In addition, if you are not in a hurry to merge the layers, congratulations, the PSD file can be saved for other models in the future. You only need to replace the newly baked textures by category. It is also very easy to change the painting style without affecting other details.
6. Summary
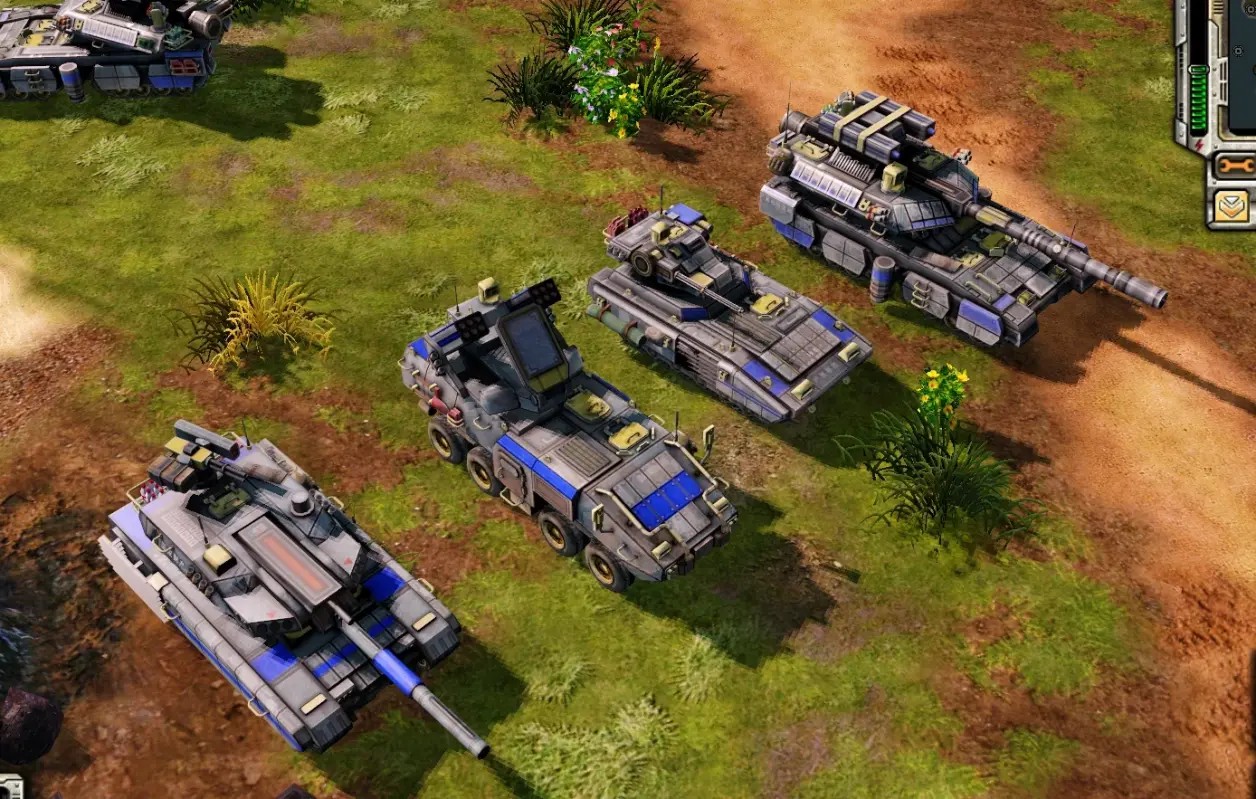
Through the above process, we finally got a set of usable textures, and the performance in the game is basically up to standard. Under the constraints of limited workload, this result is quite satisfactory.
Whether to use it or not depends on the consideration of each reader. The author is not a computer graphics expert or art major, and most of the descriptions are based on my own understanding. If there are any errors in the article, please tell me to correct them in time.
7. credits
RedMaple (co-author of this article, has finally polished my workflow from "theoretically feasible" to "simple and efficient" through repeated experiments since July. Screenshot examples used here are mostly provided by 🍁, who also wrote the main framework of this article. In a sense, 🍁 is the real author of this tutorial)
CHANGSOO EUN (author of the simple map baker script.)
Himeko (taught us crucial knowledge as a real technical artist)
Lanyi (Explained how RA3 shaders worked)
Parametheus (aesthetic guide)
Alienvoid (creativity guide + taught me basics of 3d art back in 2020)
Yi-wang_Trinity (author of some very useful old tutorials)
Erika Von Nachtwächterin (aesthetic guide + emotional support)
Sascha (thanks for mainting a cheerful RA3 community)
Profile
Level
52%
Maker of Stuff14
Maker of Stuff14
Avatar
