1. Open the editor and load up the Lightbox Map (This map is available for download here and is very handy for a lot of things)
2. Re-size editor viewport as large as it goes. Removing things like the Roll up bar or the toolbars at the top of your window.
3. Open the console type in r_displayinfo 0 (This will remove and display info up at the top right hand corner)
4. In the green screen area of lightbox set up your model and set up your shot
Items should have a strong silhouette as they lose a ton of detail when sized down to icon size.
5.Hit Print Screen on your keyboard
6.Load up Photoshop or GIMP or any Image editing program (I will be using Photoshop)
7.File>New (It should automatically detect the document size you need)
8.Hit Ctrl+V to paste your Print Screen
9. Crop out a perfect square area of the image with your item in it(This is so you have a perfect square image to resize. If it's going into flash it doesn't matter but if it's going in engine it must be power of 2 [64,128,256,512,1024,2048,4096,etc])
10. Go to Select>Color Range and click on the Green area of your image (Use the setting in the image for good results)

11.Delete the green selection
(Note: If you are going to modify the image at all now would be a good time to do so. Once you resize the image you have less pixels to work with so your filters and edits won't come through as much[Note on a note: I still usually add a levels adjustment layer at the end to make sure everything works and the colors are right.)
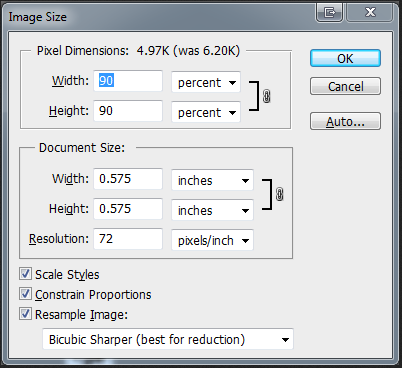
12. Resize your image using these settings until you're close to the resolution you need (Our inventory icons are 46 x 46 you may need something different) (You might want to set up a photoshop Action for this)
Make sure to use Bicubic Sharper (Best For Reductions) and resize by ten percent until your close to your target resolution then resize to the correct resolution.
Resizing by ten percent preserves the fidelity of an image. Anytime you resize or downsize an image if you do it in increments of ten percent it looks much better(most of the time).
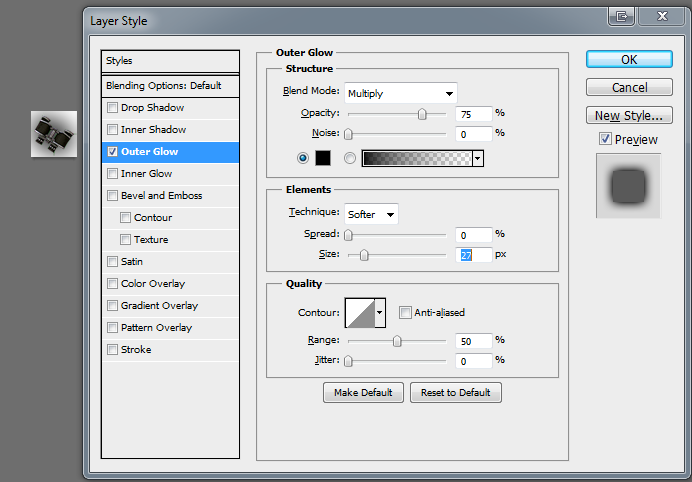
13. (Optional)Apply an Outer Glow Layerstyle to the image using the below settings(adjust Size Setting as needed) This sometimes makes the item feel more grounded and helps sell the silhouette a little better)
14.Make sure your item is on a layer by itself and there are no visible layers below

Now you have a handy little icon version of whatever item you need!
If you have any problems with anything let me know I'd be glad to help!