| Posts | ||
|---|---|---|
| Invarus - 3D Model Jester Head WIP w/ updates | Locked | |
| Thread Options | ||
| Oct 31 2011 Anchor | ||
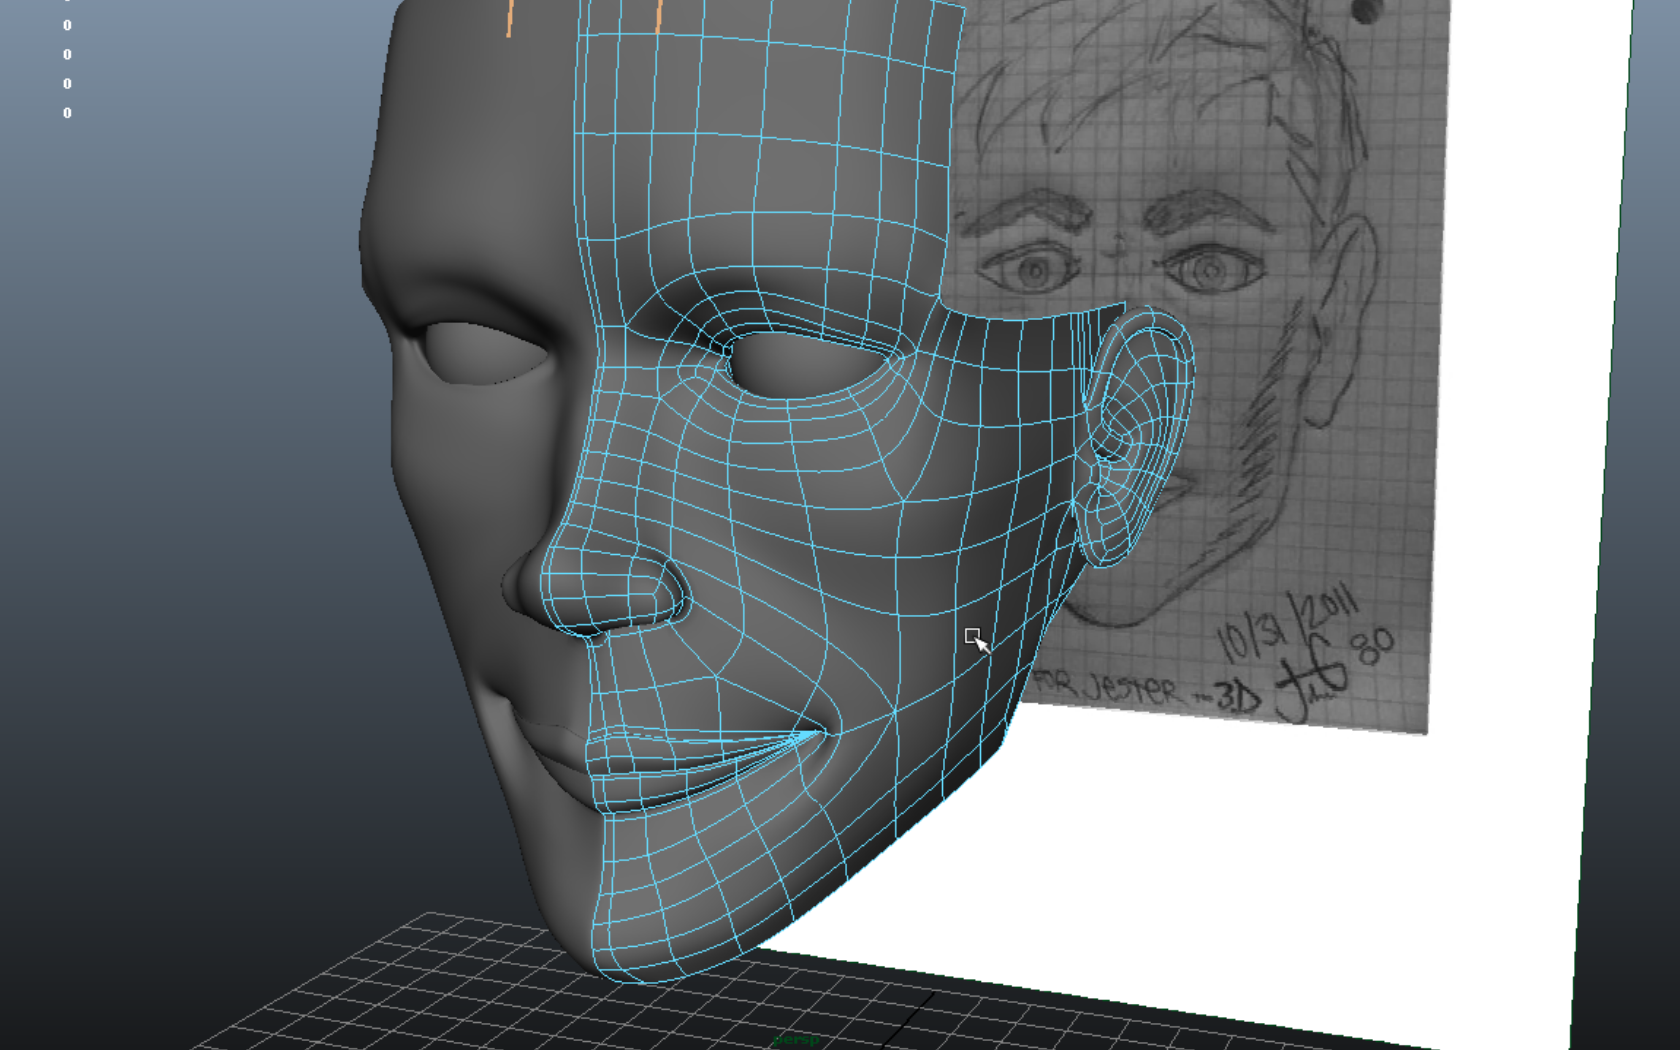
|
Starting work on this and putting the gun on the backburner for a few days to finally get started on this jester character for a game in development that can be found on this site, Helios. Using planes to model the entire model. You can find the updated images and more information on the pipeline it will be going thru from start to finish. Concept sketch was done earlier today on some graph paper and I cropped out the pic in Photoshop for import to Maya. Set up the image planes, placed em in space, and made the first poly around the eye and extruded around it, closed it and extruded out to create the bridge area of the nose. Then I extruded out downwards and went from there. New technique i found on the internet, just following along and applying what I know to it. I don't usually use planes to model, as I am used to the box out method. But this is turning out pretty good so far and I'm enjoying myself so far. Just sharing the process to help out anybody interested in modeling heads or new techniques. Please let me know what you think and any pointers or advice you may have as I continue to update this thread. =) Cheers! www indiedb.com/members/johng80/images/jester-wip |
||
| Oct 31 2011 Anchor | ||
|
Nice work. --
Operation Downfall, my WWII FPS. |
||
| Nov 4 2011 Anchor | ||
|
Update to the jester head WIP has been fun trying out planes modeling. i can see why this method is not as preferred as the box method, but i definitely urge all modelers to give it a go at least once. heres the update cheers! |
||
| Nov 4 2011 Anchor | ||
|
I think when modelling something which is so dependent on excellent topology, like the face, your best bet is to go with plane modelling. Though in this case I think you've gone high-res too quick, for sure. As well as there being quite a few N-gons in places of frequent deformation; above the lip, two on the eyebrows, one on the cheek. There are of course going to be 1-2 on each side of the face but the placement of these indicates an error in your topology. I suppose as it's for a game it'll be baked down anyway so the high-res's topology isn't so important but, when you build your low res get some reference images from google, or even CGTalk's topology research thread. It will help a lot when it comes to animating this if the edge flow is right, it'll save you a lot of time rigging if everything moves more-or-less as a real face would just because you've isolated everything jusssst right. The face itself looks good; just a few tweaks - the rear of the jaw is a little narrow compared to the concept, the mouths huge from this angle (unless of course you're making steve tyler |
||
| Nov 4 2011 Anchor | ||
|
thanks for your post on my wip MrJuzah! I must have looked over that mesh a hundred times and not once did i see that 6 point pole coming off one of the mouth loops by the jaw. I also took a look into a combination of the following keywords into google: topology n-gon animation ... and this led to nearly an entire day of reading and not a single minute in Maya. Those keywords led me to discover a few things I have not considered, or knew of yet, such as deformations and poles. have spent a good bit of the day studying topology for game characters as well as basic meshes to study the geometry and locate its 3 and 5 poles within it. i also fully read a thread posted on another website, polycount, which i just discovered today and will be spending much more time there to up my skills. anyhow, this thread was about topology of the human head, edge loops and placements of in the mesh, as well as the workflow/pipeline of the development process. i actually got a good look at the basic mesh used for all the characters in gears of war 3, theyre mesh has a 5 pole vert on the jaw and neck as well as the spots you mentioned. i found to be the most interesting of videos i watched today and can be found here .. Polycount.com my conclusion on the poles and n gons are that they should be placed in areas that will not be greatly affected by the animation, also..depending on the structure of the face/body, additional 3 or 5 poles are necessary to correctly topologize the character... which would explain the 5 pole on thd chin of the mesh for gears of war 3...have you seen the chins on those guys? huge! i will have to change that 6 pole on the jester wip to a 5pole and continue on. i defintely have not seen any 6 poles in any meshes thus far, although i have seen some pretty wild ones ^^ so thanks again for your input as it has helped me to become more aware of the process involved when creating a character for animation. you are absolutely right on about the steve tyler lips =P will continue reading up and drawing some sketches and continue work on the jester tomorrow and update the images/blog on my profile that evening. |
||
| Nov 4 2011 Anchor | ||
|
Poles are always going to be in any mesh that has flowing edges instead of just a dense grid. You'll normally find them tucked along the more boney areas where they'll be less problematic (usually always on the zygomatic, along the orbital margin, probably the angle of the jaw, etc). |
||


 ). The planes of his face seem off to me...too flat maybe? The rest looks relatively good though, nice work on the ears :p

Only registered members can share their thoughts. So come on! Join the community today (totally free - or sign in with your social account on the right) and join in the conversation.