Hi everyone! I'm LOSTⒶLLOY's artist Maruki, and this is Aftertile's devlog/tutorial.

Name: Aftertile
Genre: floatformer
Team: @MarukiHurakami (me, art and art), @sugoidev (code and sounds) and Sounds for Pixels (songs)
Platform: pc, mac, linux
The mockup for the first stages have been one of the most difficult and fun things I’ve done (or rather, doing, because there are a few elements missing still). As said before, this is the first time I’m doing anything in pixel art, so more than half of my time I’m spending studying (and whenever anything nice comes out of it, I try to make it available as public domain). But, most of the time, work is pretty frustrating, as the pixels don’t seem to obey you and insist in showing a will of their own. This post is more a documentation piece that an actual log, but as I describe a mental process, it can be very useful to other beginners.
Aftertile happens inside a comet, the Ever-Floating Comet. It’s an eternal rock formation that came from space and stopped mid-air. It is populated by the Comet Mikos, who are responsible for the internal modifications of the structure and for the general maintenance of the place (more on that on a later post).
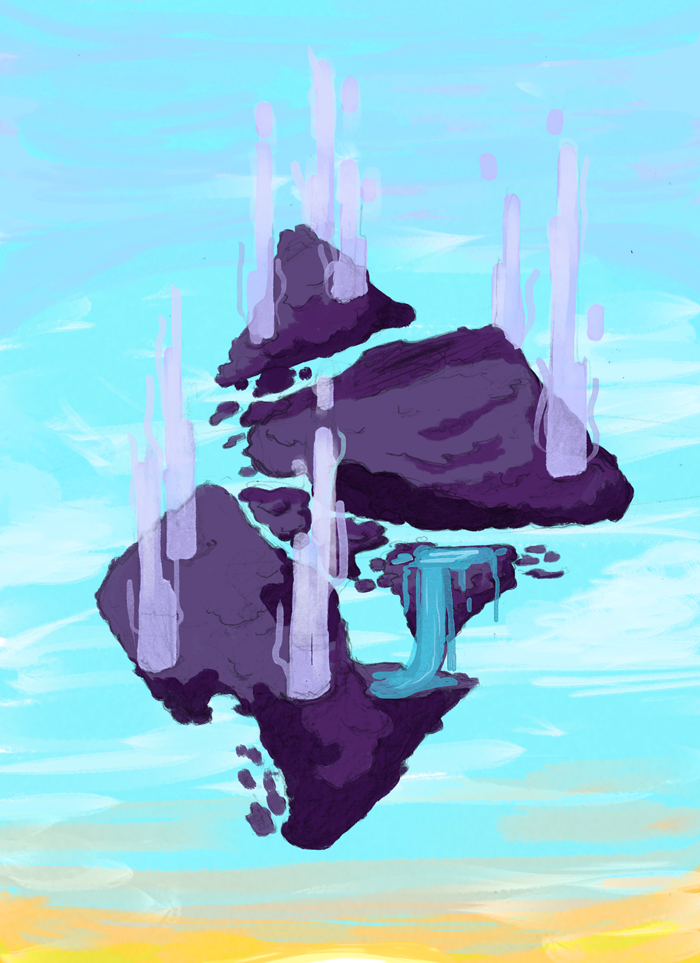
Given that, the most important type of tile for Aftertile are rock tiles. Ghosty won’t be able to penetrate those tiles, so they have to give off the impression that they are impenetrable without looking harmful (if Ghosty touches them, nothing happens). I went through many rock sketches to get close to what I wanted:
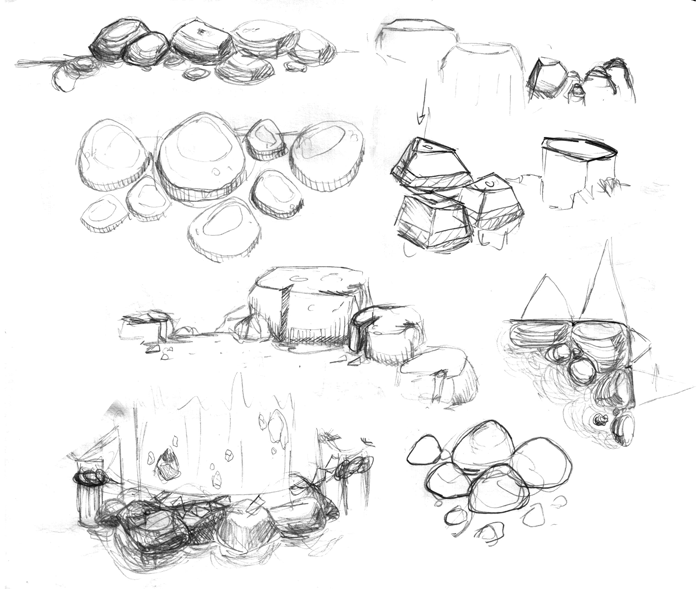
Those are some of the sketches I’ve done before I actually opened up Aseprite. I went from the closest to the reference (I was using comet surface pictures, they have strong shadows) to the farthest, already mixing what I had in mind to what I liked in the games that inspire me (in this case, Castlevania and Metroid). Then I chose the rocks that I thought look better and finally opened Aseprite.
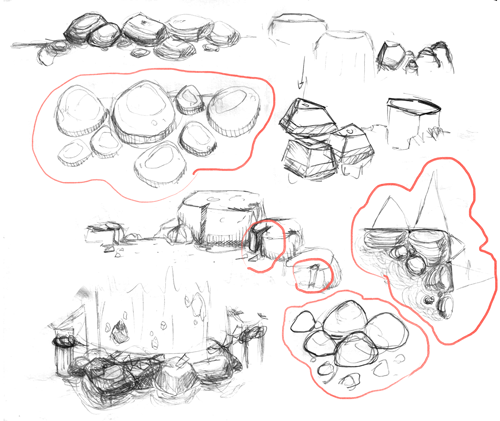
These are the ones I chose to use as a reference. I also kept a mental list of the characteristics of those rocks: round, more or less smooth, with sediment and cracks.
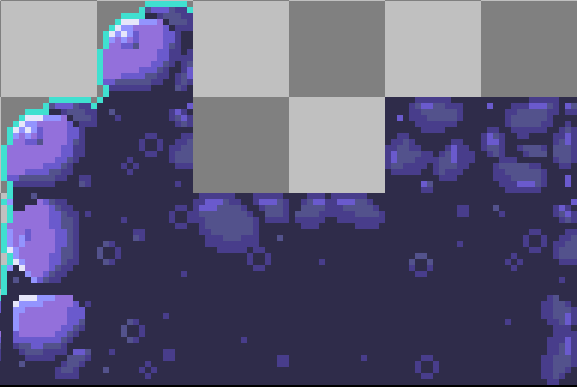
As it’s illustrated in the concept, the Comet main color is purple, so all rocks would be purple or akin to purple. From my 176 colors palette, I selected the ones that would better fit, created another one for the deep dark purple solid few, and selected an extra color for the stroke. The solid dark purple will be used as a filling for all areas that are not rocks, to simulate depth, as I chose the light to be coming from the outside of the rocks.
As for the stroke, I chose a color that won’t be used in any of the stages, in this case a cyan. I chose to include this stroke in all tiles that are not background or props, simply to separate and add more emphasis to them.
![]()

Direction of light
The full process step by step:

I'm working with two tile sizes, but for this one I started off with a 32x32. I used the darkest color for the inner part and drew a solid rock;

to which I added a solid shadow;


from that shadow, I chose other two colors. One of them for light shadow and the other for the medium shadow, which I applied to “smoothen” the transition;

I added a lighter color where would be the lightest part;

then selected the darkest shadow to include a crack;

and with the lightest color I lightened up one of the borders of the crack. I also used these two colors to add more details;

I chose a very light lavender for the highlight;

using the shadow colors, I added sediment on both sides, also a bit of sand. I used the lighter colors 3 times too to simulate tiny shards;

and finally drew the stroke.
I also made tiles for transition (comet rock other types of tiles) using the shadow colors.
I followed this process for all rock tiles in level 01 and 02, and this is how both will look like:
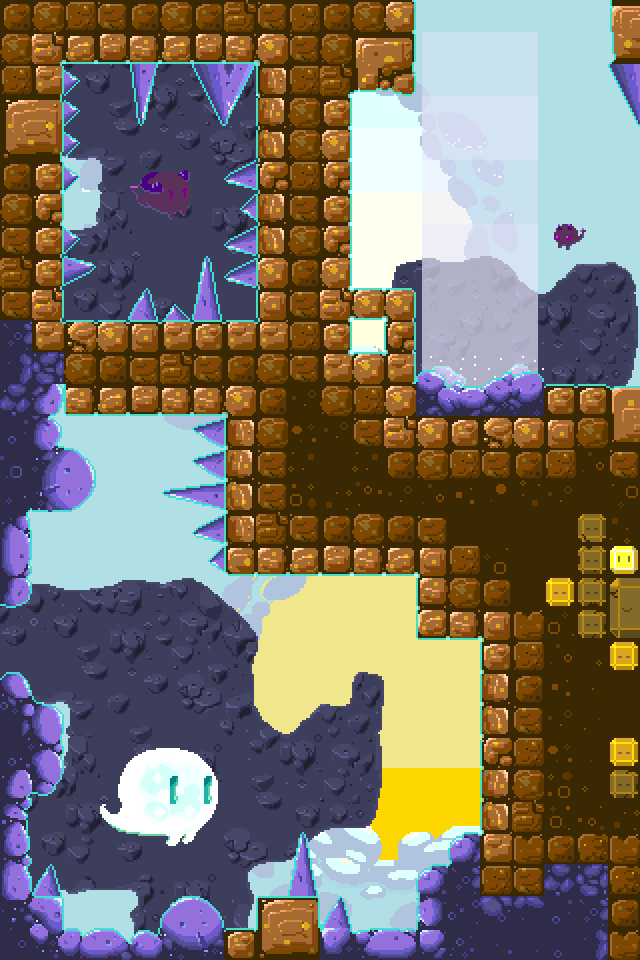
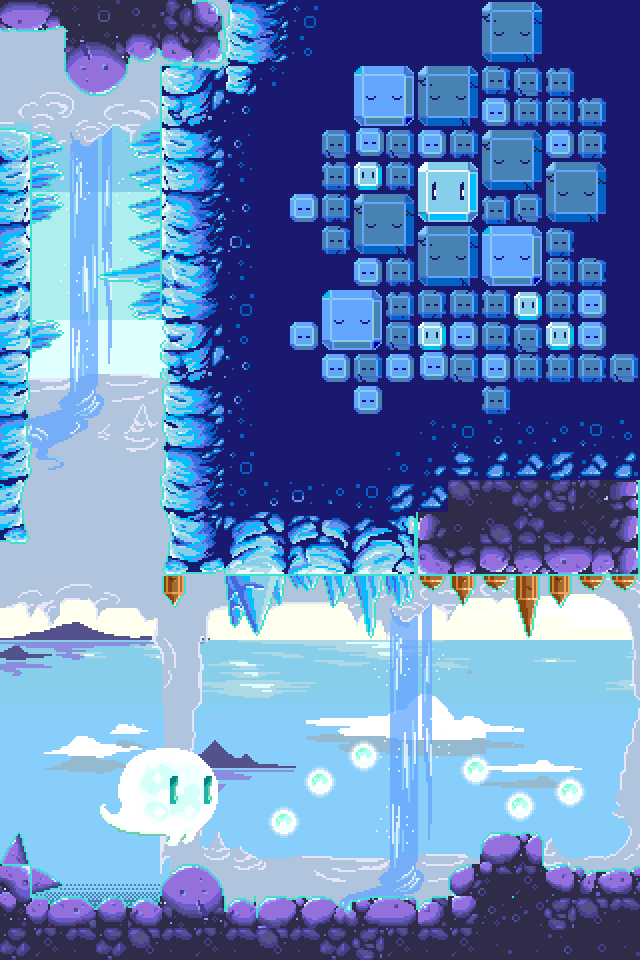
While both levels have comet rocks (because all levels are inside the comet, so those tiles will be common for all levels), levels also have tiles that were designed according to the level’s theme. For example, the first level’s theme is stone, sand, soil, thus the brown stone plaques. The second one is located at the bottom of a waterfall, so its theme is water, thus the blue rock walls.
From the mockups I’ll extract the most suitable rocks to build tilesets, and then the level per se. We were going to used Tiled Map Editor, but after some extensive research, pondering and head beating we decided to use SuperTileMap Editor for Unity.
Next piece of new of tutorial will probably be about the main character!
Any feedback is welcome! Thanks for reading!


Nice tutorial, I loved the game art, its clear and harmonious. A suggestion would be to add how you created the tile blocks and how you made them repeat perfectly side by side.
Thanks for the tutorial.