Hello, guys! Today we will tell you in detail about the whole scenario creation process. To illustrate it we will use footage taken during the creation of the 5th scenario of the US campaign in the upcoming Strategic Mind: Fight for Freedom — Western Allied invasion of Germany.
The following article is brought to you by Alex Marchenko, Lead Level Designer at Starni Games.
Stage 1: Creating a PSD file
Every level development starts with the Narrative Designers making research about a chosen operation. After studying different maps of the region (war plans, geographic maps, river maps etc.), they are making a PSD file with all hexes, where terrain types are marked with different colors.
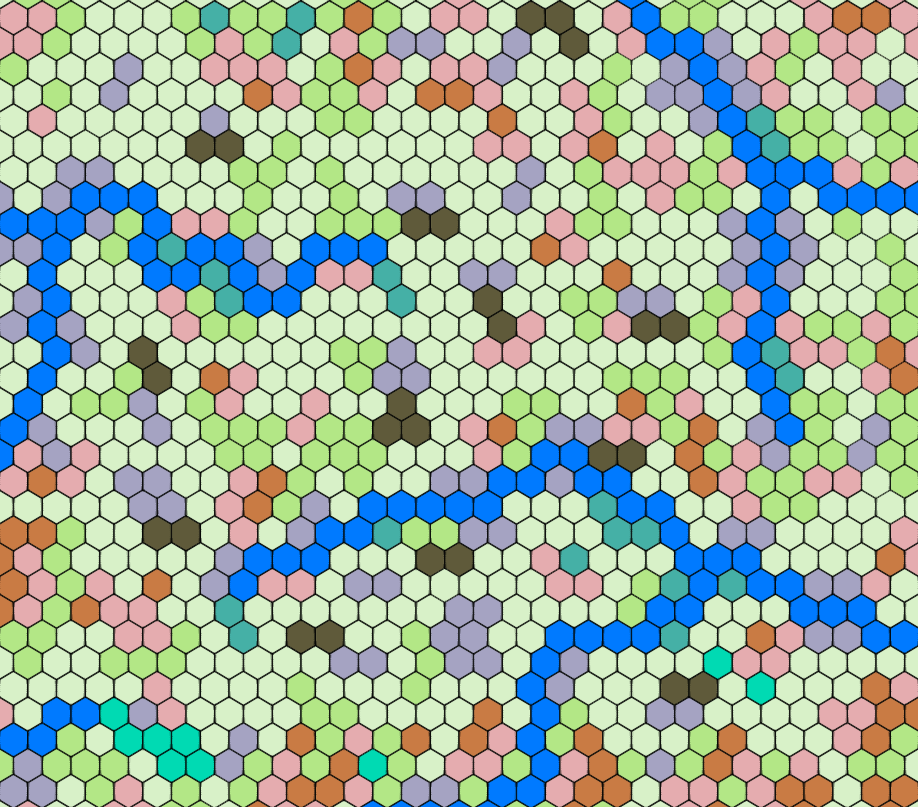
- Terrain design in a PSD file.
After designing the terrain, the Narrative Designers put different symbols on separate layers indicating: roads, infrastructure, units, objectives and other tips for the Level Designers team.
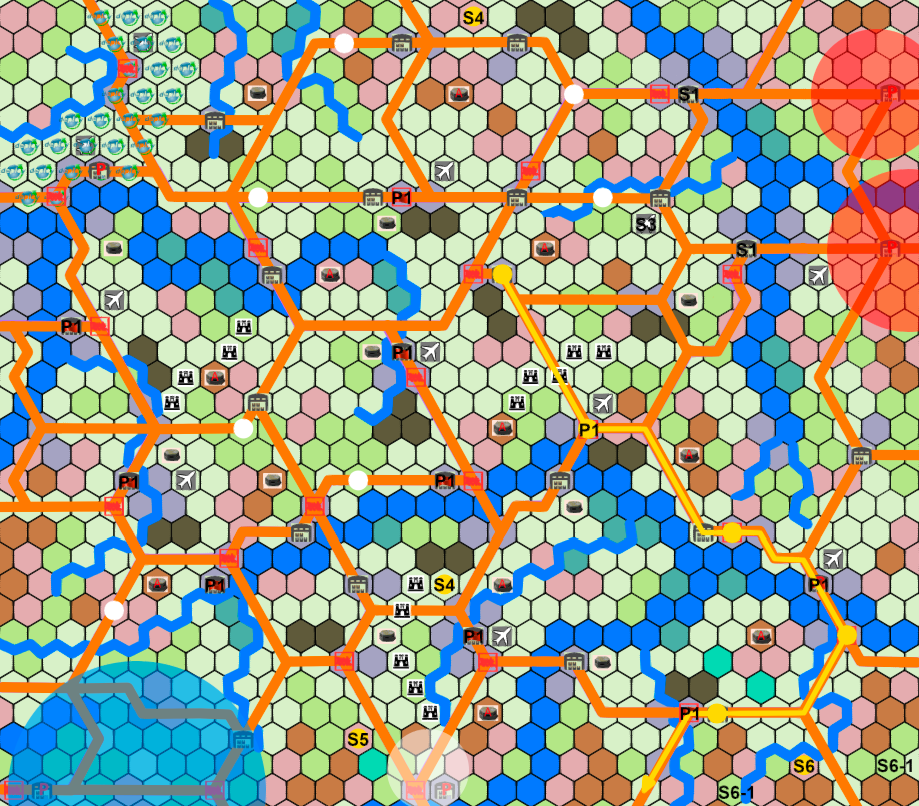
- PSD file with all the marks. Well, almost all.
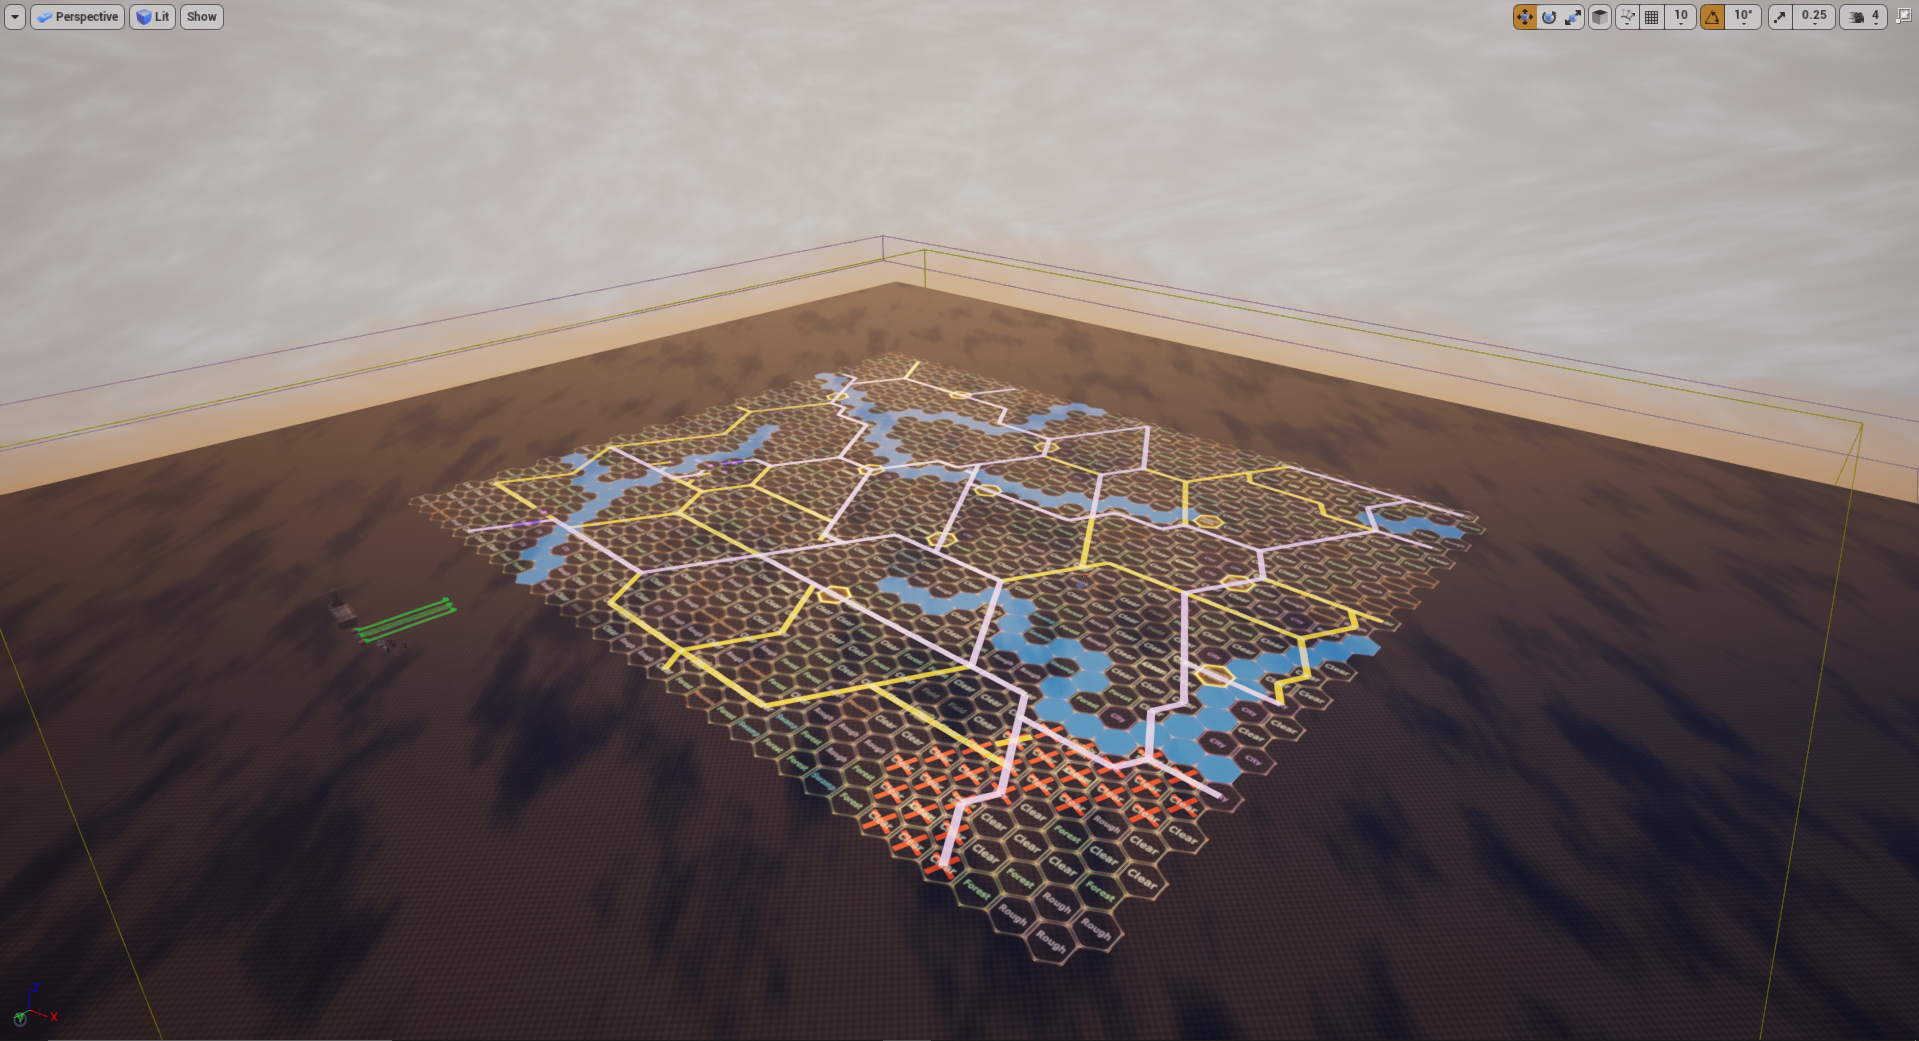
Additionally, Narrative Designers create a larger version of the map that includes territories outside the combat zone — hex grid, but which are still visible. We do not want our maps to be cut off abruptly at the edge, so we put considerable extra effort to create additional terrain around the operational area to allow a gradual fade of the visible area into the fog.
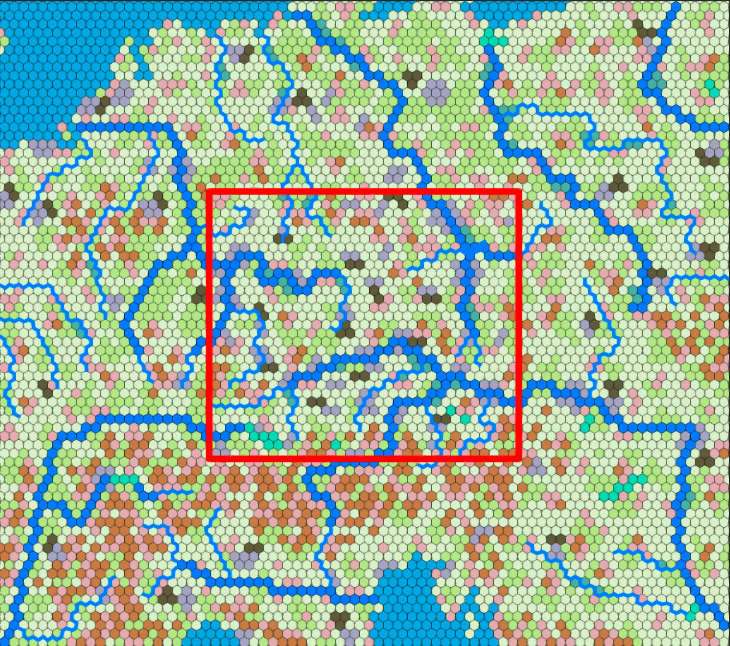
- Full level. Play Zone (operational area) is marked by the red rectangle.
Stage 2: Importing a PSD file to Unreal Engine. Heightmap creation and import
Now Level Designers make an empty level in Unreal Engine, using a sample with pre-set world settings.
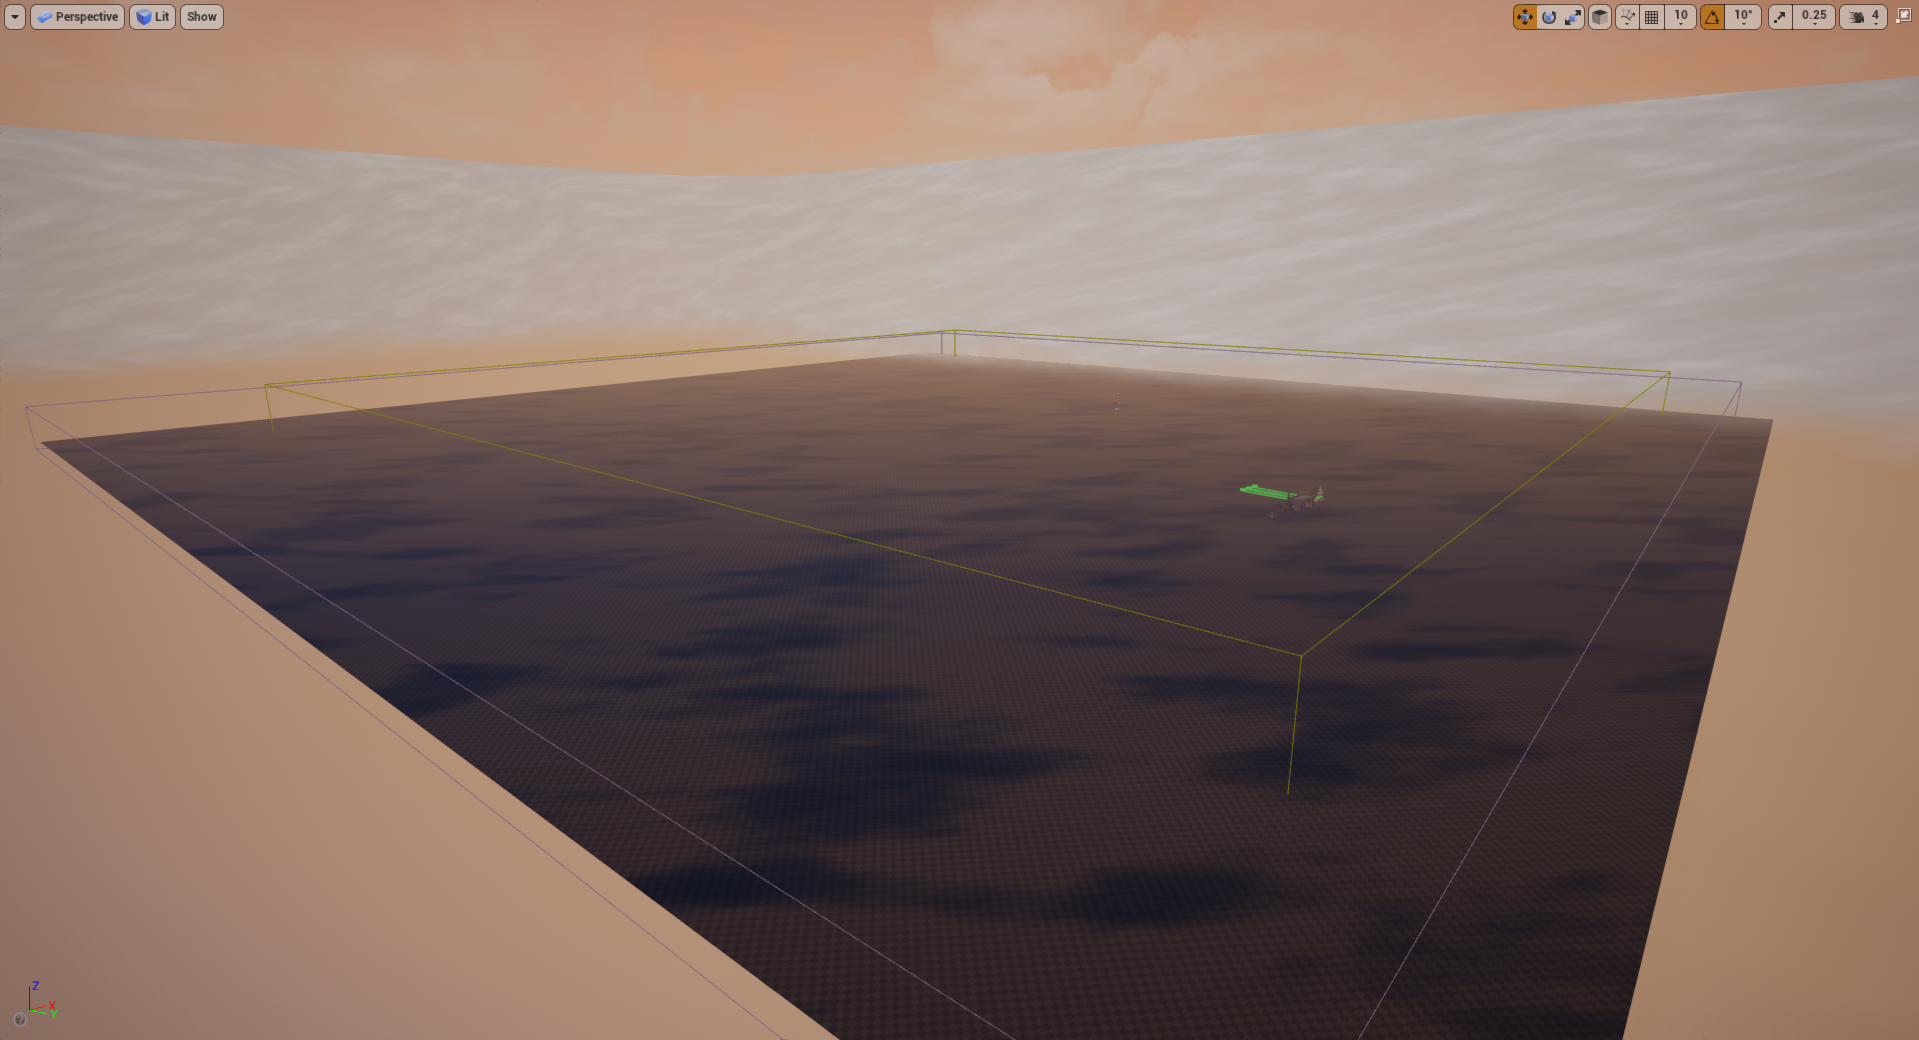
- An empty level in UE4.
Next, the Level Designers use an automated script written by our Programmers to import the hex grid and all technical parameters of hexes, such as terrain types, roads and infrastructure locations into Unreal Engine 4.
- A level with imported data: terrain types, roads, railroads, rivers, deployment hexes, etc.
Using Photoshop, Level Designers make a Heightmap of the level. The Heightmap is a special file that indicates the landscape heights at different areas of the map.
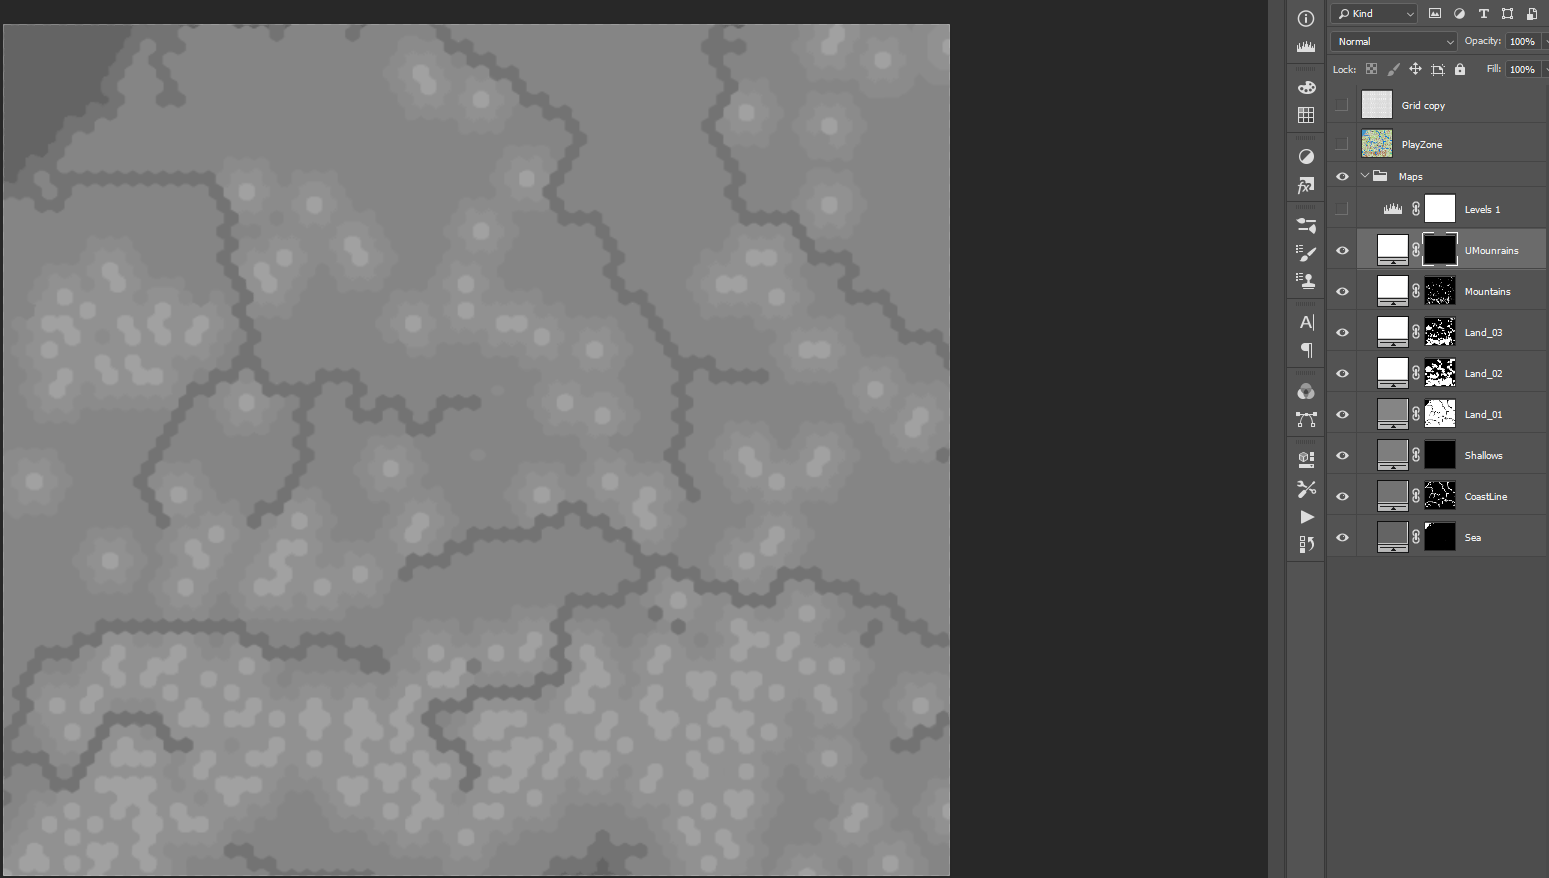
- This is how the Heightmap file looks in Photoshop.
The Heightmap is then imported into UE4 as well, using the engine's features.
- The map after the heightmap file import.
Stage 3: Adding the terrain color and texture
Next step is coloring the landscape according to different terrain types. First, the Level Designers create masks for all kinds of terrain in Photoshop.
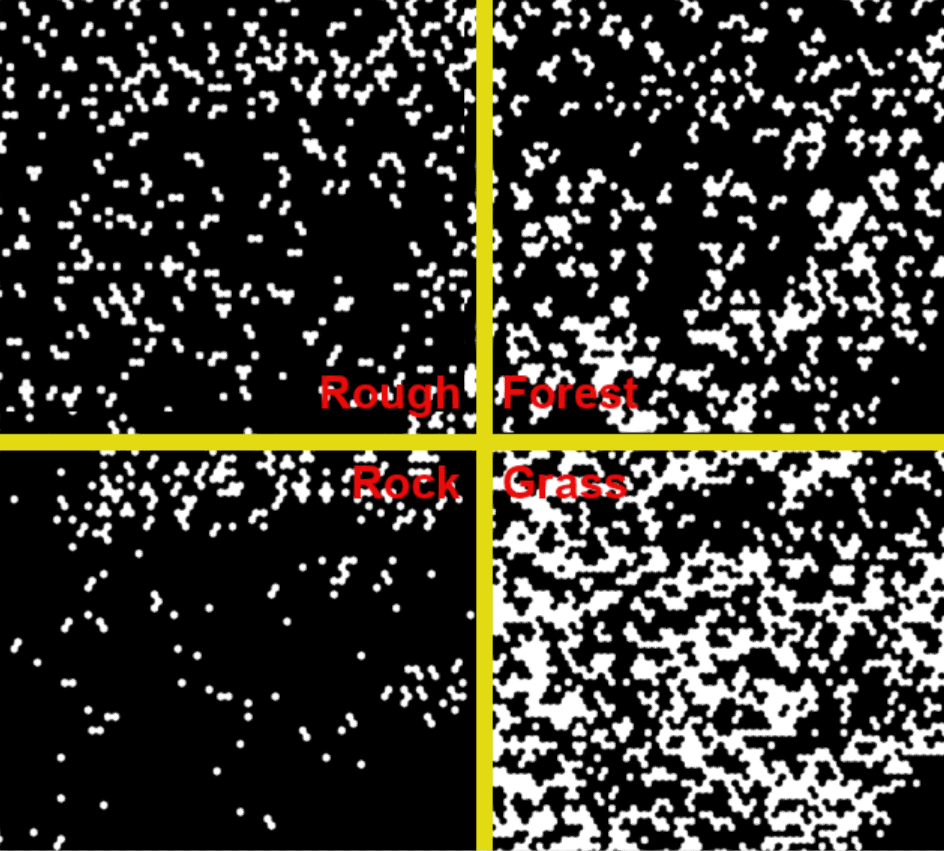
- Terrain masks for the level.
Next, we import masks into the engine, using UE4 features. As you may know, we have different visual types of maps, such as “Europe”, “Africa”, “Winter”, “Steppe”, and “Pacific”. We have also added “Jungles” setup in SM: Fight for Freedom for the operation in Burma.

- This is how the level looks in the editor after adding terrain colouring and textures.
Stage 4: Creating water surfaces
The next step is to create big rivers and lakes on the level, using UE4 tools such as splines and planes (not the fighter planes ;) ). After that, we have to smooth the river banks and paint it in the “sand” and “ground” terrain for better looks.
- The level with the proper river.
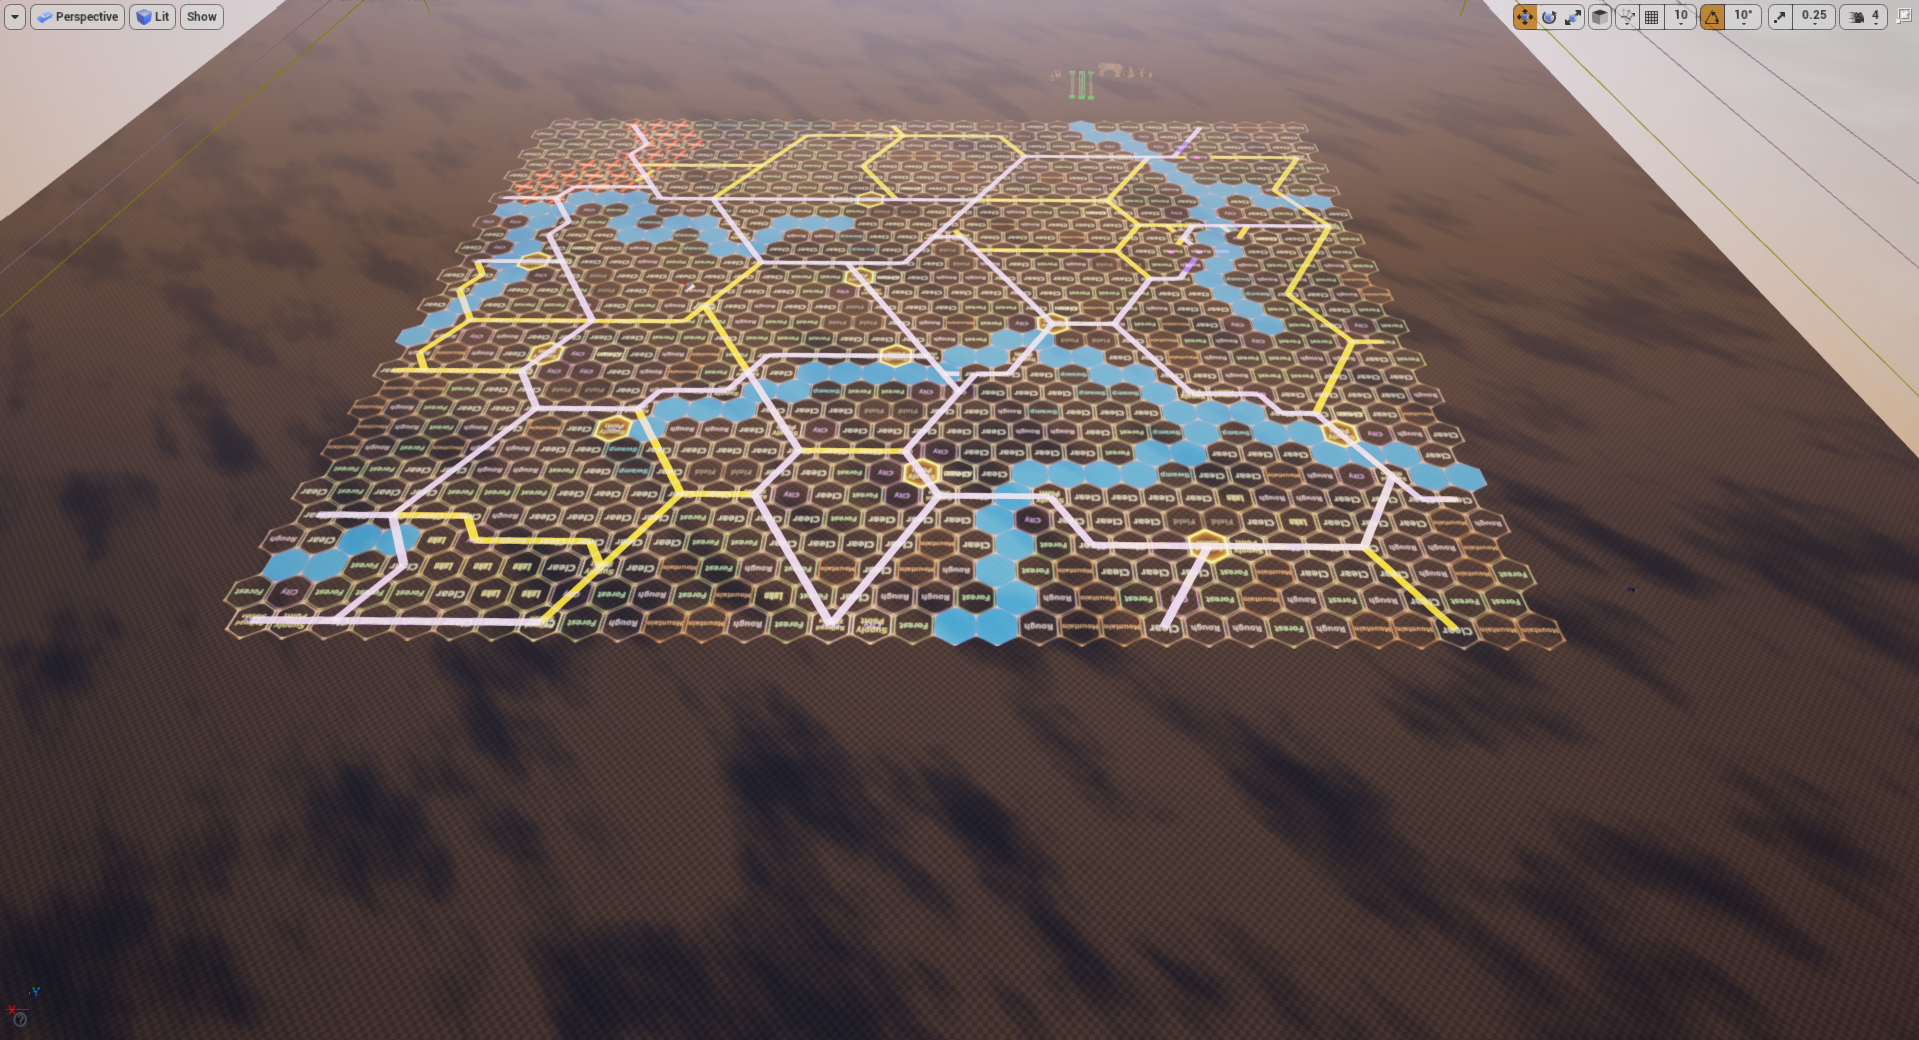
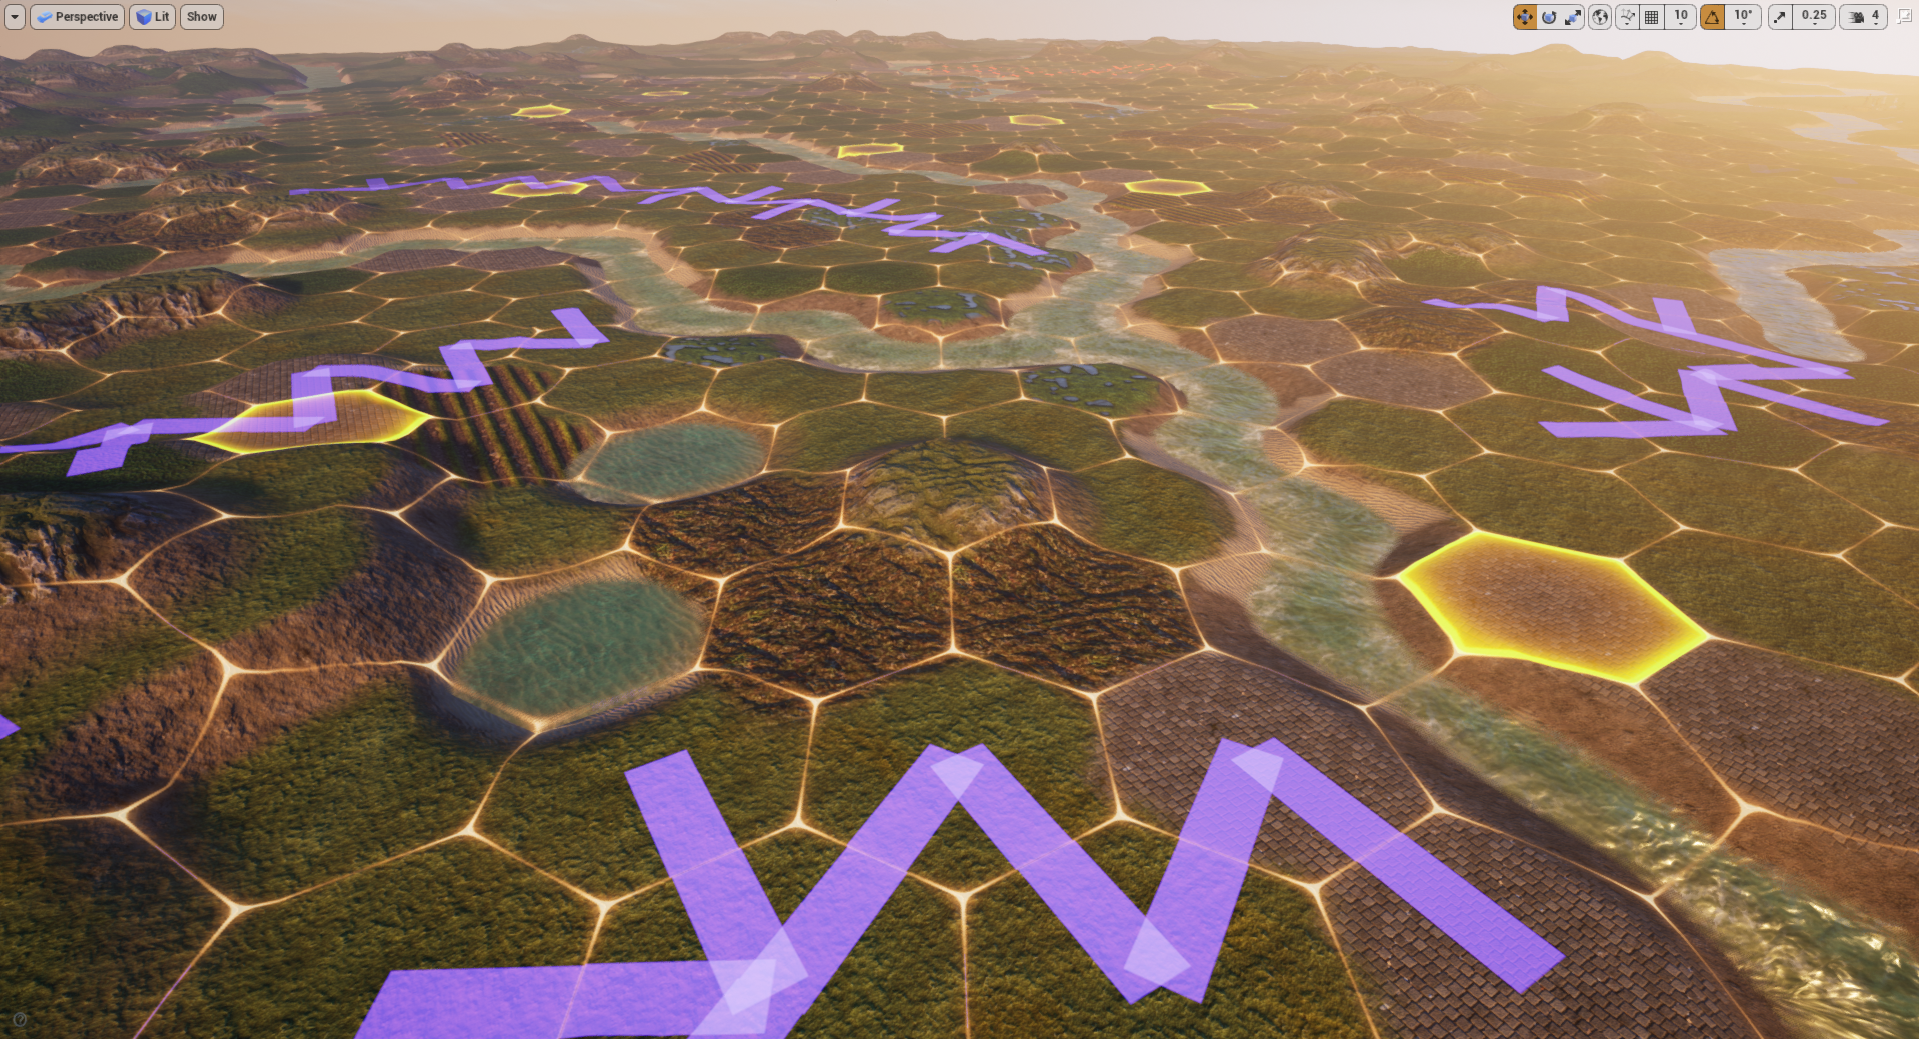
Stage 5: Laying roads, railroads and small rivers — a hell on earth
It is now time for the hardest part of level creation — laying roads, railroads and small rivers. Why is it so hard? Well, the UE4 splines are “a pain in the ... arm”, as our Level Designers would say. The task here is to lay splines on the landscape so that none will float in the air or fall through the terrain. There are useful tools to help you achieve that, but it still requires a considerable amount of manual work. Also rivers should always go downhill, so hills and mountains on their way are a regular problem. Nevertheless, a job is a job, so here is the level after road and river management:

- The level has roads, railroads and small rivers, but no cities, bridges etc.
Well, the hardest part of the work is now finished.
Stage 6: Adding buildings and infrastructure
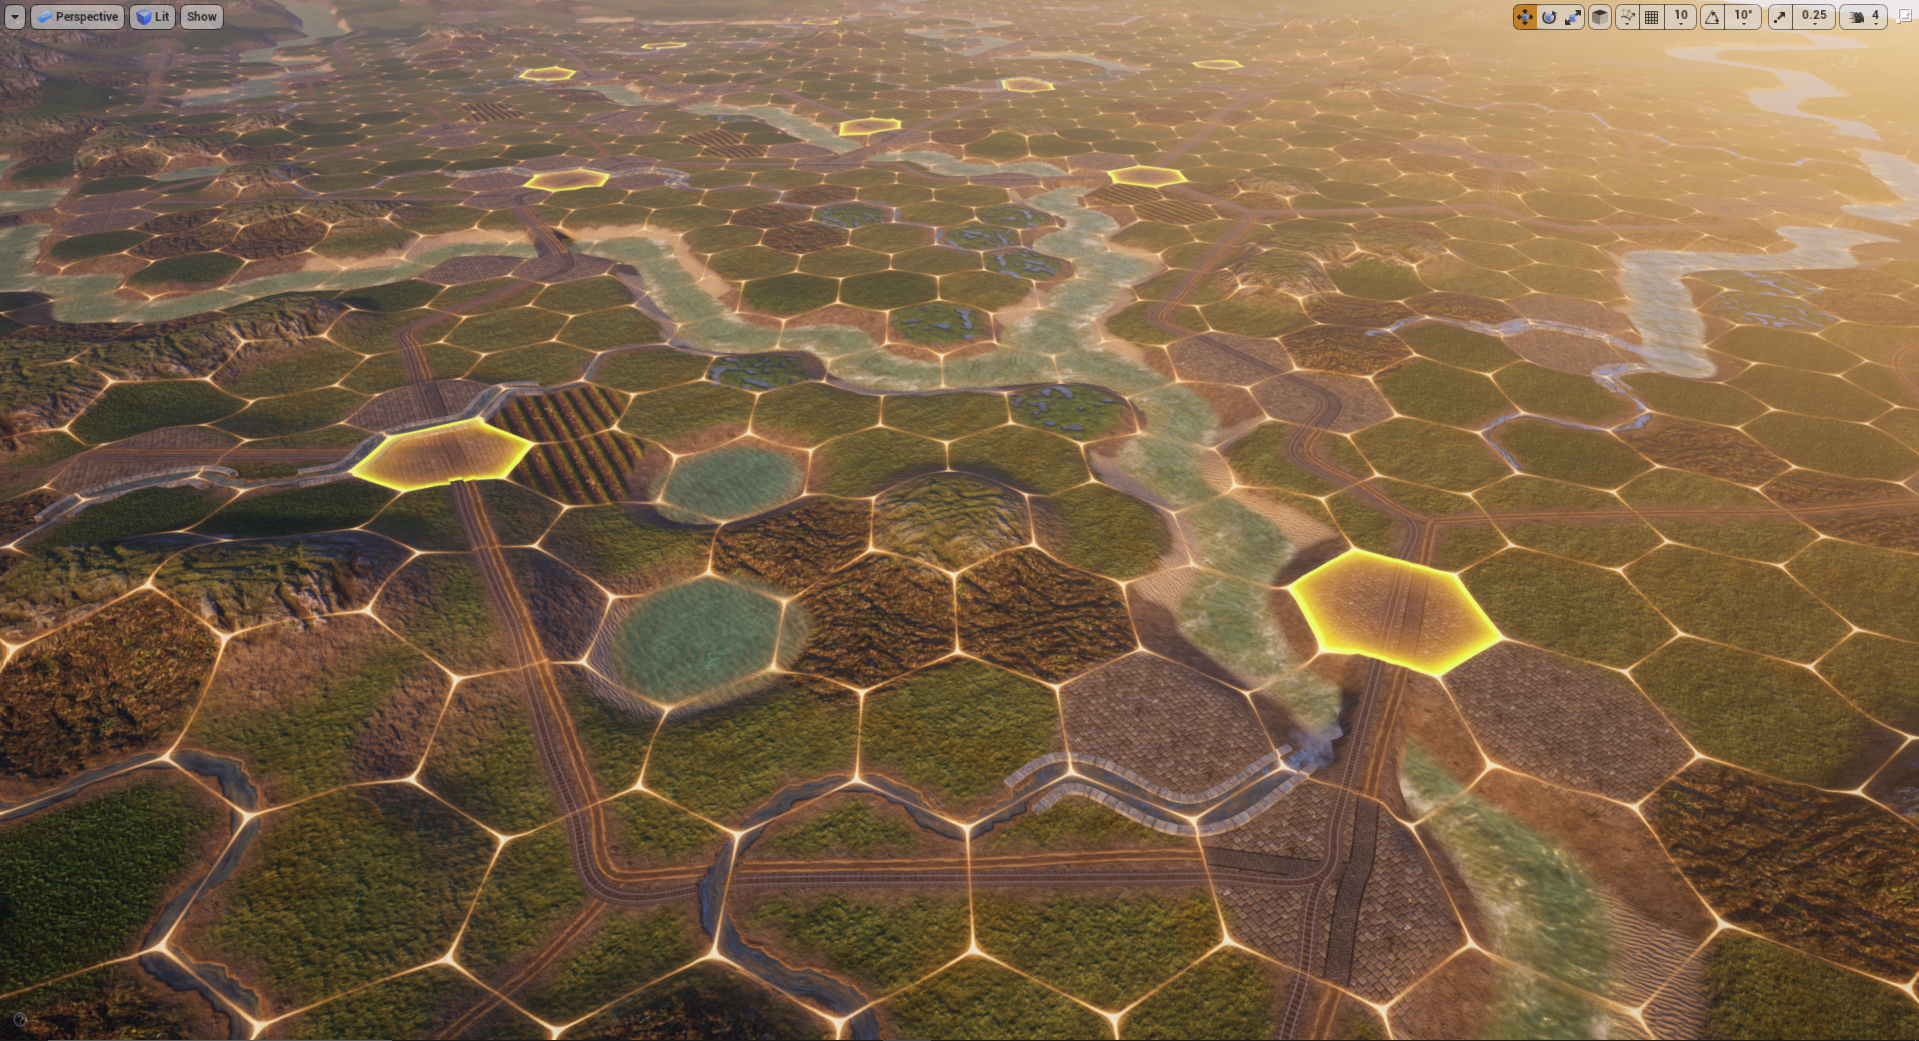
Next step is to put buildings on the level: bridges over big and small rivers, houses in the city hexes, and infrastructure: supply points/hubs, airfields, ports, and railway stations.
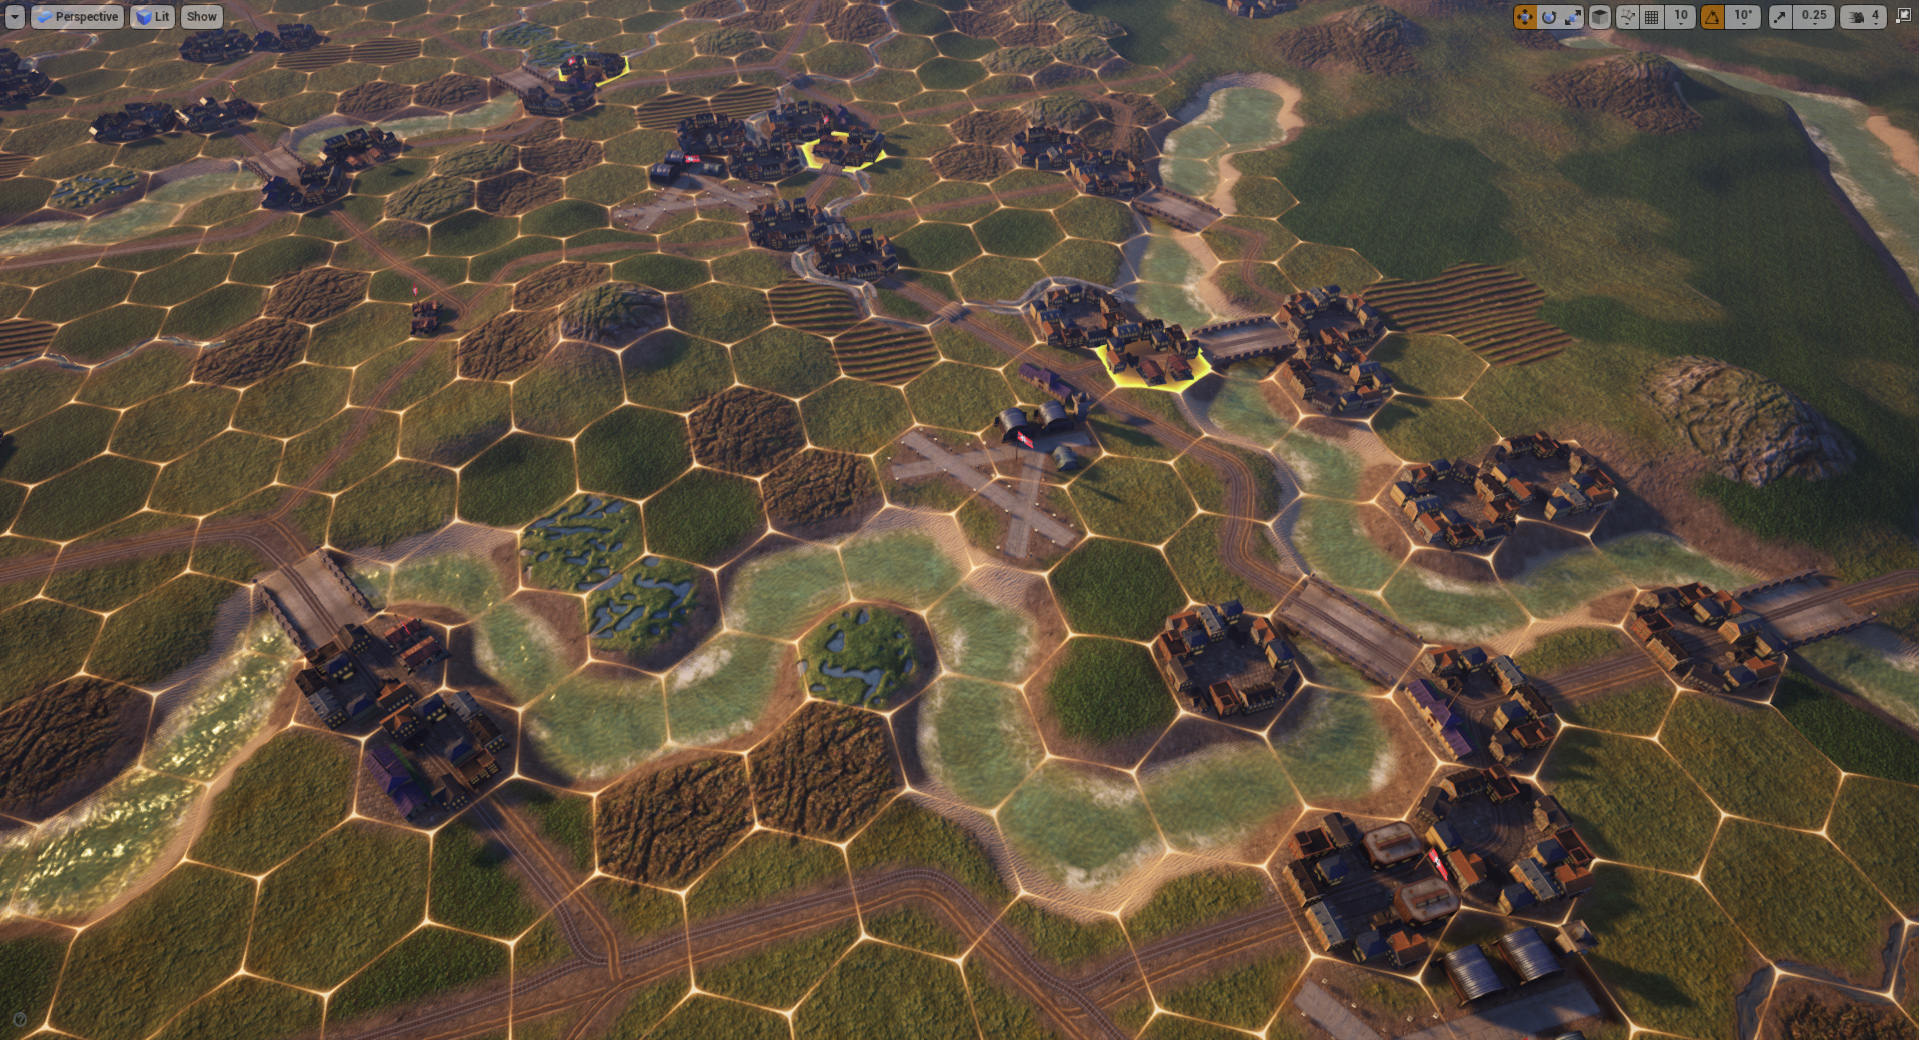
- The roads no longer look weird — we have bridges and houses.
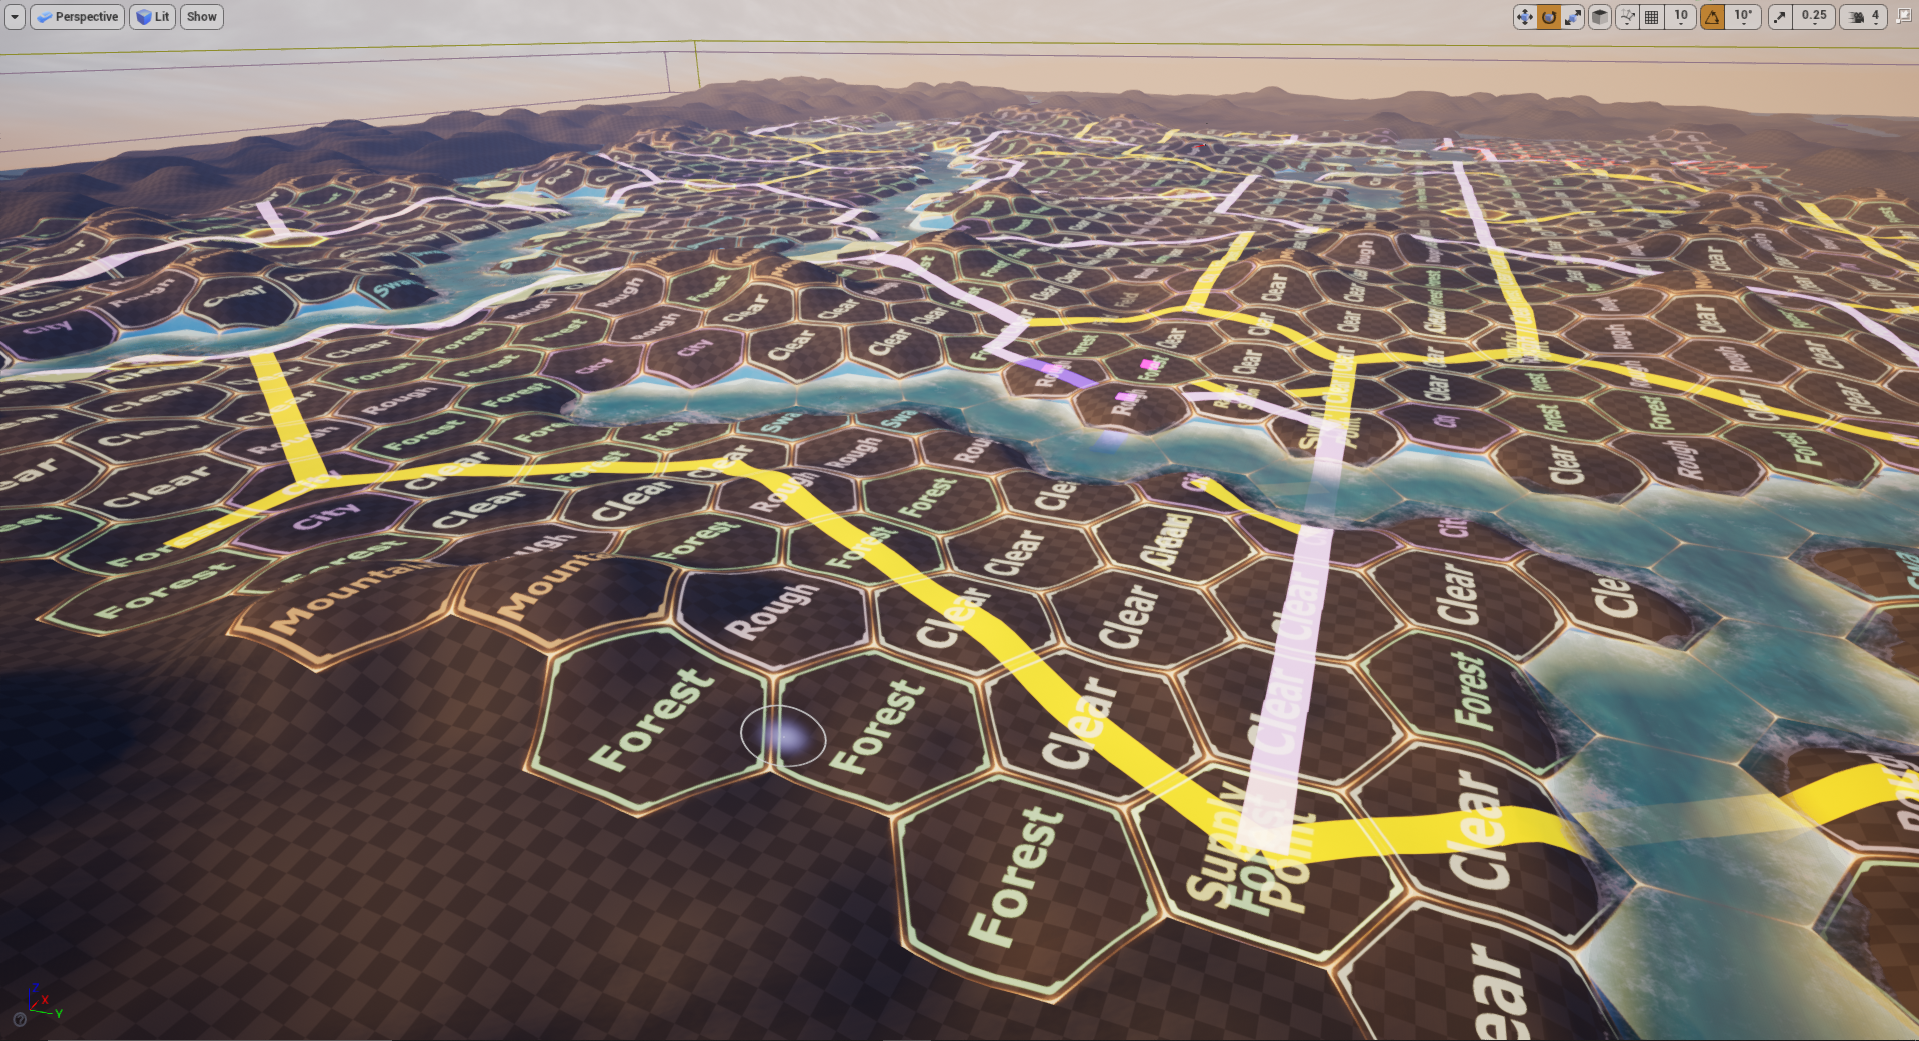
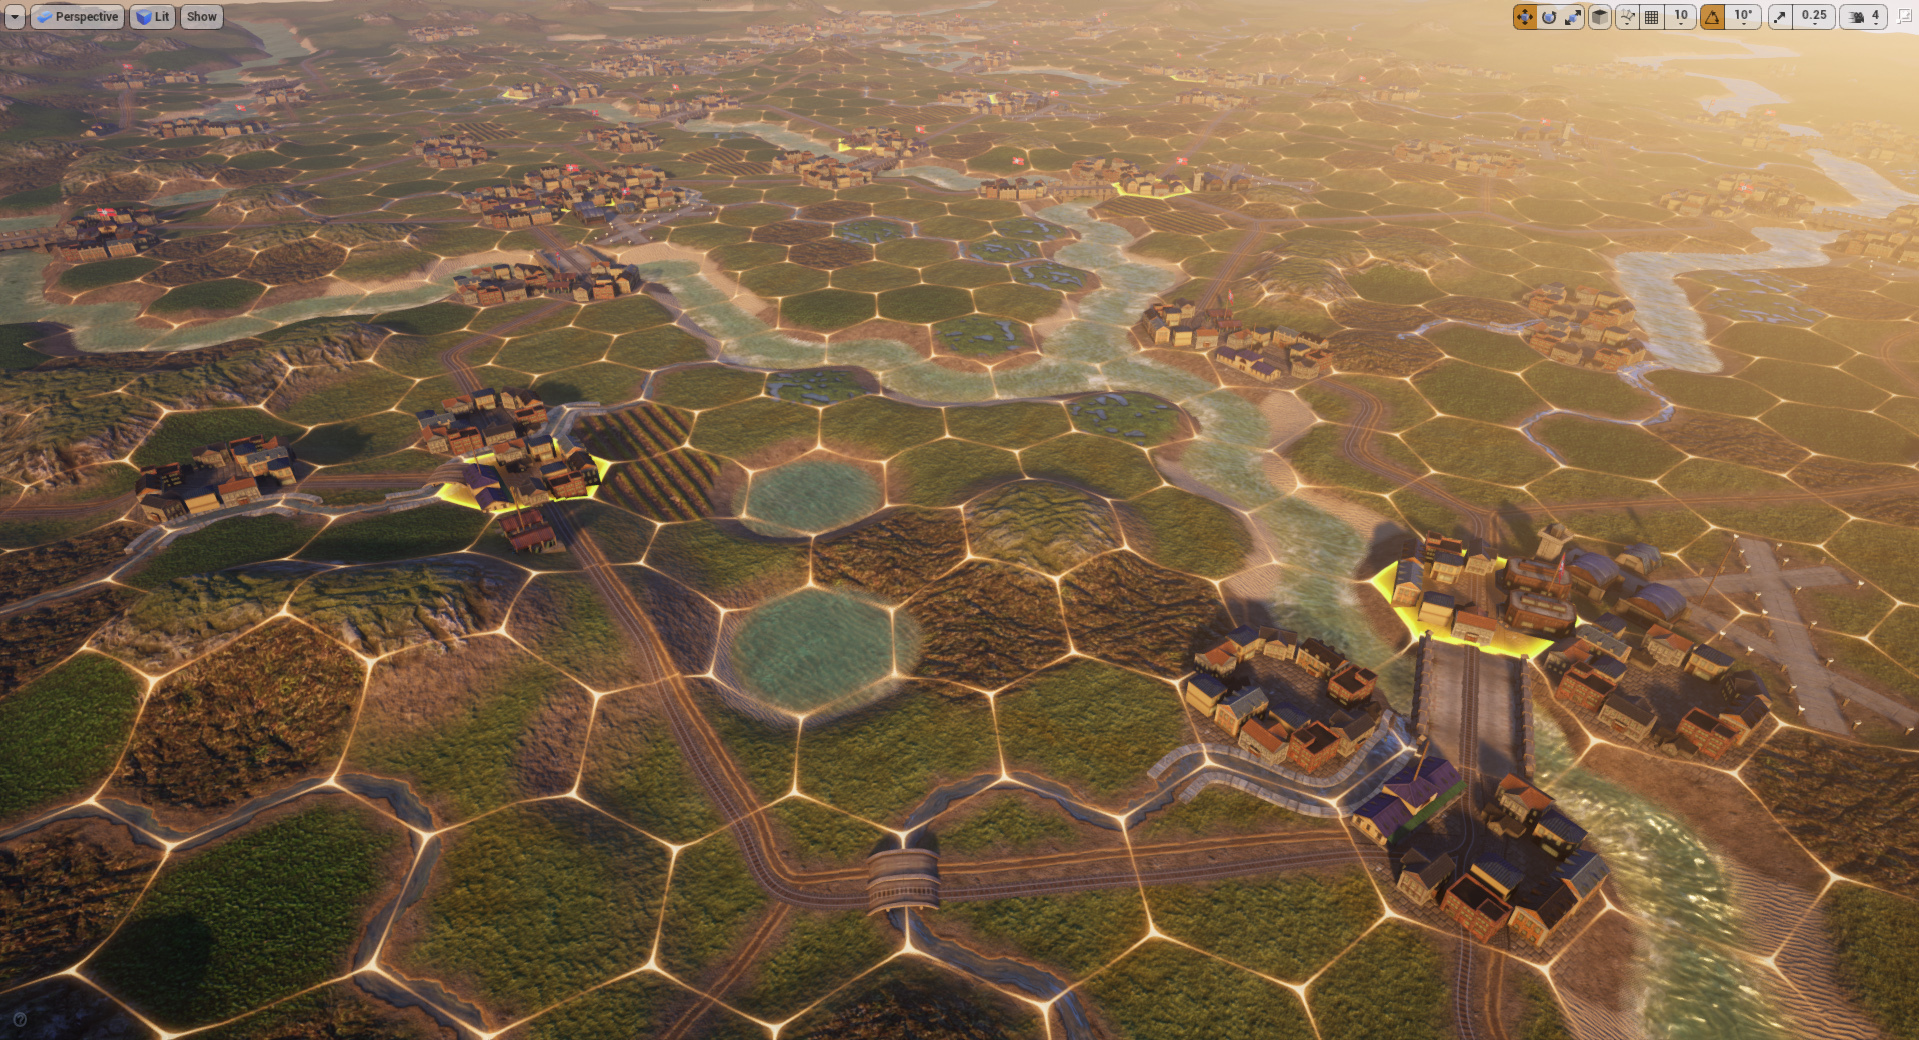
Stage 7: Planting trees, flowers, stones and adding birds. Adding more visual polish
Now it is time to give the nature some respect – we plant trees and flowers, throw stones, and raise birds.
- At this point, the work on the visual components is pretty much done.
It is high time to give some additional personalization to the level by putting different environmental features, such as destructible assets: wooden fences, statues, electric poles etc. We also add animated objects, using UE4 blueprints, such as: spinning windmills, spotlights, lighthouses etc.
We also add some of the iconic buildings and geographical features like Stonehenge, Kremlin, the Great Barrier Reef etc.
Last cosmetic part would be painting the river bottom with rocks and sea shallow water with seashells, adding clouds in the sky and putting a fog box around the map so that players cannot see “the edge of the world”.
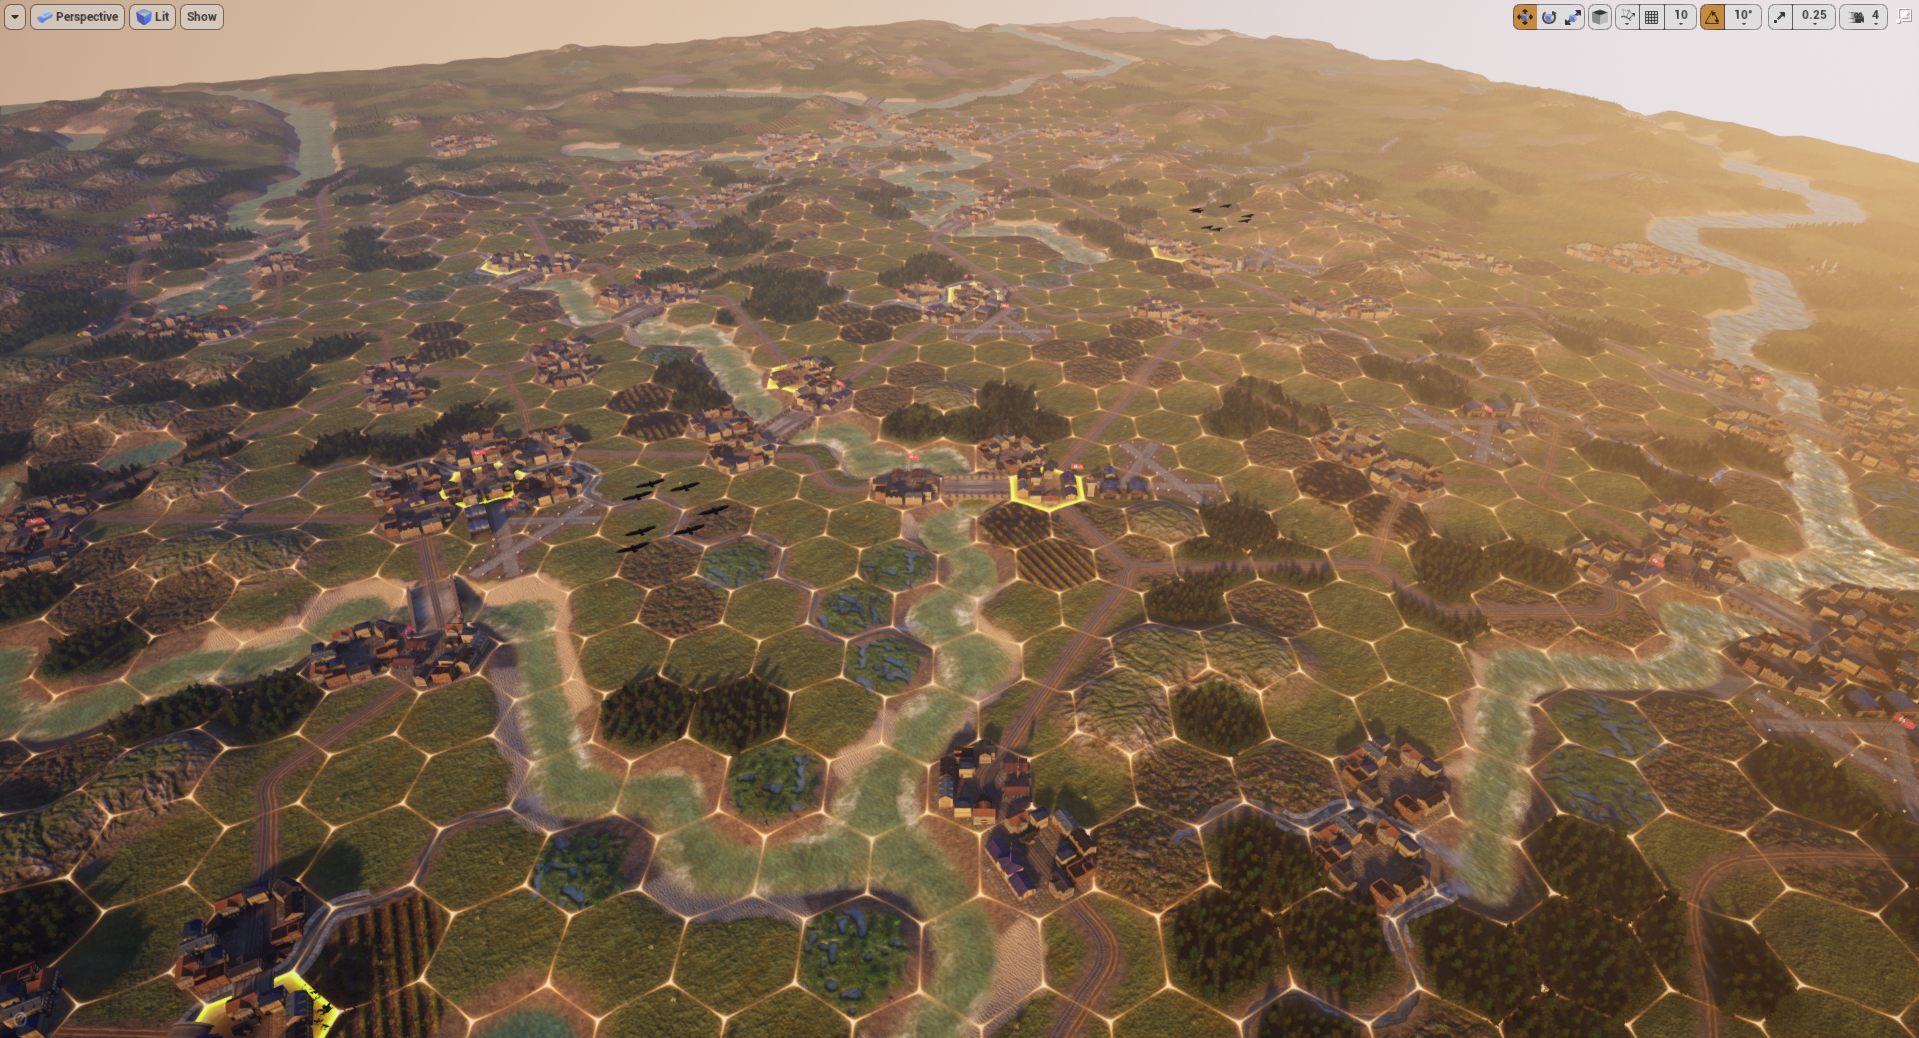
Stage 8: Placing units and their equipment
Now we have to place the enemy units on map, including fortifications, such as forts and minefields, giving them suitable equipment and vehicles. Then we will place the player-controlled non-core units.
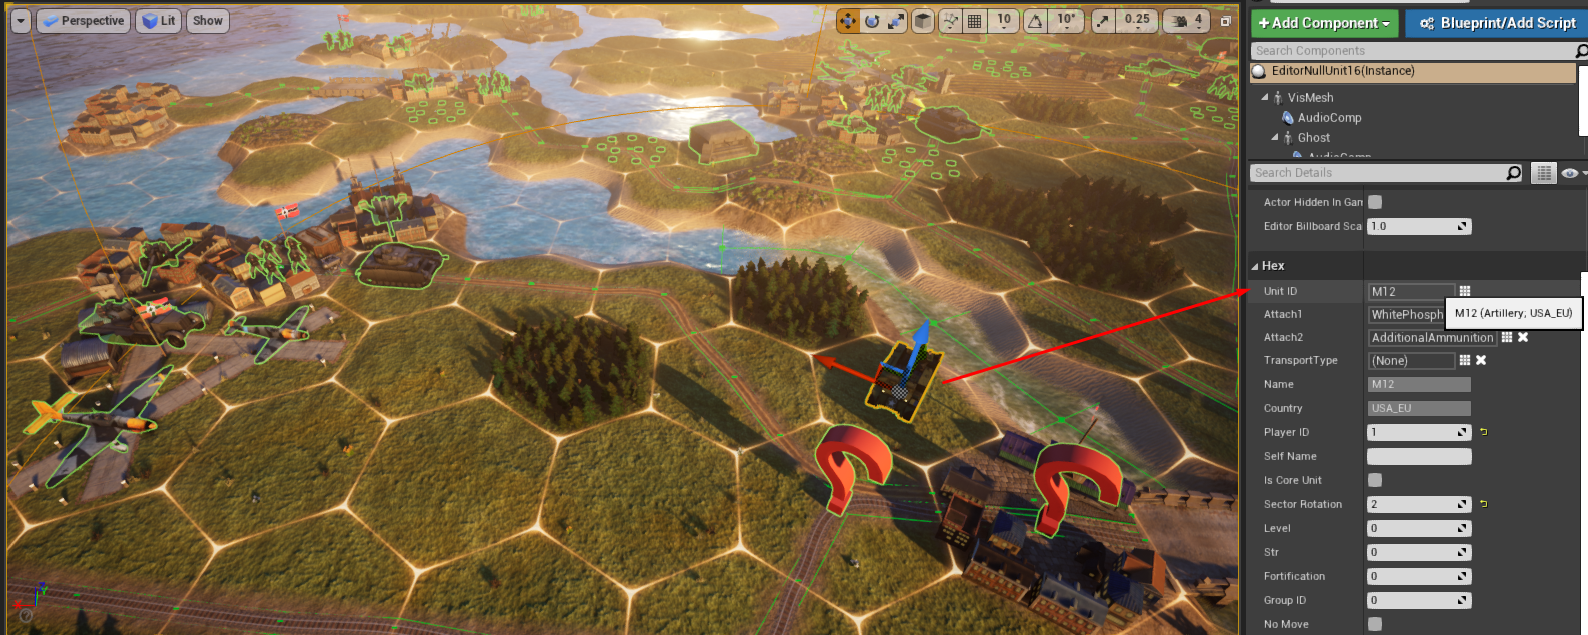
- Units that are still without models are marked as question marks.
Stage 9: Writing mission scripts
The last part would be writing scripts and finally testing it over and over again, until perfect balance is achieved.
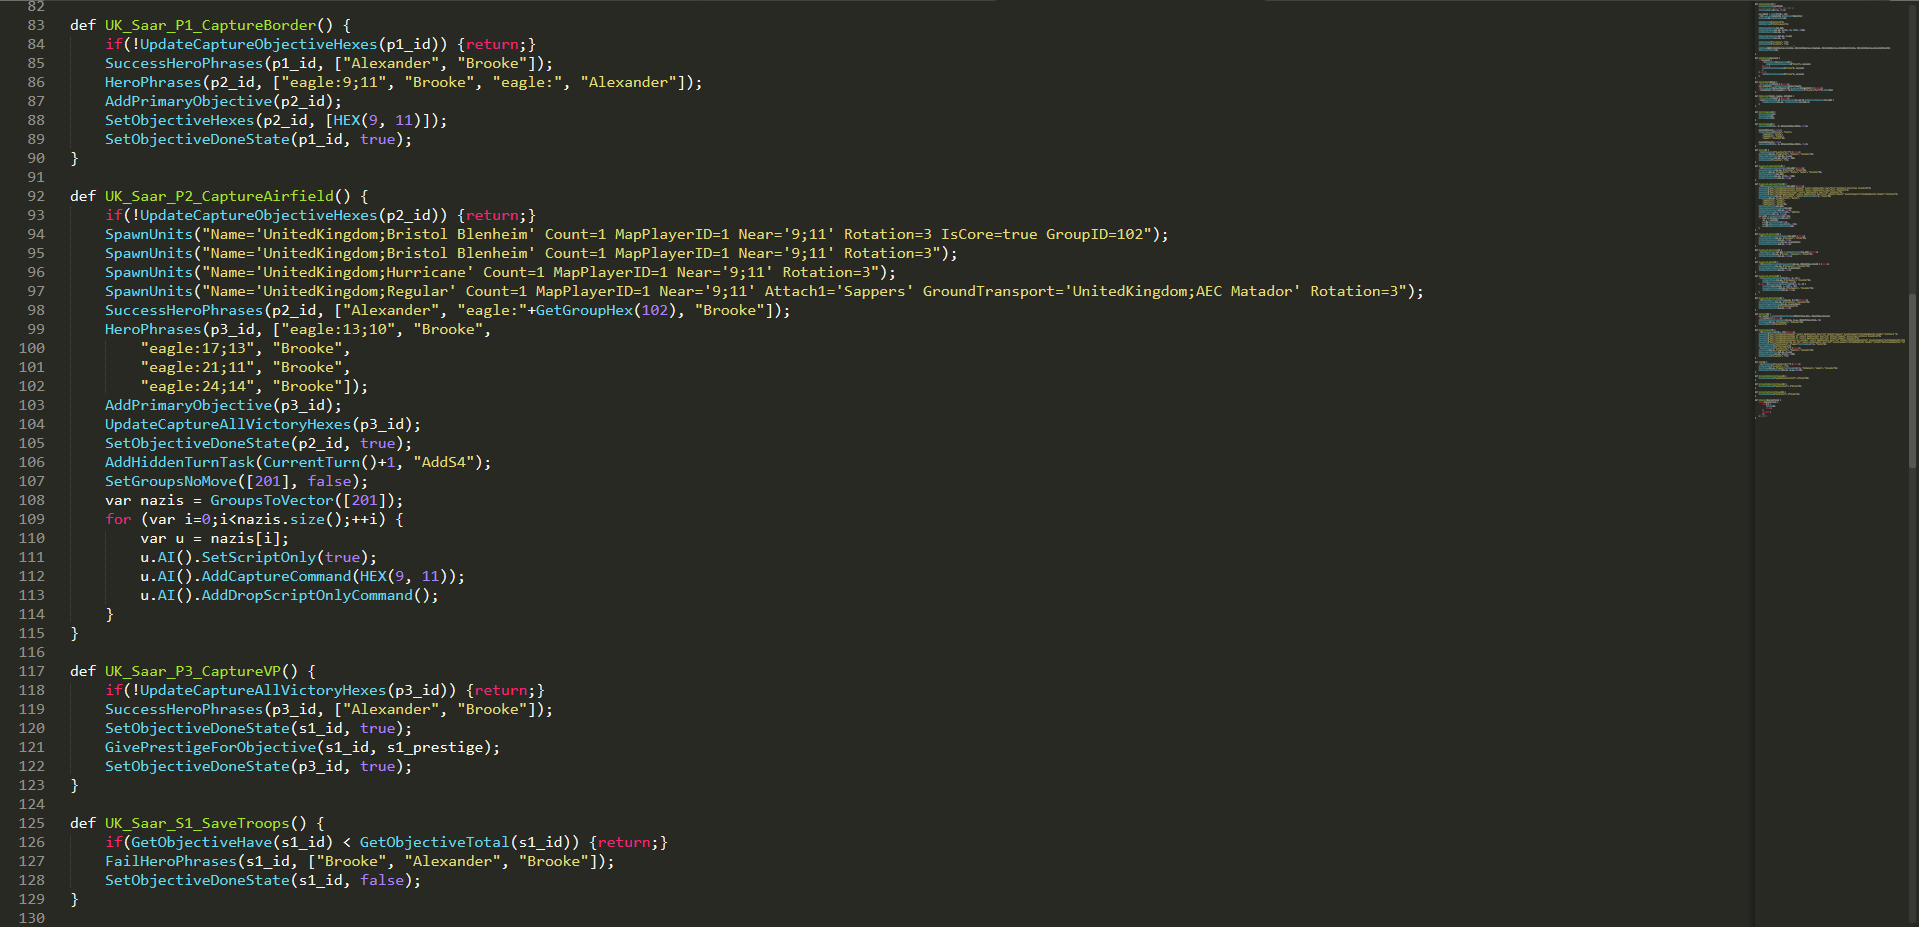
- This is how the operation script files look like. It is the Saar offensive script.
At first we just test the scripts and fix obvious balance issues for a single scenario. At this stage the use of cheat codes is allowed to speed up the testing.
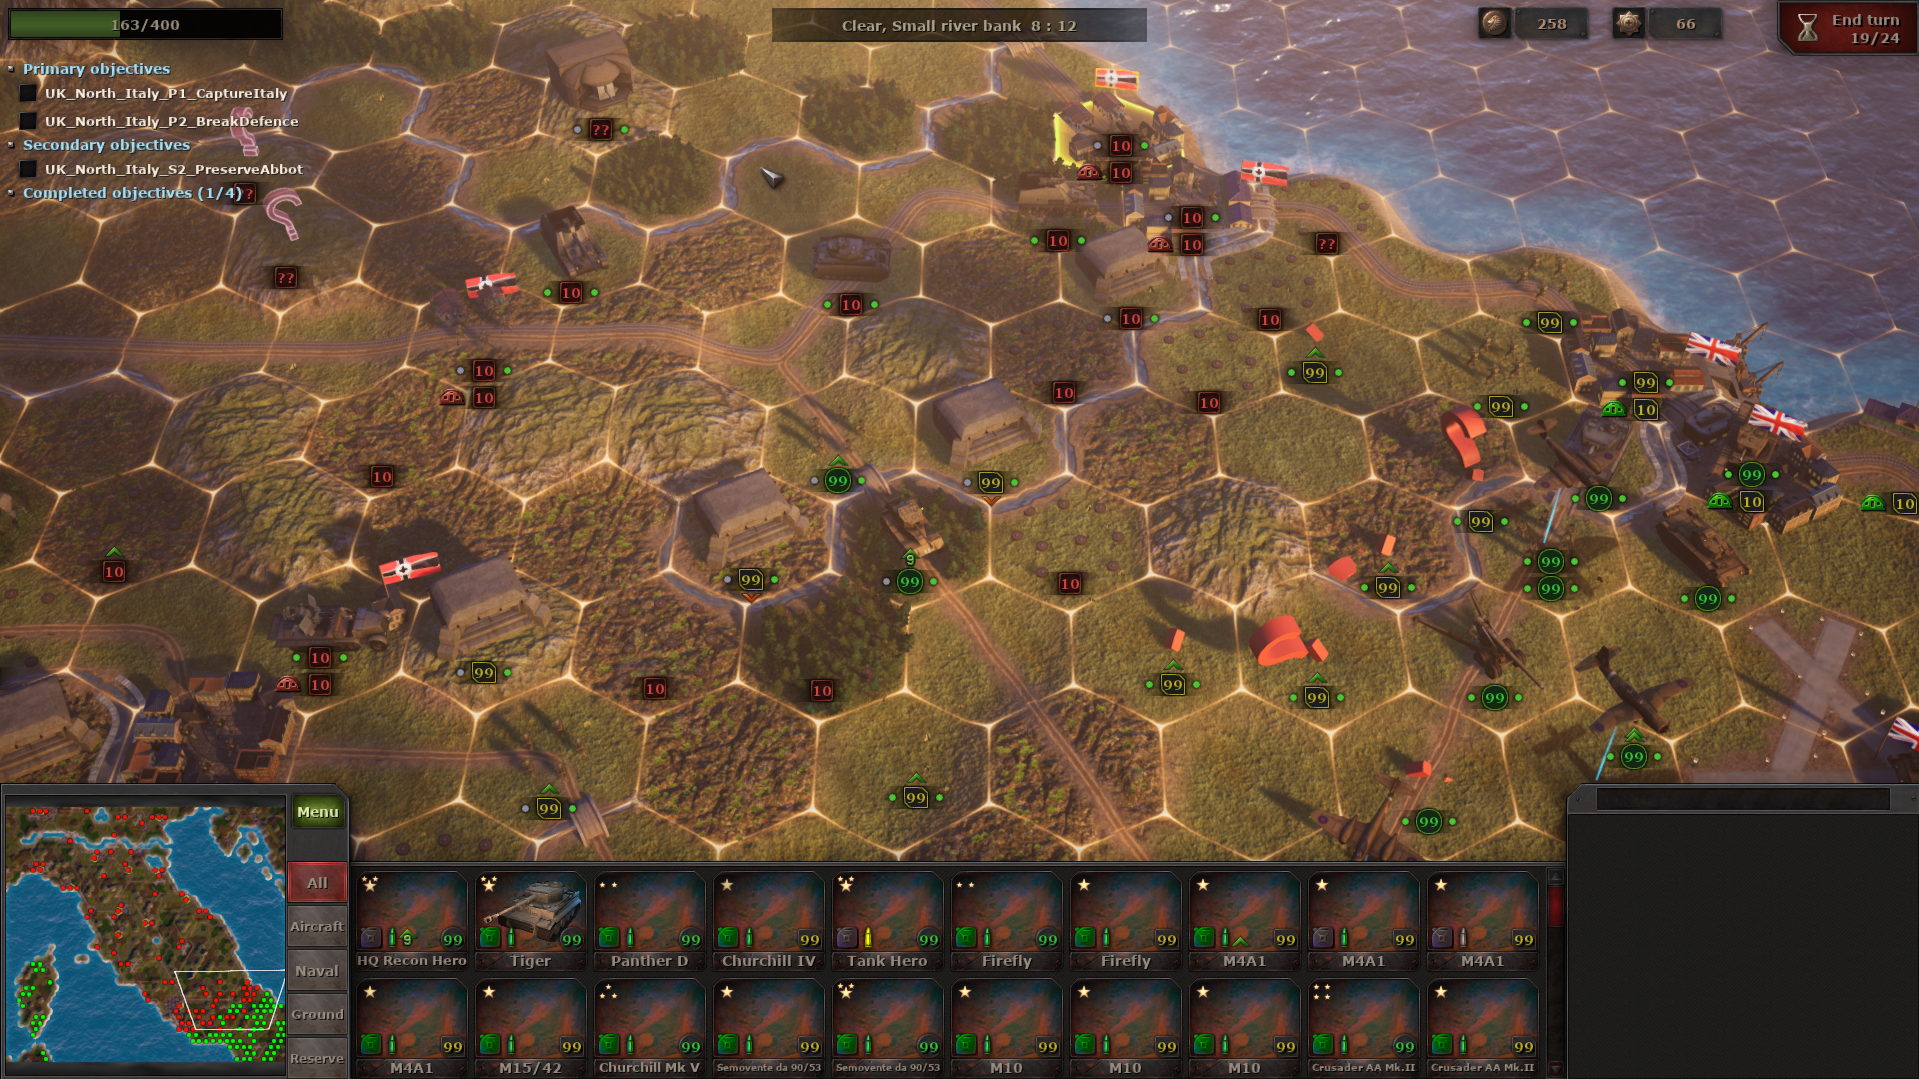
- The first tests of the operation.
As you can see, the player units have 99 strength. Also there is no localisation for mission names and no pictures for the units at the bottom of the screen. Some units don't even have a model and only have a placeholder “question mark” model instead.
Stage 10: Campaign playthrough — a more thorough testing of all operations
At this stage several people on the team have to do a full campaign playthrough, testing all scenarios in a consecutive manner and without any unfair advantages — they play exactly as the players would, to gauge the difficulty and adjust all the rough edges. Of course having played Strategic Mind games a lot, they have a very good understanding of the game, so we have to take that into account when setting the turn limits and balancing enemy units.
- The UK campaign first full playthrough completed. Some of the awards pictures are still in development.
Closing words
The process of map creation from the “Basic idea is created” to the “Game ready” stage usually takes about 2 weeks. Enormous maps such as the Battle of Moscow in SM: Blitzkrieg may take up to 4 weeks. Each map requires the work of at least 4 different specialists: narrative designer creating texts and concept, level designer creating visuals, technical level designer writing scripts and QA specialist looking for bugs.
P. S. Bonus screenshot: that’s how we test maps before our artists finished working on all the unit models.
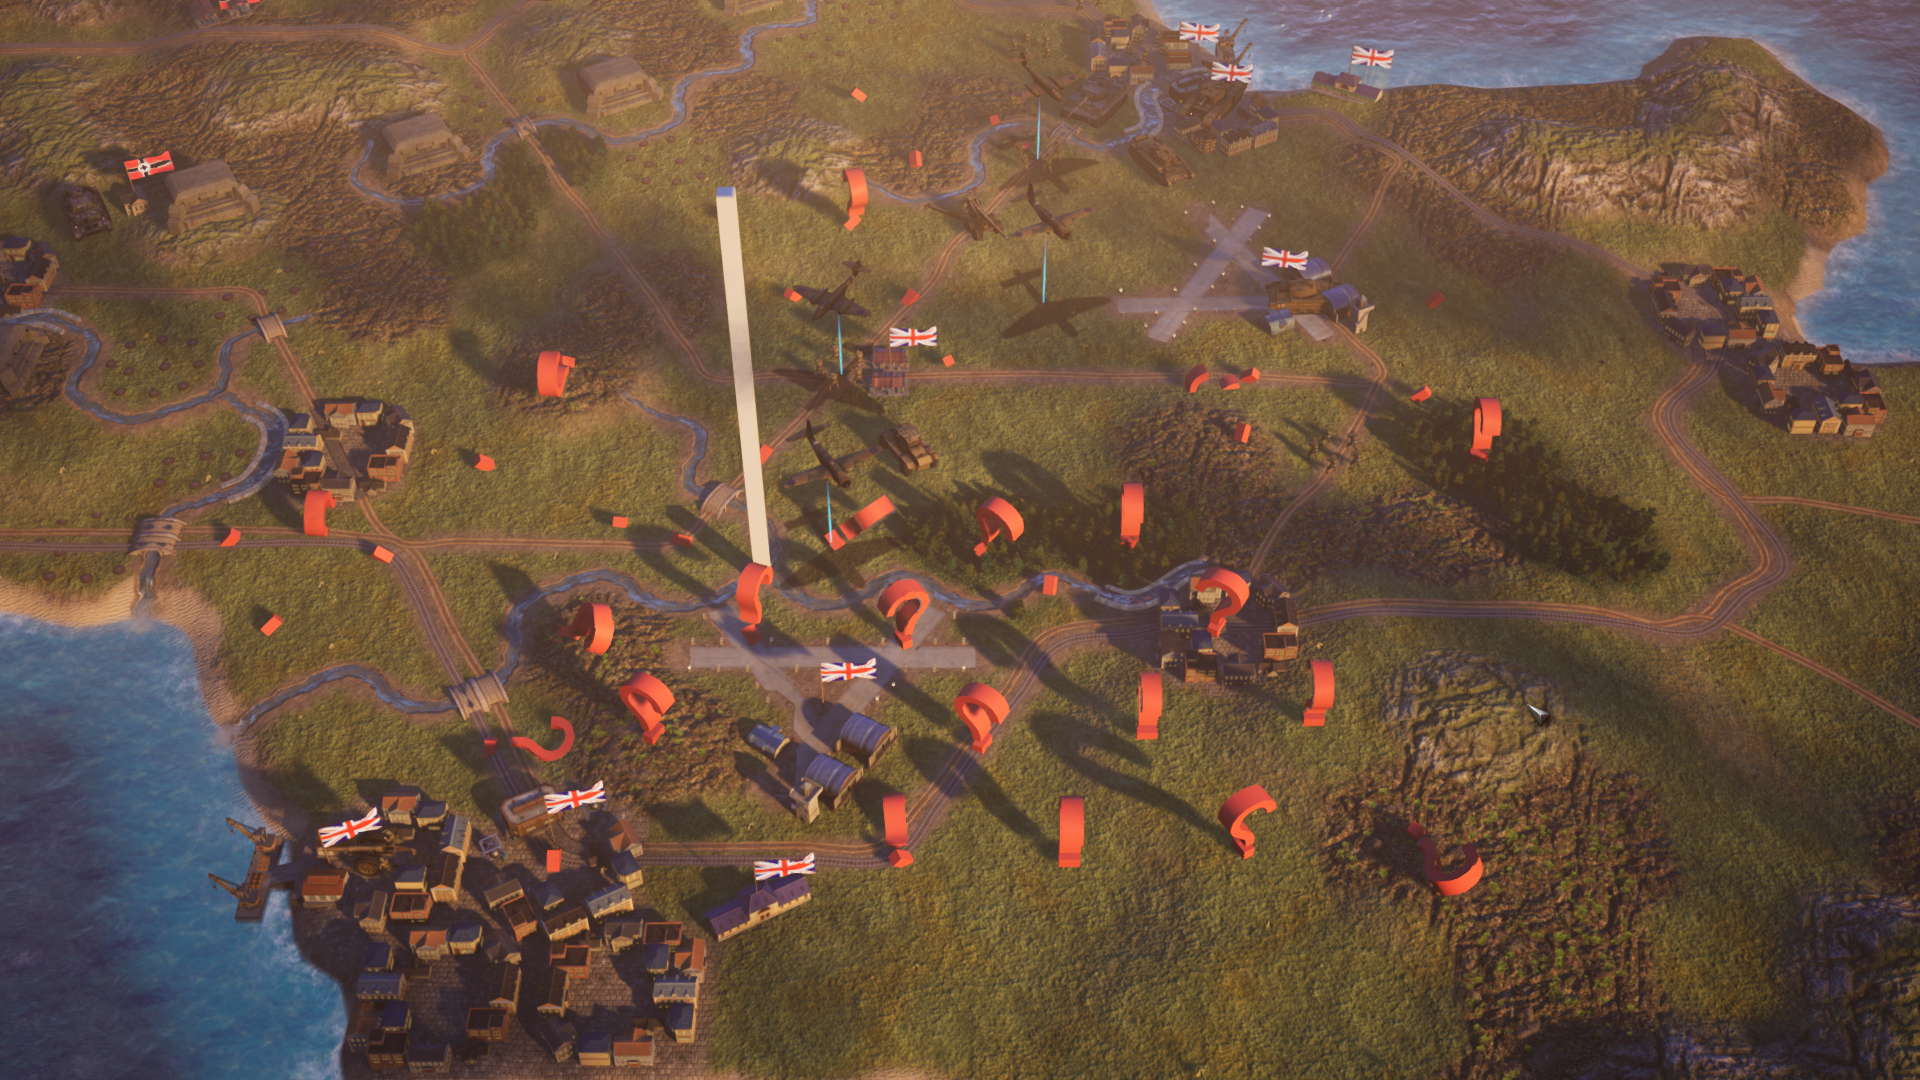
- Just imagine how difficult it is to wage war while all your troops are just a bunch of marks with different stats, lying around across the battlefield.
Share your thoughts in the comments below!
Learn more about our upcoming title: Store.steampowered.com
With best regards
Starni Games team
Maybe for prototyping your can be change "question marks" to simple cubes and spheres with different colors. For example: armored unity = red cubes, infantry = orange cylinder, air force = yellow pyramid, artillery = pink cone.
This comment is currently awaiting admin approval, join now to view.