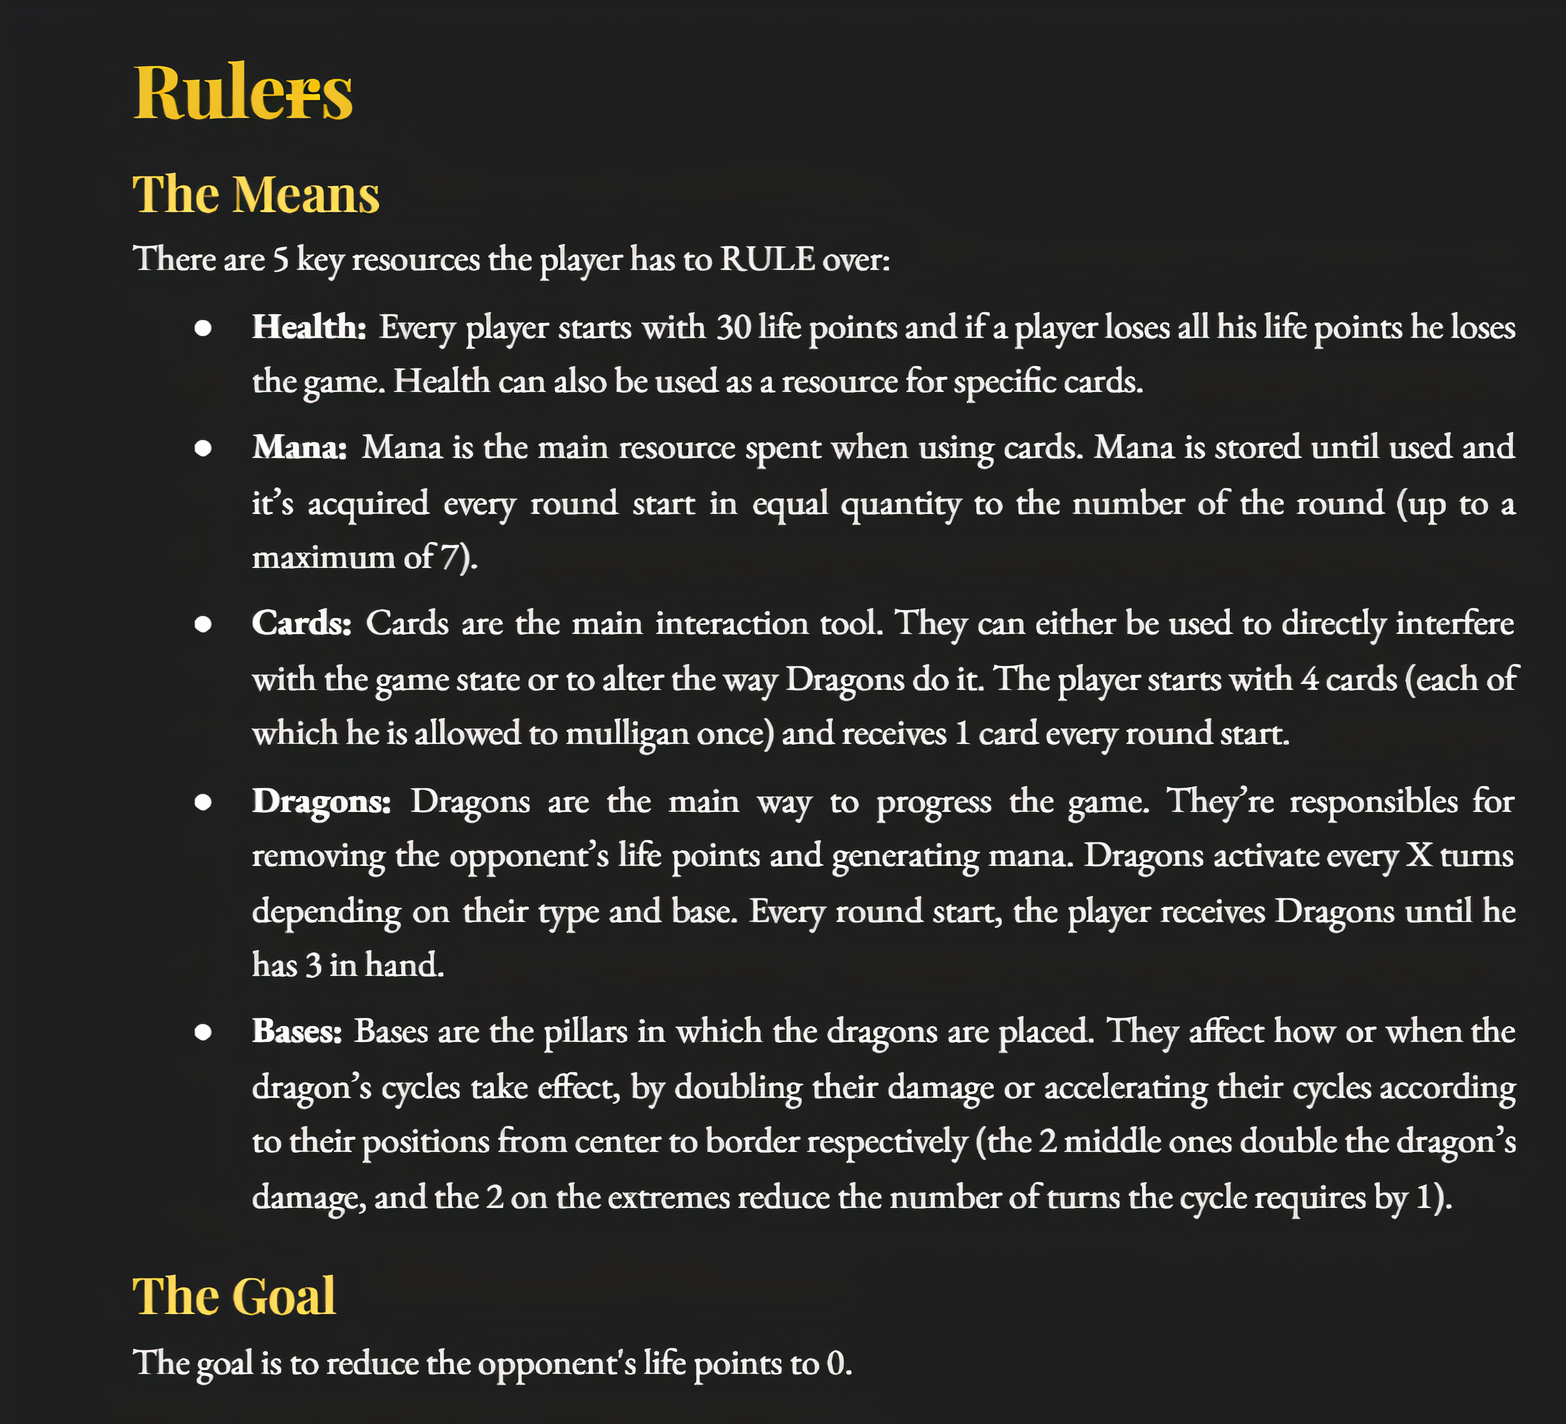
Hi again people!
Those who’ve seen our previous posts, probably have a lot of questions about the game. What are all those shiny squares below the dragons? What do the numbers mean? What is all that dragon modeling for?
Well fret not, for today we’re here to answer them!
Today we’ll make a quick dive into the system of Rulers. Everything, from resources to the turn order, will be swiftly explained as to not bore our dragon overlords. They’ve little patience for manling complexities, preferring the straight forwardness of raw physical and magical power.
This is easily identifiable on their cards:
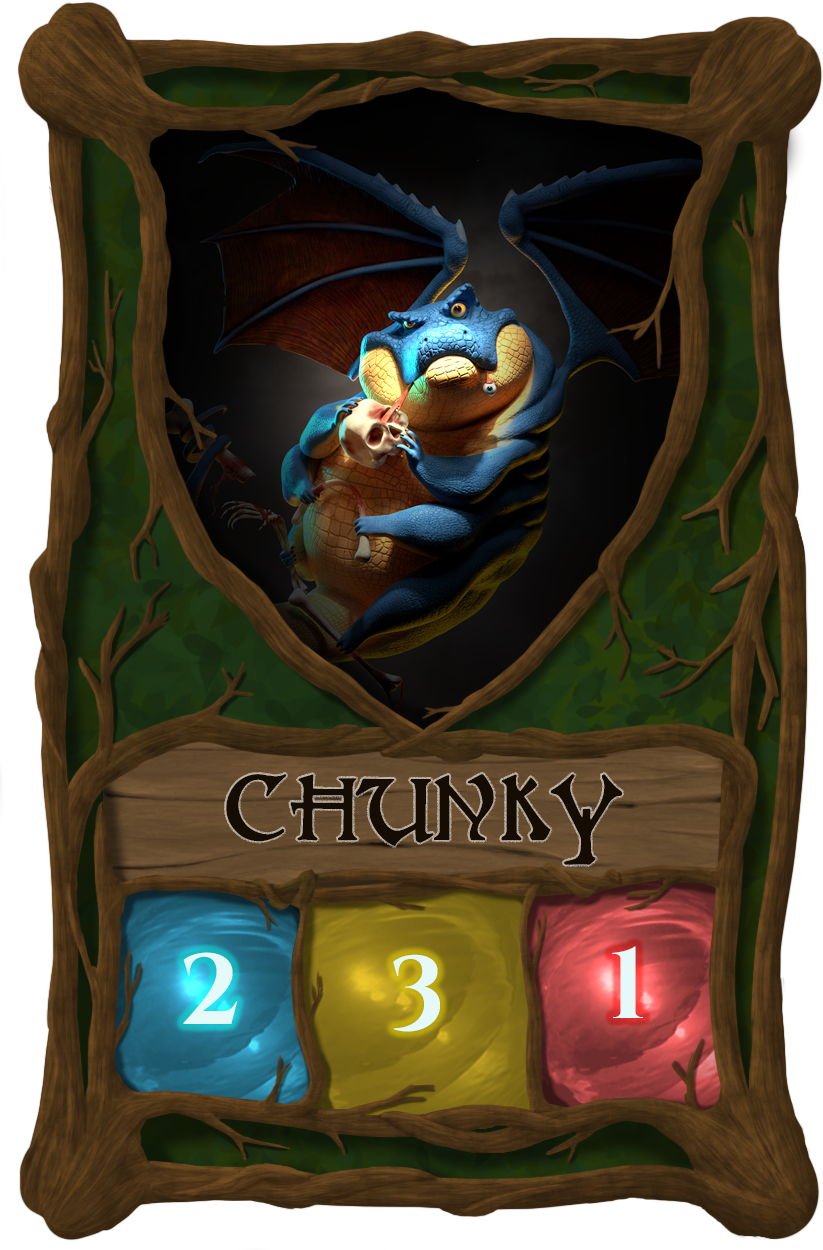
The blue represents the mana the dragons generate with their magical prowess, and the red represents the damage they inflict with their offensive capabilities. Simple yet effective, most dragons need nothing more to thrive.
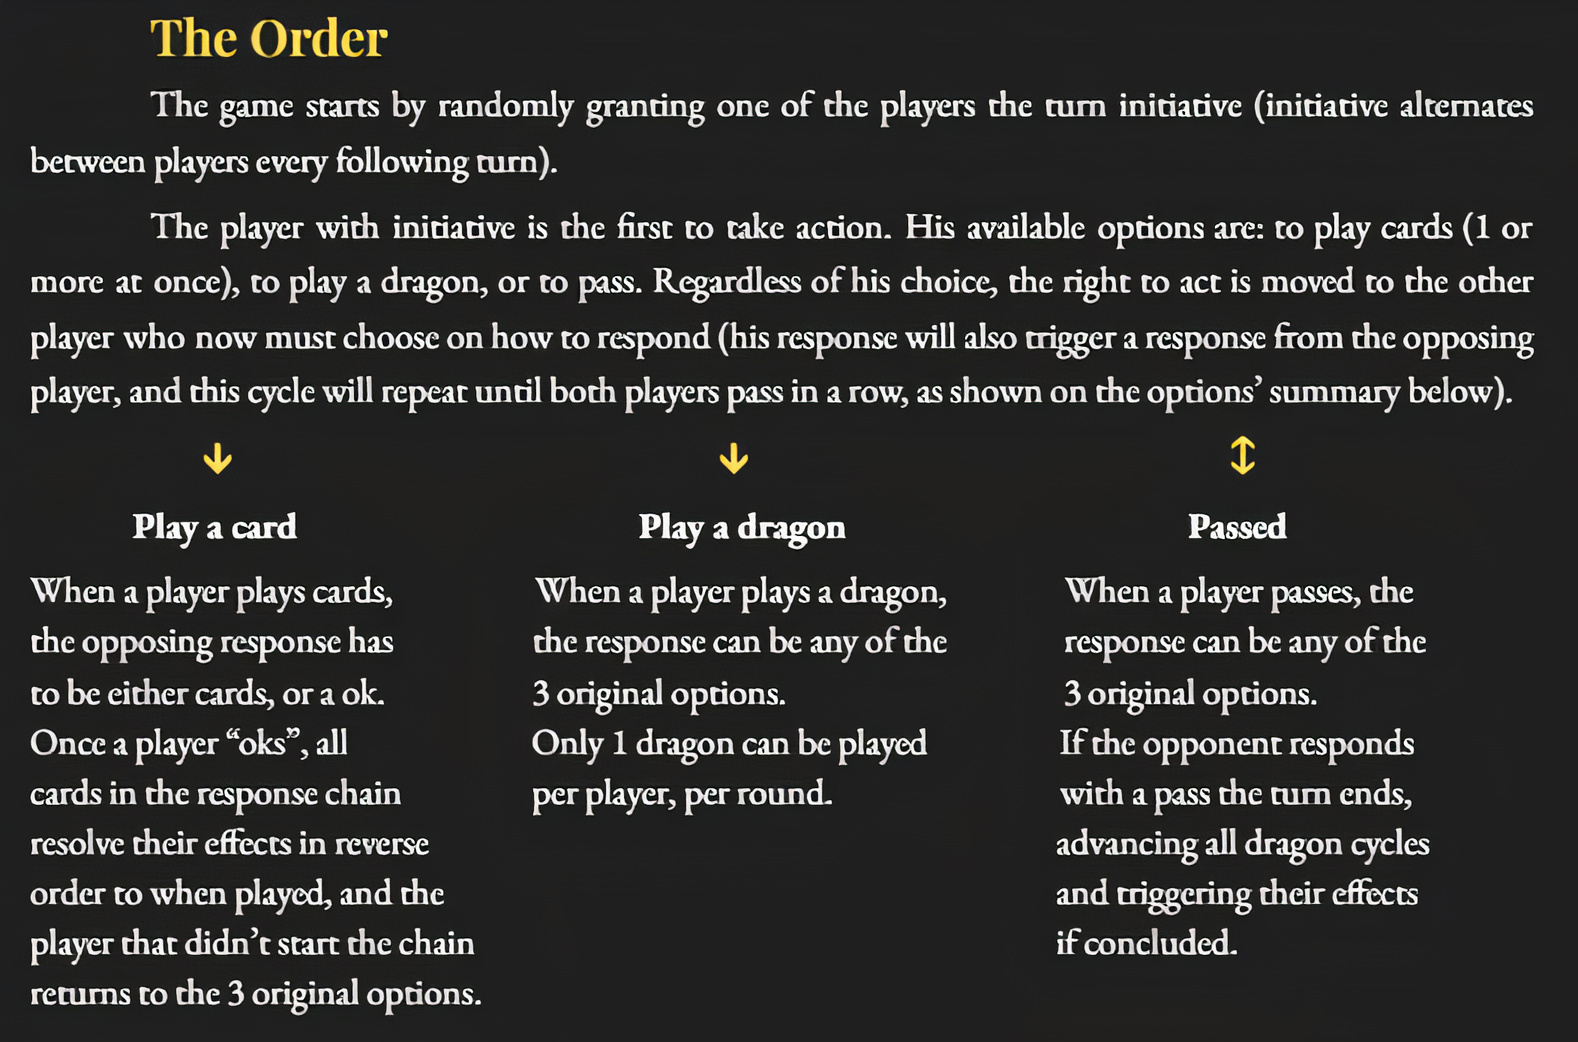
That said, due to the draconic conclave treaty, dragons have to take their time before attacking (we dare not call them lazy). Before every attack, dragons have to wait for a number of turns equal to the number on the yellow square.
Next, let us follow with the age-old question: What is the best way to serve the almighty dragons, rulers of the sky?
The answer is cards of course!
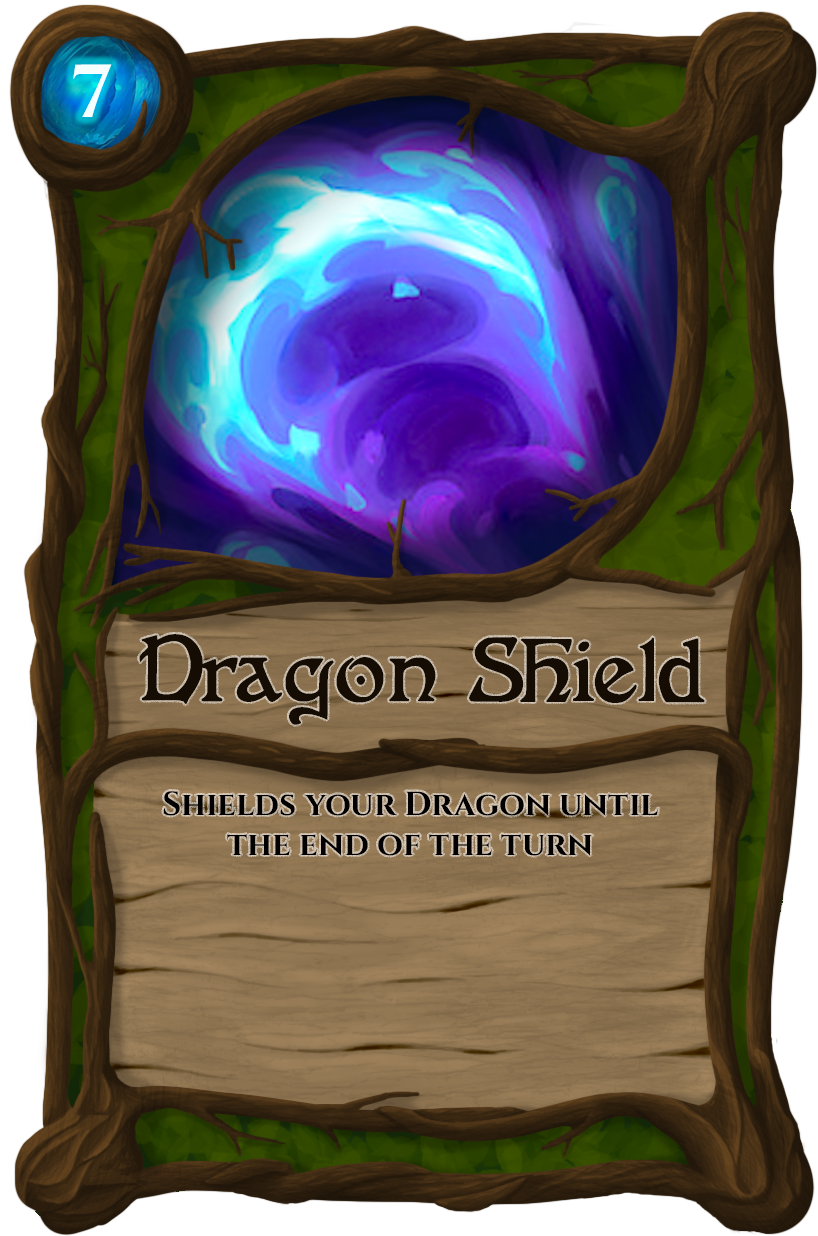
Cards have varied effects and can be accessed via simple transactions of mana (mana requirement is shown at the top left of the card). Their abilities vary greatly depending on their cost and desired effects, but all of them alter the gamestate in some capacity.
Speaking of gamestate, it’s about time we explained this:
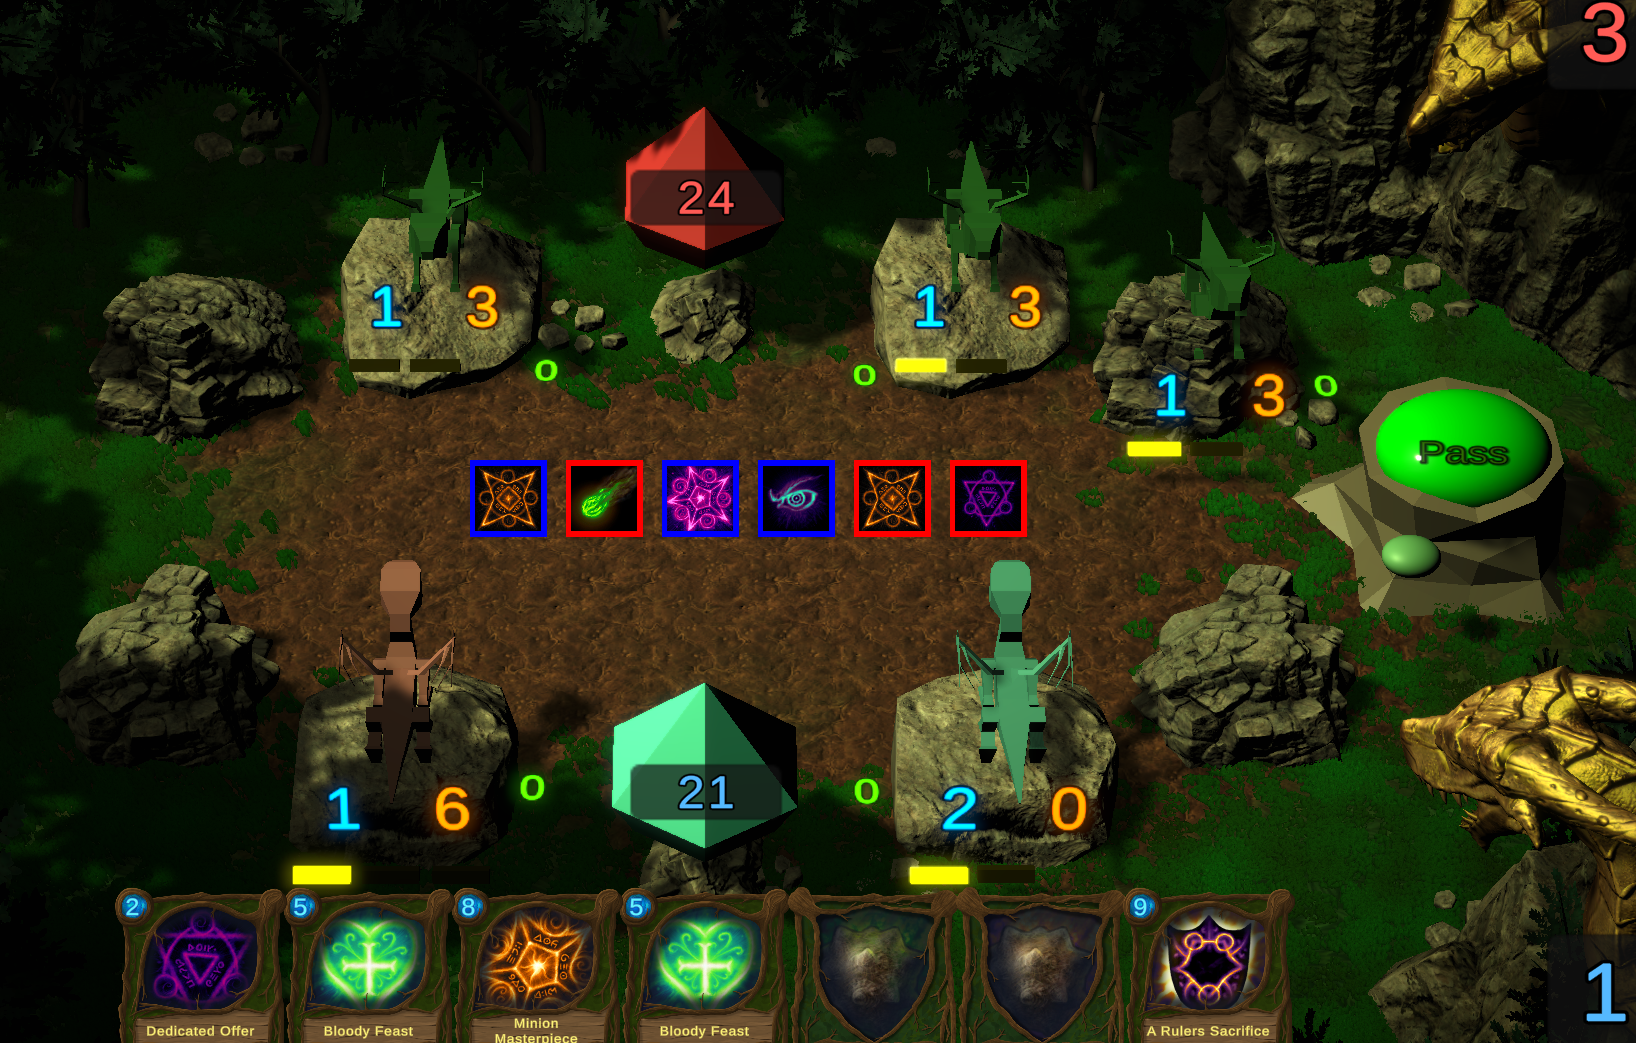
This is an updated image of the prototype that we had previously shown.
Naturally every visual aspect is only a placeholder (for those who have seen them, the lasers the dragons shoot when they attack are also placeholders, and later on will be replaced for a flying animation into a breath attack). What truly matters here, is the structure and the elements present in your view.
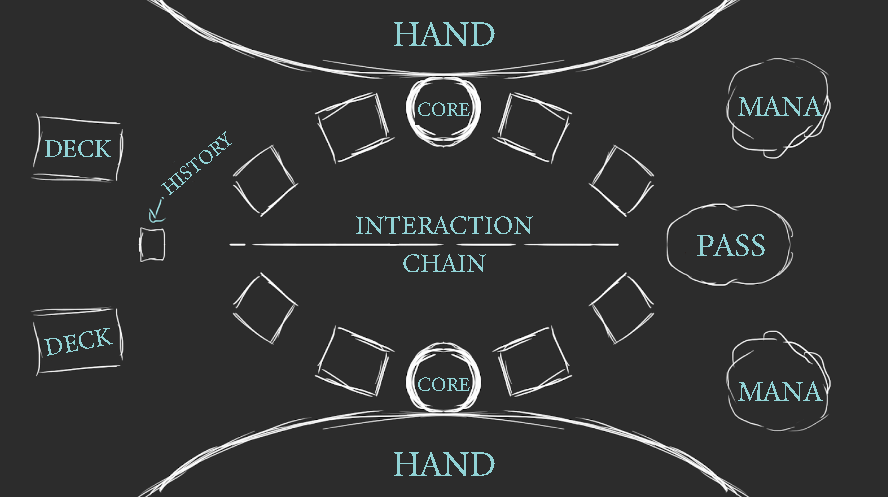
As you can see in the image above (sketch of the finalized view) the structure is very self explanatory.
The screen is divided in 2 fields (bottom for player and top for opponent), with the center being where they clash through the use of cards (interaction chain is the name for a stack where all the cards that are going to activate accumulate before triggering).
The history is not yet implemented in the prototype and neither are the clicable decks. The history is sort of a log where players can see which cards were used, when, and what was their result. The decks are clickable by the players and show a graveyard with used cards, as well as the opponent's deck list in tournaments/high elo ladder.
The core represents the player's health and the 4 cubes nearing it are the bases in which the player can place the dragons. These bases affect the dragons depending on position as explained further on the pamphlet below.
Finally, going back to the prototype U.I, one question many people had was what in the world are the yellow squares below the dragon. Well now that everything was explained, it should be easily deductible that the small rectangles below the dragon's stats represent the number of turns that dragon has to wait before attacking (every round one of the squares illuminates, until the cycle is complete).
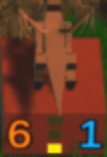 Old and new placeholders for reading the dragon's cycle
If you still have any doubts regarding the game, then please feel free to check the rules pamflet below or ask us in the comments. We'll be more than happy to help, and unlike our draconic patreons, you can rest assured that we won't bite.