Just to be a little bit out of the ordinary here, I'm going to give a brief synopsis of the project that these sorts of animations are being prepared for. Basically, we are in the process of developing an MMORPG TCG (Massively Multiplayer Online Role Playing Game, that is also a Trading Card Game). I'm not entirely certain how many of these types of games are presently out there, but we really feel we're doing something different with our little project here. In TerraForge, you play as an Avatar, which basically plays out as an idol of worship in our game's lore and mythos. The Avatar is analogous to Champions or Heroes that you may have seen in other games. We really did not want to have a conventional card associated with the Avatar, which is something that most of the other games do, even some of the AAA ones. Instead, we wanted to develop fully animated 3D models, and we wanted the animations to be awesome! This is basically where the need for complex 3D modelling and animation comes into play.
Rather than going into a giant explanation of how the Avatars function in our game and the skill-progression system, I'm going to make this short and sweet and move onto the bread and butter 3D modelling/animation discussion. For anyone who's interested in our project and what it actually entails, feel free to look at the actual IndieDB main page, there's a wealth of information there.
First of, I'm gonna drop a video here so you guys can get a feel for what I will be talking about. I generally find it helps to bring an image to the mind before you start bombarding it with text and words.
So if you've watched this 6 second snippet. That took about 13 hours to animate. Now I'm not entirely sure if this is a result of me being an ignorant animation noob or OCD with the little things or just the nature of the beast, but it is what it is. Anyways, onto the explanation. In advance, I apologize if this is useless information for some of the pros out there.
Concept Art / Idea
Before one starts to model, one should have a clear idea of what they intend to model. Having a full illustrated and colored model is a luxury that we don't usually have with our small development team, as a result I often find it beneficial to just scribble out drawings to get ideas for the general feel of what the model should look like and mood it should carry over. Very rough concepts like proportions and themed items. Below is a drawing depicting what I mean, I literally stopped writing this article to produce this in 2-3 minutes time just to show how rough I'm talking about here.
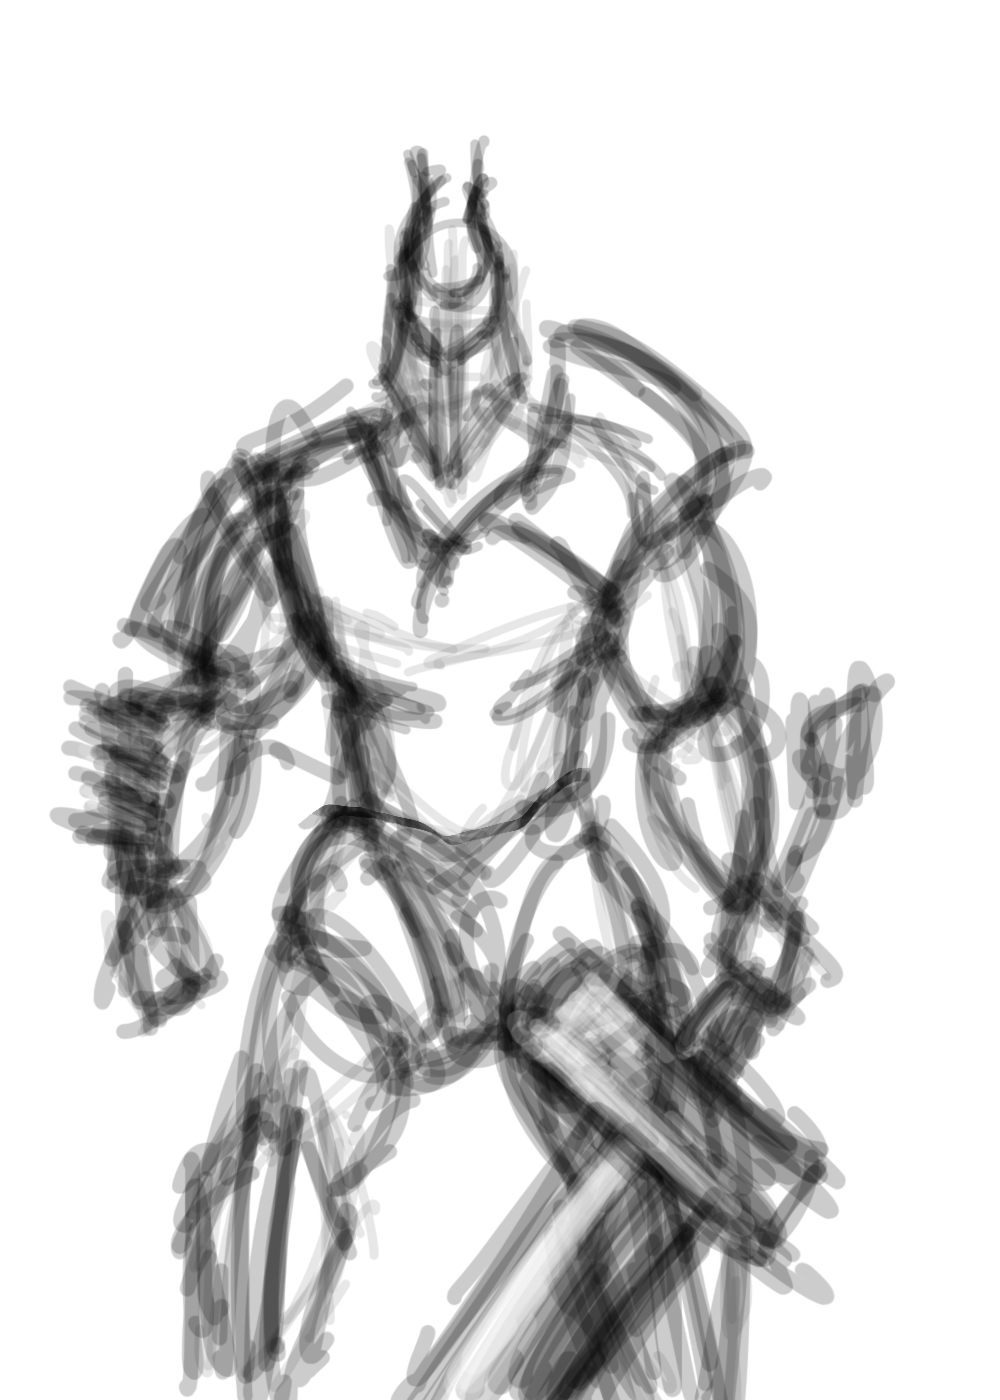
Didn't even finish the legs on this one, and I'm pretty sure that sword hilt is bending abruptly at the hand location. None the less, just the process of drawing this rough image sparked some good ideas, or at least that's the hope.
High Poly Model
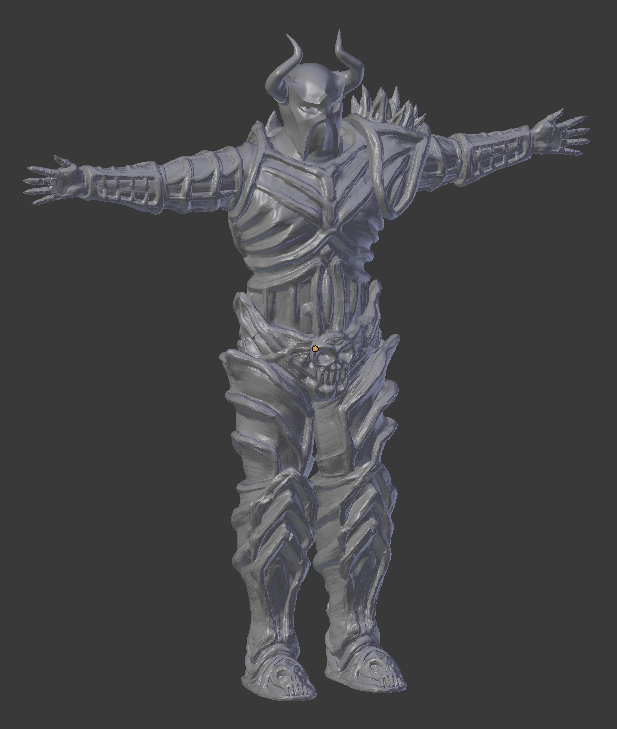
Modelling for games is kind of funny in that first you need to make this awesome very detailed model just so that you can throw it out in the end. The high poly model is basically a model with a huge amount of verticies, basically it goes as high up as your PC is going to handle. I think the StarCraft2 marine model in one of their trailers had something like 80 million verticies. Anyways, this part is basically like conventional clay or marble sculpting, you have a mass that has an infinite number of points defining it, now it's your job to give it form. Simple as that. Below is a picture of our high poly Warrior Avatar model with some very crummy Blender default shaders.
Retopolization
Once your high poly model is done, the next thing you need to do is a process called retopolization. I like to call it 3D tracing. Basically, this process requires you to trace the shell of your high poly model with as few triangles as possible, while still defining the overall topography of the model. There's some scripts out there that can do this for you using triangulation algorithms based on your high poly model; however, I would not recommend these because it makes the UV unwrapping process super annoying and difficult (if not nearly impossible). I will discuss the UV unwrapping in a bit. A good way to tell if you've done a good job with your retopolization is to see if your low poly mesh (the retopolized mesh) essentially creates a perfect envelope around your high poly mesh when viewed from all iso views.
UV Unwrapping
UV unwrapping is an art in itself. It really is. There's some general good practices, but altogether it's just experience and your ability to unfold a 3D object into its flat 2D components. The basic example of this is a cube. Effectively a cube can be defined using a T-shaped arrangement of connected squares (6 squares). I won't spend anymore time talking about UV unwrapping since there's a wealth of good tutorials out there related to this, just know it's something you need to do in the modelling/animation pipeline and that it effectively allows you transfer a wealth of important information that is define in a 2D image, onto your 3D model. Basically, a UV unwrap produces a UV map which is ultimately serves as a means of translating information on a 2D image to 3D space.
Normal Mapping
Once you have your UV mapping coordinates defined, you can proceed to normal mapping your low poly model. In blender I do this by baking the high poly model topography onto the low poly. The normal map basically serves to define how light that is cast on your model will define be translated on its topography. Similar to UV unwrapping, there is a wealth of good tutorials and articles on the internet related to normal mapping, just remember this is really the step that allows an otherwise mundane 3D model to truly shine as a detailed model.
Texture Mapping
Texture mapping is pretty self explanatory. Color your model and texture it using the UV mapping coordinates that were defined. Really that's all there is to it... what you see is what you get.
Ambient Occlusion
Man, I remember the first time I heard this term... I was like WTF is ambient occlusion? I think we first saw it in one of the shaders built into Unity... needless to say we had no idea what it was (we still are a little bit confused). Basically, ambient occlusion is a shadow culling phenomenon, it basically defines those super dark shadows that form in crevices and slits. Similar to normal mapping, usually this is baked onto the low poly model. I find this isn't nearly as necessary as normal mapping per say, but it really does help your model go that extra mile from zero to hero.
I was really planning on discussing the animation in this post, but honestly given that it has gone on as long as it has, I feel that I'll leave the discussion for a Part 2 post.
Now to get the gluttonous marketing out of the way :P
If you're interested in our project feel free to check out our IndieDB home page and check us out on Steam Greenlight :)
Support us on Steam Greenlight!

Cheers!

Lots of work, good you have an animator.
Yeah it definitely helps haha!