After starting a Unity project (or booting original Unity car-racing one).
1. Select Edit -> Project Settings -> Input
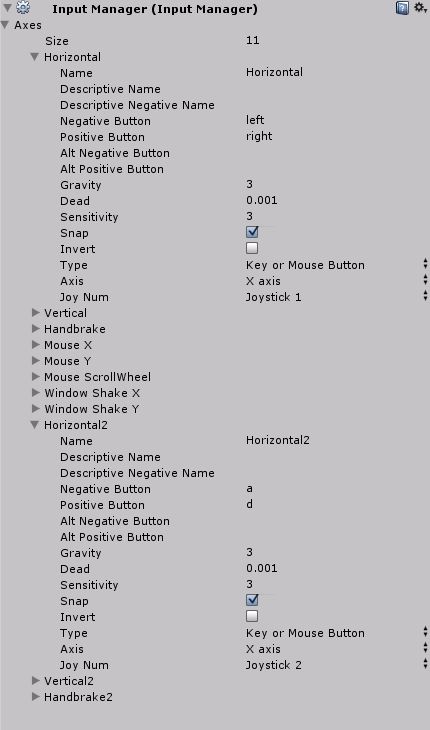
2. In CarEdu, Fire Axes (Fire1, Fire2, Fire3) were removed, and only 11 were left:
Horizontal, Vertical, Handbrake, Mouse X, Mouse Y, Mouse ScrollWheel, Window Shake X, Window Shake Y, Horizontal2, Vertical2, Handbrake2
As you can see, also Jump axes were renamed to Handbrake axes, and instead of having two Horizontal (Horizontal, Horizontal), there is Horizontal and Horizontal2. The number 2 points out which players own which "axes", i.e. keys.
In Horizontal axis Alt Negative Button and Alt Positive Button settings were erased.
In Horizontal2 axis alt Negative and Positive buttons were defined ("a" and "d" keyboard keys), and other options (such as Gravity, Dead, Sensitivity, Snap, etc.) were made after Horizontal.
Also notice change in Joy Num property - it was changed to Joystick 1, and Joystick 2, respectively.
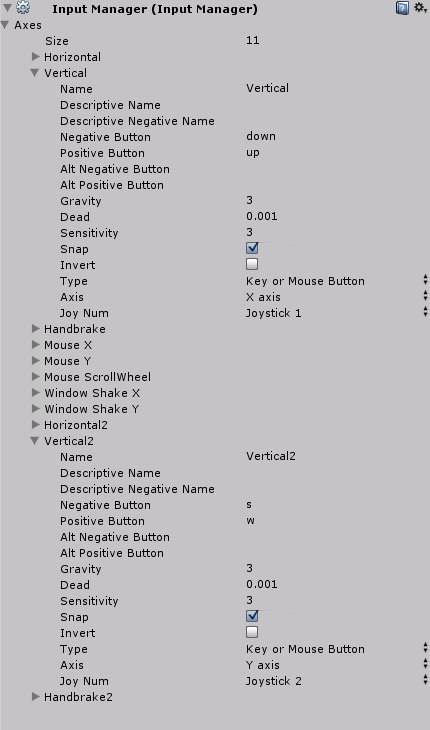
Same was done for Vertical (Vertical, Vertical2) axes.
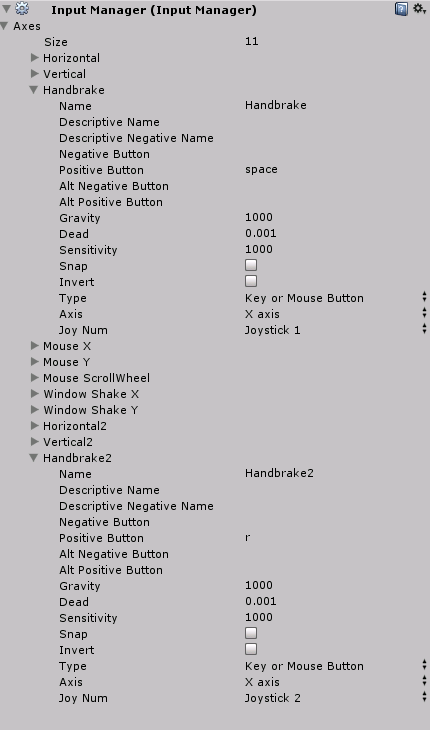
Also, Handbrakes were set appropriately. You can compare them all with input settings of the original Car-racing tutorial by Unity.
See pictures below to see the everything done.
Mouse X, Mouse Y, Mouse ScrollWheel, Window Shake X, Window Shake Y axes were left untouched.
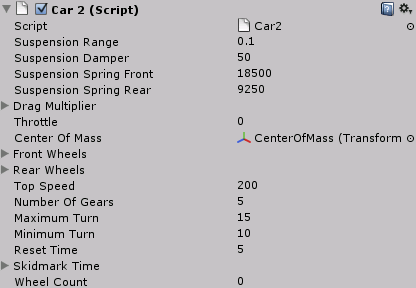
Also, notice that in Project section, in the directory Scripts/JavaScripts, there is a new script Car2.js that was created using duplication function of Unity (CTRL + D).
The entire class Wheel was removed from the Car2 script, since only one class with such a name can exist.
class Wheel
{
	var collider : WheelCollider;
	var wheelGraphic : Transform;
	var tireGraphic : Transform;
	var driveWheel : boolean = false;
	var steerWheel : boolean = false;
	var lastSkidmark : int = -1;
	var lastEmitPosition : Vector3 = Vector3.zero;
	var lastEmitTime : float = Time.time;
	var wheelVelo : Vector3 = Vector3.zero;
	var groundSpeed : Vector3 = Vector3.zero;
}
Then look at the code itself of Car2.js. What has changed? Can you spot it? ;-)
As you can see, we need to allow both players to control their respective cars (or characters if you make your own game with the splitscreen multiplayer). So we scroll down to this function:
function GetInput()
{
	throttle = Input.GetAxis("Vertical2");
	steer = Input.GetAxis("Horizontal2");

	CheckHandbrake();
}
In this function, there are two different axes for each player, see below.
Car1.js
throttle = Input.GetAxis("Vertical");
steer = Input.GetAxis("Horizontal");
Car2.js
throttle = Input.GetAxis("Vertical2");
steer = Input.GetAxis("Horizontal2");
Vertical2 and Horizontal2 are names of the axes you set earlier in Input Manager. If you renamed your second Horizontal to e.g. Player2Horizontal, and your second Vertical axis to Player2Vertical, you would have to set such axes:
throttle = Input.GetAxis("Player2Vertical");
steer = Input.GetAxis("Player2Horizontal");
So proper keys are mapped to proper players.
You need to set handbrakes right, too. You need to find CheckHandbrake() function in Car.js. Below its code and structure:
function CheckHandbrake()
{
	if(Input.GetKey("space"))
	{
		if(!handbrake)
		{
			handbrake = true;
			handbrakeTime = Time.time;
			dragMultiplier.x = initialDragMultiplierX * handbrakeXDragFactor;
		}
	}
	else if(handbrake)
	{
		handbrake = false;
		StartCoroutine(StopHandbraking(Mathf.Min(5, Time.time - handbrakeTime)));
	}
}
There's a line that will interest us most:
if(Input.GetKey("space"))
As you can figure out, there is another button set for the second player.
Here:
if(Input.GetKey("r"))
The "r" keyboard key will be used by the second player to brake.
Also remember to set the Car2 object itself to the Car2.js script, by clicking Car2 object and dragging Car2.js script onto the car, as below:
All done. :-)


This comment is currently awaiting admin approval, join now to view.
This comment is currently awaiting admin approval, join now to view.
This comment is currently awaiting admin approval, join now to view.
This comment is currently awaiting admin approval, join now to view.