Hi Wizards and Sorceresses,
from today on, you will be able to produce seamless terrains for your games in great pixelart! Many times I wrote about my heretical approach to produce unlegit pixelous assets from photos in order to save times, but in professional quality.
“With my method you’ll quickly produce stunning assets for your game, dear Oni!”
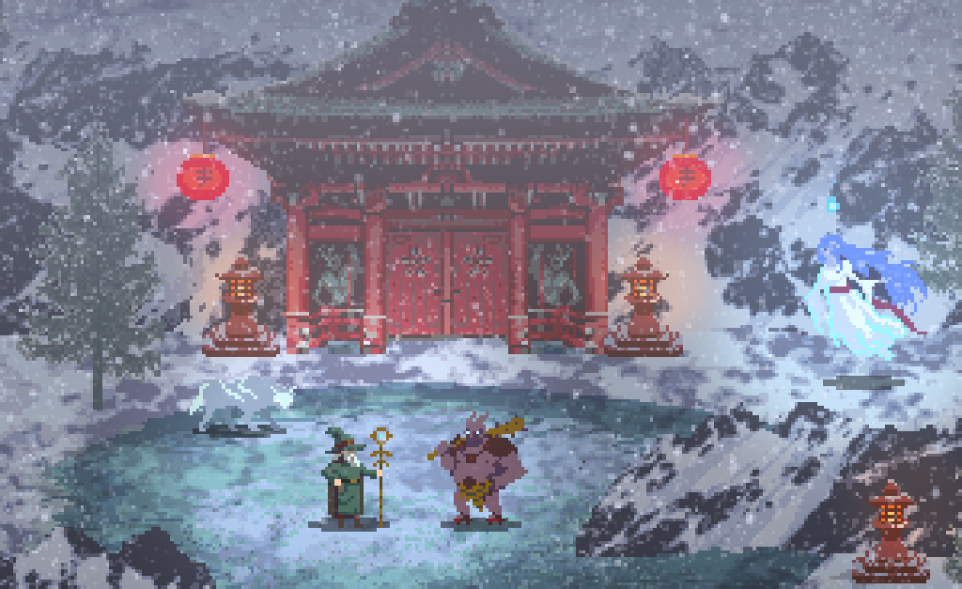
The floors I realized for the fire stage and the ice stage convinced me I was right, and that my method could be spread and shared.I’m sure there’s something similar on the net, but I never found an accurate and professional solution as the one I created.
So today, let me introduce Lynx’ Heretical Pixel Art Method. At the moment there are just written instructions and pics for a seamless basic terrain, but I wish to make a video tutorial soon.
Let’s start!
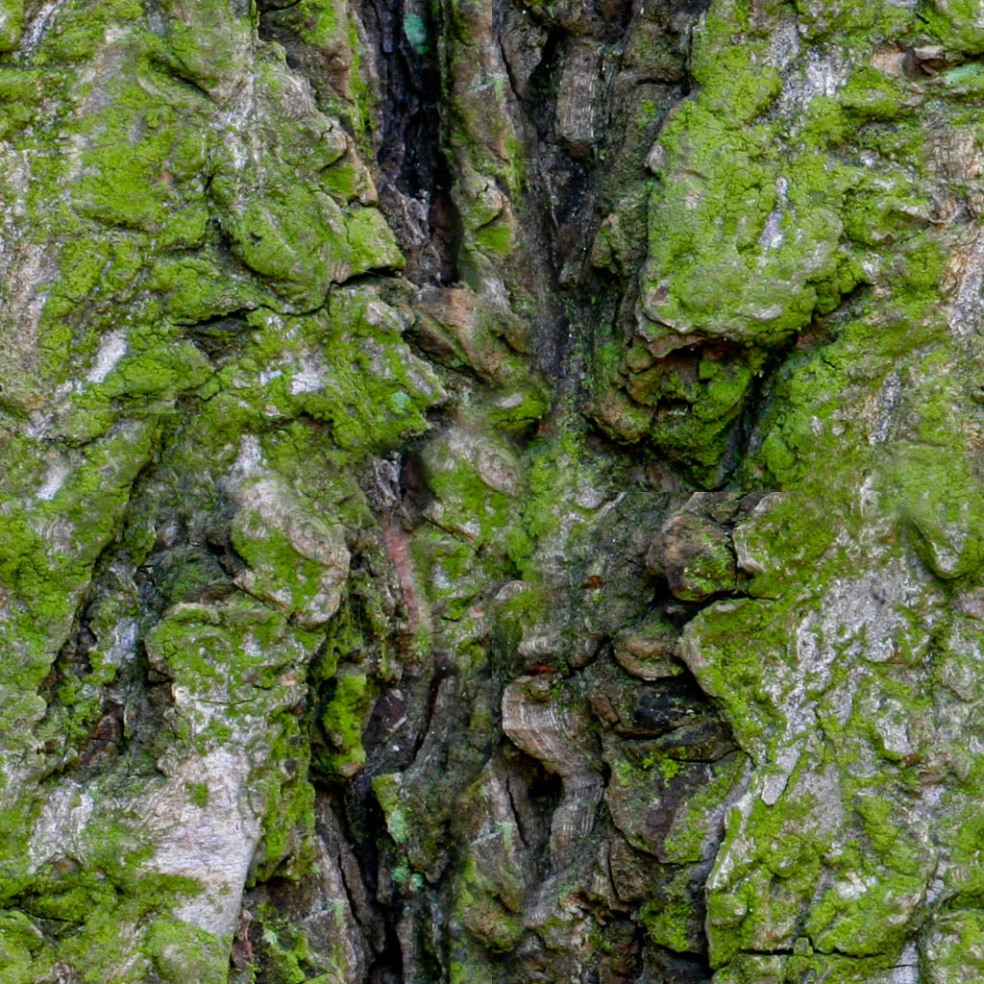
1 – Open wide textures full res
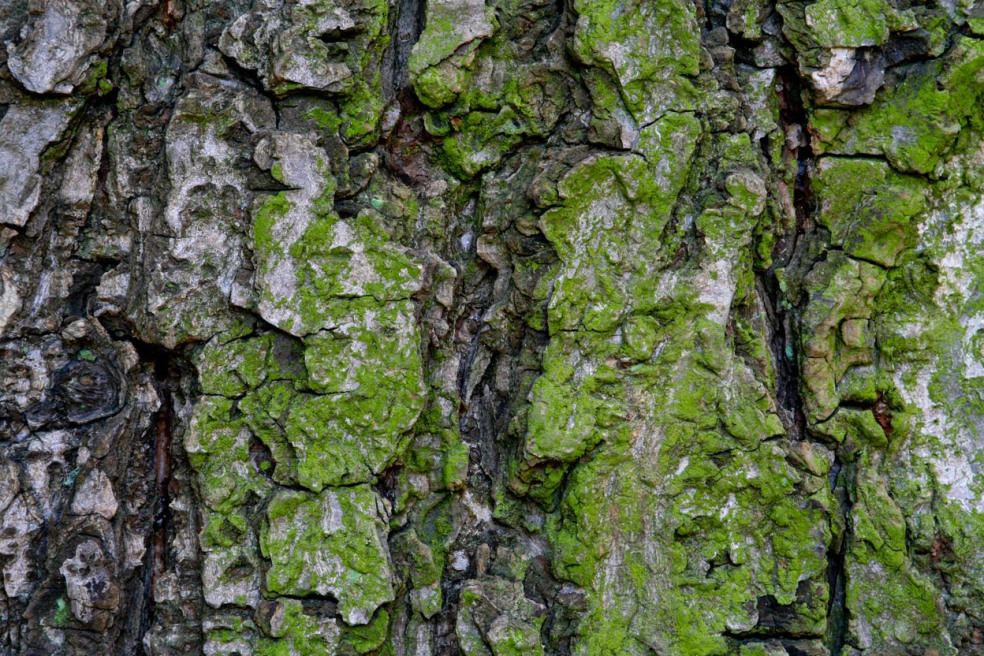
The web is Fulfill with HD gorgeous textures. Choose yours and go ahead! There’s no need for a 4K image, just be sure the file is more than 1024 x 1024 px. Natural pattern as tree’s bark, molds and soils are my favorites.
2 – Square crop with 1024×1024 px
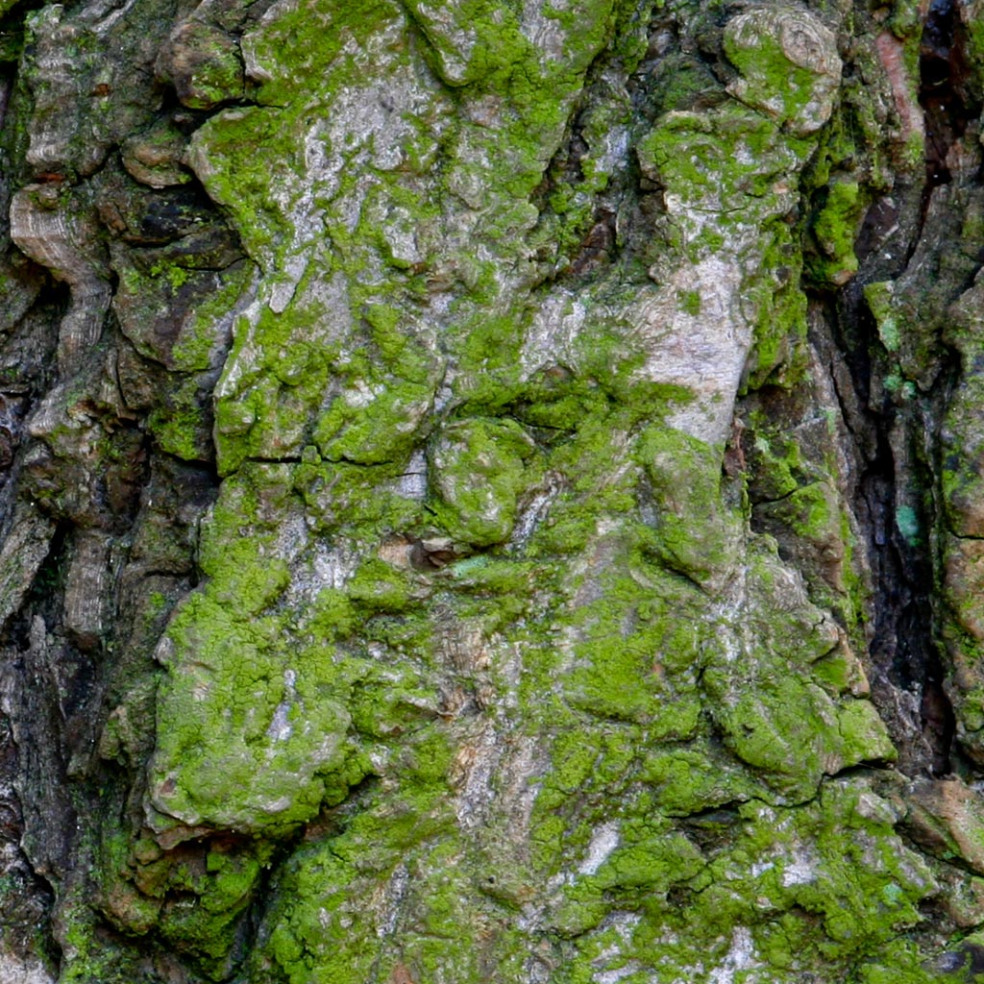
Select a square of 1024×1024 px in your texture. Be sure that the left and right borders more or less match with each other, as well as the top and bottom borders. This will be helpful in the next steps.
3 – Offset your textured square
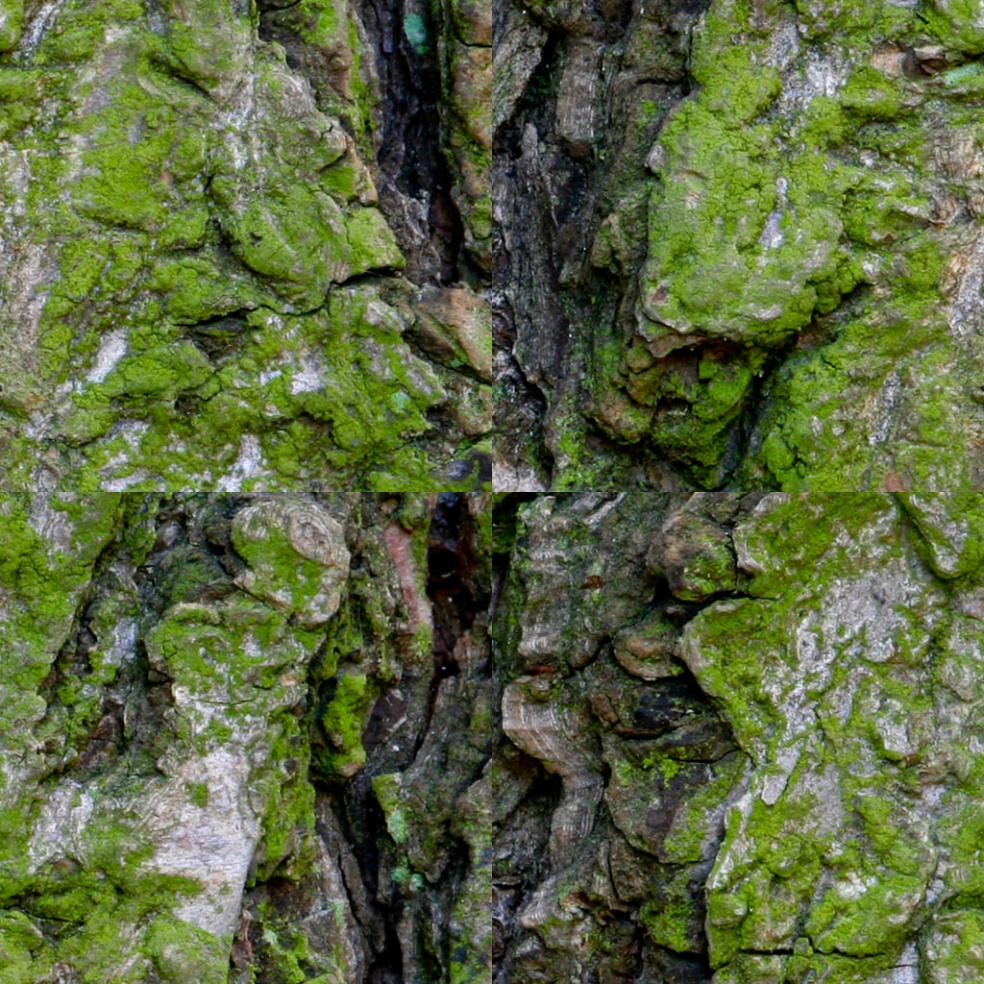
In order to make your texture seamless, click Filter -> Other -> Offset. Set the horizontal and vertical cursors both on 512 px, half of your square. The cross in the middle of the image are the borders we’re gonna eliminate.
4 – Retouch the axis with Clone Stamp Tool
With the clone stamp tool you can eliminate the tears. I used a 50% soft brush big enough to not get lost into details, but keep the texture fresh. Now your texture is seamless.
5 – Shrink for a bird-view effect

Image ->Image Size: reduce high to 512 px, obtaining a rectangle. This is useful to give our texture an apparent inclination, simulating a bird-view angle instead of a classic top-down.
6 – Reduce the colors’ range
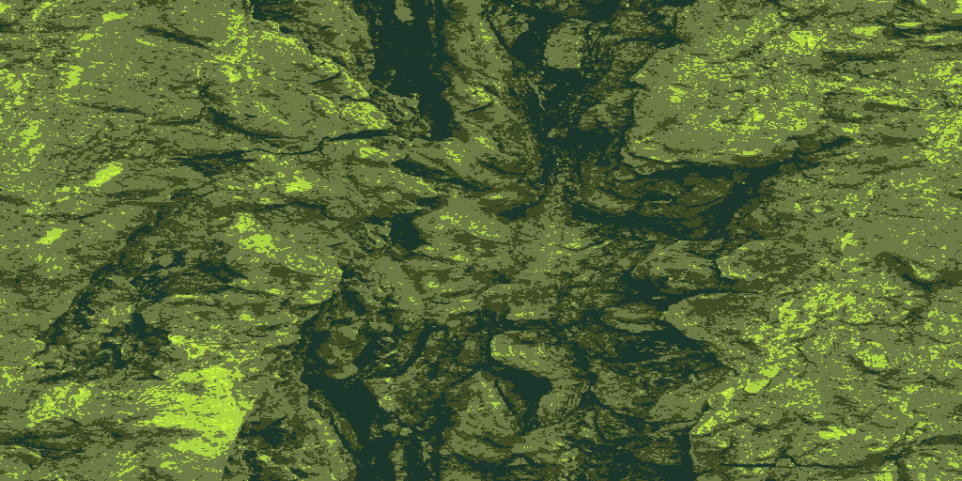
Palette: Personal
This is the most delicate and complicated phase. Image -> Method: Indexed Colors. In the dialog that opens up I insert 5 as the numbers of colors, and shift the palette to Personal, choosing the scale on previous sketches and studies of the stage. If you want to experiment just let yourself go wild, otherwise if you need effective results my advice is to arrive here with a clear colors scheme to not get frustrated. Anyway, remember that you can change colors if you raster the pic in PNG and than shift in RGB again. For my terrains in Wizards of Unica I use 5 colors + alpha. The colors numbers must be balanced with the color depth of your characters and props. Keeping the colors index very short helps to not mess up with playable sprites.
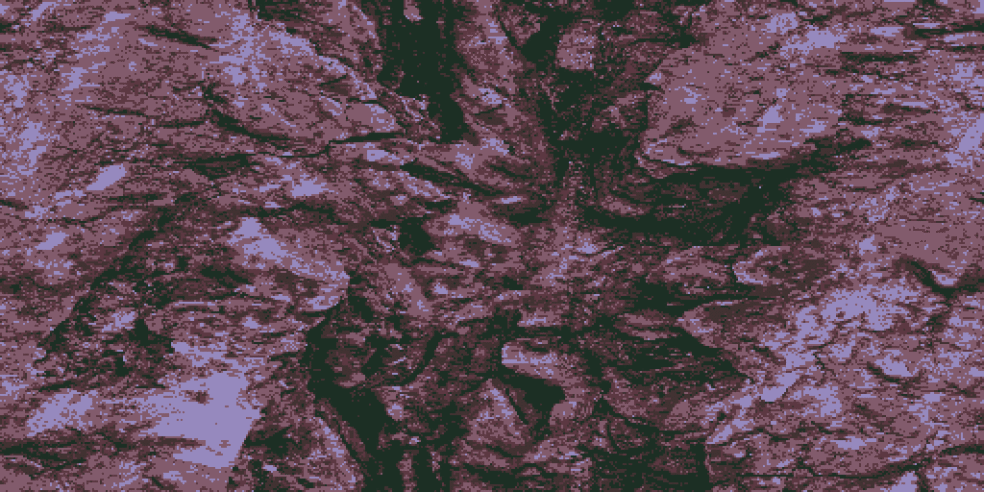
7 – Colors change

Colors substitution with bucket tool
Indexed colors do not work like color substitution: the palette you choose will be applied to the original brightness values, so for example a pale blue will substitute the white and a dark red will be in place of the black. There is no way to put a bright yellow where the black was, but you can simply raster your work saving in PNG, shift again in Method-> RGB and than substitute color by color with the bucket tool (avoid the anti-aliasing check box!!). In this way you can change the deep green of the crevices with orange and give a touch of lava at your terrain.
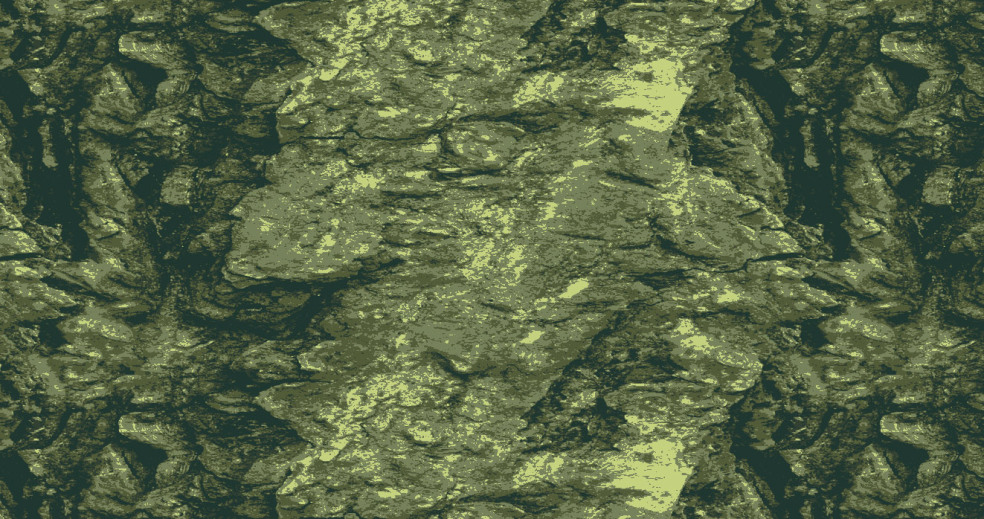
8 – More pixel than ever!
If you want a lower fidelity in the pixel style, just reduce the size once more, i.e from 1024 x 512 to 512 x 256 or less to fit the style of your game. Just remember to always use Nearest Neighbor as interpolation.
As you can see in the picture below, even with just with a few transformations and a 5 greens color scale the final effect is natural and very rich, and seamless. This could be a finished terrain for someone or a good base for a more complicated piece with manual pixel art insert. But whatever your needs are, I hope my method could help you somehow.
Lynx’ Heretical Pixel Art Method is far from finished, but after a whole year of research I wanted to share with you all. The first thing I noticed is that changing the sequence of the operation (i.e. reduce the vertical size after or before the 1024×1024 crop, or add the color index at first) change a lot of things. So if you are pixel geeks like me, and you start to play with my method please let me know your experiments and results. Lynx’ Heretical Pixel Art Method doesn’t mean to substitute legit pixel art, but is intended as a effective procedure to create great looking assets.
Let me know if you find this useful, thanks for your passion and support
Daniele Lynx Lasalandra – Art Director
tweet @TheBlindLynx

Nice!