How to add an animation:
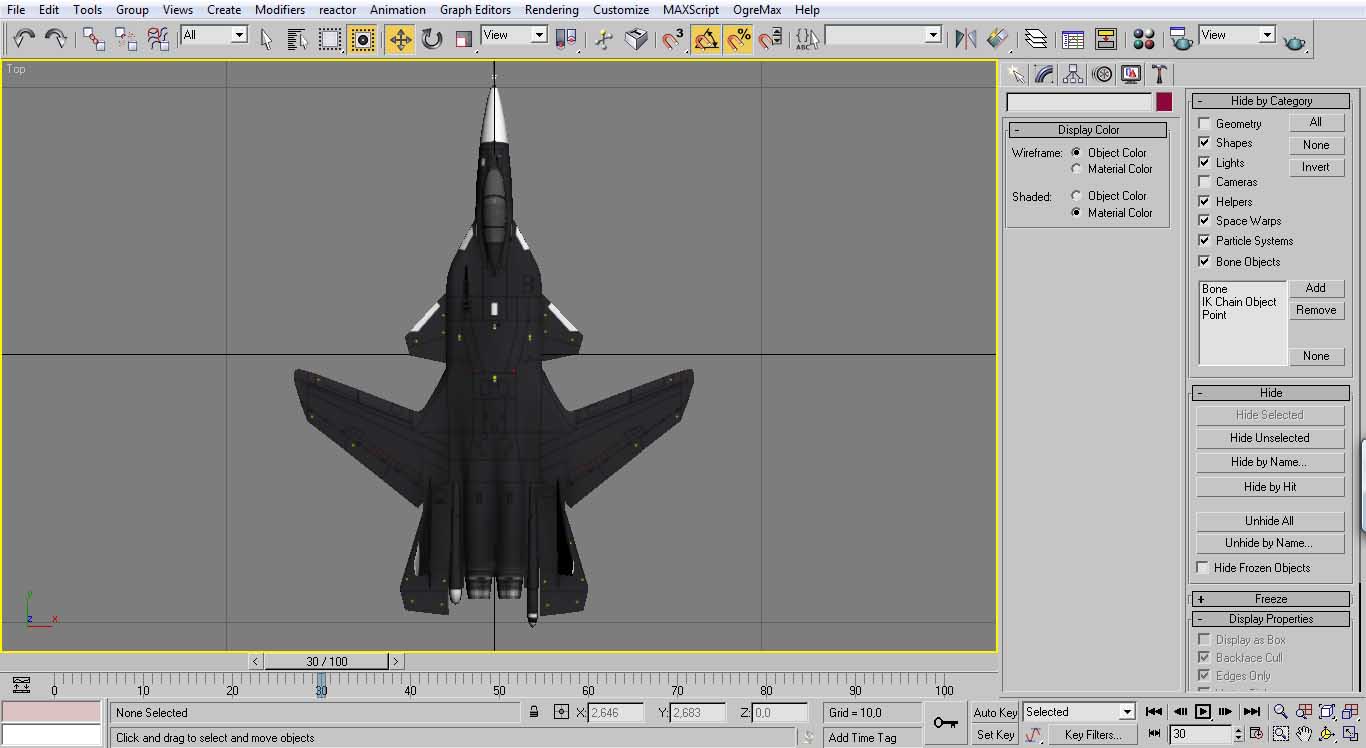
I recommend using the top view.
Place the model in the position [0 0 0]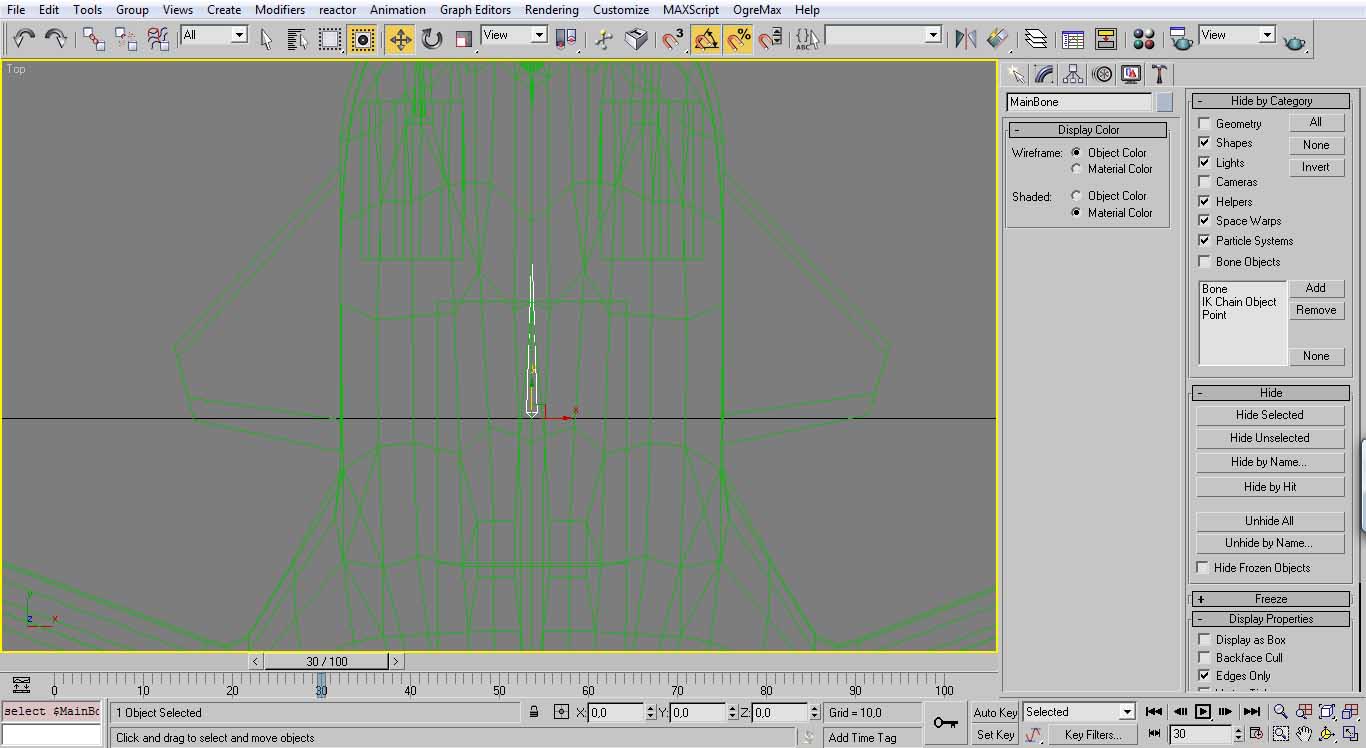
Add the main bone in the position [0 0 0]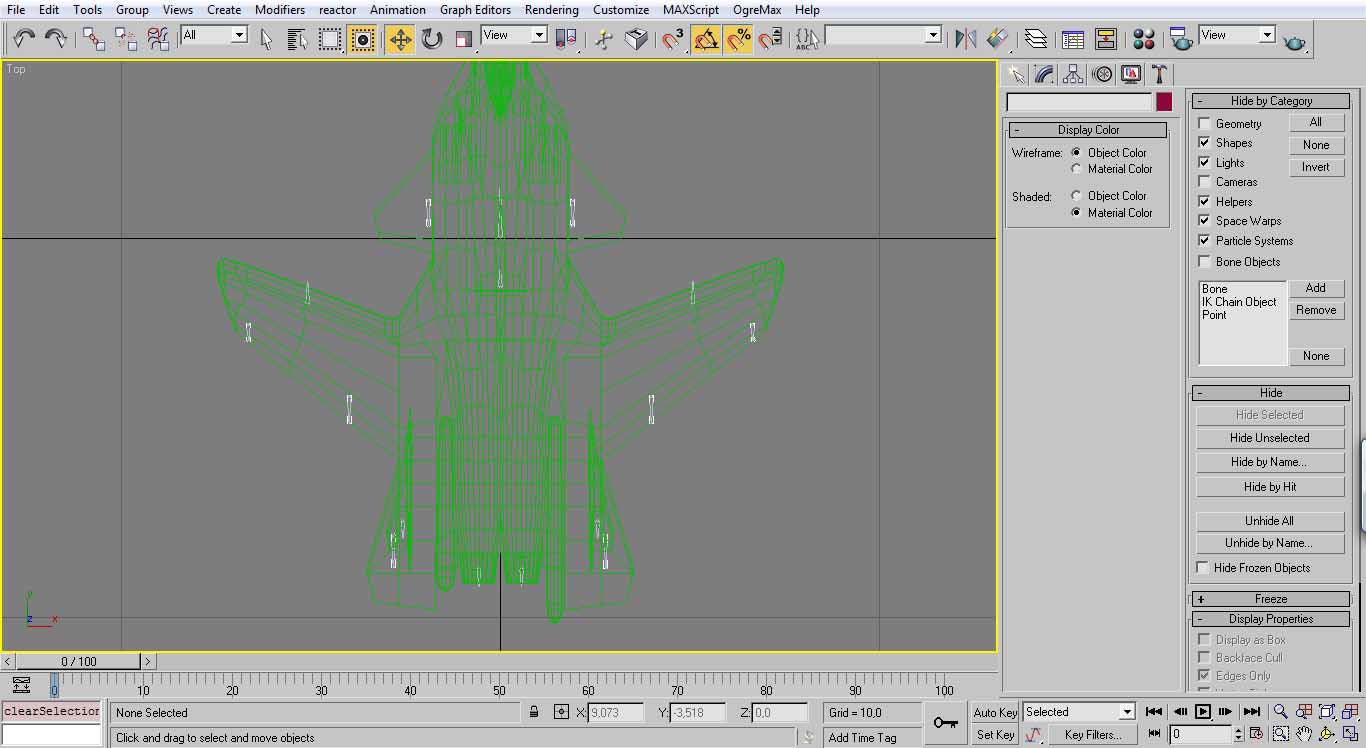
Place the bones for all moving parts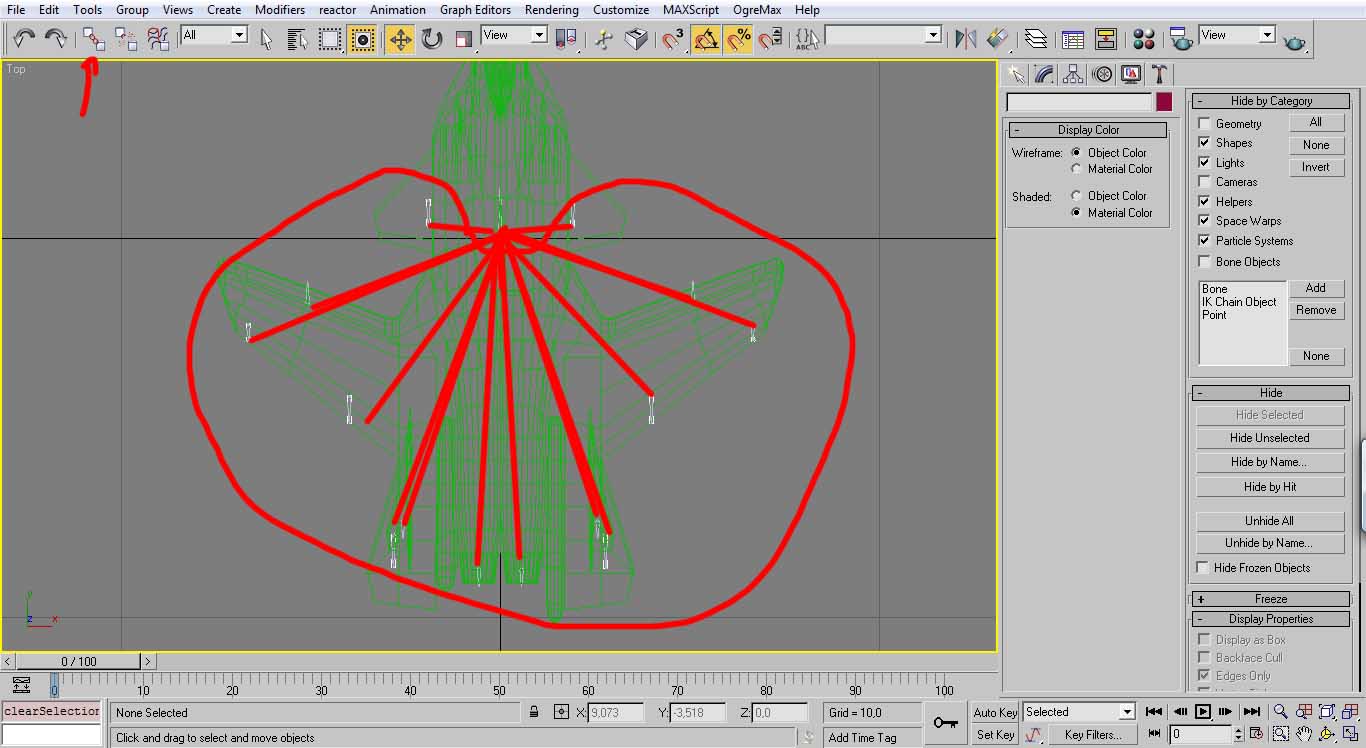
Select all the bones, exploding the main, and link them to the main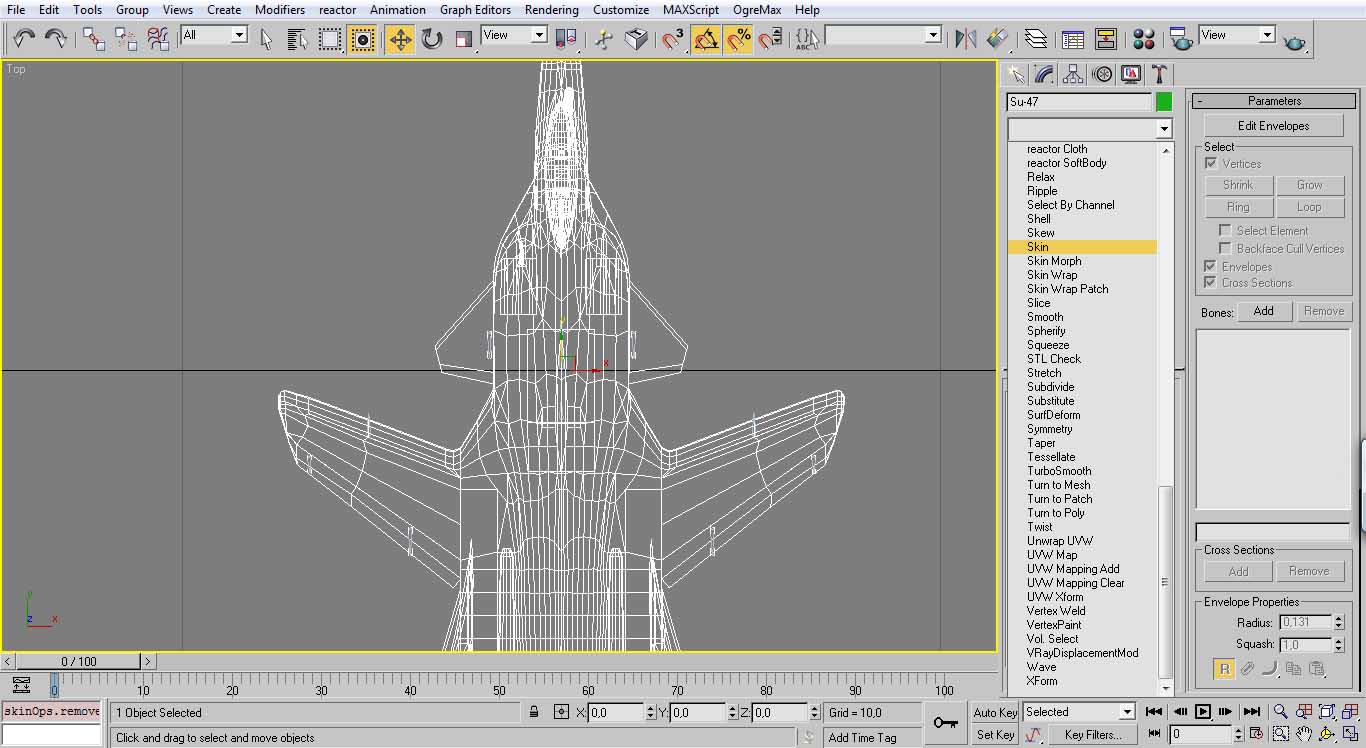
Select the aircraft and select skin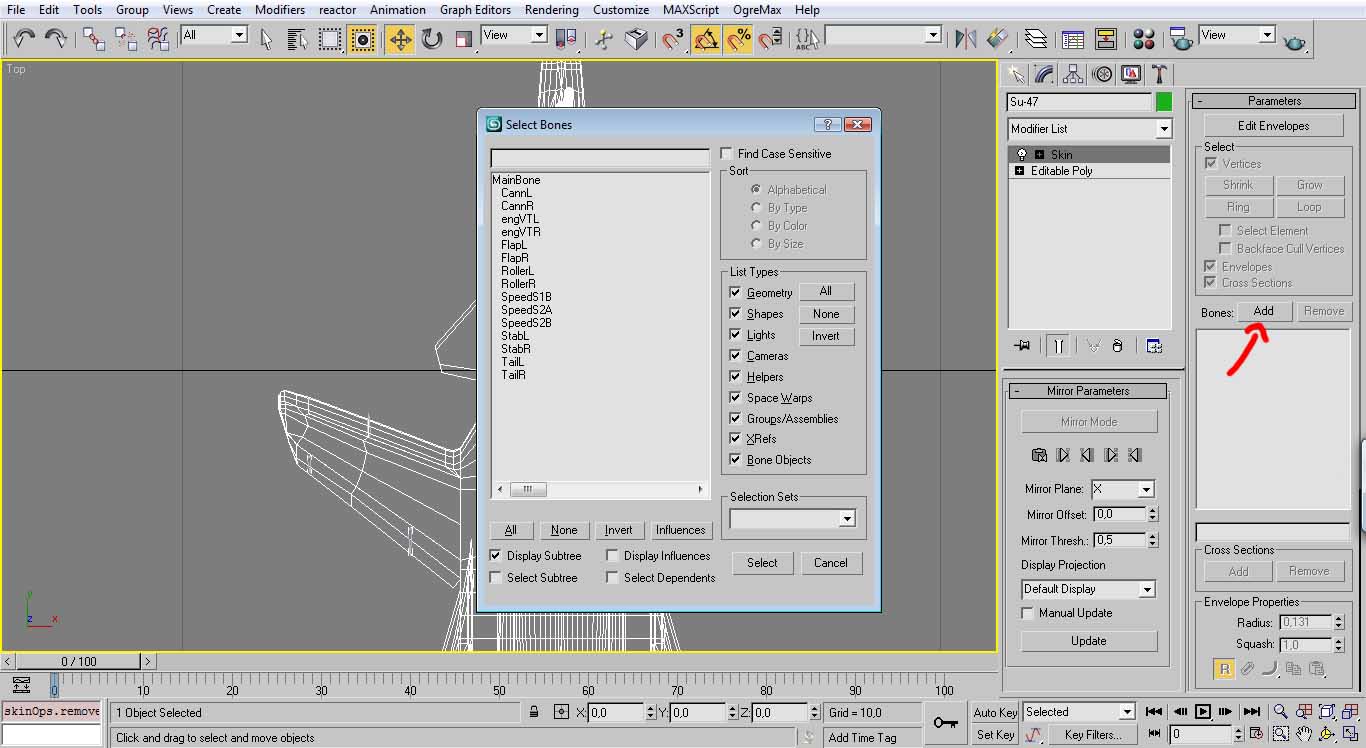
Add all the bones
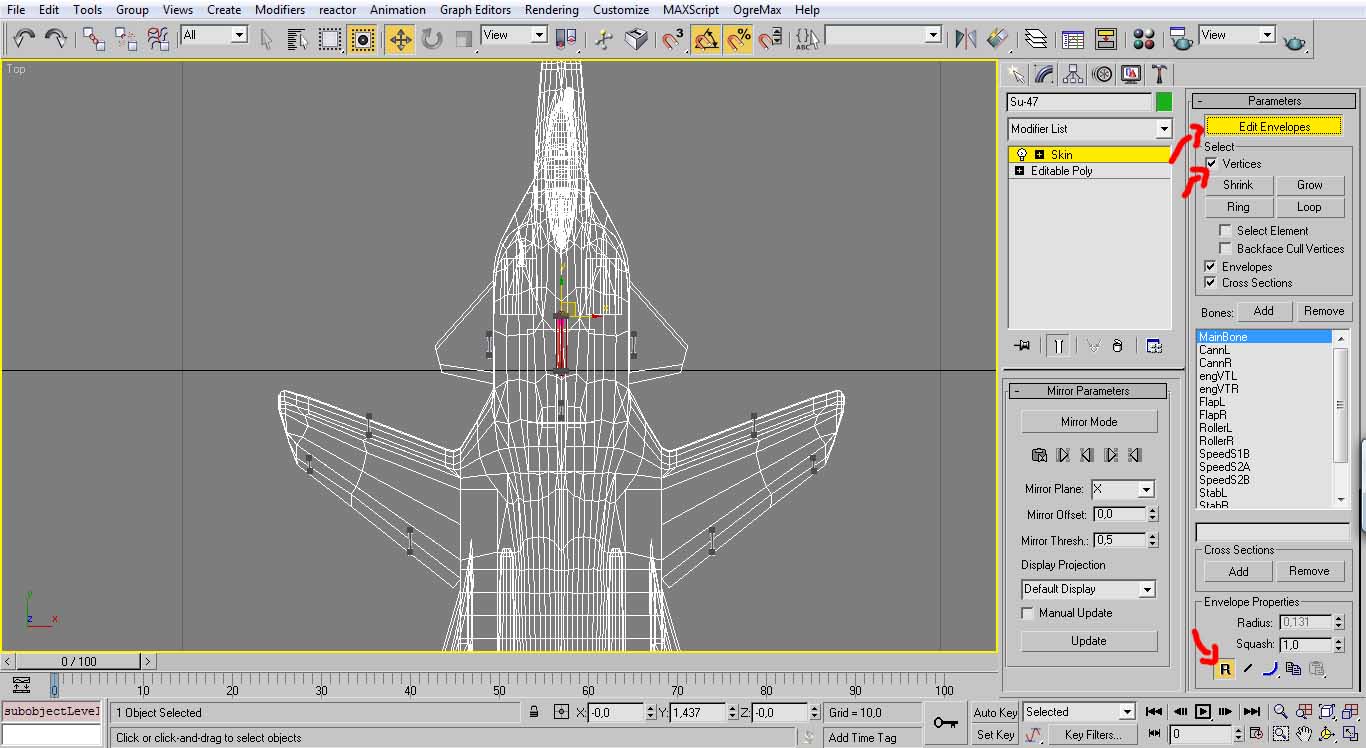
Set up the bones, selecting them individually a press the button [R]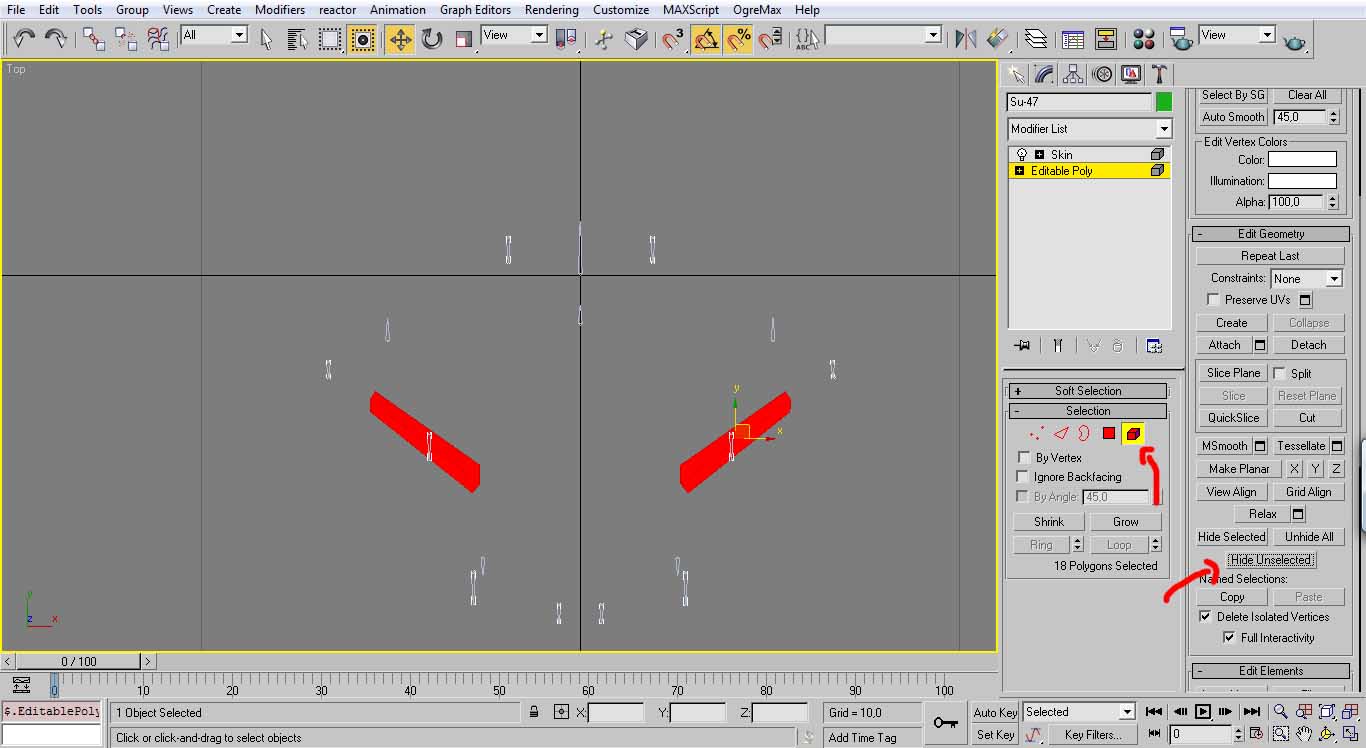
Now go back to the plane and select a control surface to skin, and hiding everything else (how do you do this, depends how the aircraft is modeled)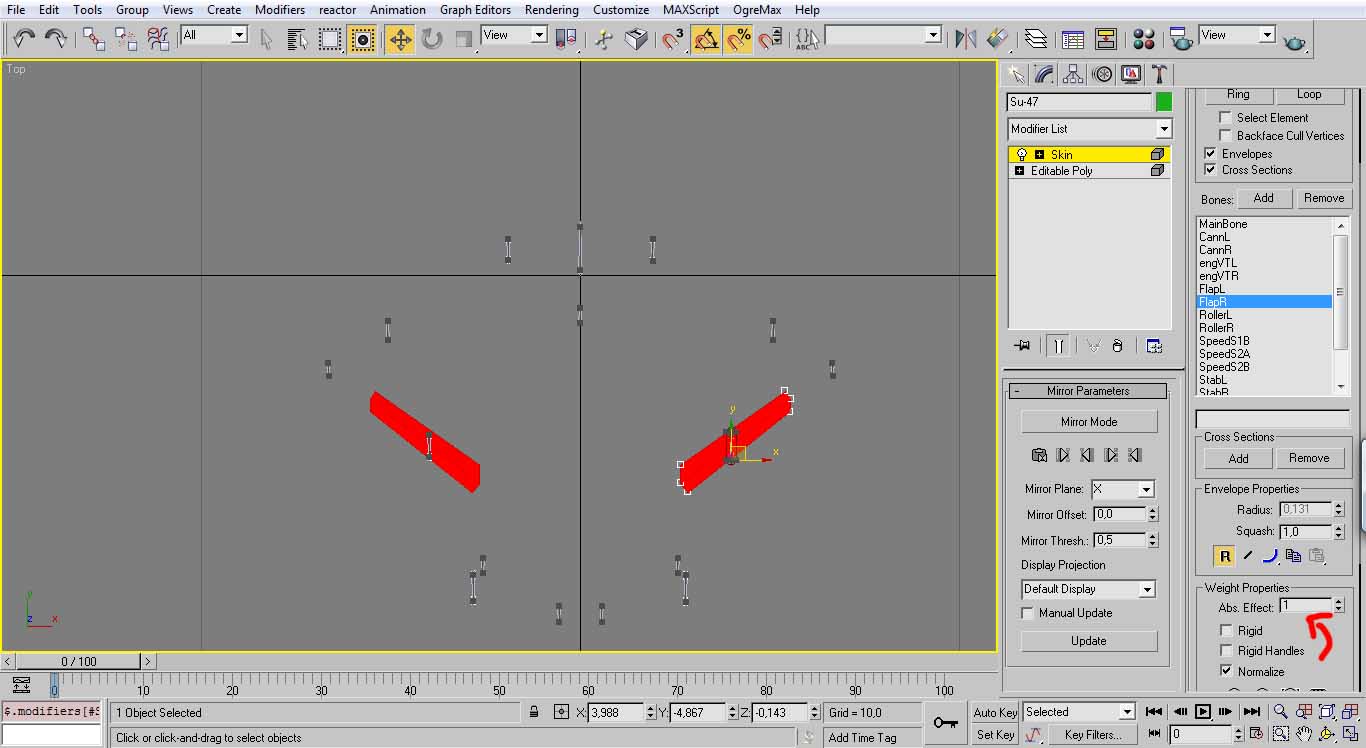
Select the bone that will control that surface and then select the respective vertices. After selecting them, set the [Abs. Effect] to 1
Repeat the process for all moving parts.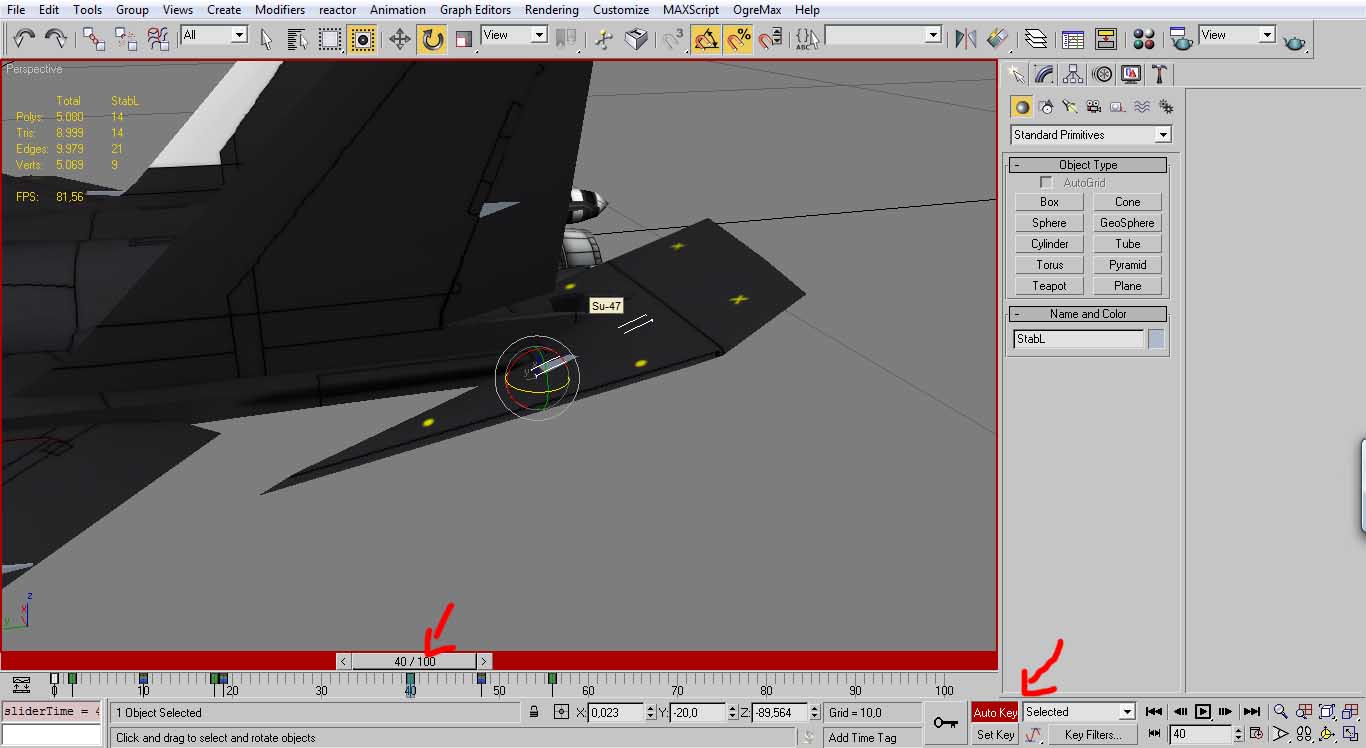
Go back to selecting each bone and animate them the way you like (don’t forget to set the auto key on)
There isn’t any special rule in naming nodes, but some tips in setting up the parameters:
-You don’t necessarily have to call the animations by “AnPitch, AnRoll, AnYaw or AnBrake”
- AnVelSt1 is for animations that varies with the velocity, it is useful for variable sweep wings or flaps (for the su-47 it also it is used for the small parts in the top of the body)
-As for the standard key frames that are used:
For yaw:
X -> key frame turning left
x+5 -> key frame in center
x+10-> key frame turning right
For pitch:
X -> key frame pitching up
x+8 -> key frame in center
x+16-> key frame pitching down
For Roll:
X -> key frame roll left
x+8-> key frame in center
x+16-> key frame roll right
For Brake:
X -> key frame default
x+10-> key frame max brake
For Acceleration:
X -> key frame default
x+10-> key frame max accel
For Velocity state:
X -> key frame default
x+10-> key frame state active
For sub weapon:
[Weapons]
...
SubWeapPos= "-1.076 0.264 -2.838"
SubWeapDirVector = "0 0.00 -1"To find the exact position, place a dummy near the model and copy the position values.
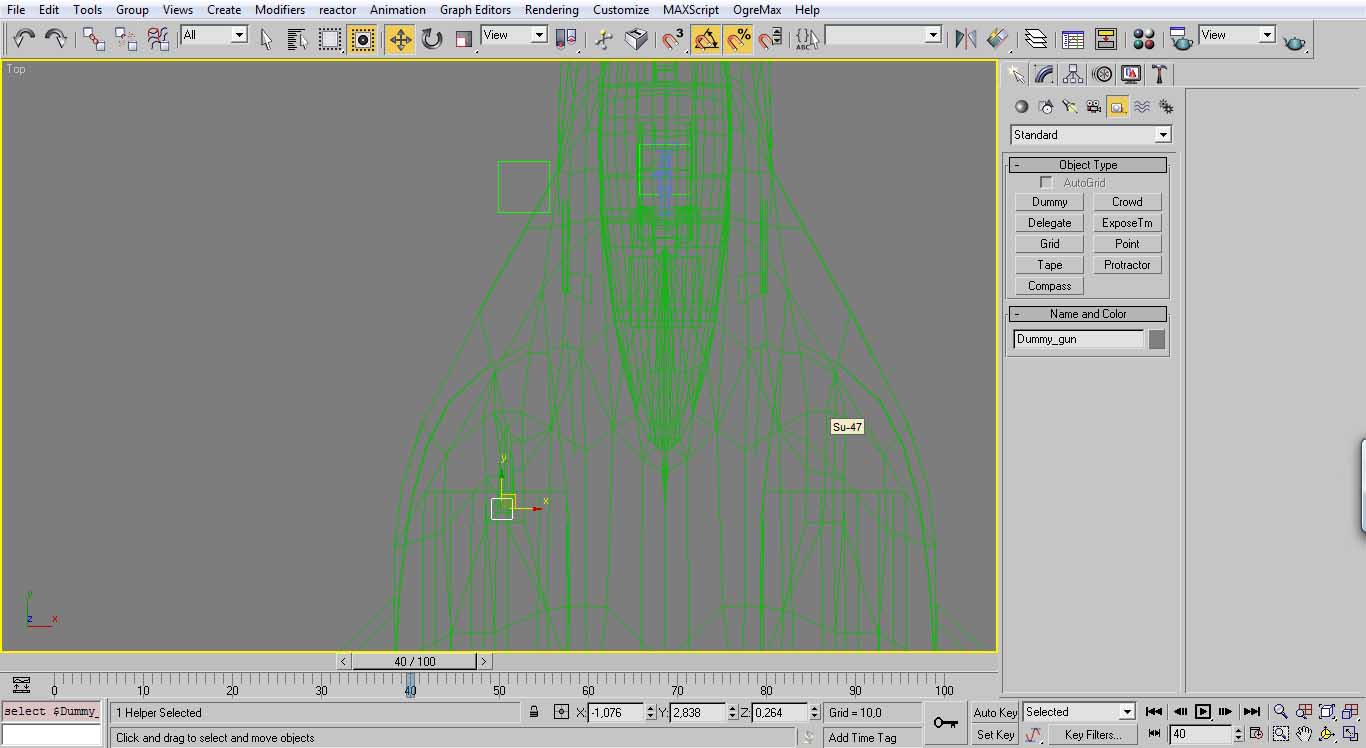
Very important! If your using 3d max there is some covertion in coordinates.
[X,Y,Z] -> in the game become [X,Z,-Y]
Like for example [-1.076 2.838 0.264] become [-1.076 0.264 -2.838]For the engine:
If you ar not using a skeleton set Engine_#_BoneAttach to false
Also if the plane’s engines are not attached to any bone, change the afterburner reactor to:
[Reactors]
AfterBurner_Reactor = “AfterBrn”
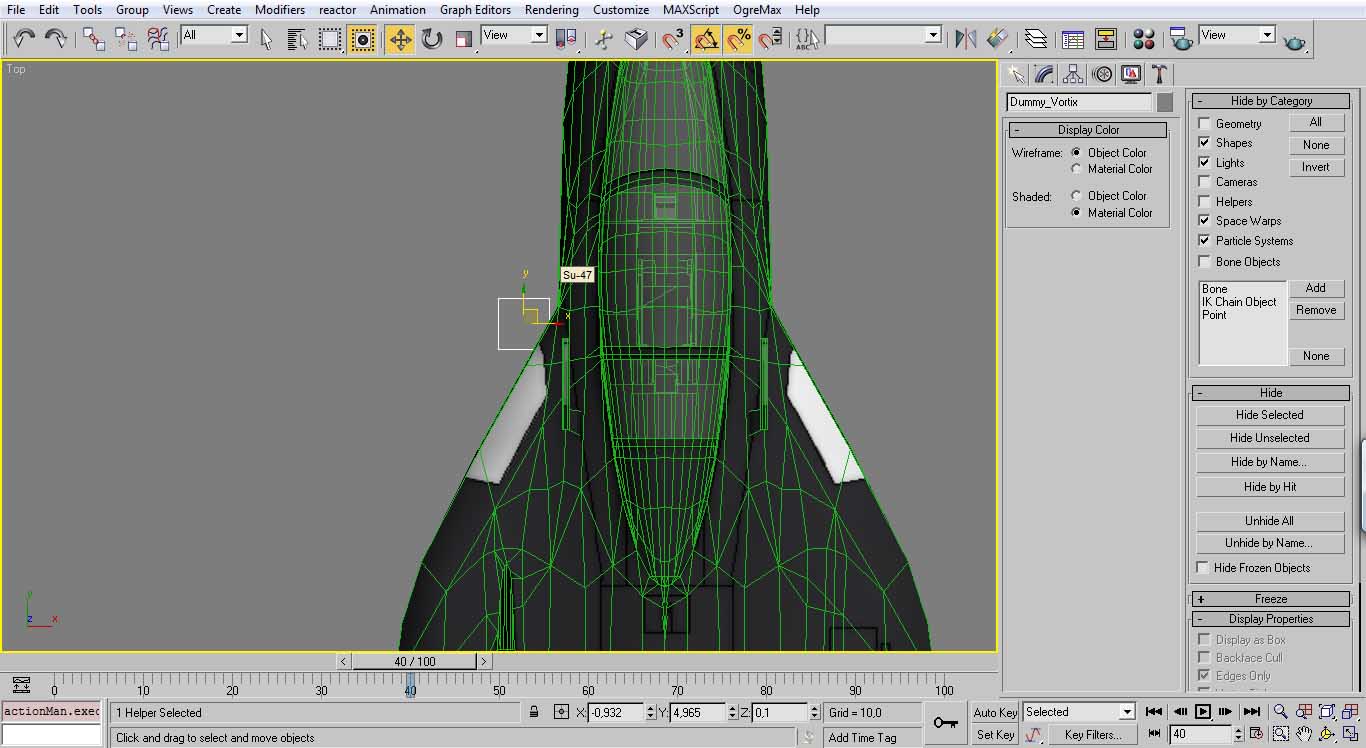
For the vortice:
Is similar to the gun.Place a dummy near the model and copy the values.
The next step is to define the animation names.(this part assumes that you are using the easy ogre exporter, if you don’t have it, you can find it in this link: Ogre3d.org)
So, how to define the animation names:
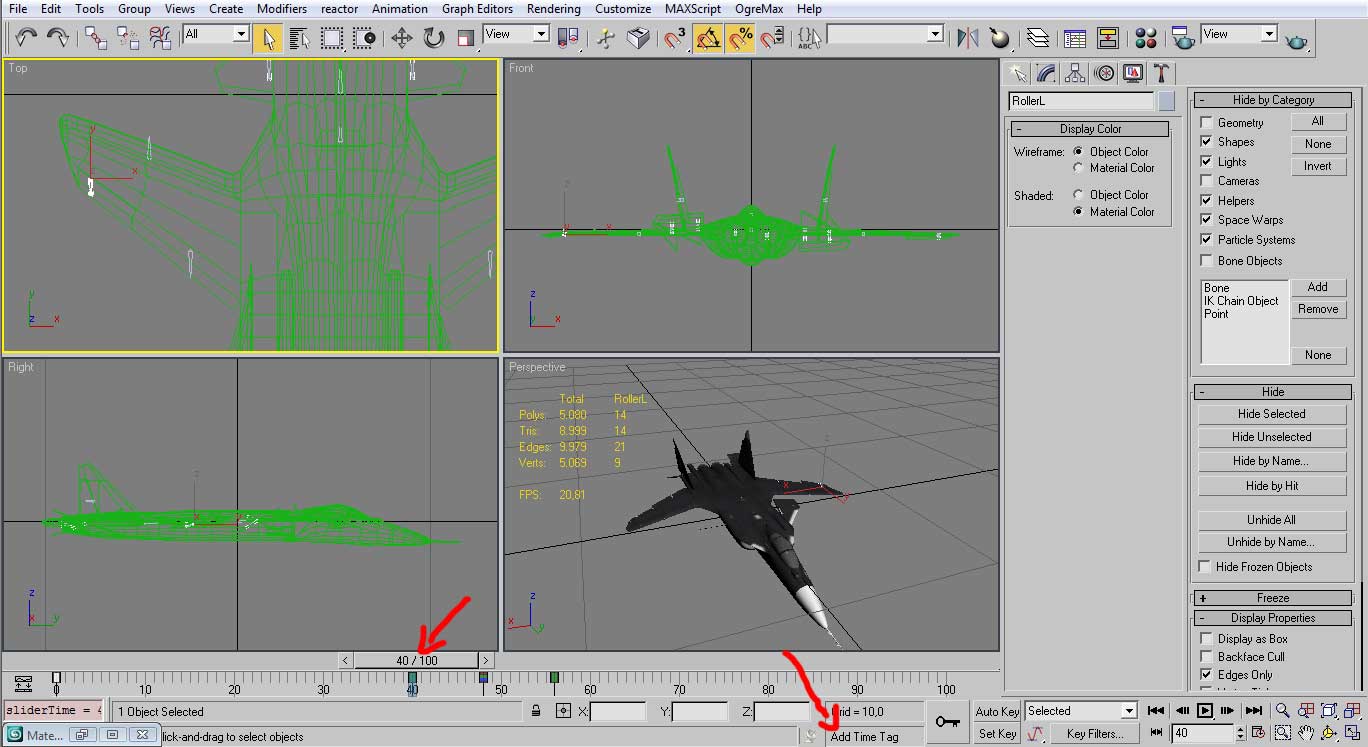
Place the time slider at the start of the animation. Then click in [add Time Tag]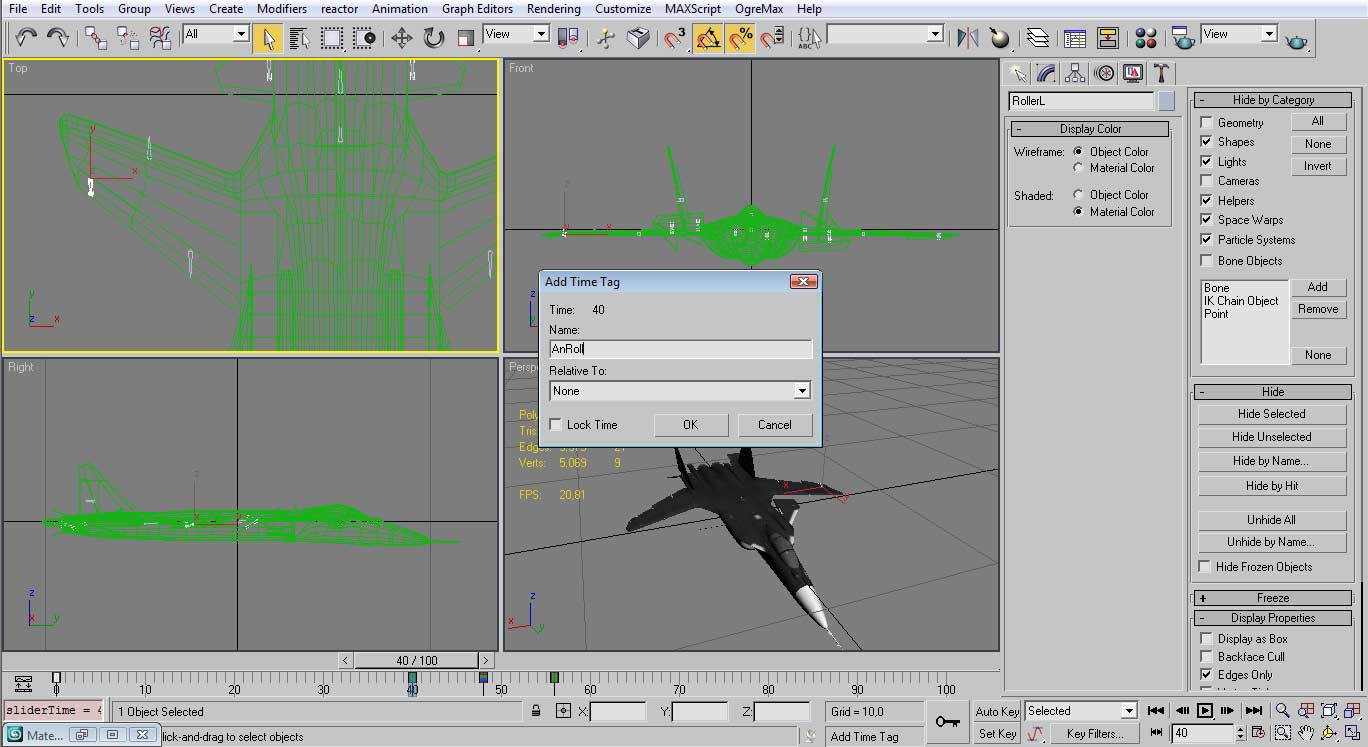
Add the name of the animation that you want.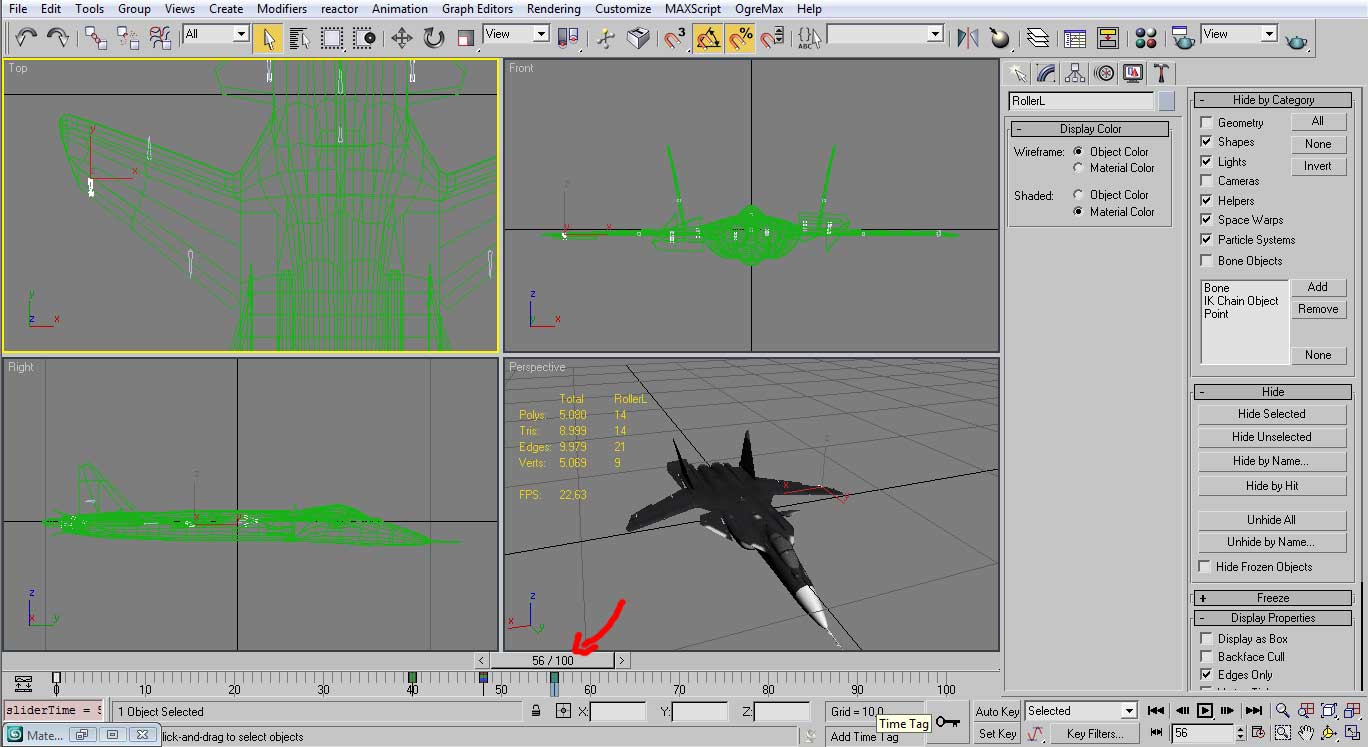
Move the slider to the end of the animation and click [add Time Tag] again.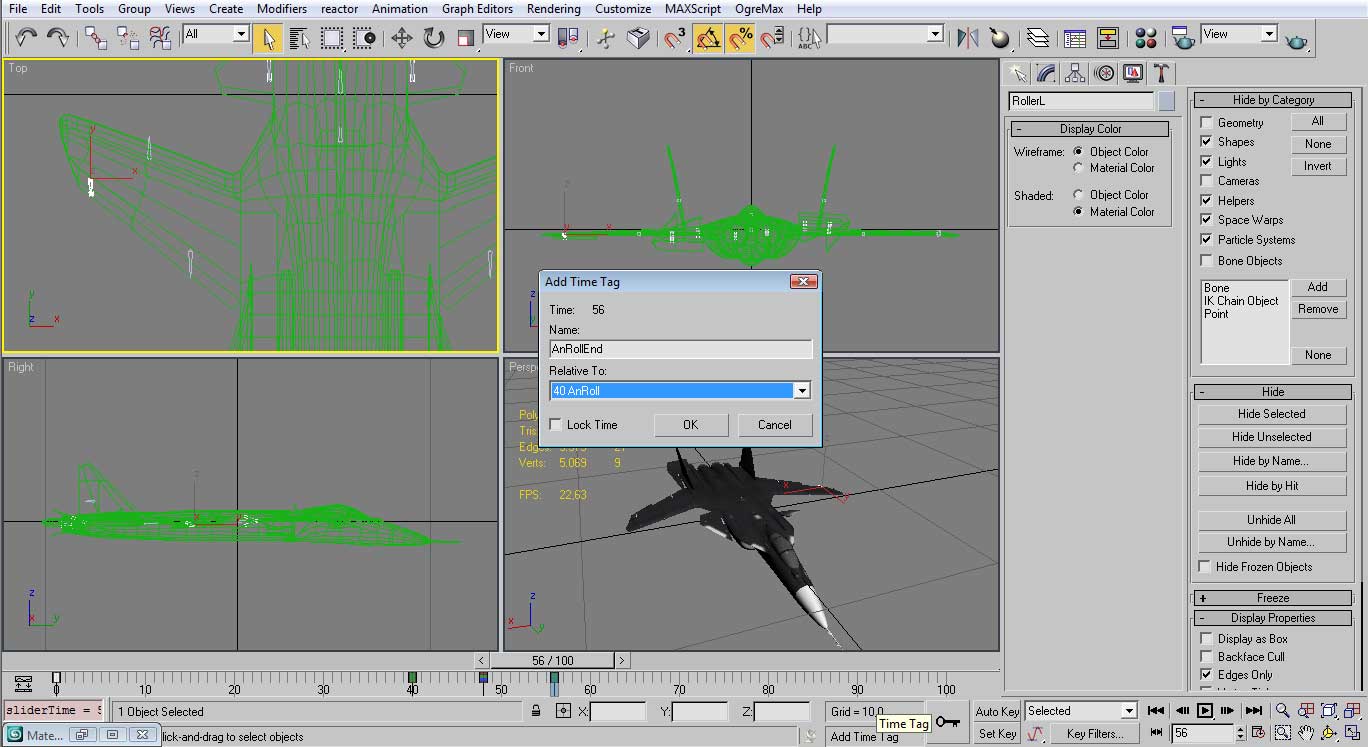
Add the name of the end animation. This name doesn’t matter, what is important is to link back to previous name in the [Relative to:] line.
After setting all the animations, select the plane then go to File->Export Selected and chose:
Ogre Scene (*.Scene)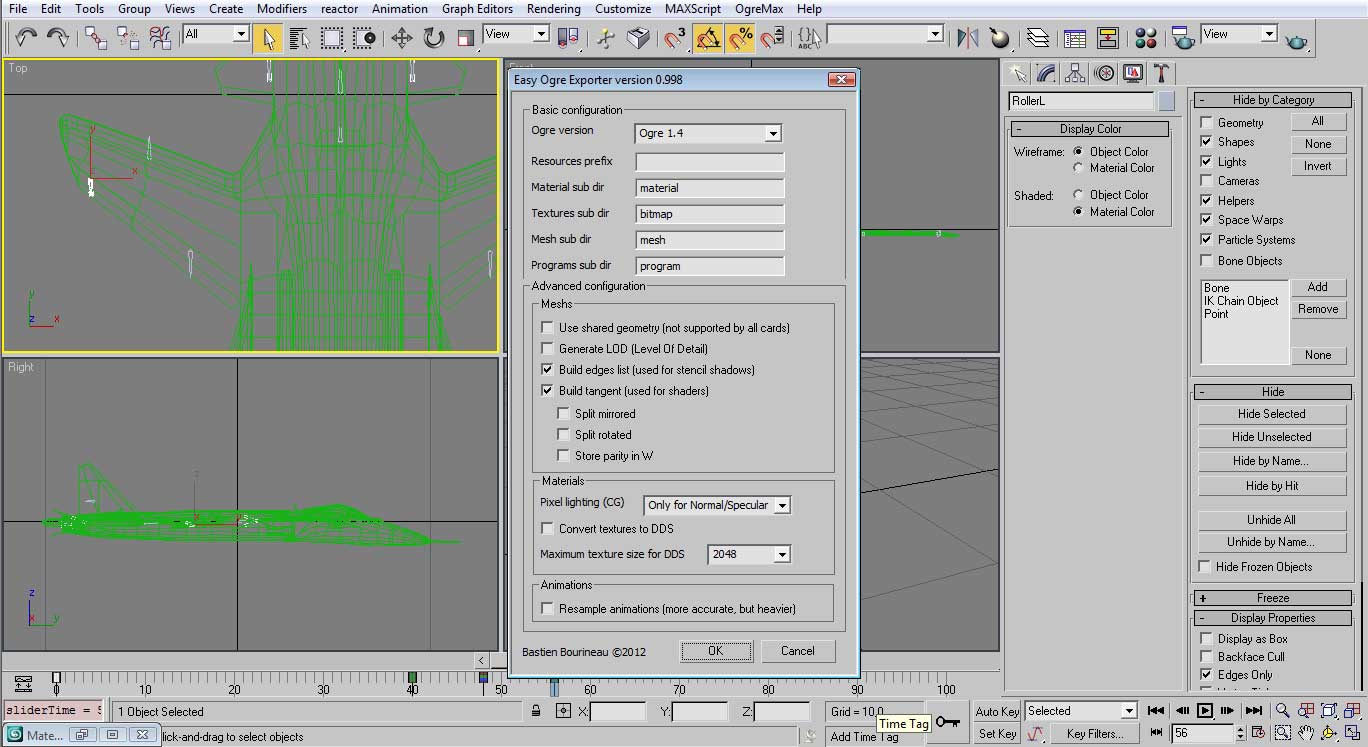
And finally configure to Ogre version 1.4 and it is done. If all goes well you will have a .mesh and .skeleton file.
Important Note: when creation animations make sure different animations don’t overlap each other at the same time and set non used parts in their default position.


Thanks for the tutorial, TimeSymmetry. I still haven't finished my exams for the week but I'll give it a shot as soon as I can.
Nice Tutorial... but i use maya,is there any plugin to Make it supported to maya? -_-
i would like to make an export text (Just a test, of course it would not be the final craft... as it has no animations yet) but i kinda dunno how to export it -_-
here's an example:
Kira-sr.deviantart.com
This comment is currently awaiting admin approval, join now to view.