Guide the сar avatar through the world made of tiles. Uncover hidden paths, meet friends and outsmart enemies. Each level of the game is a unique tiny adventure.
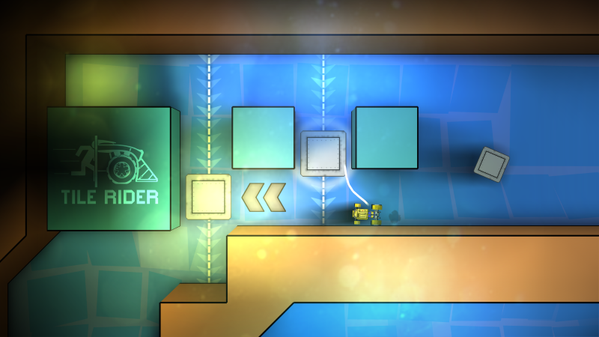
Player controls the car which can be equipped with weapon and magnet gadget (Gordon’s gravity gun analog) which can move objects. In most cases levels can be completed with smart logical solutions but sometimes player has to enter battles.


Articles
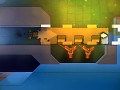
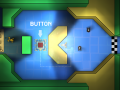
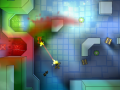
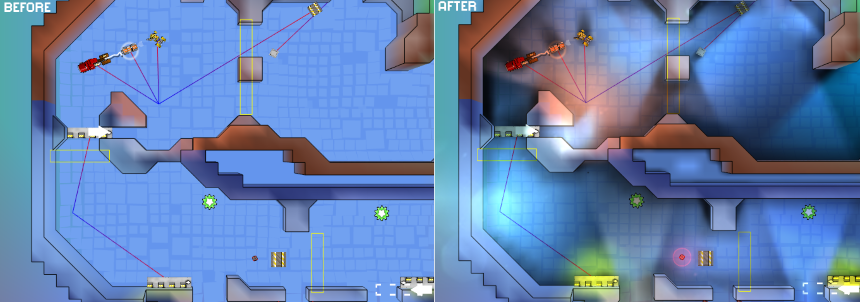
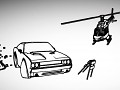
To cut the long story short, these screenshots show what the game is all about:
They say first impressions is half of the battle, and as the book is generally judged by its cover, we decided we needed a good “cover” as well. However, this was not an easy task without an artist in the team.
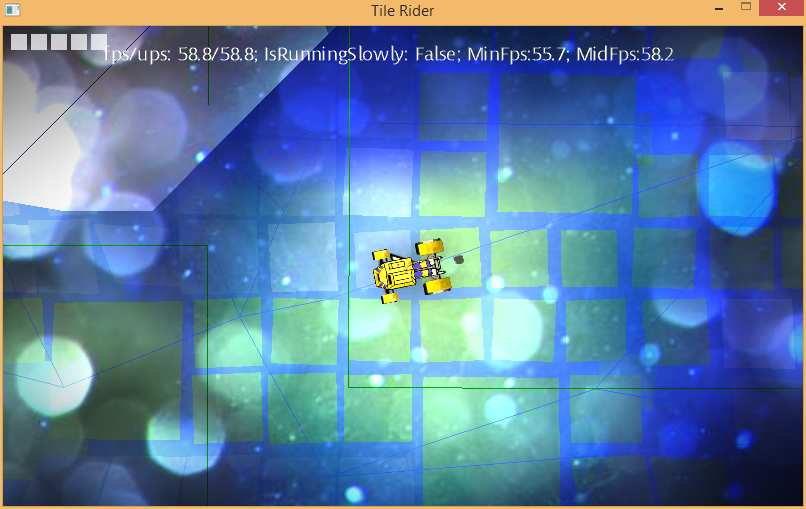
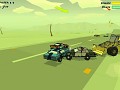
By the moment the game looked like this:
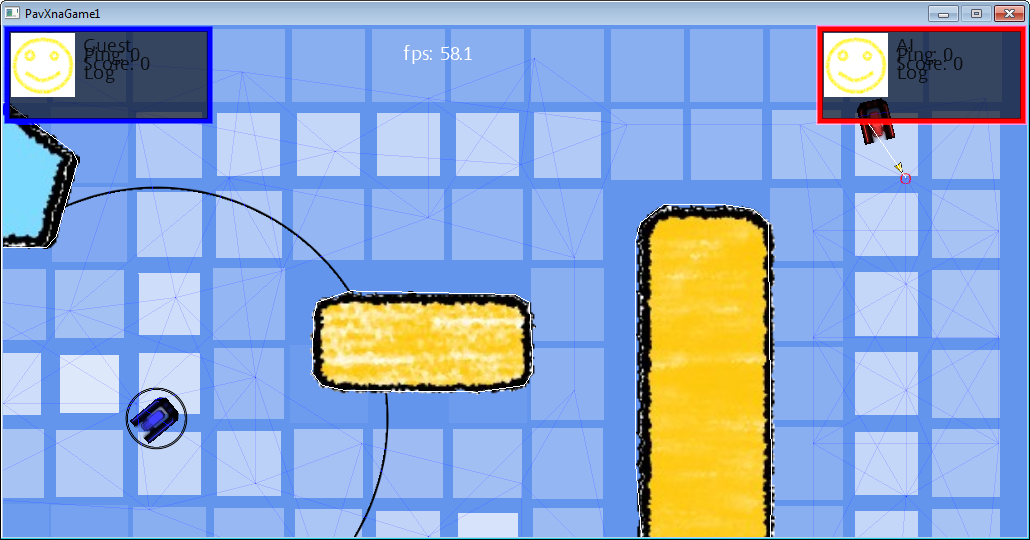
- it became clear that we needed to add something that would make the picture more dynamic and diverse, using the developer's skills only.
From that moment on, the process of inventing the way to implement the light solution in the mobile game, started.
Technical tools and specifications:
- Year 2012
- XNA Framework 4.0 Refresh. Rich Profile, which don't allow using custom shaders
- The device available: Nokia Lumia 800 with Windows Phone 7 (2011)
- Everything should give out 60fps, saving some resources for the rest of the game's logics (AI, physics, music)
This is to give you an idea of why we had to save on everything where possible.
Day 0: The Prototype of Light in the Game
To start with, and to check the idea, we decided to draw the light by hand. It was quite simple:
- Take a map and draw the light and the shadow by hand.
- Use the texture from Step 1 as lightmap texture.
- Choose the appropriate blend mode.
The Blend Mode was used with the following parameters:
ColorSourceBlend = Blend.Zero,
AlphaSourceBlend = Blend.Zero,
ColorDestinationBlend = Blend.SourceColor,
AlphaDestinationBlend = Blend.SourceColor,
ColorBlendFunction = BlendFunction.Add,
AlphaBlendFunction = BlendFunction.Add,
The result looked something like that:
Day 1: Simple Static Shadow
The game is 2d and the camera is set up to the same angle nearly all the time. That's why we make the simplest static light.
On loading of a level, the texture of light is generated. The texture is rendered above the level. As the game is «almost» 2d, there is no need in a sweep drawing. As 3d geometry is static, the light there is merged into the vertex color.
Light texture buffer (light map) generation is quite simple:
For each source of the light:
- Clear a temporary buffer.
- Render a light's texture into a temporary buffer (a gradient circle using the Color Blending of the source of the light). Then, apply absolutely dark shadows – for the obstacle that may occur in the area of the light.
- Blend the temporary buffer with the common light buffer, using Additive Blend.
The result looks interesting, although a bit raw.
Day 2: Adding penumbra
Usually the source of light is not of a point type. It means the shadow is not sharply defined. Moreover, it tends to be more blurred with increase in distance to the source.
Here the idea was stolen from a famous game – F.E.A.R. For each source of light, a light map is rendered several times with a little angular shift with regards to the source of light.
Day 3: Smooth Shadow
Here we only blurred the texture that deals with the light a little.
As the game is mobile and the shaders are very limited, we decided to use the possibilities of hardware interpolation
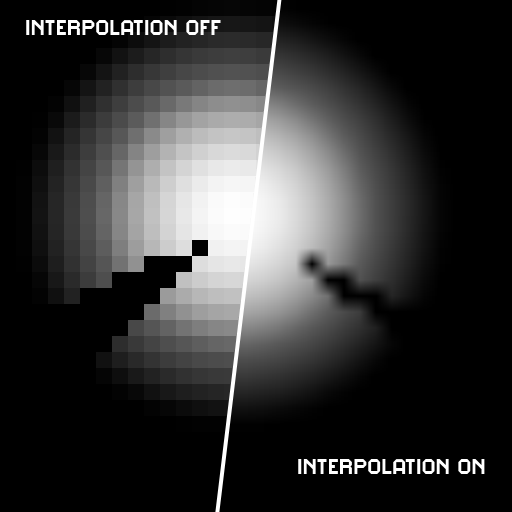
In order to achieve a smoother shadow:
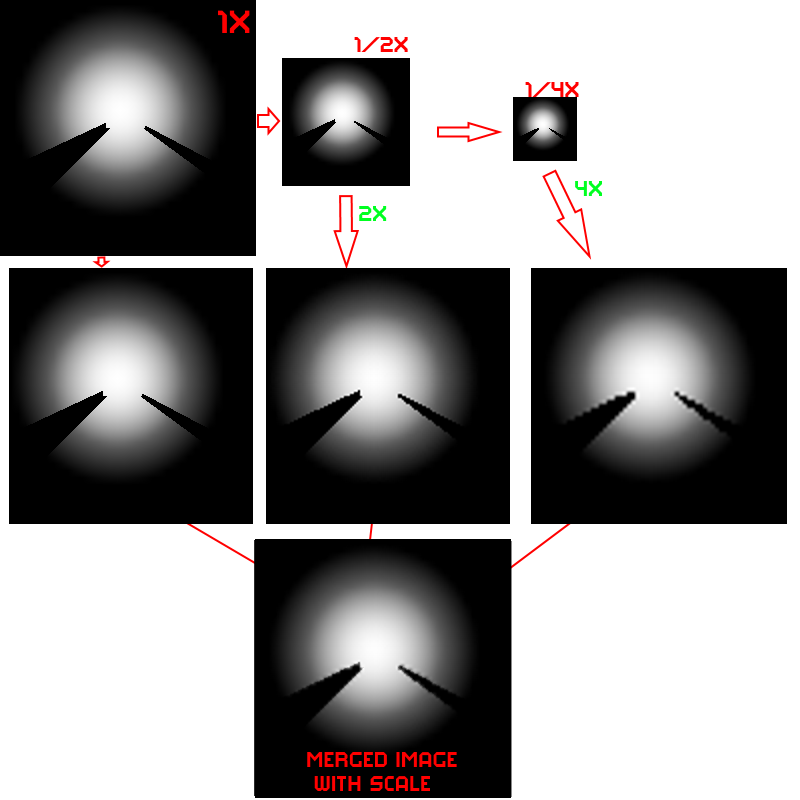
- Render the original lightmap several times with a lower scale (1/2, 1/4, etc.) into different buffers.
- Blend all these buffers with the corresponding scale (2 for the texture of ½ of the size, 4 for the texture of ¼ etc.), using Additive Blend Mode and alpha 1/N, where N is the number of buffers.
We had an idea to blend in a more «intellectual» way, so that to emphasize the sharpness of the shadow at the start and the blur of the penumbra. However, the result of a simple blend and the penumbra from the previous point seemed enough for us, so we left it that way.

Day 4: Occlusion Shadow
For creating the illusion of the walls ambient occlusion, we had to use one more texture (of a lower resolution), which was generated with the help of Distance Map.
For example, here is a physical map of the level. The walls are in red:

Level map + Distance grid (Blue – wall close, White – wall far):
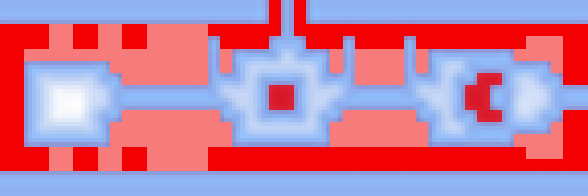
Map + Occlusion shadow:

In this texture, the color of the pixel was selected by a simple rule:
If the distance to the closest wall is more than a threshold value – the color is transparent, otherwise the color is black.
As the texture is small there (1 pixel per 1 game cell ~1.5m), a smooth change in colors is granted by the hardware interpolation with the scale of the texture (it stretches up to 50 times). As all the walls in the game are square and are situated accurately in the grid, the small size of the texture doesn’t create any visual artefacts.
Or in the game:
The difference, as you may see, is not significant, but it adds to the depth of the picture.
Day 5. Dynamic Shadow
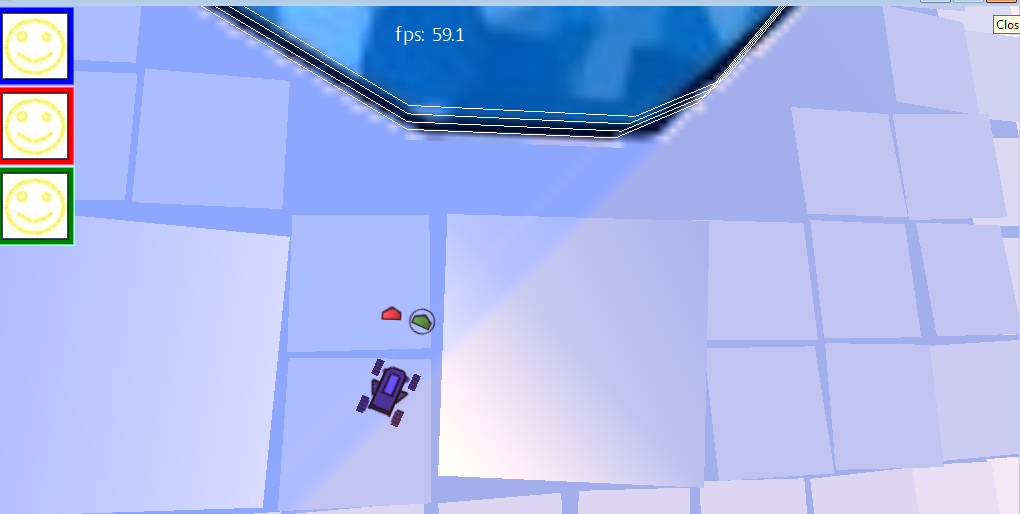
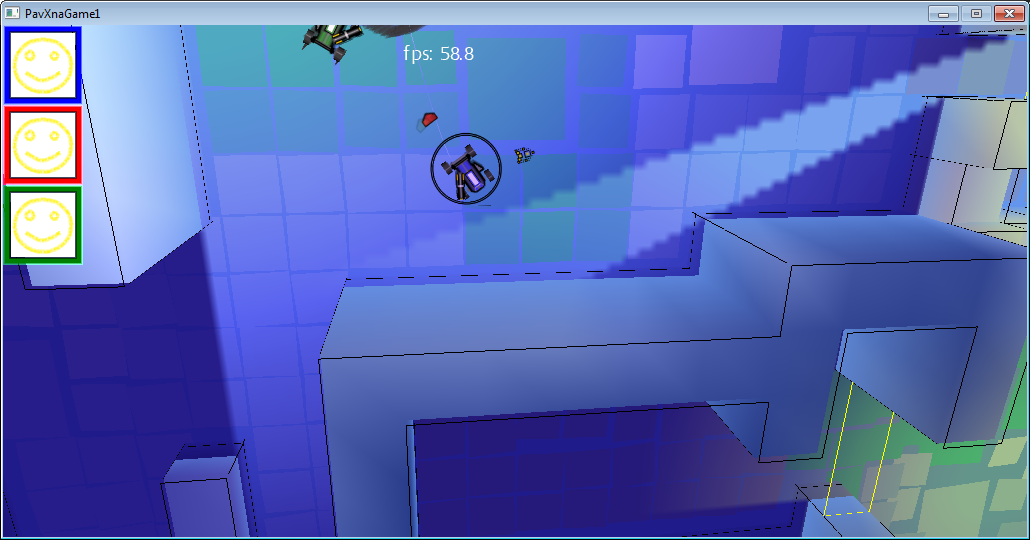
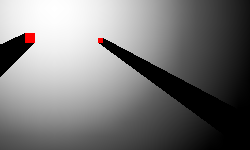
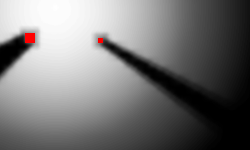
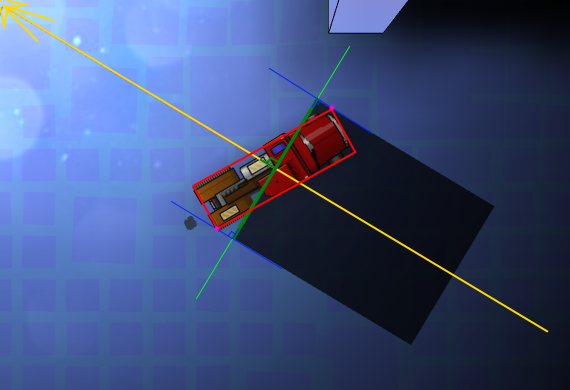
Static shadow is good, but dynamic is even better. However, we didn't plan to spend a lot of resources on it, neither ours nor computer’s. We had an idea to use 1-2 sprites for one dynamic shadow, and change only the angle and scale depending on the relative location of the object and the source of light. All game objects being rectangular, the calculation is not that complicated. No need to perform ray casting on shapes. We don’t need super-accurate shadow, it is enough to draw a rectangular shadow with the width equal to the projection of a dimensional rectangle (it is highlighted in red on the screenshot below) on the axis perpendicular to the beam from the source of light to the center of the object.
And in order to get a cone, render two sprites with a turn, considering the angular size of the object.
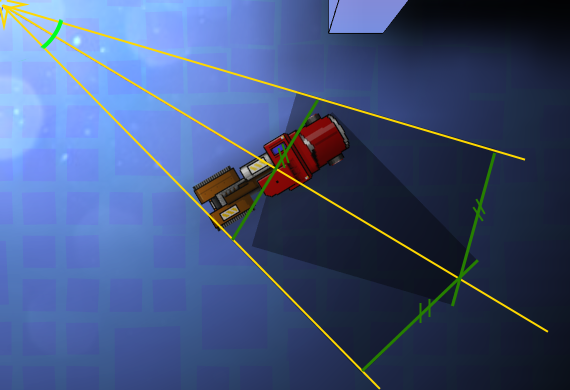
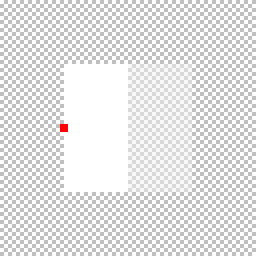
For the shadow sprite, we used the texture 4x4 pixel with gradient (the red point on the screenshot is the origin).
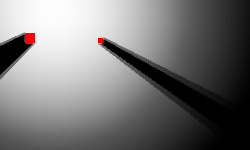
The result looks as follows:
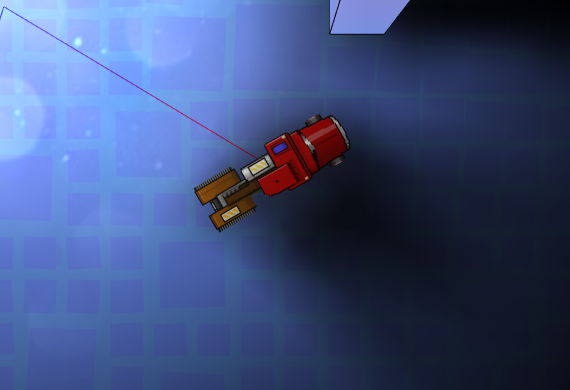
By means of the texture gradient, we achieve soft shadow. And as two textures are rendered with a little alpha blend, we get a more intense shadow in the center.
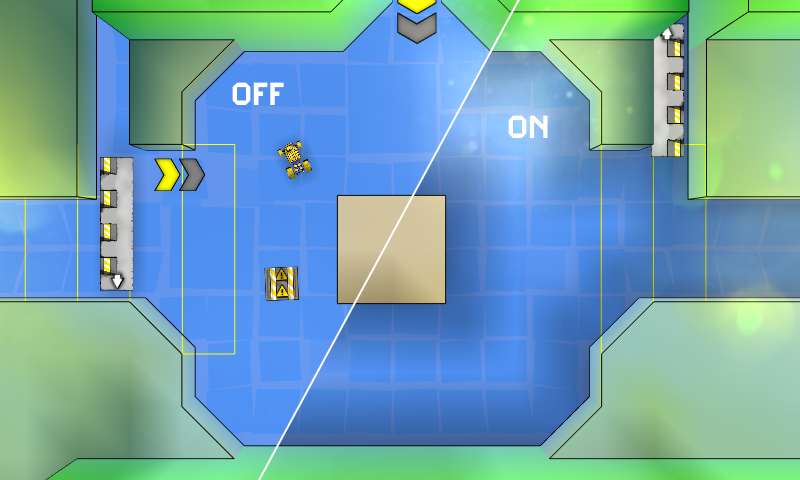
An example of the static and the dynamic shadows comparison:

Small tricks:
-
As the shadow is simplified and does not take the walls into account, we need to take care of it not «showing through» the walls. Here the Distance Grid can help again.
For each object, the maximum length of the shadow is limited by the value of Distance Grid + minimum size of the wall. Surely, it leads to a not very accurate behavior of these shadows when close to the walls. However, this effect is far less noticeable than the artefact that looks like this: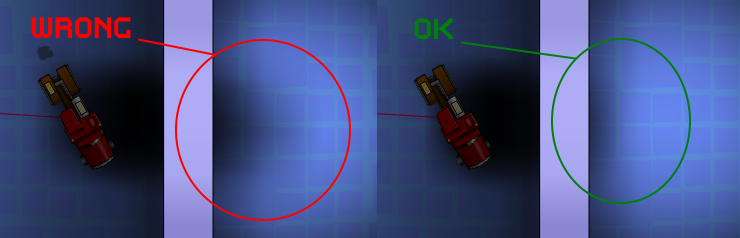
-
At a small distance from the source of light, the angular size becomes too big for the rendered textures to imitate a shadow without a break. So, there are two options: a)increase the number of shadow sprite draws; b)lead the shadow into transparency up to a complete disappearance in case of exceedance of a certain angle
We chose the second option, as it is more convenient in terms of saving the resources.
-
At a big distance from the source of light, two textures of the shadow practically become one. We just render 1 texture with doubled alpha in such cases.
-
As you may have noticed, the given implementation of shadows only works in case of one source of light. That is why in case of more than one source we simply… don’t show the shadow. :-)
-
A result of Point 4. As the source of light for such shadows is always unique, if it changes or disappears, there is an unpleasant effect of a instant change of shadow. In order to avoid it, it is enough to add a smooth transition: an old shadow goes into transparency, a new shadow (if a new one is necessary) on the contrary, emerges from the complete transparency. The game is dynamic, that’s why such transitions don’t stand out as unnatural.
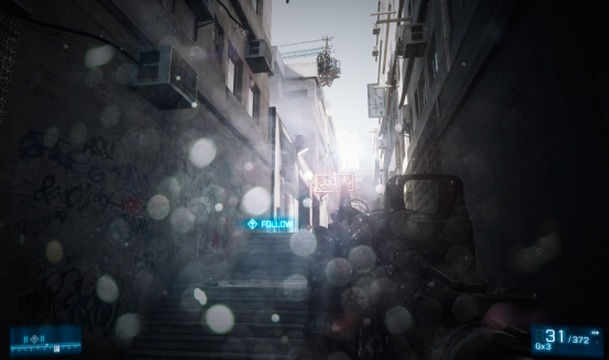
Day 6: Dirty Lens Effect
The final touch was a wish to add a fullscreen dirty lens effect.
An example is below:
This turned out to be not as simple as it seemed, because of the absence of the full access to shaders and a wish to have high performance.
Solution 1: quick and simple
Take a dirty glass texture and use Blend Mode that reveals itself on bright areas. An example of the Blend Mode use:
ColorSourceBlend = Blend.DestinationColor,
AlphaSourceBlend = Blend.DestinationColor,
ColorDestinationBlend = Blend.One,
AlphaDestinationBlend = Blend.One,
ColorBlendFunction = BlendFunction.Add,
AlphaBlendFunction = BlendFunction.Add,
Although the given solution was quick and sometimes resulted in a good picture… Example:
…still, in many cases the result was far from good. Example:
The reason is clear – we don't take the real light of the area into account, using the pixel color only. That is why the maps with contrast light look more or less good, and the ones that are well-lightened look horrible.
Solution 2: slow, but elegant
Render all lights from all sources (smaller in size and without shadows) in the camera projection, into the buffer. Then, render the dirty lens texture with Blend Mode from Solution 1. After that, the final buffer can be used: 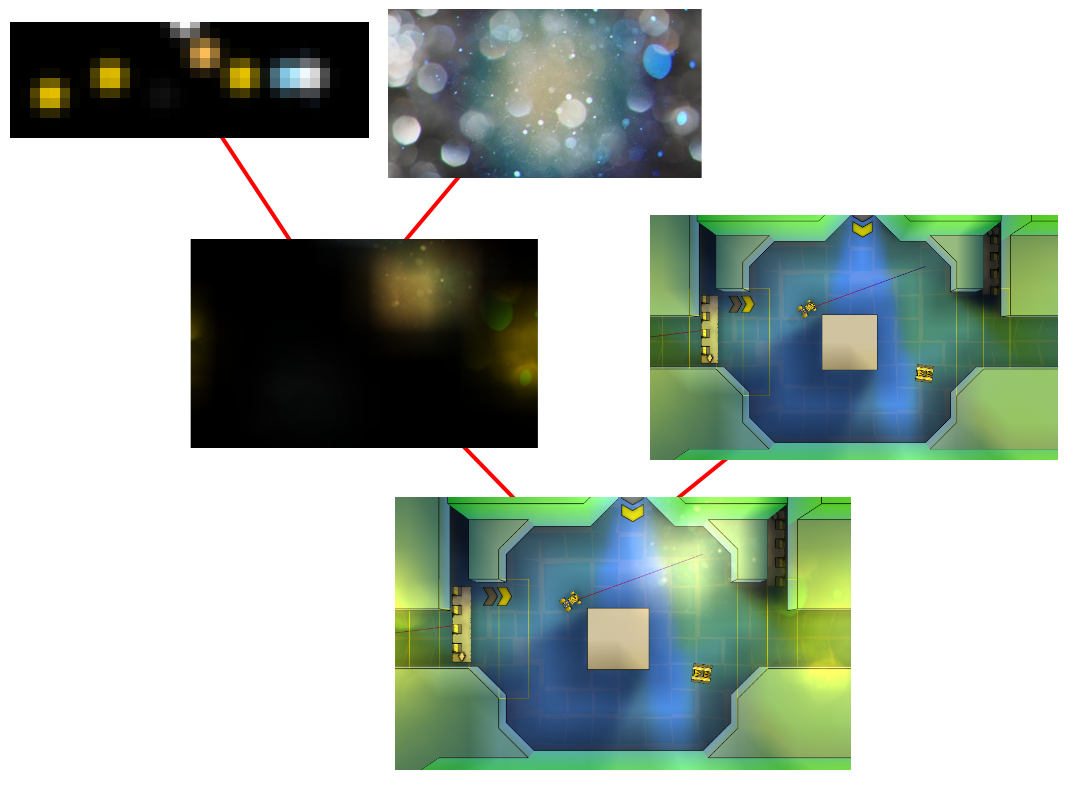
However, to render an additional buffer at every frame is not quick at all. The advantage of a separate buffer is – it can be updated not at every frame, but only during camera movements. But even after this optimization, the performance on mobile devices is far from desirable.
Solution 3: quick and elegant
We didn't have the full access to shaders, but we had access to one pre-installed Dual Texture Shader. It blends two textures, taking into accout the textural coordinates through multiplying (to be more precise, through Modulate2X Blend Mode Blogs.msdn.com. The first texture was a pre-rendered texture that contained all light circles (it is enough to prepare it once for the level), the second one was the dirty glass texture. The only thing that needed to be updated at every frame, was the textural coordinates of the first texture. They are calculated using the screen projection on the coordinates of texture 1 (these are just world coordinates with a scale).
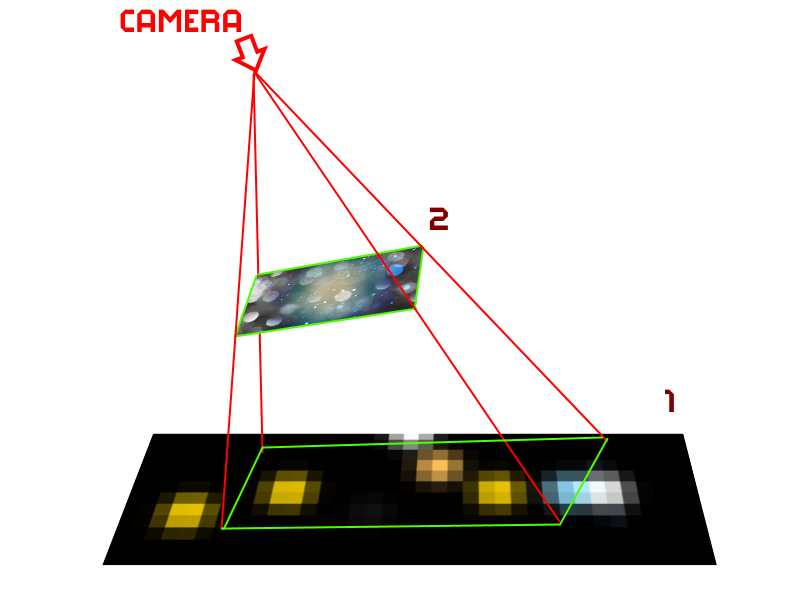
The end result is not much different from that of Solution 2, and doesn't require extra renderings into the buffer.
Summary:
Thus, for the final frame we:
A) Once, on the map's start:
- calculated the static light map
- calculated the occlusion shadow
- prepared the buffer of lights for the dirty lens effect
- prepared the cache of the nearest source of light for all points for dynamic shadows
B) For each frame:
- rendered the static light map
- calculated the angle and the width of the dynamic shadows, and rendered 1-2 sprites for an object
- projected 4 points into the world coordinates, updated textural coordinates, and rendered one texture with the Dual Texture shader for the dirty lens effect
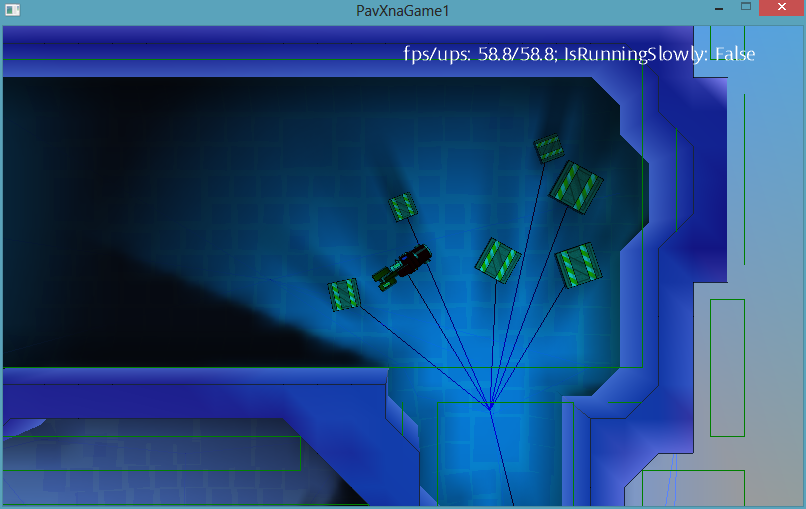
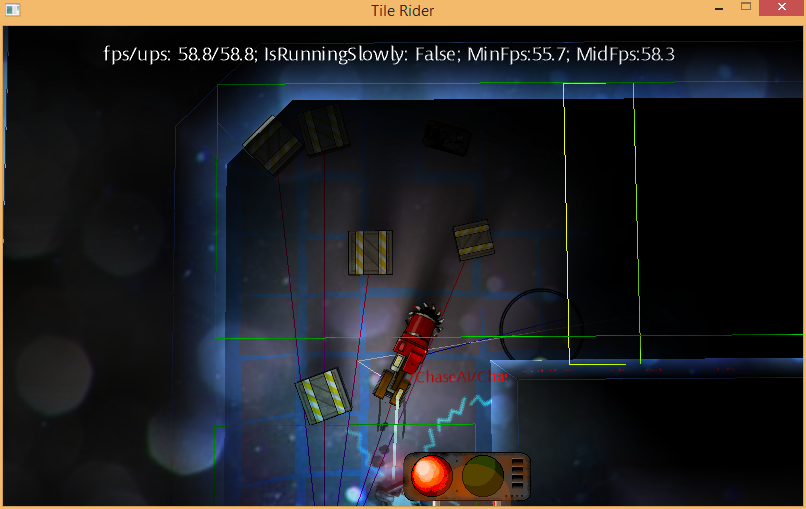
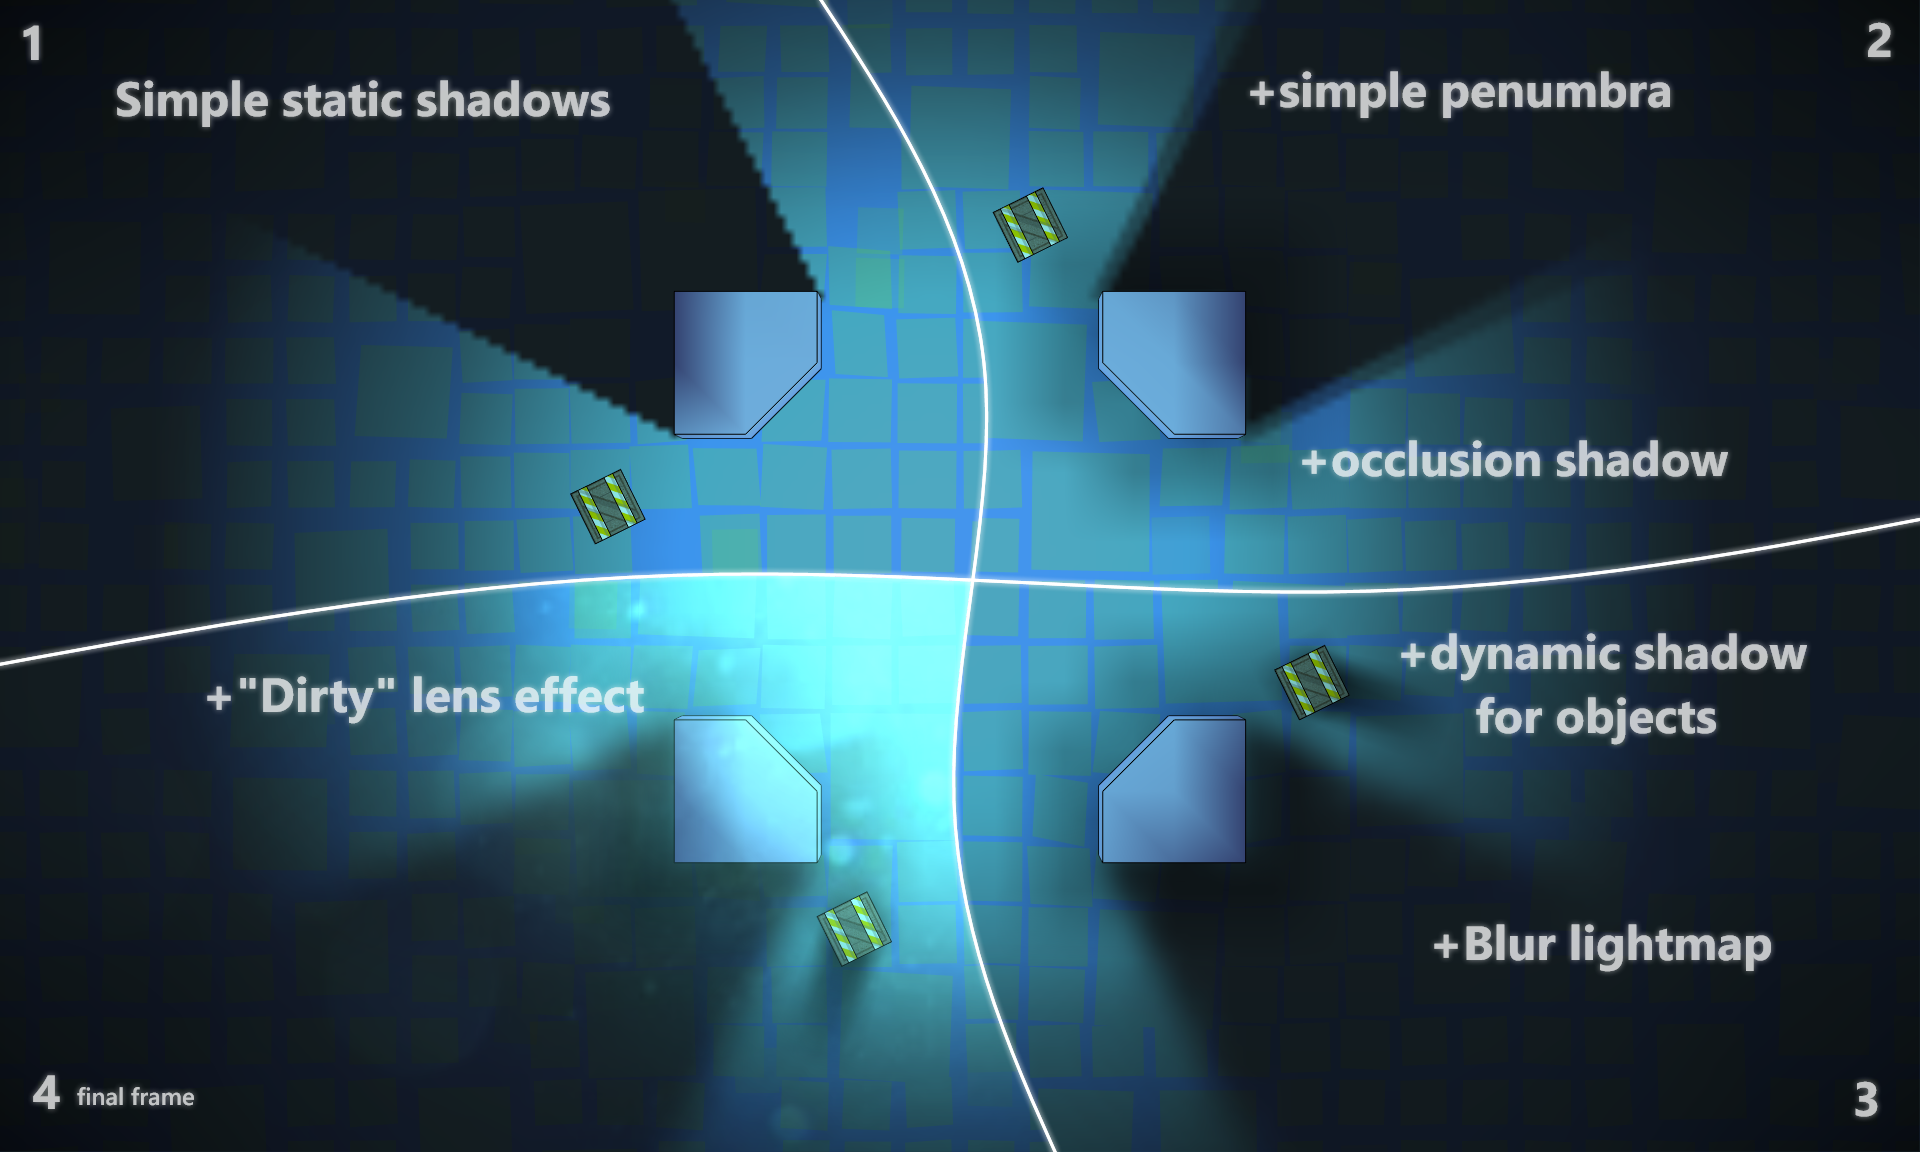
The picture below illustrates all the described techniques:
Video:

Tile Rider is now available on iOS
NewsAfter 3 years in development, Tile Rider game launches on iOS.

Tile Rider: balance update on Steam. Working on iOS version
NewsTile Rider has just got updated with a lot of new features on Steam. We are currently working on iOS version.


Tile Rider will be released to PC and Linux on June 11, 2015
NewsTile Rider is coming to Steam in 3 weeks on June 11, 2015.
Post a comment
Profile
Icon
Developer & Publisher
7 Soft PillowsEngine
XNAContact
Send MessageHomepage
Tileridergame.comRelease date
Game watch
Follow
Purchase

X
Tags
Embed Buttons
Link to Tile Rider by selecting a button and using the embed code provided more...


You may also like
Cars And Guns 3D (Paper Cars)
Car Combat
Black Rims WANTED
Car Combat

_speed_
Car Combat

Fender Bender
Car Combat
NEED FOR MADNESS
Car Combat

Icebreakers
Car Combat