Hey, this is leeswim247 here.
My plans here are to help people starting out in the gaming development community in order to create their dream games. With me having absolutely no knowledge when it comes round to physically creating a game, this is a learning experience not just for you, but for me as well.
I will keep all of the tutorials here as simple as possible so that developers of all levels can follow easily, and I will be using all of the materials in these tutorials to go into the final version of SumoBlocks (the current game in which I am developing).
To follow these tutorials, simply track the SumoBlocks' Profile.
Or you can visit the Rolling Tank Productions' YouTube page.
Carry onto the next page to see a detailed written version of the tutorial above.
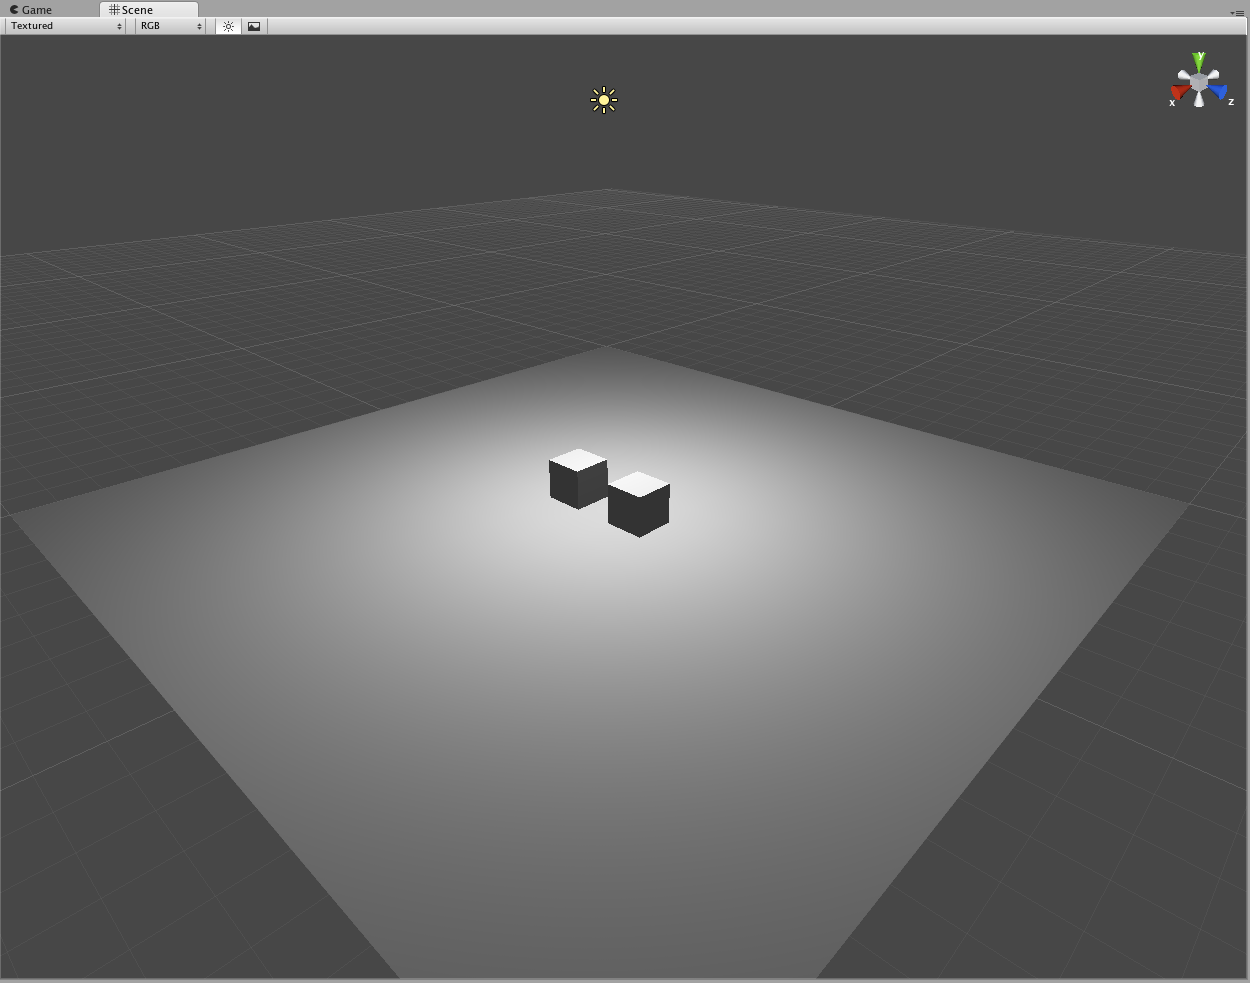
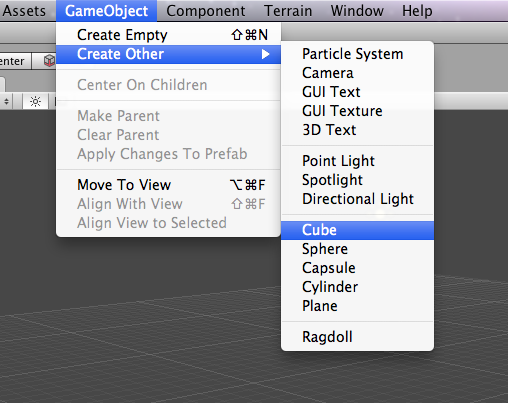
If you've not already done this, you can create them by clicking on GameObject, Create Other and Cube.
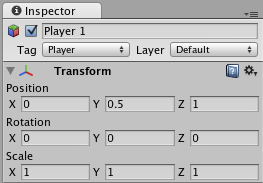
The Inspector window will show you the Position, Rotation and Scale of the object.
Have a play around with these to see what they do.
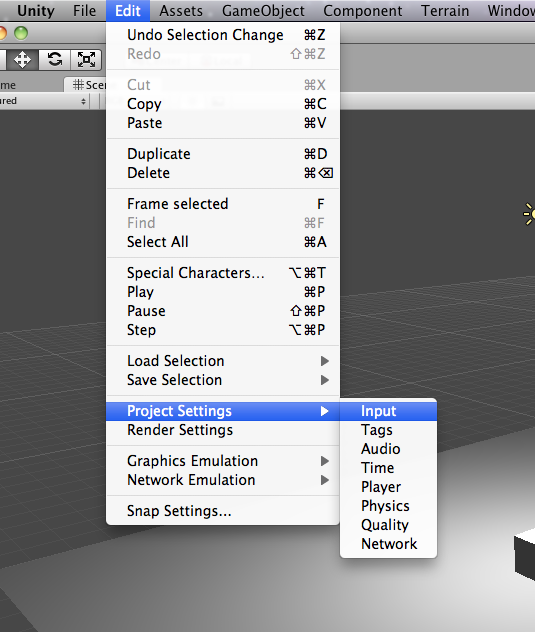
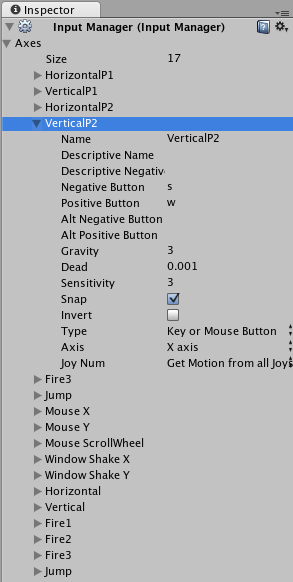
Text will now pop up in your empty Inspector window.
This is the Input Manager. This "is where you define all the different input axes and game actions for your project". Basically, where you change what happens when you either press your mouse button, move your joystick or press a key on the keyboard etc.

If we drop down the menu...
The top two; Horizontal and Vertical, control the players movements. Currently, the Horizontal movement tells you that the Negative Button is left, and the Positive Button is right. These are the ones we want to keep an eye on.
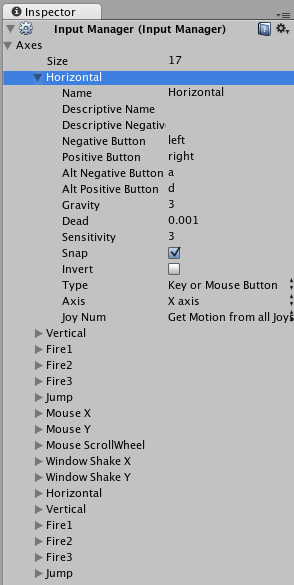
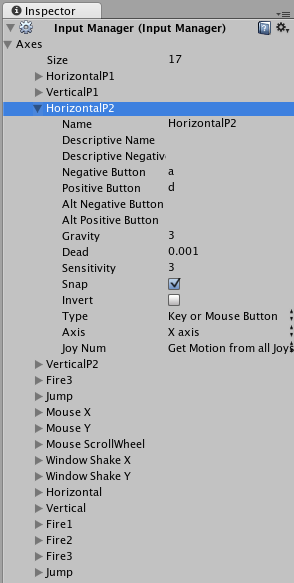
What we'll be doing now, is changing the top four Axes.
We'll be changing the Name, Negative Button, Positive Button, Alt Negative Button, Alt Positive Button, Gravity, Sensitivity and Snap.
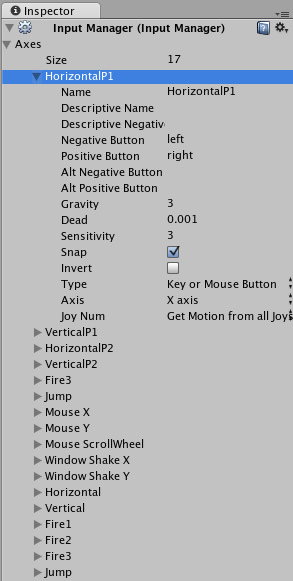
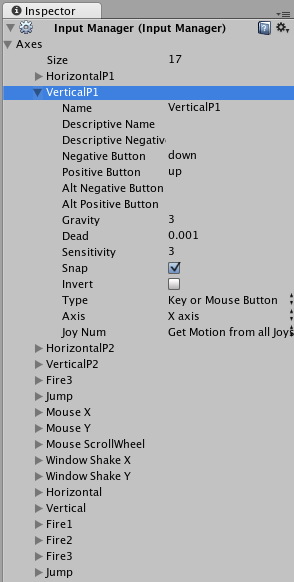
Copy these four and you will have your two player movements.
To do this, create them by clicking Assets, Create and JavaScript.
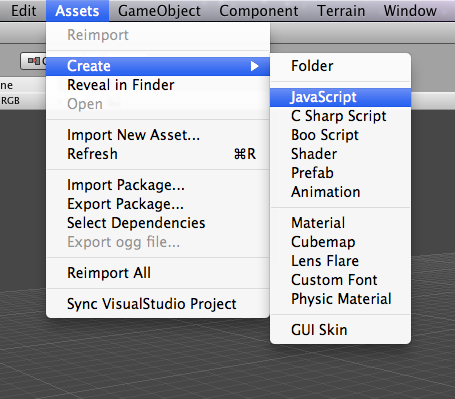
The scripts will show up in your Project window.
Rename them from NewBehaviourScript to MoveAroundP1 and MoveAroundP2 as you will be using these names in your script later.

When you double click the script, the Unitron script editor will appear to allow you to edit.
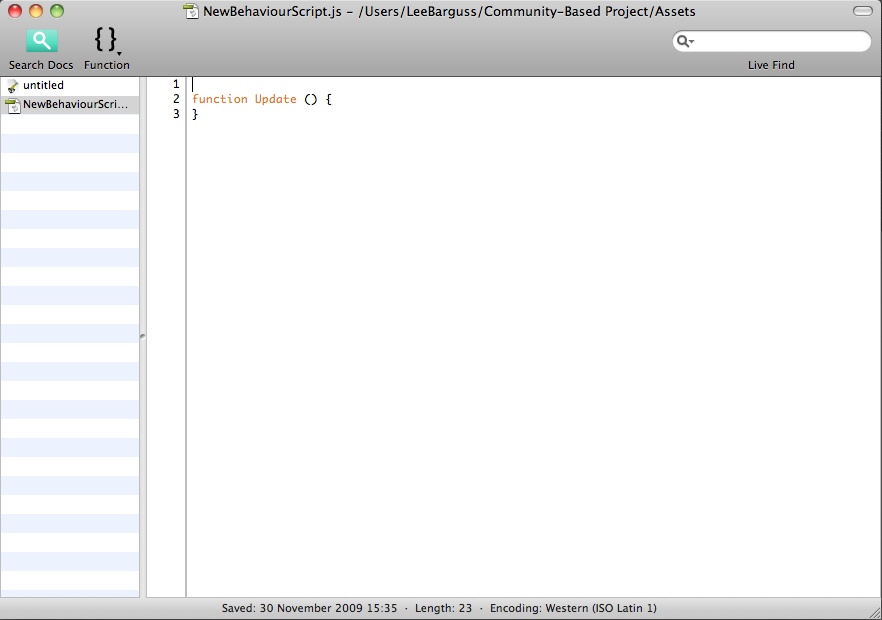
You will need to delete this and copy and paste these codes:
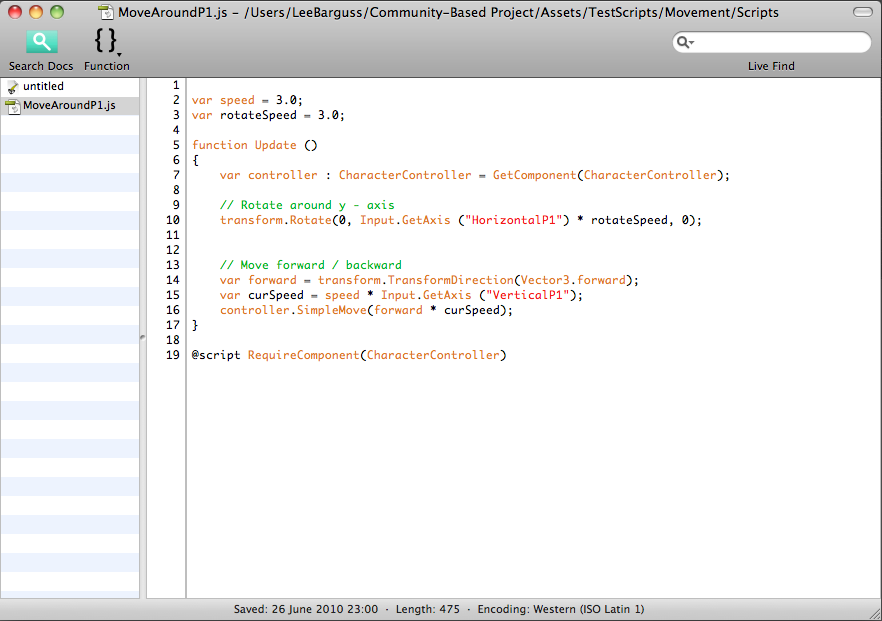
MoveAroundP1 wrote:
var speed = 3.0;
var rotateSpeed = 3.0;function Update ()
{
var controller : CharacterController = GetComponent(CharacterController);// Rotate around y - axis
transform.Rotate(0, Input.GetAxis ("HorizontalP1") * rotateSpeed, 0);// Move forward / backward
var forward = transform.TransformDirection(Vector3.forward);
var curSpeed = speed * Input.GetAxis ("VerticalP1");
controller.SimpleMove(forward * curSpeed);
}@script RequireComponent(CharacterController)
MoveAroundP2 wrote:
var speed = 3.0;
var rotateSpeed = 3.0;function Update ()
{
var controller : CharacterController = GetComponent(CharacterController);// Rotate around y - axis
transform.Rotate(0, Input.GetAxis ("HorizontalP2") * rotateSpeed, 0);// Move forward / backward
var forward = transform.TransformDirection(Vector3.forward);
var curSpeed = speed * Input.GetAxis ("VerticalP2");
controller.SimpleMove(forward * curSpeed);
}@script RequireComponent(CharacterController)
MoveAround wrote:
var speed = 3.0;
var rotateSpeed = 3.0;function Update ()
{
var controller : CharacterController = GetComponent(CharacterController);// Rotate around y - axis
transform.Rotate(0, Input.GetAxis ("Horizontal") * rotateSpeed, 0);// Move forward / backward
var forward = transform.TransformDirection(Vector3.forward);
var curSpeed = speed * Input.GetAxis ("Vertical");
controller.SimpleMove(forward * curSpeed);
}@script RequireComponent(CharacterController)
Here, we have writing in three different colours: Orange, green and red.
Orange words are functions. They tell the script what to do.
Green words are notes. Type "//" at the start of a line to start writing in notes. These are generally used to help you remember what the functions do.
Red words are known as strings. These link to important...
Let's move on to the MoveAround script:
The two following variables are defined outside the scope of a function.
This means that they can be modified in the Unity interface instead of in the code.
This is the movement speed.
MoveAround wrote: var speed = 3.0;
This is the rotation speed.
MoveAround wrote: var rotateSpeed = 3.0;
This is the update function, it runs every frame. So at 30FPS, its run 30 times/second.
MoveAround wrote: function Update ()
{
This creates a CharacterController object. It gets the specific CharacterController of the object this script is attached to trough the GetComponent function.
MoveAround wrote: var controller : CharacterController = GetComponent(CharacterController);
This gets the rotation based on the Axis being used and the rotation speed.
MoveAround wrote: // Rotate around y - axis
transform.Rotate(0, Input.GetAxis ("HorizontalP1") * rotateSpeed, 0);
Get the object vector pointing forward, define the new position, and smoothly moves the object there.
MoveAround wrote: // Move forward / backward
var forward = transform.TransformDirection(Vector3.forward);
var curSpeed = speed * Input.GetAxis ("VerticalP1");
controller.SimpleMove(forward * curSpeed);
}
This makes the script require the CharacterController component.
MoveAround wrote: @script RequireComponent(CharacterController)
And there you have it. I hope that this tutorial has been a great help to you. Any questions you have about this, don't hesitate to ask and I will help you along your way as much as I possibly can.


Nice tutorial.
I visited their page, so its true that I have to pay 100,100$ (on words: one-hundret-thousand dollars) for it? (Pro version)
Well, here are the prices: Store.unity3d.com
There are a lot of debates about whether developers should buy the pro version, and most come to the conclusion that "there's really no point". Apparently there aren't enough differences between the free and the pro version for the payment to be worth it. Although, to develop the games on platforms such as the iPhone, you have to make the payment.
ok, 4000 is much cheaper than 100,000 O.O
But I dont think that this price is ok.
for what can I use unity?
Well, it's good, depending on what you're looking to create.
If you have the knowledge, Unity can create some amazing projects.
Check out their portfolio: Unity3d.com
It shows you what Unity could create.
Unity is very affordable compared to most other commercial game engines! You can even develop a game for free and release it commercially but it will have the Unity logo at the beginning (which might not be much of an issue). If you want to use Unity to develop for the iPhone you do have to buy the Unity iPhone license but I think it is currently only around 300 or 400$. Unity FTW!