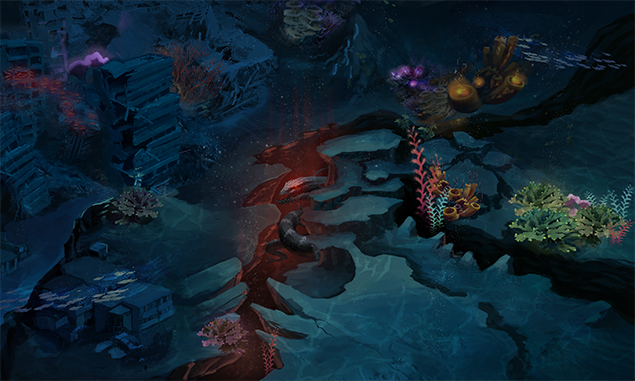
When you work as a leveldesigner, one of the first things that you will have to do is to translate the vision image into a first draft 3d scene.
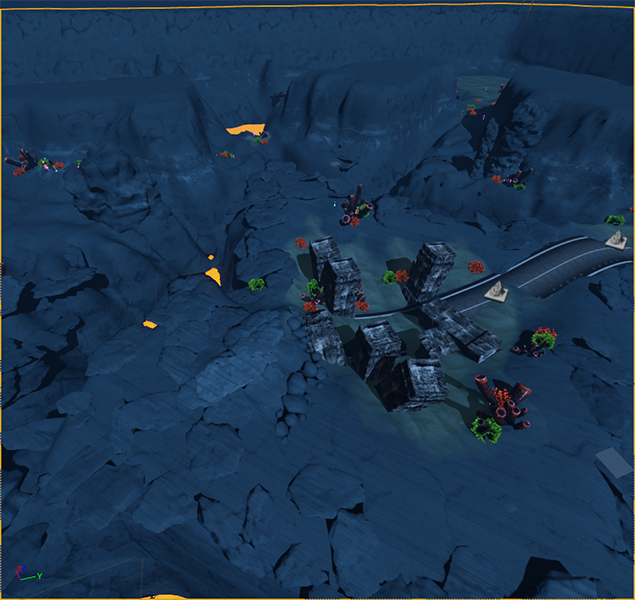
So first we set up some materials and create a quick scene in unreal where you can play with the lighting and coloring. A good start can be to use the mountain demo landscape material (If you want to have this material in your project with all dependencies, just use the migrate function). Unreal uses a special material for the landscape so you’re in full control on how to blend the ground textures.
When this is set up, we can add a height fog, render the scene and start to adjust a lot of sliders.
In strategy games it is important to highlight the units, make them stand out or at least ensure that the player knows what is going on when he tries to manage his units in a battle.
So in our case we desaturate the background and aim for a dark blue ocean that feels like we are really deep under water. That of course has a considerable effect on how we approach the leveldesign, how the scene will be lit and how the details in the ground textures and the details created by placed 3d meshes should be handled.
The next important step, especially in unreal, is to add a post processing effect that really lets you change the visual appearance of your level in any desired way. We also added a caustics effect and played around with the ambient occlusion. Just a little.

With the post processing volume added, a lot of things happened. We added a depth of field, to get things blurry in the distance and a color gradient makes the foreground slightly more cyan.
But the best thing is that we can create custom blendable shader materials that let you adjust the end result of how the scene looks.
Here it is used to render additional darkness into the scene depth and create an additional water wavy effect. In the end we have a material instance that lets us adjust this custom effect in an instant via simple sliders and values.
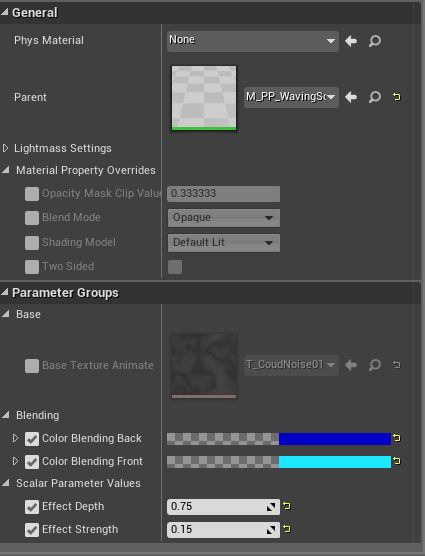
“Effect Depth” and “Effect Strength” are custom variables that we created ourselves in the process and its functionality can be changed or expanded at anytime.
The following shows what happens when you start playing around with those variables.
By adjusting the effect depth we get a darker blue in the background and with the effect strength we increase the “wavy effect” as you can see in the video (The buildings get distorted).
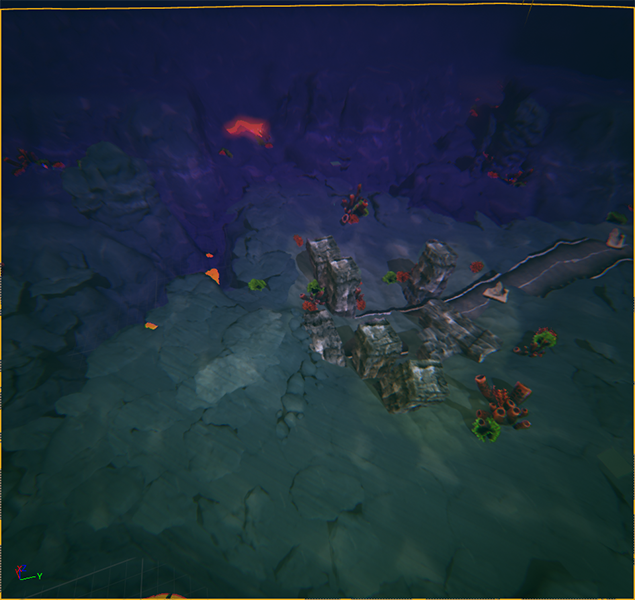
Of course we can also change the colors to change the mood of the scene completely.
Gameplay can also greatly influence how you translate the vision into an early level concept. In Submerge, we wanted a planar movement layer for our units with easy identifiable blocking objects. We used large structures and cliffs to clearly communicate to you where your units can move and where not.
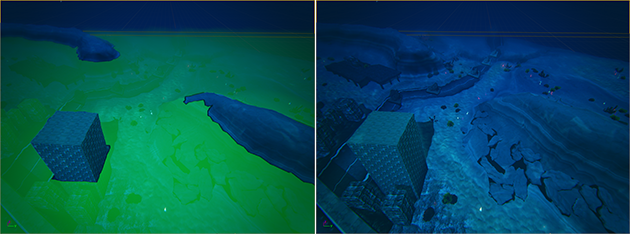
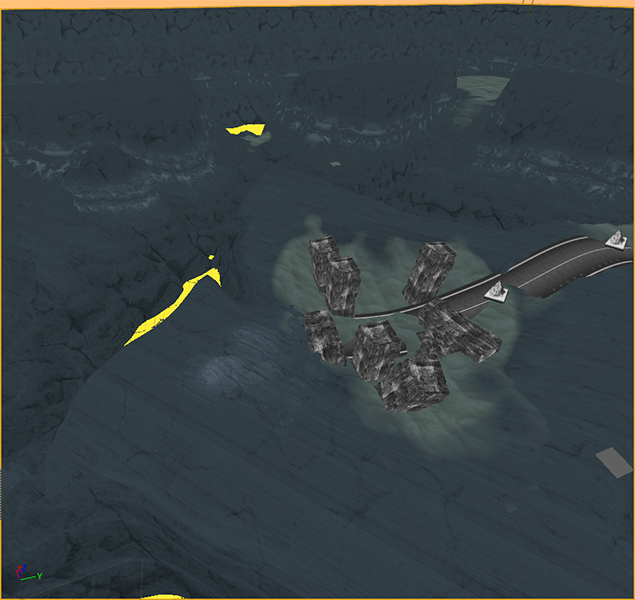
In the left picture, you see a green layer which visualizes the calculated navigation mesh. For the cliffs we used a special texture that renders cliff stripes into the rock texture that can be adjusted in height. On the right picture you can see how the white cliff stripes indicate where the units actually can move.
With unreal engine 4, we were capable to quickly translate a certain targeted mood into a 3d scene without the necessity to create much content in the first place. For a leveldesigner this is a great way to rough out your early design and make it possible to communicate the focused art style even in the early stages of development.