Rush: Time Trial Racing
My original idea for this game was to have it as a Mario Kart style game with Multi-player support, land mines, rockets, etc..
But, when I started to research how much work that was going to be and how limited the graphics are on iDevices, I started to cut back on those ideas. I also realized that having multi-player support would also mean server hosting and a whole lot of money I just didn't have; my goal of this game was to have something I could use as a portfolio, I do not want to start a game company.
Vehicle design:
I went through a few different vehicle designs before deciding on the one used in the game. The first two designs were trucks and were both experiments in the sense that I didn't have much experience with how the UDK vehicle system worked.
Rigging, testing, and general discoveries:
I found out that the rig had a huge effect on the vehicles center of gravity and with the way it handled. If the 'base' bone was too high up within the vehicle, the vehicle would be really top heavy and either spin out extremely easy or just roll. Also, within the code of the vehicle, the LongSlipFactor and LatSlipFactor had an extreme effect on its handling; even if the setting was changed by .5, it was often enough to make the vehicle uncontrollable.
The 'suspension bones' also had a great effect on the turning radius of the vehicle. Putting them closer to the inside of the vehicle (closer to the base bone) would give it more stability, but it would also make the vehicle slide around more. Having them too close to the 'wheel bones' would increase the turning radius but it would also make the car flip easier. Fine tuning this took a lot of patience; about 80 hours.
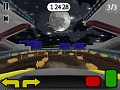
The camera placement turned from a 'third person' view to a 'first person' view after I realized that in order to make a dynamic camera system (the third person, rigid camera, was extremely jarring and just hard to play), I would have to put a immense amount of time into not only learning how Unreal Script handled cameras but also how to manipulate them in order to change with the vehicle speed and other lat and long slip factors. I ended up setting up a 'camera socket' bone within the vehicle rig and learned how to use an attach-camera-to-a-socket via a small bit of code. (There was a good amount of camera information on the UDK forums that I was able to learn from.)
The height of the suspension (how high the car sat and how far the wheel bones traveled on impact) had an effect of my camera choice as well. I noticed that if the suspension bones were too stiff, they car felt extremely shaking but if they were too loose the camera was more appealing but I started to notice mesh clipping (the wheels would pop out of the hood).
The final visual design of the car is a rough representation of a Subaru rally car. (from random, non-orthopedic, Google images) The graphics were not based on anything other than I wanted it to be mostly yellow and to distinguish the 'hood' with black. Also, since the only part of the vehicle that was going to be showing was the front, the side, top, and back of the vehicle are either just flat surfaces or non existent. The wheels are also simple, eight-sided cylinders. I did this in order to have more polygons / verts on the visible hood, creating a better looking view for the player.
One of the toughest aspects of the vehicles design was the throttle speed (how long it would take for the vehicle to get to max speed) and the max speed. I found that it was easier to design the scale of the jumps around the design of the vehicle, not design the vehicle around the level(s). It was much easier to move a mesh then it was to change the code, re-compile it, then test.
The vehicles code:
Coding the vehicle was relatively easy. Between the Mobile Vehicle Example on UDN (http://udn.epicgames.com/Three/MobileVehicleExample.html) and the other vehicle tutorials, it came down to simply testing some of the subtleties of my car. (Every vehicle is going to behave differently just from the small changes in size and rigging.) Like I said before, the trickiest part for me, was the LatSlipFactor and LongSlipFactor and how they effected the vehicles handling. It took a long time to figure out how to narrow in on the correct input for both of these settings. One of the most helpful things for testing this was the ability to brink up the Actors control settings inside of UDK and test from there. Then, when you found the numbers you wanted, you just had to go into the code and change it there. (Everything is always defaulted back to the code whenever you start the Mobile Previewer so it's important to change the code, or all that testing will do nothing.) – you bring up the Actor control by opening up the console, inside of the Mobile Previewer (by hitting the tild key: ` ) and type: editactor class=vehicle class name – vehicle class name is the name of your vehicle class. For instance, if I wanted to test my vehicle the console command was: editactor class=RallyCarPlaceable
Things like suspension height and stiffness were relative to what I wanted the car to do and they had a pretty big gap in effectiveness; the difference between 50 and 75 wasn't huge so it was easy to find a number that worked well.
Most everything else was kept default. The vehicle speed and max speed was changed, the throttle speed was changed to be a bit faster than the Mobile Vehicle Example and it was just about finding what I wanted the vehicle to do.
Level design; a long list of discovery in no particular order:
With the idea that I wanted muli-player support, my original sketches had very wide turns, extra paths, and just an overall “many players should be on this” feel. When I decided against having multiple players on one track, I had to rethink level design. I also had wanted a lot of extra meshes and particle effect to bring a more impressive environment to life but again, the graphical limitations of iDevices hindered my plans.
The first level I created was the 'Farm map'. While the track design has stayed the same since the beginning, my original plan was to have it indoors, wrapping around the inside of a steel factory styled environment. I had read that levels should be limited to around 40k verts and I was approaching that with barely half of what I wanted done. I settled on an out door map and it kind of just merged into what it is now. It became more about experimenting with how I wanted the game to look overall, not that specific level.
From there, I had an idea of the way I wanted the textures and meshes to look but I had to figure out how to merge the track designs into something that worked well with them. For instance the 'Building map' originally had a unique material for every building but it ended up looking extremely bad because of how I made the textures. Having that cartoon / painted look on everything meant that some materials blended better than others. When I made all the buildings use the same reflective glass look, the entire level felt more complete and much more appealing.
From here, everything was pretty much on autopilot. I had a visual styled I liked and a method on how to make it work. The only thing that troubled me was making levels that were some what connected. For instance, I had one level design that involved the player driving on top of a library table. The jumps where books with paper or cut up pencil boxes on the sides and pencils created the edges of the track. There was an iPod, coffee cup, a plate with crumbs on it, etc... all the things you'd expect on a library table that had been used by somebody all day; having a track laid out on top of it gave me a funny mental image of a bored college student messing around. But, the style of the map didn't fit anything else in the game and having an indoor map increases the amount of meshes you need to create a real environment. After I play tested it a bit (it was in game and pretty much done from a design stand point), I figured it just wasn't right for what I wanted and scrapped the idea.
Once I came up with an idea, I say it took about six hours of 3D modeling, 5-10 hours of UV work / textures, then about another 5 before it was in game and able to be play tested. A lot of the time, I would find many things that didn't fit and I would go between UV / Texture work and importing into UDK. I also had a bit of an issue with how meshes would export the direction of their faces. If a face is facing the wrong way when you import it into UDK, it appears invisible and you have to go back to the model and reverse it, then re-import into UDK. Luckily the UV's weren't effected and the only time consuming bit of the process was if the model had many faces in the wrong direction. Then it was about finding all of them that displayed wrong in UDK, find them within Blender and then reverse them to face the proper direction.
The triggers, volumes, and lighting were one of those things that once I figured it out on the 'Farm map', it was easy to take what I had learned and move forward with it on the other levels. The one thing about the 'Farm map' is the immense amount of re-spawn triggers that prevent the player from falling off the track. At first, I had something like one-hundred and ten unique trigger volumes that would re-spawn the player if they had fallen off the track. The thing I discovered is that if the vehicle wasn't destroyed immediately after it had hit a trigger volume (I destroyed the vehicle by putting: bDestroyInPainVolume=true inside the vehicle default properties and then using Physics volumes to cause 'pain'.) , it would hit another trigger, and spawn another vehicle. So even if the player had re-spawned, was attached to another vehicle, it would throw another on the track; if the vehicle hit three triggers, it would sometimes throw two extra vehicles on the track, etc. It took me a while to discover a method that would work because some pieces of the track were really close to each other / it was easy to jump the car onto a portion of the track that wasn't a proper route. What I found was that if I made a single trigger volume, using extrudes, for each platform, it limited the chance of a player hitting more than one trigger. But, it also limited the amount of spawn points because each trigger had a designated spawn point. And, with all of the information for 'find / spawn at nearest path node' being limited to bots, I ended up settling on this system. Plus, I had invested enough time into the level that I decided it was decent enough to be fun and functional. In the end, it's one of my favorite maps; I still enjoy playing it.
I find UDK's brush system god awful. It is so clunky and time consuming I did as much as I could within Blender. After the 'Farm map', I really worked hard on making the meshes so all I had to do within UDK was make box brushes and volumes. The downside to this is that the vehicle gets caught on the edges of box blocking volumes very easy. I ended up adding an angled blocking volume to the edge of the boxes so the car always has some sort of traction. A major example of this is the 'Western map'. The buildings the player can jump up onto are covered in softer edges.
The menu level:
I wanted the menu level to include a piece of each of the tracks. I used the layout from an old 3D Buzz, UT2003/2004 tutorial, where they walked you through a complete design of a small DM map, that included three, eight sided cylinders, each as a level of the map. The center of each of the levels was cut out with a small hole, as in entrance (or exit) into the level below or above. With this simple layout, I setup single Camera Actor and then setup a Matinee that climbs up, between each of the five levels, and displays a simple layout of each track.
The Input Zones are pretty much a loop of back and forth options (there is a couple holes in it that I don't plan on changing). The concept of getting players into a playable area is there and a couple flaws (such as opening the help screen, from the level select screen, will bring you back to the main menu when you turn off the help screen.) aren't going to take away from the overall game experience.
The only issues I had with this setup is that, if you use a square texture that includes an alpha zone, because you only want to show a portion of the perfect square (256x256 etc.), the touch input still works in the invisible alpha section of the texture. So, if you layout the textures too close to one another, there can be an overlay and hitting one button can trigger another. It's as easy as spreading the Input Zones out a bit to seclude them from any others.
Blocking volumes:
The blocking volumes that surround every level are all pretty easy but can do some strange things to the vehicle if the player runs into the right way. I found that if there is a 90 degree angle (between the ground volume and the wall) its pretty easy for the car wheels to get stuck. It's rare that the car ever gets stuck though, so I never added anything to ease how jarring it is to hit walls.
Blocking volumes can present a strange dilemma. When I was making these levels I understood that there was just some parts you can take advantage of but if you put a blocking volume in the way of that, it can really take away from the semi-real view of the game. I ended up just deciding that if there is anything that can be taken advantage of, it's better to have it walled off, even if it's an invisible wall. An example of this is the 'Arena map', between the dirt jumps and even up into the stands.
Designing levels around iDevices control system:
One aspect of level design I overlooked at the beginning was how the control system works for iDevices. It isn't a very forgiving platform for things like turning a car. It is still one of the things I feel makes the game more difficult than it should be. This is one of the reasons I have designed levels with wider tracks than is needed. And, since I had to find some way of increasing the forgiveness of certain things within levels, I also did things like added blocking volumes that extend into the 'dead zone' of jumps (the portion you would miss the landing) so if you come up short on a jump, you don't fall. (some of these are more noticeable than others, especially on the 'Western map'.) I also decreased the vehicles speed a bit and increased the rate in which the car reaches max speed. This allows the vehicle to feel more static and less uncontrollable. This also presented some challenges with how I designed the jumps. I found that if I put a little extra lip on the jumps I could have the car 'pop' off the jump a little better and make it fly farther. This allowed me to create more exciting (bigger) jumps without having to make the meshes look strange.
Behind Kismet; the process that made the game function:
I'll start by saying that before this project, I had no idea Kismet even existed. But once I found out about it I knew I was going to use it for the majority of the games functionality. I ignored the “It's better to use Unreal Script” and “You can't make a game with just Kismet”. Now that my game is done, the motivation I found from being stubborn and making Kismet work has faded, I agree with both of these statements. But, even if you can't make a complete game with Kismet, you can get damn close; my game is proof of that. The only things not controlled by Kismet is the vehicle, the camera, the player class (Technically, you can use Kismet for this as well; Jazz Jackrabbit is an example), and the game type. Everything else (UI, menus, scoring, timing, displays, counters, matinee, etc...) is a jumbled sequence of Kismet actions, events, comparisons, and loops.
The thing I love about Kismet, is that it's an amazingly easy thing to learn. I picked it up within hours of starting to play around with it. I have the type of brain that if given a set of tools, like Kismet, then given a problem that is solved with those tools, my mind goes crazy with ideas and it's just test, test, test, until I figure it out. (My dreams early into this project were very strange but I also would wake up with some things in my mind I probably wouldn't of come up with awake.)
Spawns:
There was quite a few things I had to figure out in order to make Kismet work. For instance, the original spawn system for the vehicle had nothing to do with the player class. I had a system of Vehicle factories and Actor factories, that would spawn the car, spawn a camera, then attach the player and camera to the vehicle. So, say a player fell off the track in the 'Farm map', the Kismet sequence would re-spawn a new vehicle at a specific location (I used path nodes at this point), spawn a camera (I used triggers for the location because if you build paths, path nodes fall to ground level. Triggers can sit above the ground.) It didn't take too long to figure out that this system was just awful. It lagged, it was buggy, and it was crazy tedious to setup and implement. (Think of aligning cameras in the exact same position, relative to the vehicle spawn point, all over the map.)
I started to go over the Mobile Vehicle Example on UDN (http://udn.epicgames.com/Three/MobileVehicleExample.html) and found that even though it was setup for tilt turning and acceleration (which was easy to turn off), I could use the player controller and all I would have to do is setup a camera system for it.
Camera setup:
The reason I was so reliant on Kismet is because I do not have a firm grasp on writing code. I have read enough 'beginners guide to [insert programming language here]' and watched enough tutorials that I can generally understand code. Asking me to write it on the other hand, that's just a task I am unable to grasp. It's one of the things I wish I had the money and time to go back to school for; hell, if this project does O.K., maybe I will. It's worth learning since I've decided this is what I want to do. I find that unless I have a visual clue on what things are doing, it takes more time for me to learn. This is probably why Kismet was so easy for me, everything it is doing is connected and visible; code is different in my mind.
I ended up getting a tremendous amount of help from a UDK forum member, Tegleg. (He has an assortment of tutorials related to vehicles and has a very good understanding of the Unreal engine and UDK. He's also a nice guy.) After I discovered that the Mobile portion of UDK uses CalcCamera and not VehicleCalcCam for it's cameras, locking the player camera, via the PlayerController class, to the socket I had designated, was easy. All I had to do was offset the position of the cameras socket (the socket is relative to the camera bone I setup in the rig) in the skeletal mesh, socket settings. This setup made it so I could exclude the whole spawning cameras thing and just focus on where I wanted the vehicle to spawn; still using vehicle factories.
Lap display and setup:
At first, I had a very simple system of triggers that displayed lap numbers. The issue with simple is that it can be generally taken advantage of and pretty much break the game. Such as, if you setup a trigger that turns the lap counter by one every time it's hit, it's as simple as driving back and forth over it, then you win. This also didn't prevent people from going the wrong way and having the counter still work. What I ended up doing was setting up four trigger volumes that would use a simple equation and, if trigger in the proper direction and in its entirety, would then trigger the lap counter, increasing it by one.
Trigger one: 2+1, then put the result into an int variable
Trigger two: Take result of the first trigger (the int variable) [3] and multiply by 2, take that result and put it into another int variable.
Trigger three: Take the result of the previous trigger [6] and divide by 2, then put the result into another int variable.
Trigger four: Compare the desired result [3] with the int variable from the previous int variable. If it came back as 3=3 then it added a lap to the lap counter.
[2 + 1 x 2 / 2 = 3]
This system not only prevents people from moving back and forth over one trigger, it also prevents people from going backwards. Even if people found a way to skip portions of the track, if they missed a trigger it still would not allow them to progress forward / cheat the lap counter. The only issue that came about from this, is if the re-spawns bumped the player vehicle past a trigger, it wouldn't trigger the lap counter. So, there was a bit of finesse with spawn locations but only have four 'lap counting' triggers over the entire length of the track made any issues with the spawn system easy to fix.
I had used this system to setup a 'Wrong way!' display if the player decided to turn and go the wrong way but it wasn't nearly as effect if the triggers were close together and turned out to be buggy if any of the triggers were hit while the player wasn't in control of the vehicle. Such as, when the end of the race matinee is triggered, the car still moves forward; it's not destroyed. (Some examples of this are in the arena map, you can often see the vehicle during the matinee.) If it hits a series of those triggers it would send the 'Wrong way!' text, after the race had ended. I figure that since I included the 'reverse' tracks into the game, people would understand that the game is designed to move in one direction and, even if they decided to go the wrong way, the lap counter wouldn't work and they would get the clue that way. It is also a good way for players to play the game endlessly, or play more than three laps.
Draw text and relative location / size:
When I first looked into events (back when I had just started developing), I didn't understand how they worked at all and they got put on the end of my list of things to do. Only in the last few weeks of development did I start to play with them and I discovered how easy they were to setup. This was awesome because there are some limitations to the Actions → Misc → Draw Text node, in comparison to the Events → HUD → Draw Text node. The first, and most important, is the lack of support for 'relative positioning'.
I had always presumed that I was going to need three versions of my game, because of the resolution changes. iPhone 3GS, iPod Touch / iPhone 4, and the iPad 1 and 2 (480x320, 960x640, 1024x768). I even have three folders, right now, with UI setup for each device. Only in the last week of development (literally, the last week) did I discover that you can setup the UI to work with all three.
This is done with relative positioning, which takes the screen resolution and allows you to place UI in a specific place and the place you put that UI is relative to the screen size. So, if you place a button bottom right of the screen, it'll be in that position, on any device, regardless of resolution. This was great news considering that if a person was to buy my device for say, an iPad. They would have had to buy it for their other devices, if they wanted to play it on there as well. Who wants that?
I re-did all the UI elements to sit properly, using relative sizing (images use relative sizing as well) and relative placement. The issue I came across was with the text. I found that if you use a 72 point font, with the Authored Global scale of 2.0, it'll stay 72 point regardless of the device. So the font that works well with the iPhone 3GS, will be extremely small for the iPad. The solutions for this is the Multifonts imported from TrueType: Udn.epicgames.com
Multifonts:
Multifonts are pretty much a clever way to designate how big the font should be, by any given resolution. For instance, for the iPhone 3GS I used a 32 point font, for the iPod touch and iPhone 4, I also used a 32 point font. (This was annoying because even though the resolution is a massive upgrade from the iPhone 3GS to the iPhone 4 / iPod touch, the screen size is the same, so you need the same sized font, but also a different setup within the Multifont.) For the iPad, I used a 72 point font. This allowed me to have one universal UI, using Kismet, for every iDevice.
UI quality:
I've seen some trouble with the quality of images when dealing with the mobile platform, using UDK. I found that setting up alpha layers within Photoshop, then saving them as .tga allowed me to use relatively low resolution images and have them look good enough on all the iDevices. I believe the Gas, Brake, and arrow images used for the steering and vehicle movement are all 256x256. Then, inside the texture editor within UDK (double click the texture, the texture editor will pop up), I clicked the 'Force PVRTC4' box and then in the LODGroup drop down, select UI. This increased the quality of the image displayed and helped with some of the harsh looking edges created from the alpha layer.
Display timers:
The display timer and the lap timers were a bit of a challenge. At first, I tried having an Add Float loop but counting back to the thousandth of a second was just too many zeroes. I also had an issue with lag that resulted in a very unpredictable timer; it would be off by many seconds, most of the time. I believe this was an issue because the counters work by frames per second (at least that's how the game engine was explained to me). I don't know exactly how fast the Kismet loops will cycle if there is no delay; I was also told that Kismet is pretty low on the important list when it comes to the engine; many other things get called before Kismet actions.
With the Add Float idea out the window, I had to figure out another way to display accurate time. I came up with a system that was much more precise but also much more tedious. I would use a series of Add Int nodes for individual pieces of time. So, one for hundredths of a second, tenths, seconds, and one for minutes. (Each Add Int node had a Delay node set to it, so it would only add to the Int Variable every amount of time designated.) This system allowed me to display the portion of time I wanted (not as many zeroes as Floats) and it allowed the time to be easier to calculate; for the engine. The biggest flaw with this system is that if I ever wanted to add a system where the player could save, and compare fastest lap times, I would have to use a crazy amount of save variables and then come up with a system of Compare Int nodes that were accurate; if you compare 1:34:03 to 1:34:12 you would need a system that compares every digit, decides if its greater, equal to, or less than, then decide what to do next. So comparing minutes is easy, but what if you have to go back to seconds, tenths of seconds, or hundredths? Also, you can compare a hundredth of a second, have one of them be greater or less, but then, you would have to go to seconds, or minutes because those could be greater or less. Overall, the system was just too intense for what Kismet had to offer and presented such an immense amount of work, I just didn't even start on it. This is definitely an aspect where coding is king but my system does work, it's just not as rewarding to the player.
Technically, there are sixteen timers in each of the levels (four minutes, seconds, tenths, and hundredths.) There is the display timers, that displays the entire length of the race (and is constantly displayed in the top center of the UI); it is also used for the 'total time' at the end of the race. Then, there is are unique timers for each lap. The reason there is one for each lap is that in order to call value at the end of the race, you have to have an active value to call from. At first, I just had the one timer and would have a trigger call the time after each lap, then display it on the screen at the end of each lap. The problem with this is that because the counter would be constantly changing, there would be no way of saving it for the end of race time and I didn't want to have each lap time on the screen for the entire race.
What I ended up doing, to display and 'save' the lap times, was have a Compare Int node for each lap that would compare the lap the player was on, from the lap counter triggers, with what timer should be called. (Say, at the end of lap one, compare 2 with lap number [2], if it is 2 = 2, then trigger the events; same for the next lap, etc) Then, from that, I would start the timer and also pause the previous timer so I could call that time at the end of the race. So for every completed lap, there is a trigger that calls the lap time and displays it, then pauses that timer, then starts the next in the sequence. At the end of the race, each timer is called again and displayed on the final screen. This limited the amount of timers counting in the background and kept game performance at an acceptable level. It was also a fun puzzle to figure out; definitely one of the reasons I'm glad I used Kismet, I love these sort of puzzles where it's up to you to not only create it, but to figure out any issues that arise with it.
Events:
Like I said earlier, I initially had a hard time wrapping my head around events but later discovered how they worked. I think it's just cause, in the whole world of Kismet, they are a bit strange; especially using Named Variables and Values that need to match other Named Variables and Values. Then, you need to setup rules, using the Named Variable that's attached to a Value. Then, once an event is called you have to have both a true and a false New Action → Event → Activate Remote Event. This is all very handy and is great for things like fake load screens, or having text display for a specific amount of time. All you have to do is setup a delay between the true and false Activate Remote Event(s).
---- An example of this (which is something I used for all the loading screens and background images, text, and pause menu) is say you want to display an image when the level is started. You need to create an Event → HUD → HUD Draw Image event. Then, create a Bool (New Variable → Bool) and name it. Create a Named Variable (New Variable → Named Variable), name it the same as the Bool. Then, create two New Event → Remote Event(s); Each of these events is opposite of each other (on / off.) I used New Action → Set Variable → Bool to change the true / false statement of the Named Variable, which is attached to the Bool of the same name. So, if the player triggers the true event, the image turns on, if the player then un-triggers / triggers something else that calls the false bool, the image turns off. : after writing this I can see how this is confusing. Images of what I mean are here :
Overall, Events are a huge part of Kismet and create a much less complicated environment to work with, once you learn how to use them. Also, if you're interested in some more advanced uses of events, check out the Jazz Jackrabbit game that is provided with UDK.
Using Kismet to tie everything together.
I think one of the major reasons people say to use Unreal Script over Kismet, especially for making a game, is that if you want more than one level, there is a lot of copy and paste involved.
All of the levels in my game are essentially governed by the same Kismet. Aside from the unique music track, matinee(s), restart buttons, and lap triggers everything is exactly the same. But, having to copy and paste the same Kismet between levels, cut out the unique things from the previous level, then place the unique things of that level, into their place, is very time consuming. The thing about coding is that once you setup the rules inside the game type, it works across any level that is assigned that game type. Which is why, if you know how to code, or want to spend the time learning it, Unreal Script is the way to go to save time.
One of the strangest things I've found when working with Kismet is that when using HUD Draw Text and HUD Draw Image, is that there is some sort of internal layering that goes on by order of when those nodes were created. Say you wanted a semi transparent background, with text over it. The text would have to be created after the background image or the background image would be 'on top' of the text, graying the text out. The solution I found for this was to select the things that should be above others, copy them, delete them, then paste them. This solved all the 'layering' issues I was coming across and saved a lot of time from not having to create all of those nodes for each level, in a specific order.
There was a lot of play testing involved because of how many Console Command nodes there are in every level, that determine where the player goes when a button is pressed. It took a lot of time to test all of this because I wanted to make sure they all loaded the right level when triggered. And, since all of the Kismet was copied from another level, it took quite a bit to make sure I didn't forget to change the command that was unique to each level.
Game testing on three devices
I was excited to not have to use the Mobile Previewer to test because it was one of the final steps that showed that my game is almost done. Have a playable product on my iPad was pretty cool. It was also that final step that proved the game worked how it should. There are a couple things that the Mobile Previewer does great with; most Kismet functions, decent lighting, etc. The thing about the iPad is that the materials and level lighting really render out differently. What you see in the Mobile Previewer is an o.k. representation of what's going on but it doesn't give you a definite view of what the game will look to the people who buy it. I found that the lighting on the iPad didn't extend very far. For instance, there was a lot of static meshes that appeared really dark in the Mobile Previewer – when testing the 'Western map' – so I spent all this time setting up lighting to make it all look really good within the previewer. I then put it on the iPad to test and found that all that time I spent was wasted because the light rendered fine.
It was also cool to be able to use the controls via the UI buttons I had setup instead of using the WASD keys. It gave some verification on the overall difficulty of the game. But, I had also been playing these levels for hours and knew them pretty much inside out; down to where the blocking volumes, triggers,and other things that would otherwise be invisible to a player.
I have a friend who offered to help me test and I found his advice endlessly helpful; mostly because he tested on his iPhone 3GS. I figured if my game ran on the oldest 'usable' iDevice, it'll run even better on everything else. I think it's the people who are clueless about a game that are the best testers because they can unintentionally break something; something you wouldn't even think about. He ended up finding things that there is no way I would of found just because he was bad at the game, at least at first. As a couple days past, he got a lot better and understood the game more and so the advice from him some what diminished but the initial response from him was essential to the games balance and overall functionality. Not to mention, it's pretty cool to share your work with people. Even comments like “It looks pretty good.” really means, “It looks better than other games.” or “It plays better than other games.” etc... Most people don't praise the amount of time you put into the game, it's the visuals and functionality that extend the farthest.
I do want to stress that if you do decide to have other people help you test, be very careful on who you choose. There is a lot of documentation on how to 'reverse engineer' .ipa files, and if you give your game to a person who isn't trustworthy, it is possible for them to take your game and make it theirs. It is also against Apple's rules to sell “testing” spots to people. You are not allowed to make money outside of the App store and if you get caught, you'll lose your developer license.
Music and sound:
This is where I am glad that Google exists. There is so much out there that not only offers free advice for creating music but also free sound effects, loops, drum beats, snares, etc. I was able to find the engine and squeal sounds (for the vehicle turning) within a couple minutes and then altering them so they or sound decent within game game only took a few more minutes.
Implementing the sounds into the vehicle code was also extremely easy. It was as simple as typing out the sound path within the code: 'RaceGame.Sounds.EngineIdleQue' --- something like that, in place of the example code from the UDN Mobile Vehicle Example.
Also, on the Mobile Vehicle Example on UDN, there is the package you can download that has the
Skeletal Mesh, sounds / cues, materials, and so forth. I ended up copying everything from the engine loop they used and just pasted it into a new sound que I created in my package. Then just plugged my custom engine sound into it. I did the same for the squeal sounds.
As for the music, the three tracks I used for the levels, I made about a year ago, when I went through a music creation phase. The menu level track was put together real fast with a simple drum loop and my guitar. I was going to make a unique track for each map but the limitations of licensed software I own along with the crazy amount of time, and that creative spark it takes to make original music, just felt like a task bigger than the game itself, so I fell back onto an older project and used the fruit from that labor. But, the advice I can give to any individual trying to make a game for yourself is watch some YouTube videos, get an idea of how simple music is made (Trance is crazy easy and blends well with almost everything). And, if you're having a hard time learning this (music is not everyone’s gift), ask around. There is a lot of amateur music makers out there that would be glad to donate a track or two if it means they get their name out a little bit. Just put a thank you and their web page in the game, that's enough payment for most.
Submitting my game to the app store:
I had a hard time getting the game properly packaged so the Application Loader Apple provides with Xcode would accept my .ipa. My issues are documented here: Forums.epicgames.com
The reason I had such an issue is that the Provisions have to be distribution and tied to the BundleID used when you create the game in iTunes Connect. The certificates have to be tied to the provision and it just turned from one thing not matching to another. I ended up figuring it out and stayed away from 'wild card' Bundle ID naming because it was just too confusing and simply, it didn't work for me.
As I am writing this, I am on day five of waiting for the review process to end and for Apple to post my game for sale. I hear it is fairly random how long it takes for Apple to review the .ipa; anywhere from three to ten days seems to be the average.
Final notes:
It took me roughly one-thousand hours, in the course of just under four months to complete my game. (I put anywhere from six to twelve hours a day into this, seven days a week) While I was fortunate enough to have that much free time, it does prove that you can make something in a matter of months.
The final package size of my game was 108MB (the source material was around five gigs) and included eleven maps; the five tracks in both directions and the menu map. The total cost of my game, other than my time, was $198: the cost of the UDK license and the cost of the Apple Developer license. I lucked out in the sense that I already owned licensed copies of the other software I used, or the price tag of this would of gone up.
Now that this game is done, and I have spent as much time as I have on it, and learned as much as I have making it, I can say excitedly, this is what I want to do. I have no issue working long hours on tedious things and I don't get discouraged in the face of something challenging; I even like the challenge. All I have to worry about now is finding a game company who can put enough faith into me so I can prove that to them.
Thank you for reading this far, or skipping this far ahead, or even just coming to my website and scrolling down to the end of this wall of text; I appreciate your time. If you have any questions feel free to message me via any of the contact links on my contact page, or through the UDK forum private message system. I will be glad to help with your project in anyway I can. Whats the point in learning all of this stuff if I don't go around teaching a bit of it?
Thanks again,
Kyle