Welcome to Picaroon!
Logging on...
With so many buttons and so much on-screen, this can look a little daunting, but, in the immortal words of the Hitch Hiker's Guide to the Galaxy, DON'T PANIC! It's much simpler than it looks. In a nutshell: colonise islands, build ships, explore the world and colonise more islands. Sometimes, you may have to take them off other people and other times people will try to take yours. Balance attack and defence right, form the right allies and you're well on your way to commanding an amazing empire and zooming up the league!
Let's begin...
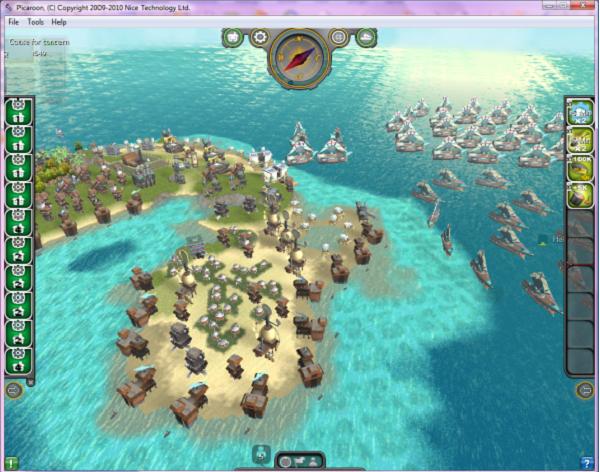
At the start, you'll see something a bit like this:
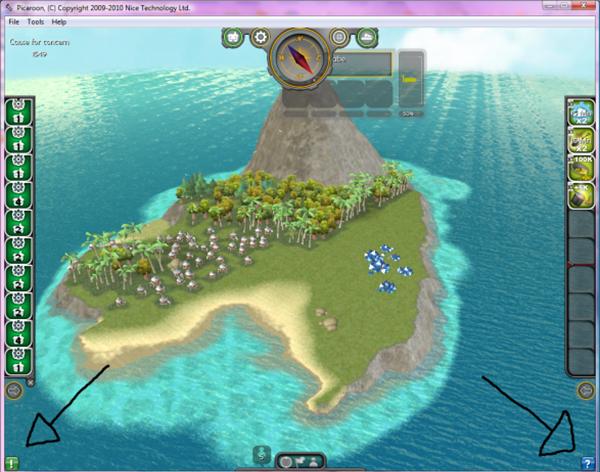
It's an empty, un-colonised island. But don't worry, it's owned by you! Here are some things to remember:
- You are protected against attack for the first three days of play so long as your empire is three islands or fewer. See that shield top left? Click on it to see how much protection you have left
- You have some ships to help you explore the area around you
- You have resources and gold to get you going with making your settlement
Middle left are my notifications (all those numbers in green boxes notify me of buildings that have been built - I can click on them to see what happened) and middle right are my specials ready to deploy. These two things remain on all screensNote the big, juicy arrows on the picture to the left. One's pointing to a green button in the bottom left of the screen and one to a blue button in the bottom right. Why? Let's move on to questorials...
Questorials: The Green Button
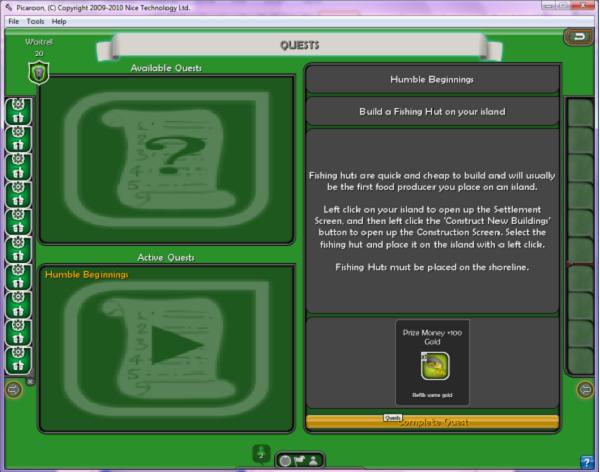
The little green button at the bottom left of your screen in the previous picture takes you here:
Questorials are half tutorial, half quests. You do things and you'll be rewarded with specials (those cool cards to help you out). In return, questorials will walk you through the best way to get your island up and running nice and quickly! Accept quests by clicking on them in the panel at the top left and pressing the Accept button. Then they move down to the active panel bottom left. When you've done them, they go orange: click on the orange ones and press the big, lovely "Complete Quest" button to complete it!
Help: The Blue Button
Although we believe you'll get used to it real quick, sometimes you need a little help. On almost every screen there is a blue button with a question mark on it at the bottom right of the screen. Click on this to get a help summary: like the example to the left. It'll show you what all the buttons do and all the various mouse controls. You'll be zooming around your empire in no time! So enough natter...
Let's get building...
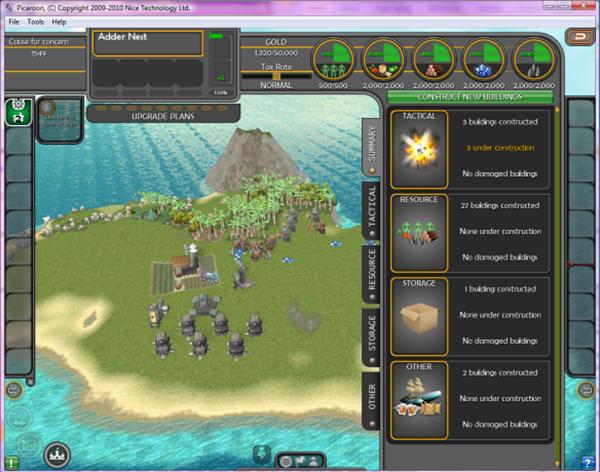
Click anywhere on your island to bring up the settlement screen:
At the top of the screen is a genral summary of the state of your island's. Starting from the top left, I can see: My score, top left (click on this to see the whole high-score chart), my island's name - "Adder Nest", the settlement's morale, my gold, tax rate and the island's current resources.Down the right hand side are the controls to view my buildings by category - either a summary (as seen here) or by type and a nice big juicy green button labelled "Construct New Buildings". Go on, click on it...
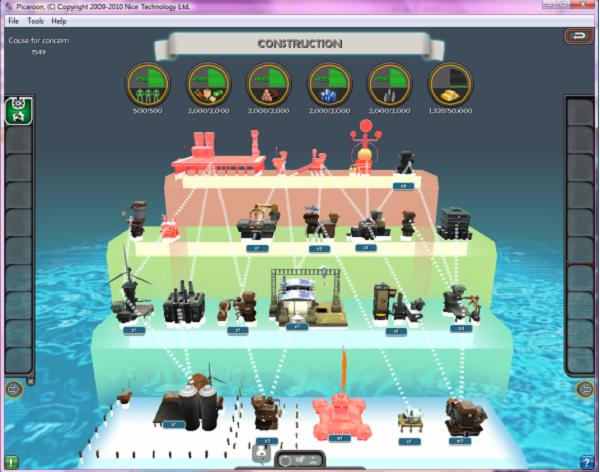
Aha! The tree of things that you can build. Here you can see a display (read from bottom to top) of what relies on what in order to be built. Top right, for example, is a siege cannon. It's a brute force weapon for defending your island. To build it, you'll need a level 1 Foundry and a level 1 Stone Mason. Buildings start at level 1 and can be upgraded to level 4. Of course, to build a foundry, you'll need something ... in this case, a level 2 Smelter. To build that you'll need a level 2 mine. It may all sound like three squashed spiders, but this diagram makes it nice and clear.Items with a red ghostly glow cannot be built either because their requirements have not been met or because you are low on resources or money.You can also see little numbers in boxes next to each item to show you how man y of each type that you have already. Right now, I'm going to build a bakery or two. I click on the bakery to get more information.
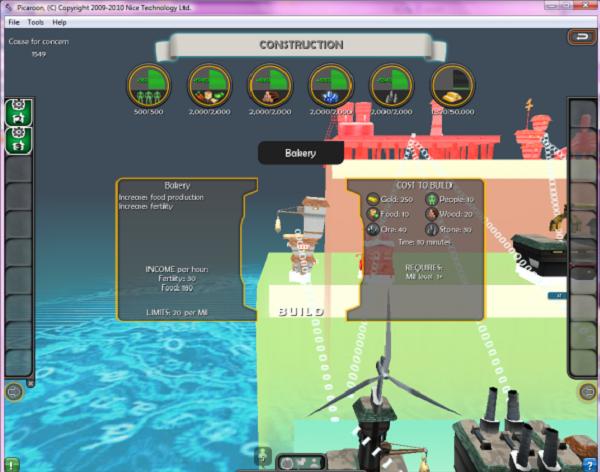 Here
Here
I can see some information about the building that I'm going to be making: some information about what it does, its income and any limits that apply. In this case, I need one mill for each twenty bakeries. I can also see the cost to build, the time to build and any requirements. In this case, I need a level 1 mill.If I decide not to build a bakery, I can right click to cancel and go back to the tree picture that shows me what I can and cannot build or I can use the cancel button that's top right of most screens to return to where I came from (which in this case would be the settlement screen).In this case, though, I want to build a bakery, maybe several! I like bakeries because they produce people and food: two of the most valuable resources.
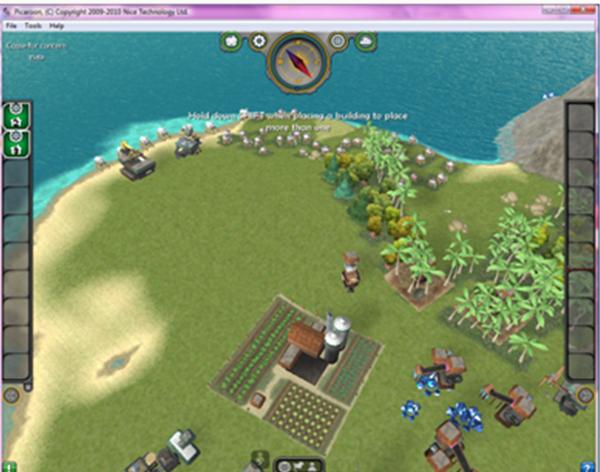
Now I'm back on my island with a bakery attached to my mouse pointer! I can move it around to decide where to build it. The building turns red if it cannot be build in the place I selected. Why might a building go red?
- The land at that point is too steep
- There isn't enough space or another building is in the way
- The building either needs or does not need water... you can't build fishing huts in the middle of the island just as you can't build bakeries in 10 feet of ocean!
I can cancel by clicking with the right mouse button, or, as the message on screen says, I can hold shift down to place more than one building.In this case, I'm going to hold shift down and click five times to place five bakeries.
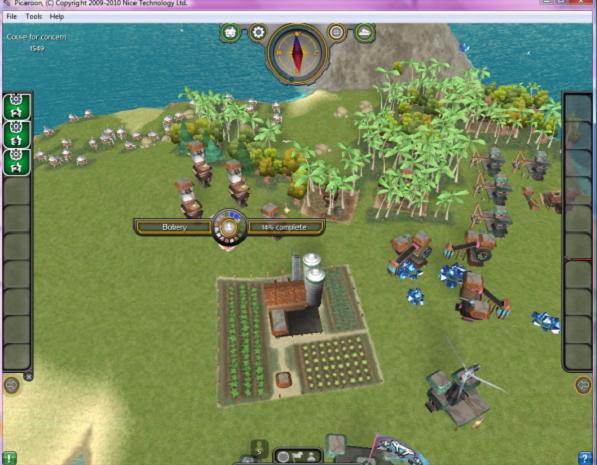
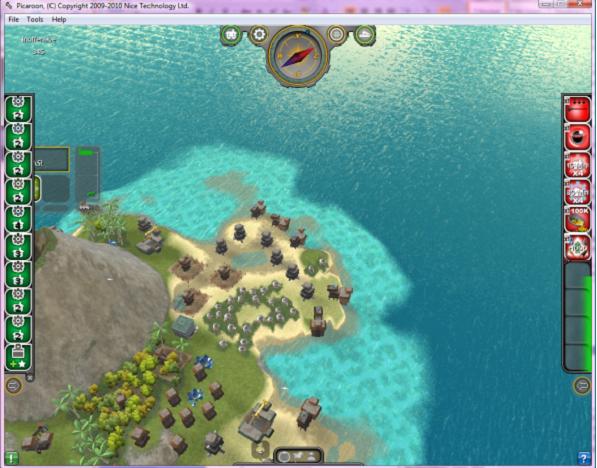
Et voila! Five bakeries. This exact same method is used to build all buildings in Picaroon. If you follow the questorials through, before you know it, you'll have an island like the first picture. So, whilst you're working through the questorials there are other things you can do. You can:
- Explore the map! Either use the ships you have or build more using a boat-yard
- Deploy specials. You will have been given some to start with anyway and as you complete questorials you'll get more.
Exploration and specials
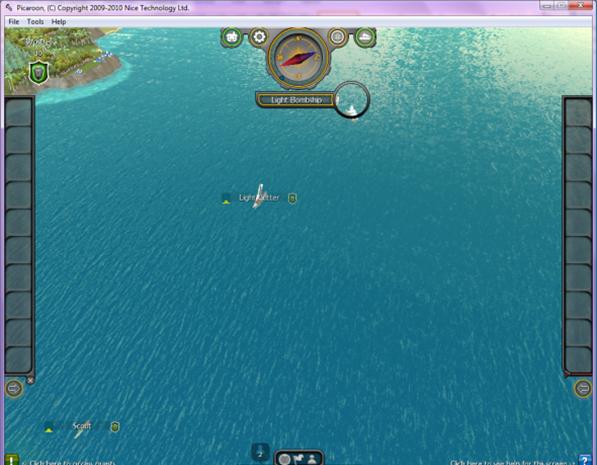
See these guys? They are your starting ships. You have 1 scout, 1 light cutter and a couple of bombships. Scouts (and submarines when you start building those) are for looking around. They're fast, cheap and quick to build and great for checking out the neighbours. Submarines have the added bonus of being able to sneak around quietly so you can see people without them seeing you!
Cutters (and the heavy cutter) are primarily for ship-to-ship combat. They will attack islands but not as efficiently as the bombship which is specifically designed to attack settlements. Later, with the right buildings in place, you can also build behemoths. Behemoths are very expensive general purpose ships: they're for attacking fleets and settlements. Whilst not as efficient as the specific units, they're great if you need to use your fleets for sinking your opponent's fleets as well as razing their islands to the ground!
Let's go exploring...
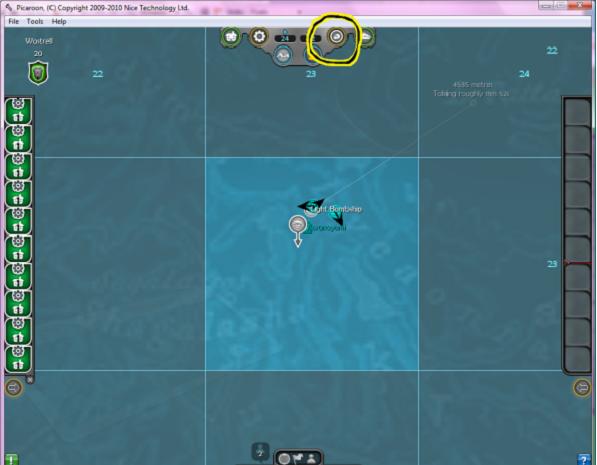
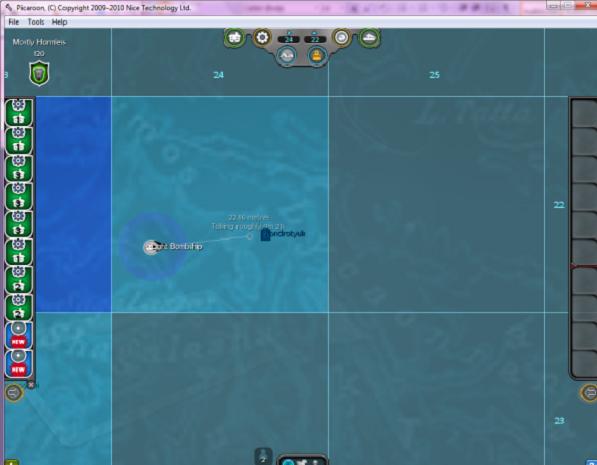
The circled button toggles between detail view and overview. You can see overview to the left in this picture. It shows where you are in relation to the rest of the world. You can control your ships from this screen or from detail screen. The mouse-wheel will zoom in and out and you can drag the screen around by holding the left mouse button down and moving your mouse cursor. You can select a fleet by either: right-clicking on it from overview or left-clicking on it from detail. In this screen, for example, you can zoom in, right click on a scout and then left-click somewhere to get the ship moving. In this example you can see all the starting ships moving in lots of directions - hopefully about to uncover something new and great!
The empire grows...
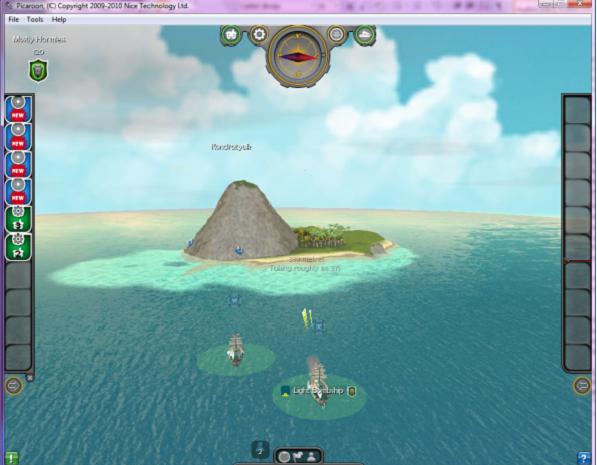
Exploring has revealed this new island. To take control of this unclaimed island, it needs to be attacked.
That's a job for bombships! Fortunately, you start with a couple. The cutter will do the trick, but it will take a lot longer. We move the bombships into range and then with them selected, click on the island.
Here are some great tips:
- You can press and hold the space-bar to see attack ranges of islands or fleets. This is great for working out when you are in range or not
- In detail view, if you select your fleet (by left-clicking on it) and then move your mouse pointer over a potential target, you get a range circle on-screen that shows you how close you are to being able to attack
If you right-click-and-hold over a fleet, you get a pop-up menu with options for leaving and joining fleets, viewing fleet statistics and all sorts of other handy options.
On to specials...
These are like magic cards that you can play at various times to help you out. They come in a bundle of categories, for example, those that can be used on whole settlements, fleets, single buildings or just single ships. There are also some other types that affect areas of sea or the such like.
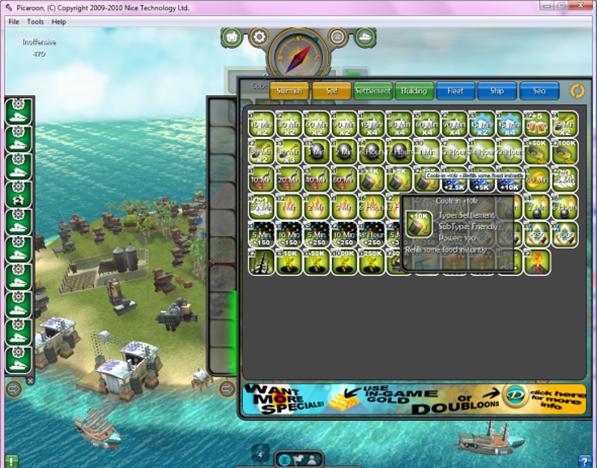
On the right hand side of your screen is a "specials deployment" area. On the screen to the left you can see a bunch of them ready for deployment. The arrow at the base of this tower lets you unfold your entire collection. You can left-mouse-drag items from the deployment area to your specials storage area and visa versa at any time. You'll also see a green bar running down the right of the specials deployment area. This is the specials power bar. When you use a special, the meter goes up and over time it goes down. When the meter crosses the maximum allowed line then it goes red disabling further special deployment until it has had a chance to go down.
Here are a bunch of settlement specials. You can put the mouse pointer over any of them to see more details. This one, a Cook-in +10K, will refill up to 10,000 food instantly using 100 power. 100 power is about half of the bar before it goes red, so if you're short of food, this can be a good call. Of course, if you've not yet built the warehousing to support 10,000 tons of food then this could be quite a waste: pick carefully!Y
You can click on the buttons at the top to cycle through the different categories specials and you can click at the bottom of the screen to see the Picaroon shop.
The process of following through the questorials (the green button bottom left) will introduce you gradually to all of these features and it is strongly recommend that you follow them through: it's the quickest way to see a lot of Picaroon and you will be rewarded with lots of specials for your efforts!
