You can access the editor from the main menu under COMMUNITY LEVELS > EDITOR > NEW LEVEL. You can then choose between BLUEWITHGRID and EMPTY LEVEL. For beginners we recommend BLUEWITHGRID, which will load a basic template with a blue image and a grid in the background. You will see something like this (except for the the numbered references):
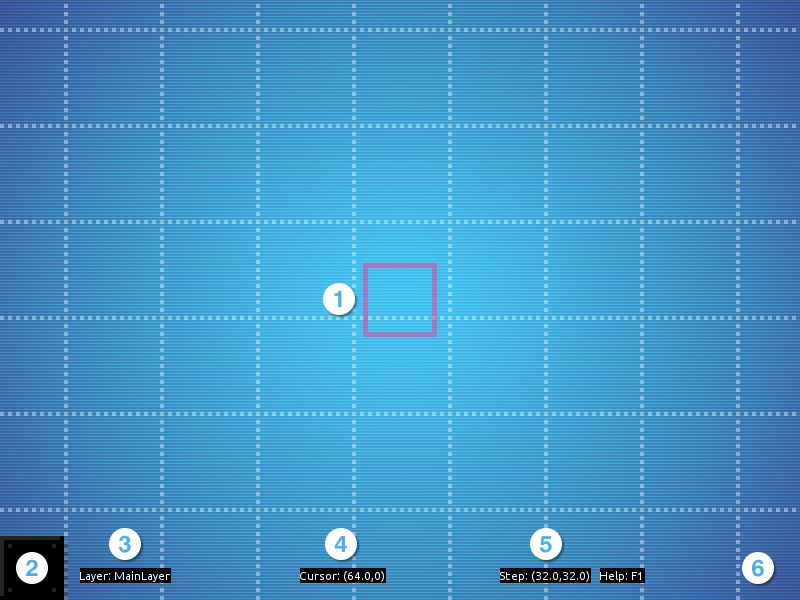
- Your Cursor
- Current Object
- Current Layer
- Position Coordinates of the Cursor
- Step Size of the Cursor
- Current Focused Object (nothing is focused in the image above)
Basic Controls
Basic Controls
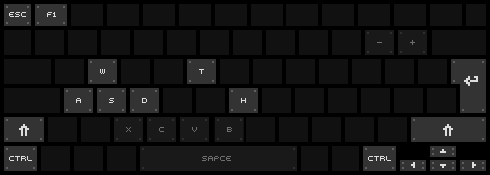
- Use the ARROW KEYS to move your cursor.
- CTRL will place the current object in the scene, more specifically to the current layer.
- SHIFT will erase the current focused object that the cursor hovers over. The placement of the cursor and the object refers to the lower left corner, by the way.
- Use A and D to cycle through the available objects, e.g. Nikki, tiles, robots, and so on.
- You can change the step size of the cursor with W and S. The default is set to the size of a standard tile, which is 64 by 64 pixels. In other words, the cursor will move in steps of 64 pixels.
- Use + and – to switch to another layer. We recommend to not use this feature in the very beginning, but to make sure that the MainLayer is set as the current layer.
- T will let you test the level, and so will H with Nikki spawning at the current cursor position.
- F1 or any unused key will bring up a help screen, ESC will bring up the editor menu.
First Steps
First Steps
The most basic elements that you usually need in a level are Nikki, some tiles for Nikki to stand on, and a switch. Since the objective in a community level is to find and activate all switches, you must place a least one switch in the level. So, let's built something very simple like this:
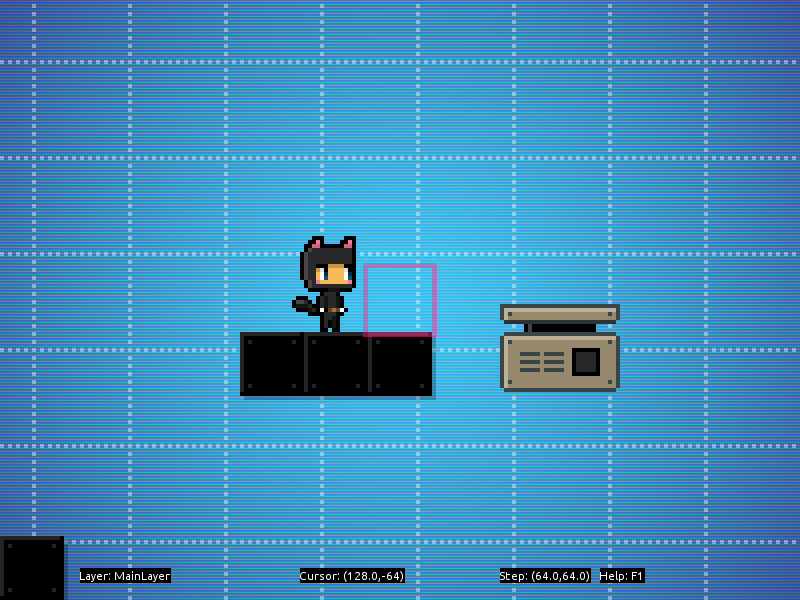
Use the ARROW KEYS to move the cursor and then place the objects into the MainLayer with CTRL. To select the different objects, you could actually cycle through everything using A and D until you find what you are looking for, but in many cases it will be more convenient to select objects by using the editor menu. Press ESC and go to SELECT OBJECT > NIKKI to set Nikki as the current object. For the switch you will go to SELECT OBJECT > SWITCH > LEVELEXIT. Using the editor menu, you can select all available objects of the game.
After having created those objects, it would be a good time to save the level. Press ESC to bring up the editor menu again, select
LINUX: ~/.nikki-free-levels/userLevels/
MAC: ~/.nikki-free-levels/userLevels/
WINDOWS: %APPDATA%\nikki-free-levels\userLevels\
(It is currently not possible to rename levels or save them as copies from within the editor, so you have to manage this in your file browser.)
Before we head on to the next part of this tutorial, let's playtest what we have just built! Select TRY PLAYING THE LEVEL from the editor menu or hit T on the Keyboard to switch from editing mode to testing mode. Instead of T you can also press H, which will allow you to start playing at the current cursor position. This way you can instantly try out your designs any time. Return to editing mode by pressing ESC.
Check out the next tutorial for placing robots and terminals! A monolithic tutorial is available here.