The AI finds navigational paths and weapon collectables and begins its movement maintaining equal distance from the wall colliders. Once they find a weapon they fire all the shots immediately (since posting this video, they now only fire if someone is in the same room). They don't currently find weapons that are necessarily closer, but that's to be worked on in future iterations.
We've also improved how our level generation works.
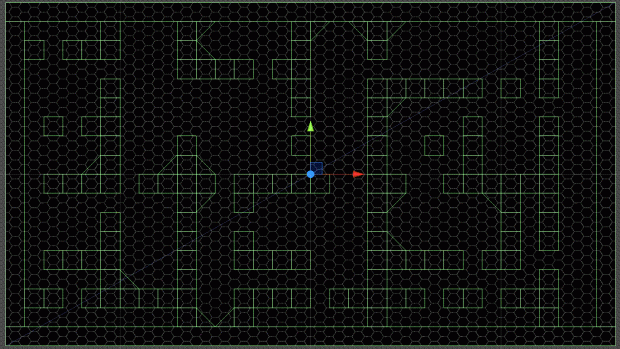
Before it generated a basic tiled map and colliders which you can see here:
Maps are now constructed on a grid using a subdivision algorithm with some custom rules to guide the process. Subdivision guarantees that every room is accessible to every other room. Throughout this process, each square is marked as either a wall, a door, or a room. Once the map is done being generated, any square with a wall has a box collider dropped in its location.
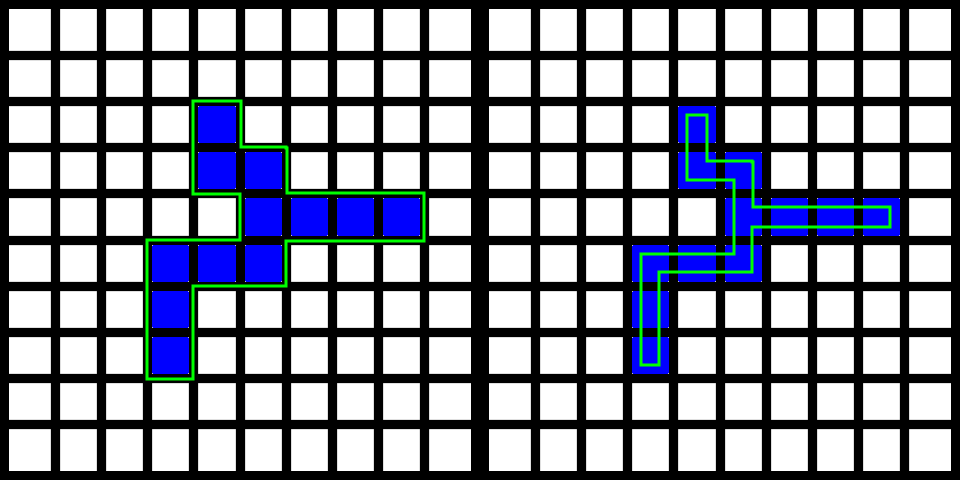
Recently, I evolved this method with two goals in mind: 1) Reduce the number of colliders to increase performance and eliminate seams.2) Build thinner walls to make rooms feel bigger and reduce wasted floor space.
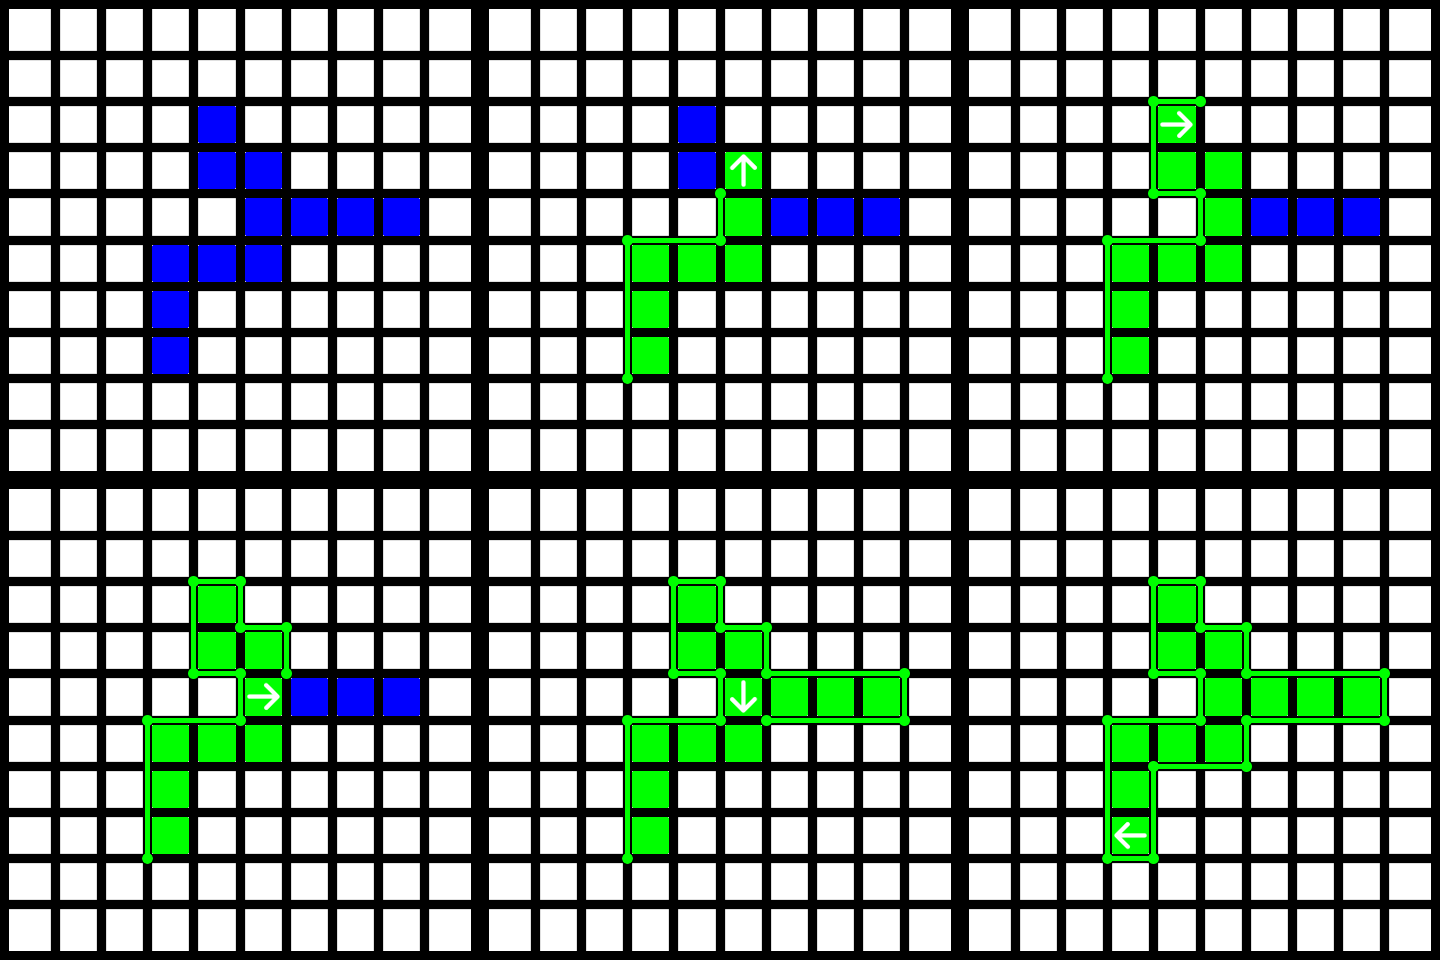
To do this, I create polygon colliders using a walk around technique. This basically is how the algorithm works:
- Pick a wall square. As long as the square to the left is a wall, move left. As long as the square below is a wall, move down. Repeat until you have found a wall square that doesn't have walls left of or below it. This ensures you can safely put your starting point in the bottom left corner and start by walking up.
- Drop a point in the bottom left corner and start moving up.
- If the square to your left is a wall, drop a point in the bottom left corner of your current square and turn to the left; go to step 5.
- If the square in front of you is empty, drop a point in the top left corner of your current square and turn to the right; go to step 5.
- Move forward, repeating the process in steps 3 and 4 until you end up back where you started. As you move along, flag the squares you've visited so that you don't create more than one collider for each wall. Remember that points and wall checks are done relative to the direction you're facing.

Wall thickness is applied when dropping the points of the collider. Rather than dropping the points in the corner of each square, an offset is used based on the thickness of the desired wall. For example, if you want walls to be 0.5m thick instead of 1m, the bottom left point would be at (-0.25, -0.25) instead of (-0.5, -0.5).

Thanks for reading!
You can follow us on Facebook, Website or Twitter for more updates!
Thanks for reading!


