My MagicaVoxel → Unity Process: A Tutorial on How to Import Voxel Models into Unity
Written by Victor Ahlin, creator of “Just Keep Running”
Video Version:
Keep reading if you want more detailed explanations.
You can safely skip the Intro section if you simply want to get to the tutorial!
Intro
There are two main reasons why I used Voxel graphics for Just Keep Running.
- It’s easier and therefore faster to make 3D models using an application like MagicaVoxel.
If I needed to make a screwdriver model, for example, I don’t have to worry about working with vertices and triangles or having a dedicated 3D artist. Both amount to more time and money, which wouldn’t have mended well with the game at this state.
Mainly because Chapter 1 was developed on a time crunch since we wanted to submit the game for our school's game awards (which we’ll give more details about in a future article!)
With voxels, you simply have a palette of colours and lil’ cubes. It’s kinda like pixel art but 3D. - It’s a unique art style. A game that I thought executed the concept of voxel graphics from both a visual and gameplay perspective really well is Teardown.
With all the volumetric lighting and impressive destruction in that engine, I thought “Wow, there needs to be more voxel games on the market!”
And while our game doesn’t use voxels in the same impressive way Tuxedo Labs did it with Teardown, I think the aesthetics of the game complement the voxel environments well!
Importing voxel models into Unity is not the most optimized process, and the way we do it won't be a perfect fit for everyone or even the most performant. But it worked for us, and it feels relatively streamlined, all things considered. And frankly, there doesn’t seem to be a one-stop-shop on the net that clearly talks about what issues might occur when importing voxel models and how to fix them, so we hope our process might work for someone else!
So… here we go.
Step 1. Make the model

Now this one might seem obvious, but there are some things you might want to consider when making the actual model.
If, for example, you want everything in your game world to be precisely to scale without re-scaling everything in Unity later to make it reasonably sized, you’ll want to make sure the model scales compared to other objects in the game world. This is if you’d like every voxel in the game world to be exactly the same consistent size.
Just to take an example from my game, I know the player is around 32 voxels tall in the game world, so I might want to make something dimensionally similar to the player that big. Fortunately, I don’t mind if the voxel scale is not super consistent, just as long as it’s reasonably consistent most of the time. It’s up to you and your technical requirements to decide what to do with your model.
Step 2. In the World Editor, reposition the model to the ground and closer to the World center
If you try to export the model now in Model View and then import it into Unity, the centring of the object will be all wrong. So you want to ensure that you’re exporting the model in World Editor, which you can switch to by pressing the ⇄ button in the top-right corner of the View Window.
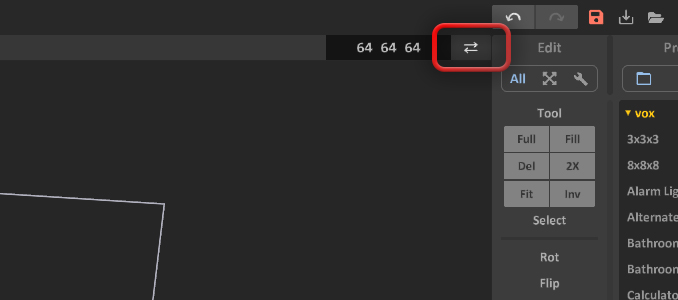
Once you’re here, select your model, and in the “Edit” window…
- Click on “Move”
- Then, click on “Ground”.
This will automatically move the object so that the bottom of it is directly in contact with the ground of the World Editor. Now you can manually realign the model so that it is closer to the center.
Note that once you export the model in World Editor, the world centre will become the actual centre of the model, meaning that any position, rotation and scaling done in Unity will centre itself towards that point.
I’ve personally found that there are two good ways to position the model for exporting. Either having the model exactly centred or having a bottom corner of the model centred.
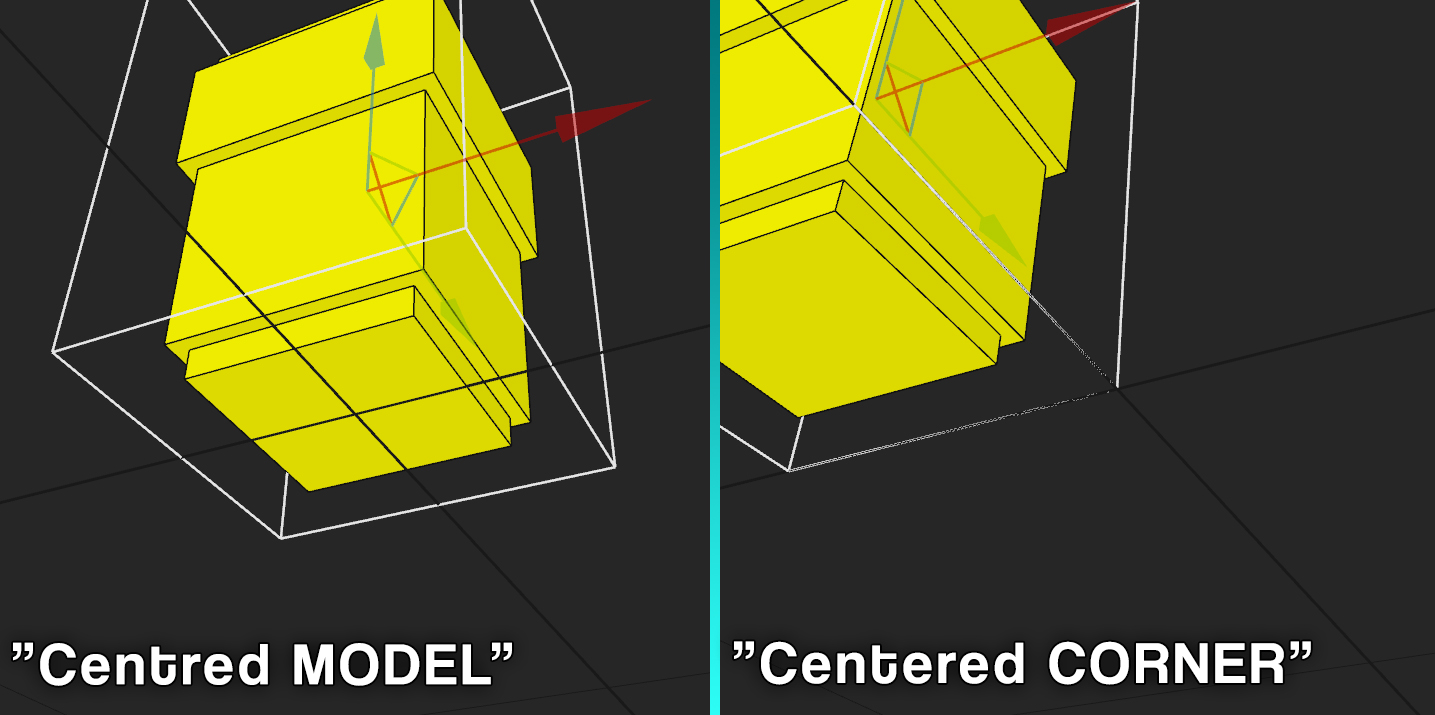
Using the “Centred MODEL” method will mean that the positioning, rotation, and scaling of the model will be exactly relative to the bottom centre of the model, which some might find useful.
I personally prefer using the “Centred CORNER” method. Since I use Grid Snapping in Unity which shares the same size as a single voxel, using this method will allow me to position, rotate, and scale the model EXACTLY relative to a voxel in the grid, which is useful if I need to position, for example, a set of wall tiles together.
Step 3. Export as an OBJ
While MagicaVoxel is in the World Editor…
- Click the “Export” button
- Click on “obj”
- Save the model wherever you wish
Now you have the model exported as an OBJ file! This will also export an MTL file of the same name as you gave the .obj file, and a PNG file containing the palette used for the model you exported. From my own testing, you can most likely ignore the .mtl file safely when importing the model into Unity.
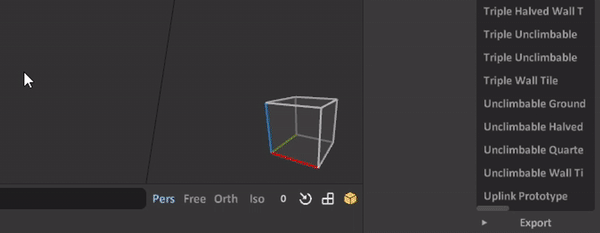
If your MagicaVoxel project contains multiple models in its World Editor, they will all be separately exported. You can later put together all the models into a single larger GameObject in Unity. This can also be a way to make a “tile set” in a single project and export each individual “tile” using this method. Just make sure all objects are positioned as they should be relative to the world’s centre.
Step 4. Import all files into Unity
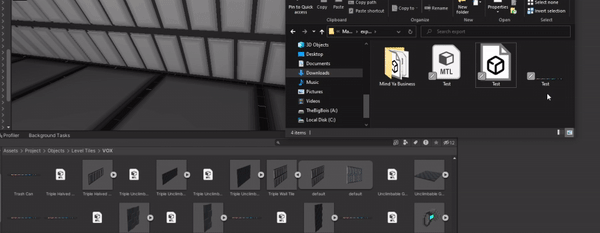
You can now import the OBJ and PNG files into Unity, and tadaa!
But, we’re not done just yet. You might notice that the model is either blank or coloured. Whichever result you get, the model still needs a material assigned to it so that it can be properly coloured. But first, you want to change some object settings.
Step 5. Change object settings
Click on the model you just imported, and in the Inspector you will find a set of settings to change. There are a few settings you want to tweak before you start using the models you just imported.
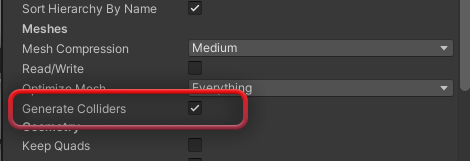
In the “Model” tab, make sure to check that “Generate Colliders” is enabled. This is so that the model will actually have physical colliders so that other objects can’t phase through the model.
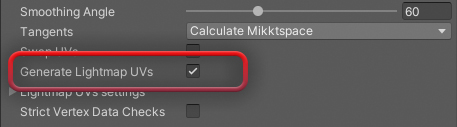
You also want to make sure that “Generate Lightmap UVs” is also enabled, since that will allow lightmaps to be built on top of the model. This is especially important if you must build the lighting in your game levels.
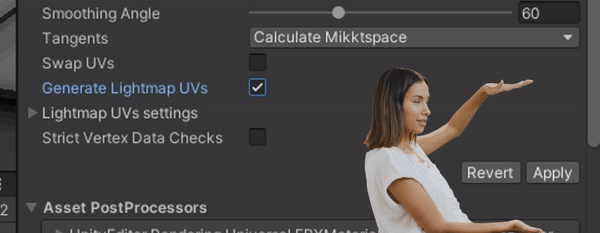
Make sure that once you made these changes, you apply them to the model. Scroll down to the bottom, and click “Apply”.
The last setting is found in the “Materials” tab. But we’ll get more into it in this next step.
Step 6. Make Material with Color Palette
Create a new Material and, for the “Base Map”, use the palette PNG you were provided with when exporting the model.
Go back to the model you imported and check the Inspector. On the tab “Materials”, change the “defaultMat” to the new Material you just created. And lastly, click on “Apply” again.
Outro
Congratulations! You just imported your MagicaVoxel model into Unity! I’m so proud of you 😀
We just showed you the methods we used when making models for Just Keep Running. It might not be a perfect fit for everyone. But, we do hope that by publishing this tutorial, we hope we helped anyone struggling with even a single aspect of the process!
If you’re curious about our game, Just Keep Running, you can check it out right here on IndieDB. You can download the game using the links below!