Artillery
Artillery must feature heavily in any WW1 game worthy of the name. It is generally considered to be the largest cause of military casualties during the war - perhaps more than 50% - and it affected tactics and strategy alike. Since Verdun artillery has been a gameplay feature of the WW1 Game Series. Then it was called in by squad leaders, while in Isonzo it is the Officer class who handle support requests, as detailed in a previous Isonzo Intel.
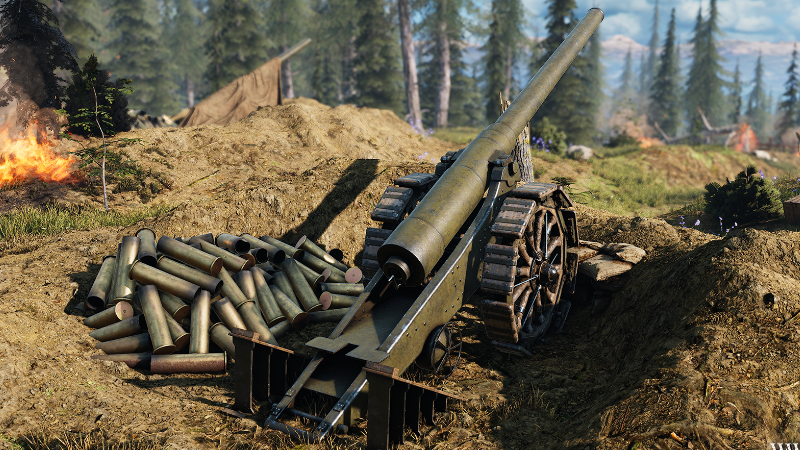
Artillery such as this 149mm Italian piece also appears on the battlefield in Isonzo, as sabotage objectives or incidental detail. There are also the mortars which are functional weapons!
Types of Artillery Support
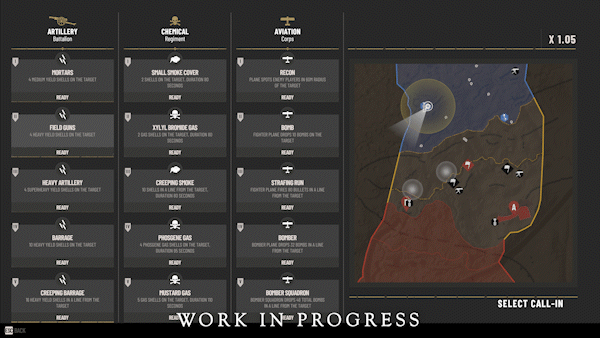
Every support category in Isonzo has five different options, ranging from short cooldown to long cooldown. For the artillery, mortars and field guns are the two shortest cooldown options. They fire four shells (medium for mortars, heavy for field guns) at the targeted flare marker. As you’d expect, they will kill, injure and suppress nearby soldiers, with the heavier field gun shells having a larger area of effect.
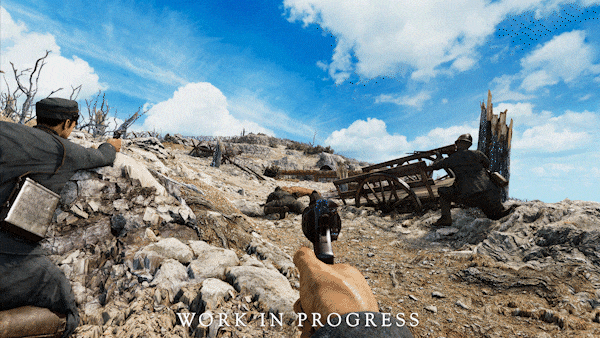
A mortar impact from the most basic artillery call-in option.
Having good cover will protect infantry from artillery shells, so artillery call-ins will be less effective when targeted on trenches, ruined buildings, and areas with a lot of large rocks. Of course there’s always the chance that a shell will land in a trench, with predictably gruesome results. In addition, because of the rocky landscapes in Isonzo, artillery will cause stone fragments to fly around and therefore has a larger range in which players are wounded.
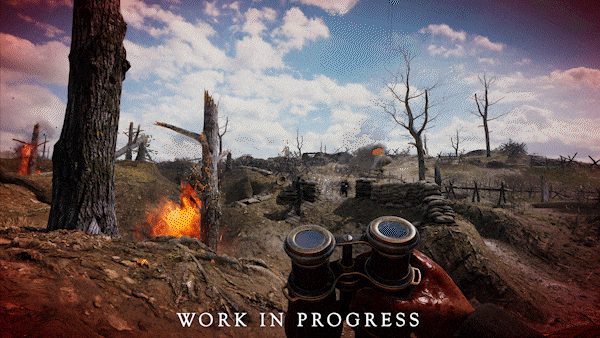
Heavy artillery
The third artillery call-in option is the heavy artillery. This represents the super-heavy siege howitzers used by each side, with their enormous shells. The Austro-Hungarian Škoda 30.5 cm Mörser M.11 fired 305mm shells, while the Italian Mortaio da 210/8 D.S. uses 210mm. Only a few shells are fired but the power of them is enormous.
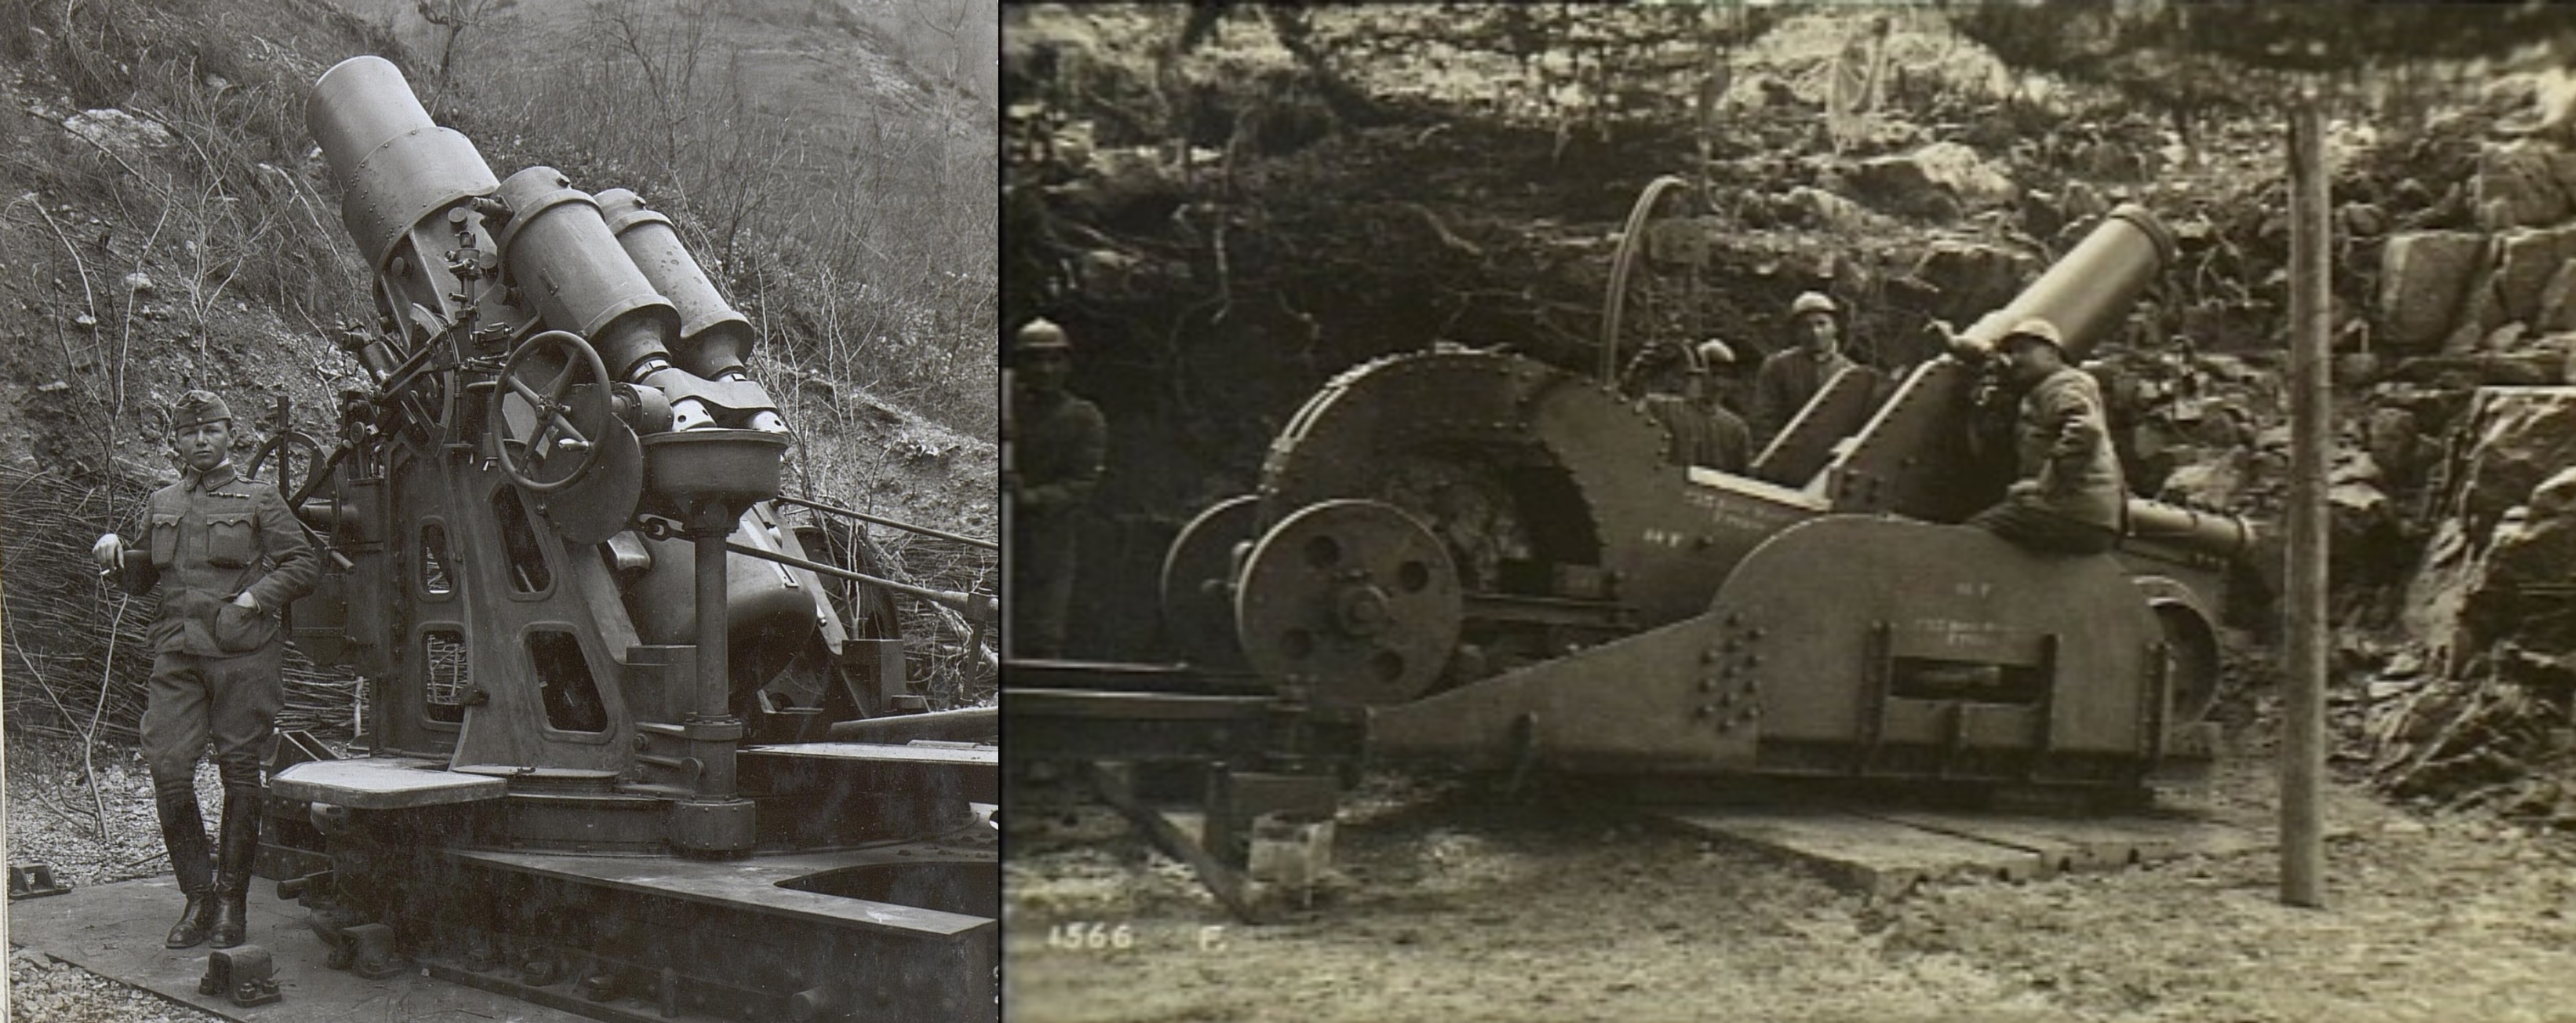
Left: Austro-Hungarian Škoda 30.5 cm Mörser M.11, Right: Italian Mortaio da 210/8 D.S.
The trend at the start of WW1 had been towards lighter, fast firing artillery pieces. These were devastating against enemy troops in more open ground, but as the war of movement ground to a halt and trench networks were constructed, the militaries involved quickly realized they had a need for heavier guns which could penetrate fortifications. You can expect the super-heavy shells of this call-in option to be more effective even against fortified positions like trenches or ruins - even if they don’t kill everyone present, injury and suppression effects can make them vulnerable to an infantry charge.
A super-heavy shell from a siege mortar.
Barrages
The last two options for artillery call-ins are the barrage, and the creeping barrage. The barrage calls in 10 heavy shells on an area, which will almost certainly eliminate any defenders outside of cover in a larger area than the earlier call-in options. The creeping barrage fires 16 shells, but has a special feature - it is aimed, and the shell impact locations will gradually move from the starting point in a direction specified by the officer calling it in.
You’ll choose the direction of the creeping barrage as you call it in, using the flare location as the starting point.
Creeping barrages were a technique developed to allow friendly infantry to advance behind the cover of the barrage, so that defenders would have to stay in cover until the attackers were almost on top of them. They were ‘creeping’ because they had to move forward slowly, at the rate of an advancing infantryman. This was a complicated business to organize with WW1 technology and didn’t always come off correctly, but when it did work out it was very effective.
A 6x speed version of a creeping barrage in action. These can be truly devastating!
As a final note on artillery barrages, remember that officers targeting a second flare on a location will boost the next call-in aimed there, which for artillery means more shells fired. This has a greater impact on the two barrages, with 25% more shells coming down during a boosted creeping barrage.
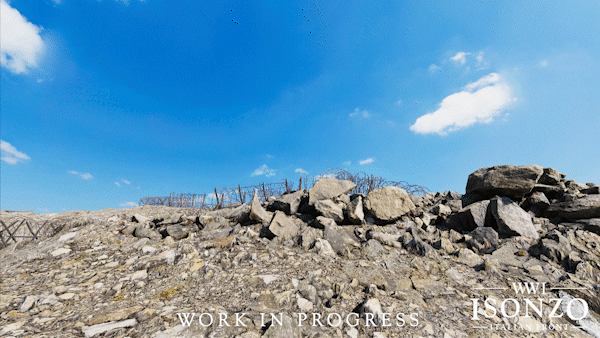
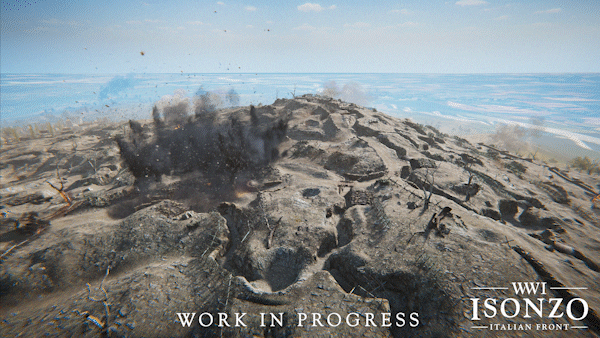
Bombardment on the Carso with rocks flying about.
Particles
We spent a lot of time on making artillery impacts feel powerful, and our particle system plays a large role in that. The dirt thrown up, the smoke left behind, it’s all particles. And it’s not only useful for explosions! We’ve used it for tree leaves fluttering through the air, ambient dust to capture the feel of certain environments and weather conditions, and much more.
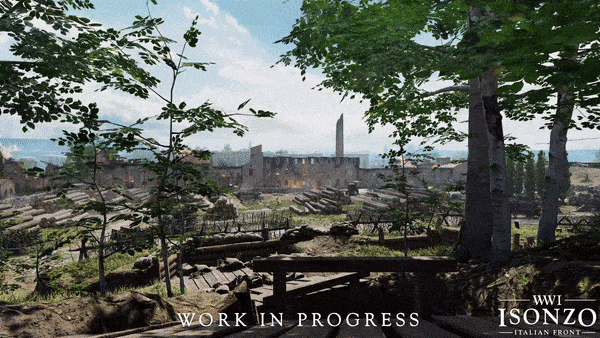
Particles in action on the wooded slope of the Gorizia map. The leaves at the start of the GIF are particles.
Albini & Figlio Binoculars
The Italian officers and mountaineers in Isonzo can make use of these Albini & Figlio binoculars for observation and spotting - often a good idea before calling for artillery support! You don’t want to waste your creeping barrage on a section of trench with only a handful of enemies after all…
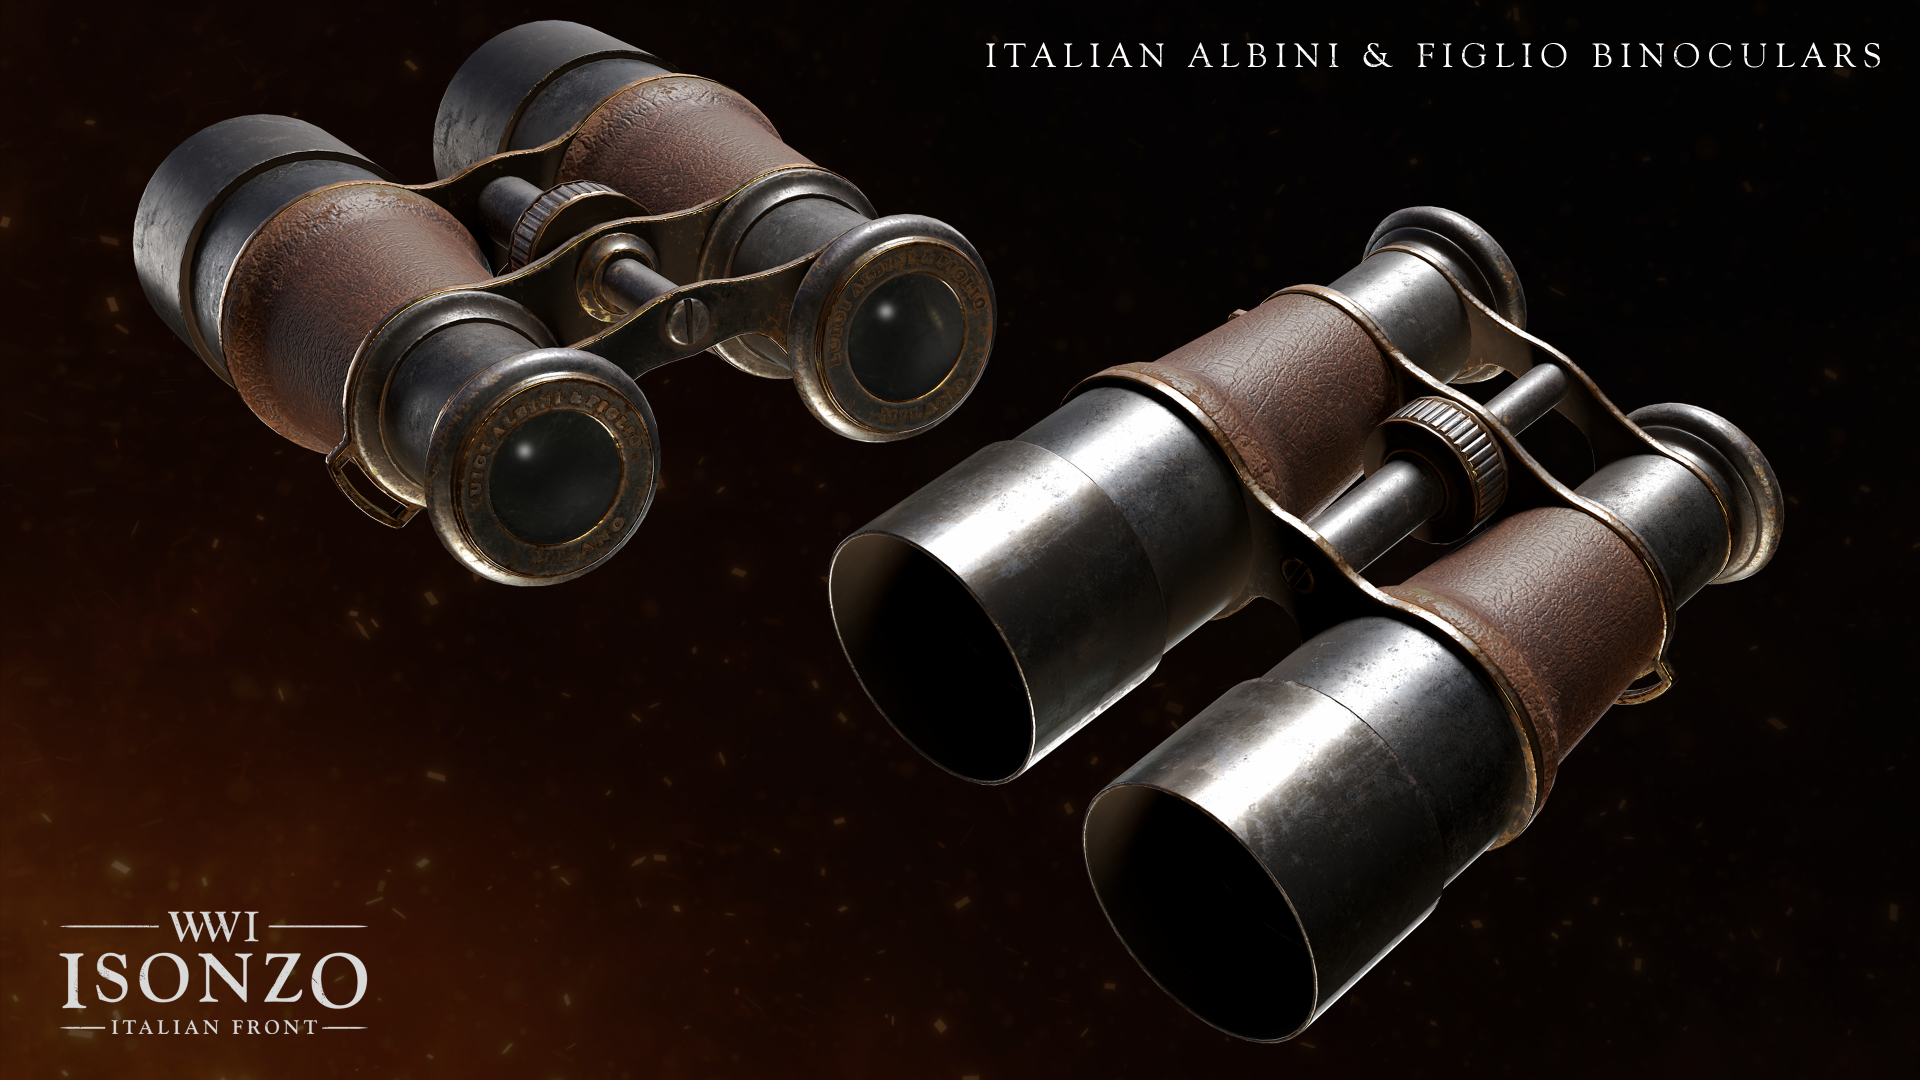
Italian Albini & Figlio binoculars.
Binoculars (also called field glasses) were in huge demand during WW1 with many officers buying privately when they could. Not only useful in ground combat, they were also vital for sailors to spot other ships or submarines, and used for aerial observation from balloons. In Isonzo they are useful for observing the battlefield, and you can also ‘spot’ enemies which marks them on the mini-map for your entire team.
More call-ins to come!
There are two more categories of call-in that officers can utilize, the feared Chemical Regiment and the dashing Aviation Corps. We’ll get to those in future dev blogs. See you next time!