Unity 3 have given us Deferred lighting so in this light prototype we'll see if I can create a lighting scheme close to Running Man while being completely dynamic appose to completely static.
Pre-Calculated lighting in Running Man

Hangar level in Running Man, lighting is completely static, created using pre-calculated lightmaps, looks good but is as dynamic as hardened concrete!
When we created Running Man in Unity 2.6 we relied on baking all lights into static lightmaps for performance; No doubt baked light looks fantastic, as it allows for calculating advanced and accurate global illumination as well as ambient occlusion, but with the obvious downsides of forcing lighting to be completely static as well as increasing the size of our builds (Mb) due to all the scene lightmaps.
Sure we would all love to have real-time Global Illumination like CryEngine 3 ... but experience tells me that we can get 80% of the way by faking it and the last 20% is a real nice to have at the moment, I guess we just have to wait till Unity integrates real-time GI in Unity. :)
Lets begin!
This prototype is created with what is available in Unity 3.3:
- Spot Lights
- What I'll generally use to create primary light sources as spotlights provides a lot of control and is perfect for casting shadows on key environment elements and dynamic meshes.
- Point Lights
- Used to simulate in-direct lighting from primary light sources as well as setting up very crude bounce light areas in the environment.
- Ambient Light (Render Settings)
- I'll use this option to apply a discrete color value to the scene to simulating a general base-ambiance in the environment, which then dependent on which colors that dominates the lighting scheme and how much light is available. The idea is to adjust this value on the fly to help simulate the global ambience in a given scene.
- Screen Space Ambient Occlusion (Image-Effect)
- I'll rely on applying a bit of detail to the lighting setup by using the SSAO image-effect on the camera. In Running Man SSAO was pre-calculated during bake-time which made it completely static.
- Bloom and Flares
- The goal is not to polish the hell out of this light prototype so other tricks such as using color correction image-effects, particles etc. is not part of this first journey into creating advanced dynamic lighting in Unity. But we got to have a bit of glow on the light fixtures - its so easy to setup and looks great.
Step 1: Setting up primary light

Spot lights and light fixtures are placed logically throughout the environment.
Step 2: Setting up primary ambient light

Next I add a point light near the primary light to fake/simulate in-direct light on the nearby environment.
Step 3: Setting up secondary ambient lights

To simulate a bit of bounce light (including simple color bleeding) I add a few small point lights where needed.
Step 4: Setting up Scene Ambient Light

Next its time to set the global ambient light color (Render Settings) to help simulate a base-ambiance in areas not directly influenced by primary- or ambiance light.
Step 5: Setting up Screen Space Ambient Occlusion

The Screen Space Ambient Occlusion image-effect is applied to the camera which brings out a lot of details near meshes in the environment.
Step 6: Setting up Bloom and Flares

Final touch to bring the light fixtures to life is to apply the Bloom and Flares image-effect with moderate "fancy" settings.
Step 7: Final result

When looking at the combined effect that all the above steps achieves, then its great to think about that all this is completely dynamic and do not have to bake/render for hours each time you need to change something in the scene.
Faking Dynamic Global Illumination in Unity
- Warning:
- Deferred lighting is calculated based on how many pixels the light influence pr. frame, so be sure to set resolution if you native default resolution is too high!
Unity Light Prototype - Faking Dynamic Global Illumination - Part 1 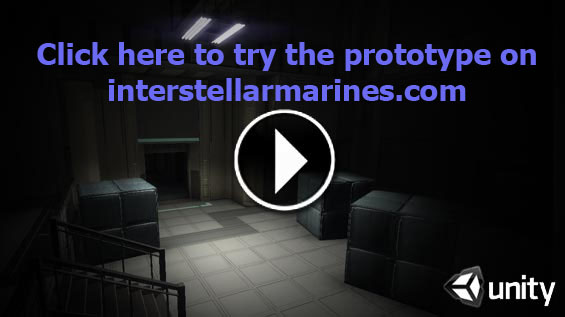
Take the light prototype for a spin and see the final result for yourself - all part of our commitment to letting you guys and girls in behind the scenes of developing Interstellar Marines, the best we can.
- Warning:
- This Prototype is not optimized for optimal performance so if you're "playing" on a small notebook, please do not expect the best frame-rates in the world!
I hope you've enjoyed this small preview into our efforts of making everything dynamic in Interstellar Marines, including lighting. In 'Light Prototype - Faking Dynamic Global Illumination in Unity - Part 2' I'll reveal more interesting ideas on how we're faking global Illumination in Unity for Deadlock.
For the love of the game!
/ZPSHicks
Note:
Not to hype or sell CryEngine 3 in any way .. but if you want to know more about the real-time global illumination in Crysis 2, take a look at this PDF - You just gotta respect the wizards at Crytek for what they have achieved with CryEngine 3.


awesome! :)
oh, wow, you are actually faking bounce lighting, that's quite interesting, think I've never seen anyone do this before :D
Great tutorial. Its good that Unity 3 has the ability to be tweaked so you can get professional results. Specially with lighting.
Do you have to use lightmaps for any of the static shadows?
your screenshots look amazing! I love the simplicity of your tutorial too.
thanks
Very nice, the results looked fantastic in the viewer too, excellent job guys.
No offensive, but tell us what's the point to lit grey boxes... show us some REAL visuals, please. We are loosing hope of get anything more than grey boxes in your game. Good tutorial of showing how to make grey boxes look cool. :) grey boxes grey boxes grey boxes...
Good god you're dumb.
The point here isn't the scenery, it's the LIGHT.