<!--[if gte mso 9]><xml> Normal 0 false false false MicrosoftInternetExplorer4 </xml><xml> </xml>
Modding tools overview
Hi guys,
This is the first full feature article on modding for Heresy War and the Corus engine. Here we'll tell you a bit about the tools that are used to modify the game , tools that we plan to release to the general public as soon as possible.
To start off, the Corus engine that powers Heresy War is a very data driven engine. This means that you can do a huge number of things just by modifying the data (textures, models, effects, levels, sounds, scripts) without touching the game executable. Also all modifications can be tested fast, without the need of lengthy data integration or compiling process. So, here are the tools that you will use to create mods for Heresy War:
The scripter
The script language is the central pillar of the Corus engine. With it you can access almost all the inner workings of the game without too much effort. You will notice that the scripting language is used for everything, from configuration files to shader definition, AI and level scripting. The console is also using the script syntax, so you can do a lot more than just set variables with it.
The syntax is similar to C/C++, so people that dabbled into programming should feel at home with it. Object-oriented architecture is also an important feature that can be used , providing support for classes and inheritance, however modders are not forced to touch this area if they don't need it.
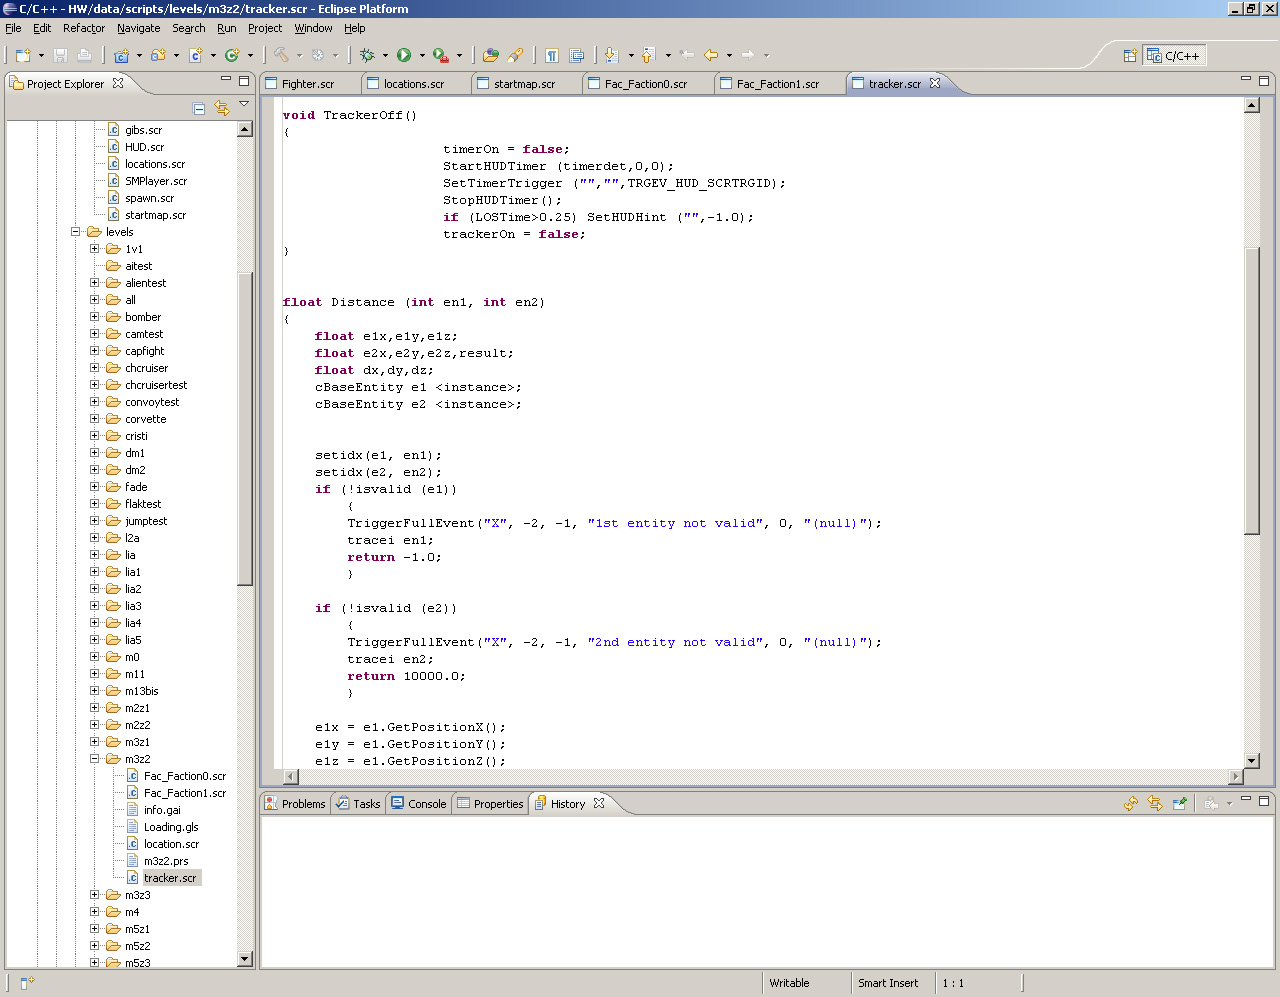
The level editor
The level editor is where the meat of the game is created. It sports a 4 view interface where all the entity manipulation is done. Apart from the usual stuff that you can do with entities there are also a few not so obvious (but helpful) tools, such as the reference checker. This allows you to quickly see where any object in the level is used. So, for example, you have a truckload of triggers and entities and you forgot who spawns who. Just select the entity you want, activate the reference list option and you will see all triggers, events or entities that use it in some way.
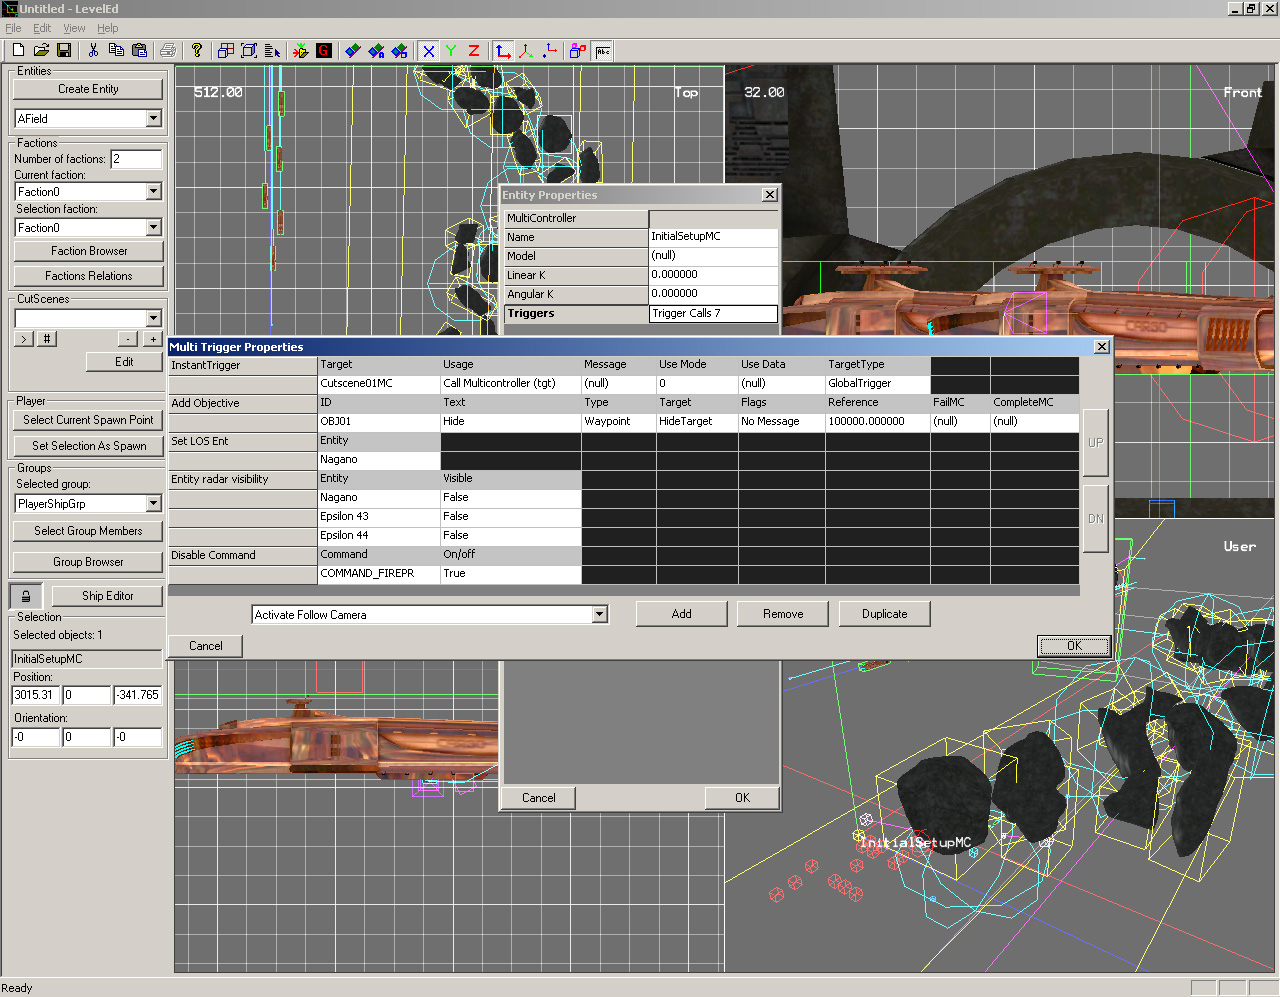
Another good feature is the parameter highlighting. Triggers are generic entities that can have a wide area of behaviors. So, when you select which behavior you want the trigger to do, you may not remember what parameter to put where for every behavior in the game. To help with this, every time a behavior is selected (or trigger usage as it's named internally) , the relevant parameters are highlighted with green and you will know exactly what fields to fill in the trigger.
For complex behaviors, the editor uses Multicontrollers (MCs) that are basically a chain of actions, all clumped into one entity. The beauty of MCs is that you can define custom functions for it at will, including the parameter highlighting in case they have complex behaviors. And all these custom functions will be visible in the editor interface and can be shared with other people.
The model compiler
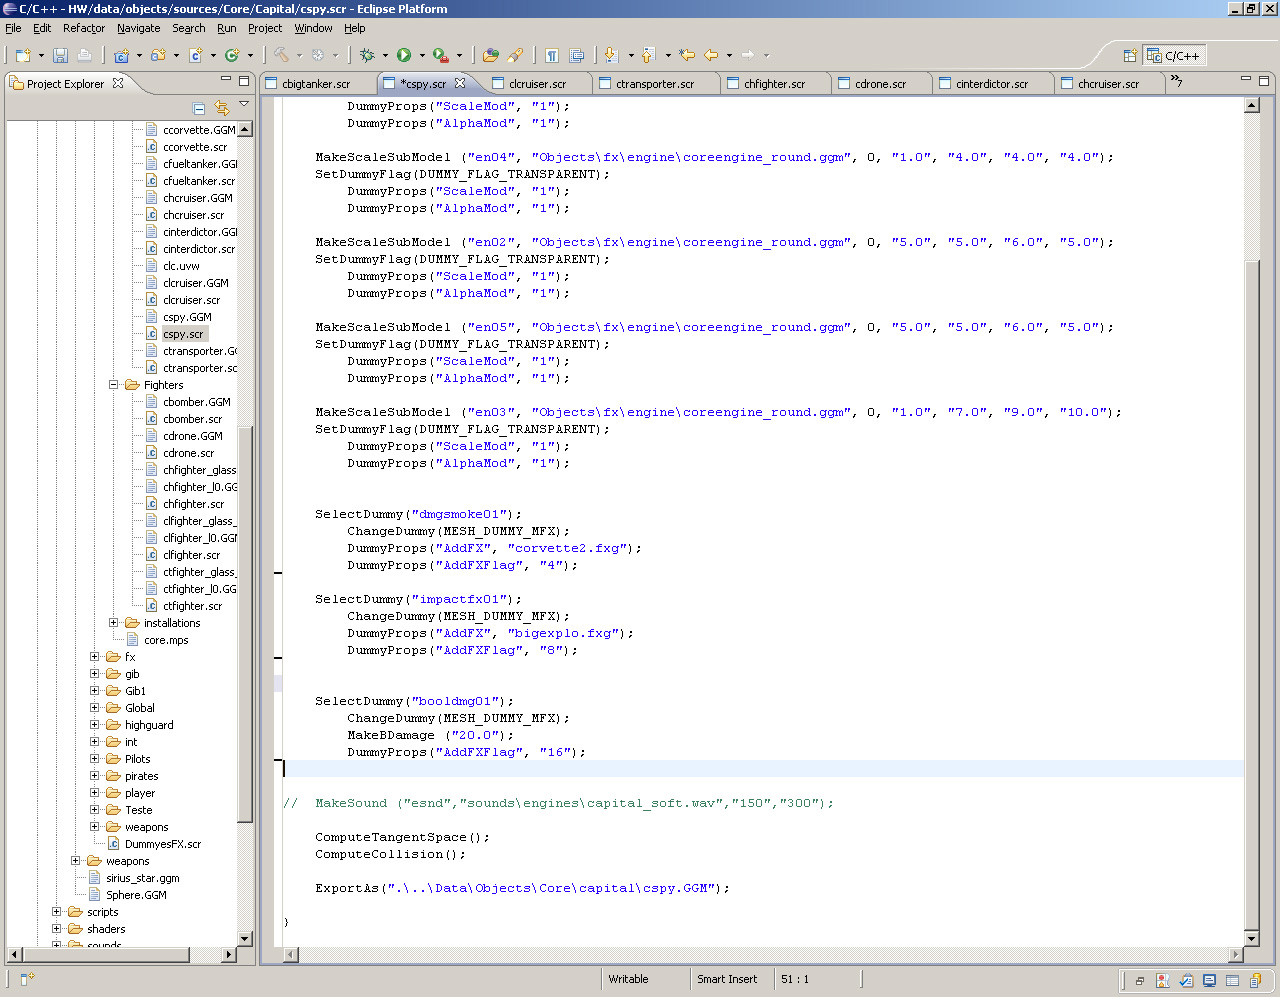
This is a command line tool that is used to convert freshly exported 3d meshes into game format. It takes a model script as a parameter, executes it and produces the final game-ready model.
The model script can be edited with any text editor and allows the modder to set lots of parameters to the model, attach to it models, animations or effects. Basically, most of what happens on-screen with a 3d model is set-up through these scripts and the setup only needs to be done once. After your model script is done , you only need to export the model ,run the compiler and you're good to go. A log file will show you if there are any errors in the model or in the script so you can easily debug everything and correct problems.
The model viewer
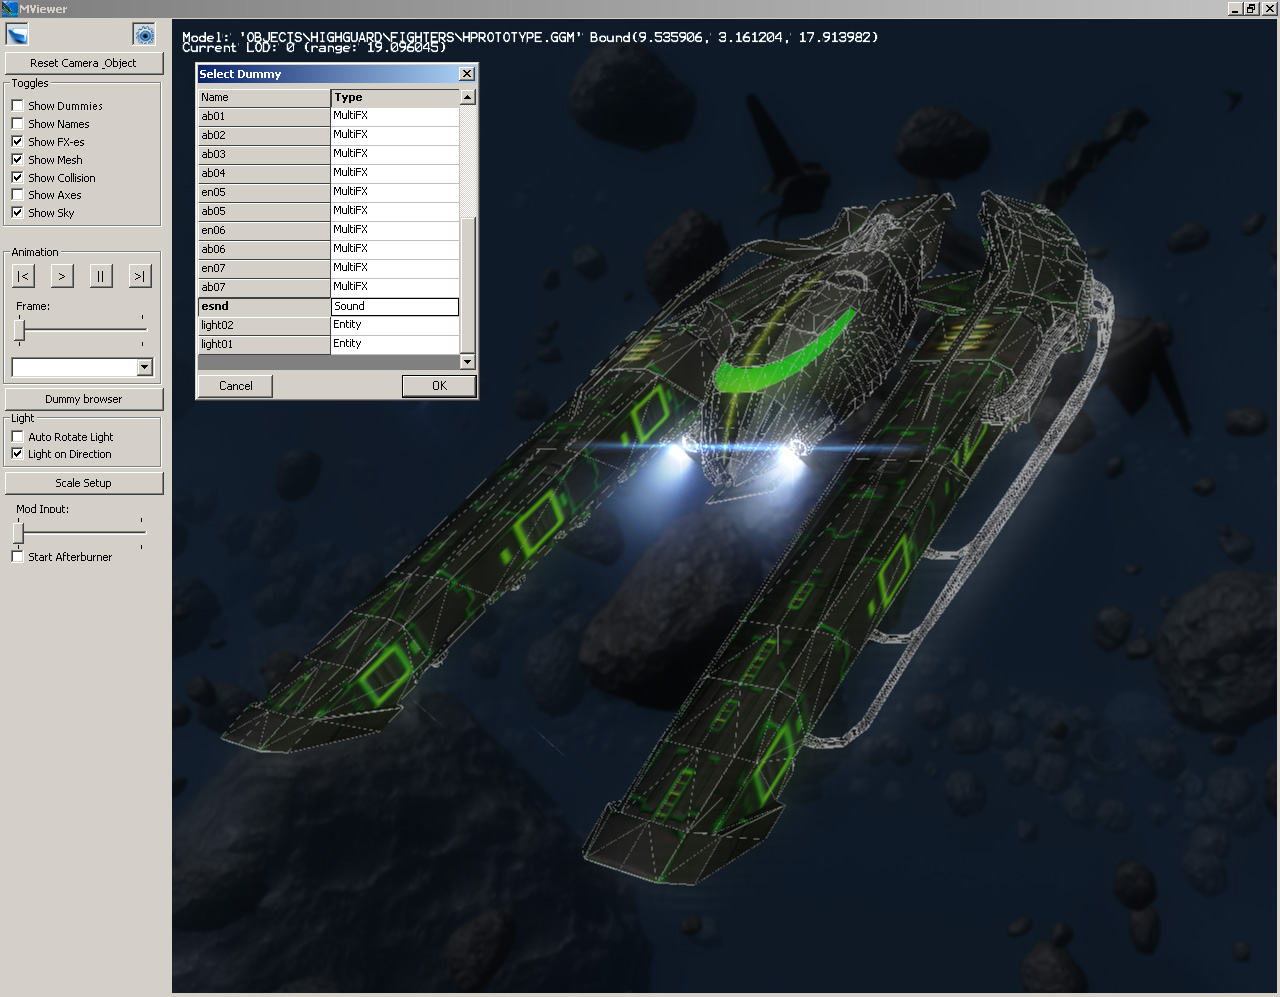
The model viewer is a visual tool in which you can check all your work done on a 3D model without actually starting the game. This makes working on 3D models extremely easy and fast as any change to shaders, effects, shields, model script are immediately visible in it.
The FX editor
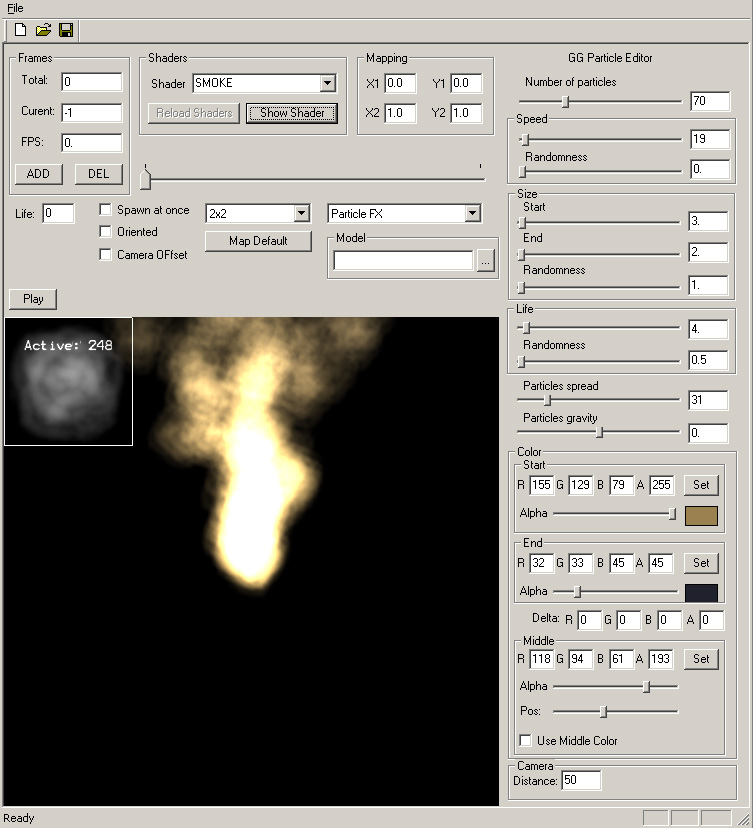
The FX editor provides a simple interface that is used to create and modify particle effects. Various parameters such as particle size, shader , colors, etc can be set and adjusted in a WYSIWYG environment that updates in real time, making effect creation/tuning a quick and easy task. After the effects are placed, they are ready to be used in game
This concludes our small presentation of the game development tools. Stay tuned for more detailed articles on each of them soon!


