I've recently gone through the motions of upgrading from unity 2019 LTS to Unity 2020 LTS. Unlike various other project upgrades, this wasn't quite so simple. This is the approach that I found worked best in my case and I hope it will be of use to you.
Preparing your Unity Project Folder for Upgrade
- Ensure your current Unity Project is compiled and runs.
- Make a note of all packages used in your project with Package Manager.
- Backup your Unity Project (If you never do this you are just asking for trouble). Whenever I backup my Unity Projects I include all folders except the Library Folder, as this gets autogenerated by Unity and can get quite large depending on your project size (i.e. multiple GB's!)
- Close Unity.
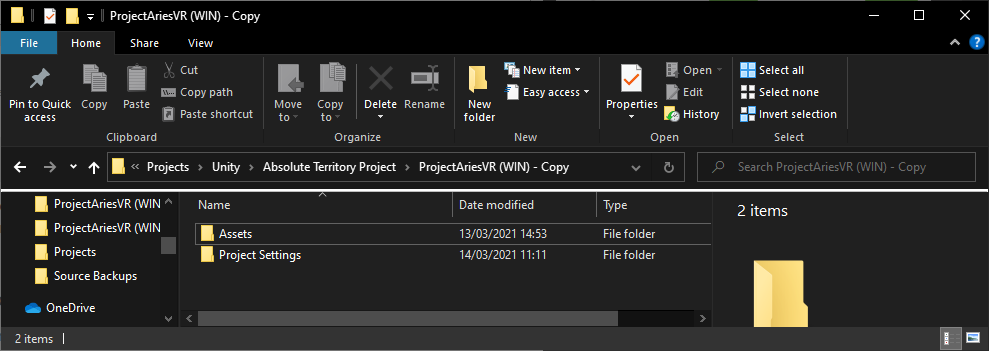
- Go to the Unity Project folder in File Explorer (or whatever OS equivalent, just not inside Unity)
- Delete all files and folders except for the Assets and Project Settings folder. All other files and folders will be autogenerated by Unity when upgrading the project.
Upgrading to new Unity version
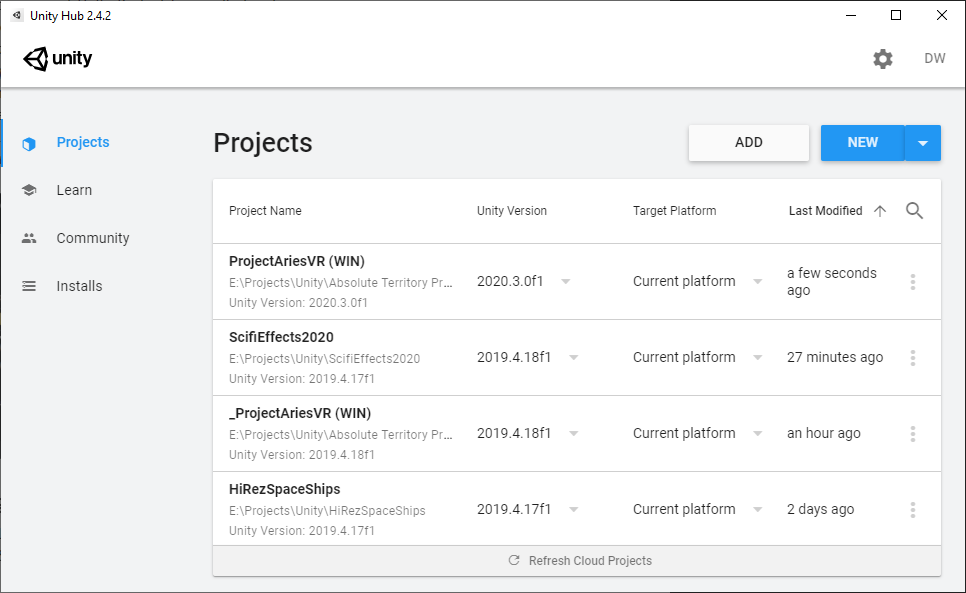
- Use the Unity HUB to download the version of Unity you intend to use (in my case Unity 2020 LTS)
- Change the Unity Version against your project to the version you downloaded
- Open the Project
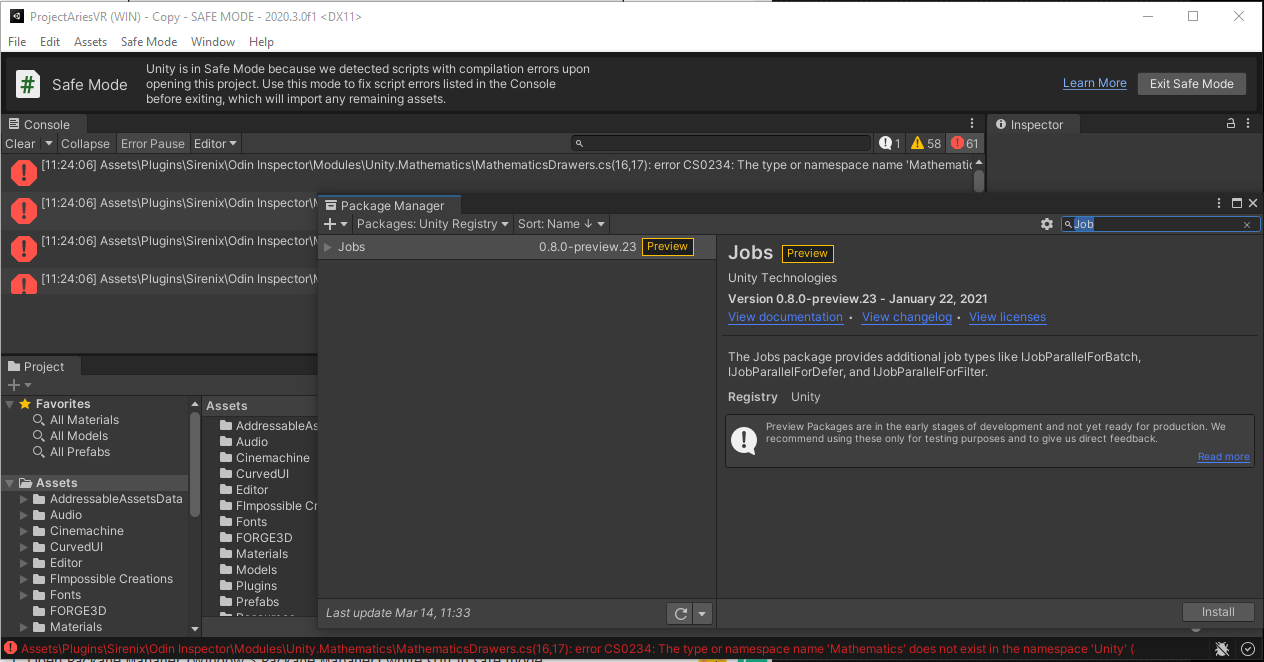
Fixing Errors in Safe Mode
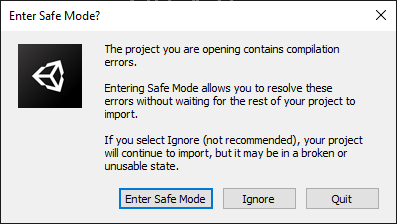
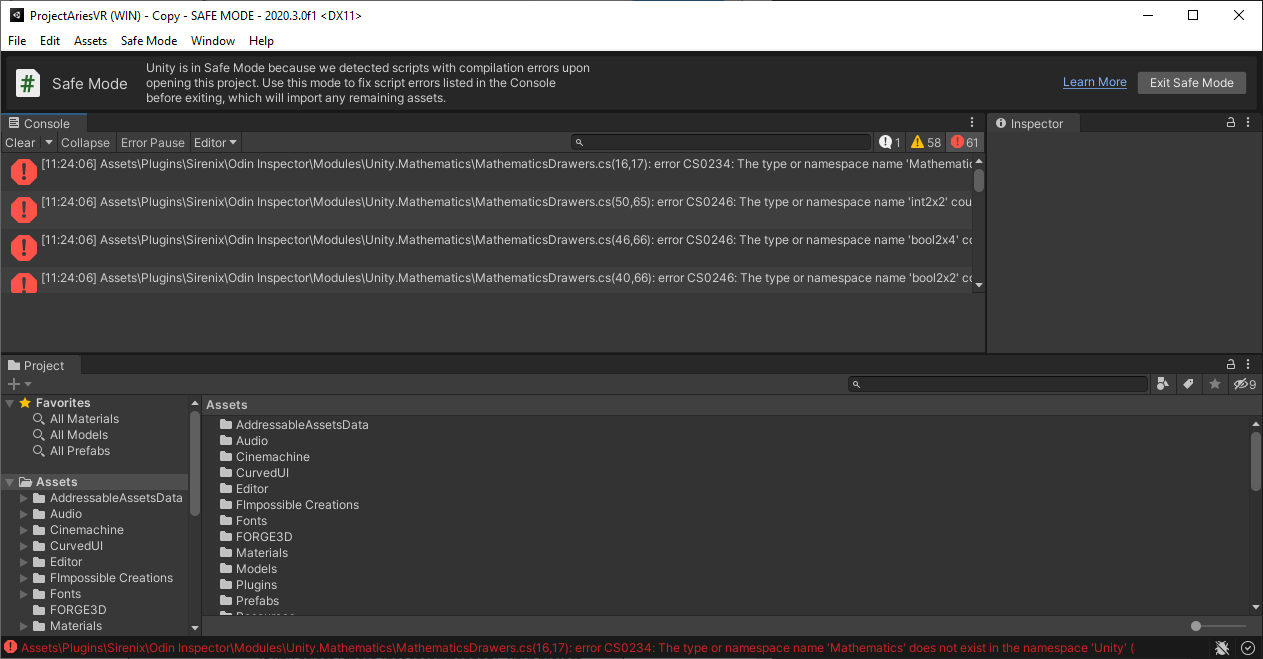
- If there are any compilation errors, enter Safe Mode if prompted.
- Review the Console for errors, fix any related to your code and ignore anything related to Unity Assets you may have added to your project
Package Manager
At this point any, remaining errors should be related to missing packages.
- Open Package Manager (Window > Package Manager) while still in safe mode
- Install all packages used in your project. As you install each Package your number of errors will start to reduce
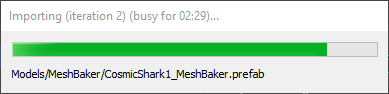
Importing
Once you get this progress screen, go make yourself a Coffee.
A word on Unity Assets
Something I found out with an asset I use called Rewired. It brought up a little warning saying I needed to use a version of Rewired for 2020. Despite that, I had already had the latest version downloaded and installed (with Unity 2019!).
I'll admit my ignorance here, but it looks like an asset is downloaded specifically for your Unity version when using Package Manager. Despite re-installing Rewired, it appears to be using the 2019 variant of the Unity Package. I want the 2020 variant since I'm now using Unity 2020 LTS!
- Locate and delete the folder for the downloaded Asset Store packages (or delete all the folders inside)
- In Package Manager, download and install each package again. Pay attention to any specific instructions provided by the various Asset authors. Though generally, deleting the asset folder (as long as it doesn't hold any specific settings in that folder) is a safe way in most of my cases
Testing
Run Mode
Test your game in run mode to check all worked out and no problems.
If you find Serialized assets are missing references you manually defined you can always copy the backup of your Unity Asset folder from before the upgrade. Just ensure Unity is closed while you do this.
Build your project and check for any errors
This was important for me. There were build errors, yet Unity produced the EXE just fine. Running the game, I found there was a problem where the game could not change to the required resolution resulting in a crash.
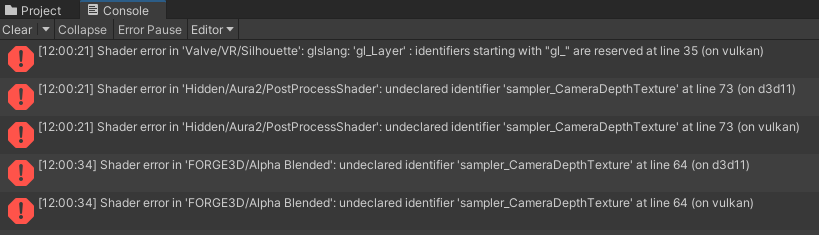
Shader Errors
To confuse me, despite the message there was no undeclared identifier when checking the shade files. In fact, even the line number were wrong. Where to go from here?
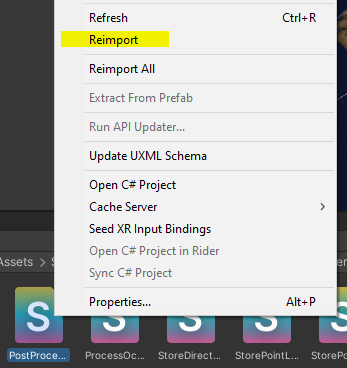
- Find the Shader in the Project folder with the error
- Right-click on the shader file and select Reimport
- Repeat for each shader with an error. You could try Reimport All, but for me, there were only a few errors making the process quick
The End
With a little luck and care, you should now have your project fully upgraded and working without any issues. If you are unlucky, I won't be able to help as I'm only covering my experience to benefit others. Though do comment below with how your upgrade process turned out and how you fixed any unexpected issues I didn't encounter during the upgrade process.
Follow me on Twitter @abs_territory