Colobot: Gold Edition is an open-source real-time strategy game where you can program your units in a language called CBOT.
Articles
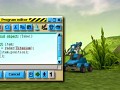
Editing reliefs was always big pain, and that's why we had hundreds of custom levels with squarish mountains, flat rivers and nothing else to look at. Can't blame anyone for that. Here comes GIMP (GNU Image Manipulation Tool), it's the best image editor for a relief because it has all the tools to make it perfect with ease, but you will need to have full GIMP version, not reduced one. You will probably hate GIMP in the beginning if you are unfamiliar with it, just like everyone did (including me), but you will come to like it later.
UPDATE: in newer GIMP tools of the same kind are grouped in the same button, unlike what you can see on the screenshot in this article. To access them you either click small triangle / arrow at the corner of the button or go explore menu "Tools".
Before working with layers, don't forget to add alpha channel to the image itself - right click on the name of the image in the "Layers panel" (which is usually on the right) and select "Add Alpha Channel" from the list. If you want to keep your layers after you close GIMP, save your image separately as xcf file. Don't forget that saving image and exporting it are different operations in GIMP.
Here are just some, but not all, advices and tips that are essential to make a beautiful looking relief. There are many more secrets in GIMP, actually. By the way, you can see name of any tool if you hover your cursor over it's button.

- Create hills, mountains and rivers. For this use "Airbrush Tool", or "Paintbrush Tool" with very low "Opacity" and "Incremental" option turned on. You can change brush shape, brush size, flow, opacity and other options.
- Make bottom of a river or a summit of a mountain flat so that you can place a spaceship or a building there. For this use either "Paintbrush Tool" or "Pencil Tool" with "Mode" set to "Darken only" (if you are flattening bottom) or "Lighten only" (if you are flattening high ground). It is better to use this after using "Color Picker Tool" to select appropriate color.
- You can extend valleys, rivers and mountains or correct and beautify them with "Smudge Tool", just make sure to give Brush Size some smaller value. Never forget about "Smudge Tool", it's really super useful and handy and you will probably use it a lot just like me.
- A REALLY VERY good way to make certain areas higher or lower without touching their relief at all is to create new empty layer, make it half-transparent (in "Layers panel" change it's opacity to 50% or lower value) and start drawing in this half-transparent layer with pitch black or pitch white "Paintbrush Tool" or "Pencil Tool". Often this method is really much better than drawing some ugly mountains in the middle of already beautiful relief.
- A very useful tool for manipulating how high or low certain areas are or your entire relief is "Levels..." in "Colors" menu. You may want to choose "Edit these Settings as Curves" option for more control. This tool allows you to play with brightness / darkness levels.
- Two tools "Fuzzy Select Tool" and "Select by Color Tool" can come in very handy. They allow you to select your rivers or mountains or areas between automatically based on their brightness / darkness. This allows you to edit only those areas or only areas outside of them (if you invert your selection). You may want to check or uncheck "Feather Edges" to make edges of areas more smooth. You can also copy selected areas to another layers altogether to keep your rivers and mountains as they are while you do some big transformations in the rest of your relief. Make sure to change "Threshold" to a value that suits you.
- Move and copy parts of relief with "Rectangle/Square/Free Select Tool" and Ctrl+C and Ctrl+V. Do it with parts of your current relief or do it with reliefs from other levels to combine them in your own relief. You will often want to use "Layer to Image Size" for pasted layers from the list that can be opened by right clicking on their name in the "Layers panel". Do not forget that you can always rotate your parts (layers) with "Rotate Tool" and "Flip Tool". Finally, to attach unattached pasted layer, click on anchor in the bottom right corner (one of buttons at the bottom of "Layers panel"), or you can create a new separate layer instead.
- You can also smudge edges of pasted parts from some other relief for example to make them blend in with the rest of relief with "Smudge Tool".
- If you have multiple layers with different reliefs one on top of another, you may want to erase some parts of upper ones with "Erase Tool" to combine them. In some cases "Hard Edge" option may be useful.
- Sometimes an easy way to make your own relief is to take some other relief or a bunch of them (or certain pieces from them) and combine them, and then start working with what you got. Try opening multiple different reliefs and copy them all as separate layers into your current relief. Then play with their "Mode" in the "Layers panel", give them values such as "Overlay", "Lighten only", "Darken only" and others. At the same time try playing with their brightness / darkness levels ("Levels..." in "Colors" menu) to see how overall picture changes. Don't forget that there also is "Opacity". This method requires you to erase and clean up a lot (otherwise you are likely to get a huge mess instead of a good looking relief).
- Sometimes it is good to blur certain parts of your relief a little. Select them with "Free Select Tool" for example, then open "Filters" menu, open "Blur" section and there choose "Gaussian Blur". Usually value 1,00 for both "Size X" and "Size Y" is good. You can check and uncheck "preview" for quick comparison. Afterwards you can do some little smudging at the edges of affected area with "Smudge Tool".
- To merge layers, right click on the name of layer that you want to merge with the layer directly below it and choose "Merge down" from the list. You may want to move it up and down the hierarchy of layers before merging it.
- Sometimes you may want to invert your selection, so that you can edit and transform not what you selected, but everything else. Open "Select" menu, there choose "Invert".
- Try playing with "Perspective Tool", you can get interesting bits from other reliefs for your own relief in this way.
- "Color Picker Tool" can be very quickly selected and deselected by holding and releasing Ctrl. You will not even have to switch from your current tool for it.
- You can undo and redo your actions with Ctrl+Z and Ctrl+Y.
You can quickly see any changes in your relief after you saved it without restarting the game, you only have to restart the level itself. Don't forget that it still takes at least some time and patience to make a relief. And most importantly you must know what your level should look like even before you begin working with relief!
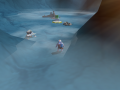
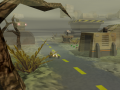
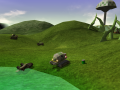
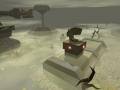
Also, it may be tempting to create many mountains and rivers that are very high and deep, but please do not. Take another look at reliefs in original campaign, they are all more on flat side and have few to none mountains, and none of these are too high, the only big exception from this is Centaury. Map designers in Epsitec surely knew that moderation is good. Additionally even if you didn't go wild with paintbrush it may be a good idea to flatten your entire relief with "Levels..." tool in "Colors" menu before exporting it.
What was described here is just a beginning and you should definitely try, experiment and mess around more to get the hang of tools in GIMP.
Enabling and disabling technologies with CBOT (updated)
Mapping/Technical TutorialDid you know that you can make your level much more complex by enabling or disabling some buildings or bots on the fly with just few more CBOT commands?
Files
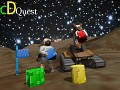
ABCDQuest
DemoA puzzle in which you need to find all 4 keys in 3 locations and open a vault in The Void location using the mechanics of moving objects through location...
Old CBOT programs
Script65 really cool programs taken from ceebot.com. See info.txt to read their descriptions and authors.
UserlevelHelperV1b
Mapping ToolVery powerful level creation addon made by melex750 for Colobot Gold 0.1.7b, but it works on newer versions like 0.1.12 or 0.2. Click "Read more".
AfC Remaster - Alpha Release
AfC Remaster Full Version 2 commentsAlpha Release. Only Polish Language and some bugs! Please Click "Read More..."!
Your Drawing Corner - 1.0
Your Drawing Corner Full Version 1 commentFirst release of the mod, the beginning - Version 1.0
Post a comment
Profile
Icon
Developer & Publisher
TerranovaTeamEngine
CustomContact
Send MessageHomepage
Colobot.infoRelease date
Game watch
Follow
X
Tags
Embed Buttons
Link to Colobot: Gold Edition by selecting a button and using the embed code provided more...


You may also like
Moduwar
Real Time Strategy
Modding MechCommander
Real Time Strategy
reconquest
Real Time Strategy
Star Ruler
Real Time Strategy
K.A.T : Kwarn Armada Tactics
Real Time Strategy
KKnD2: Krossfire
Real Time Strategy