Today I would like to celebrate the first 100 likes on the "ADS:2" Facebook page! Therefore I've decided to write a tutorial about how to create a bloody parchment texture. This is going to be a step-by-step guide using GIMP, so everyone at any skill level will be able to do it :)
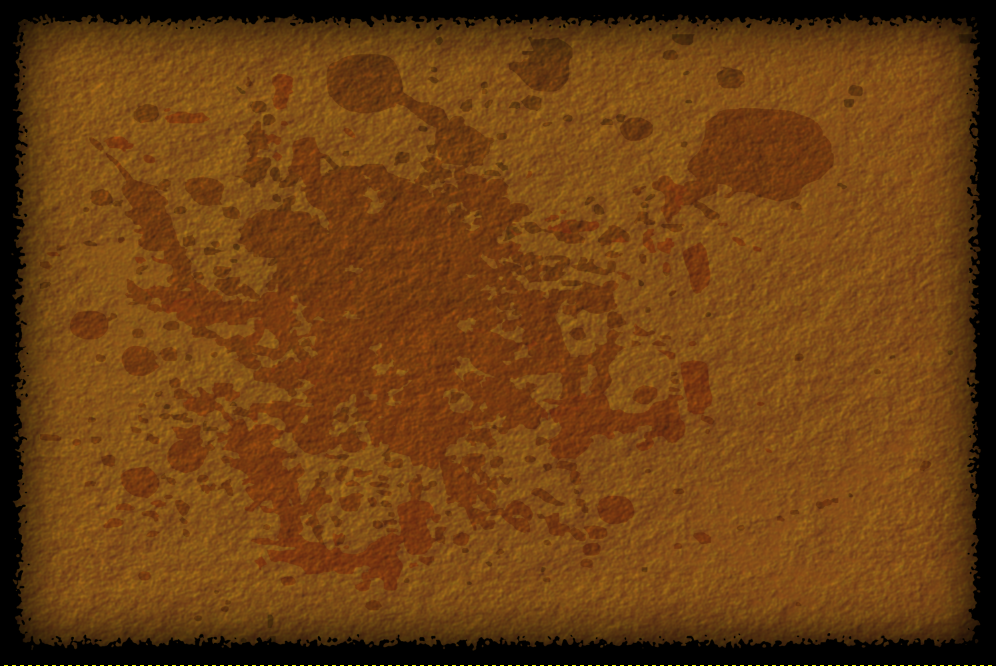
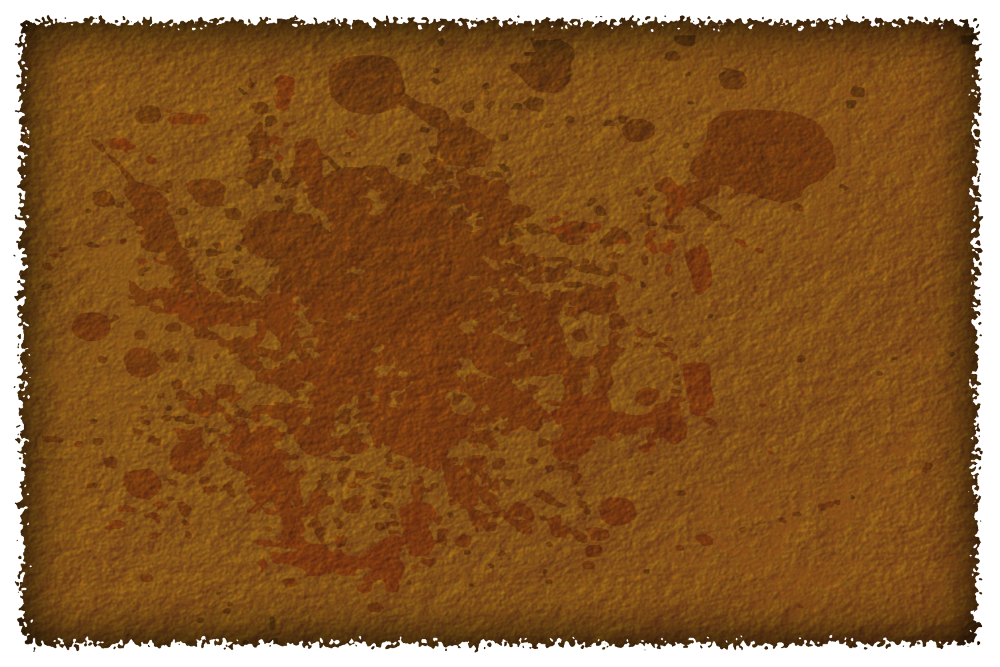
Your final texture will look something like this: (You'll have a PNG version and a version with black background.
First, what you need!
- GIMP 2 - This is freeware, you can download it here: Gimp.org
- The blood texture you want to use. For this tutorial, we will use one that is available for free but I'll show you in a future tutorial how to make your very own. The one I used for this parchment can be found here: Pixabay.com
That's all you need!
Let's continue with the steps. You will probably need about 10-20 minutes to create your own texture :)
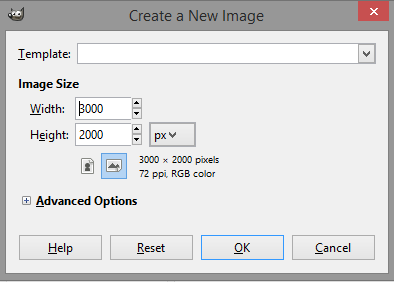
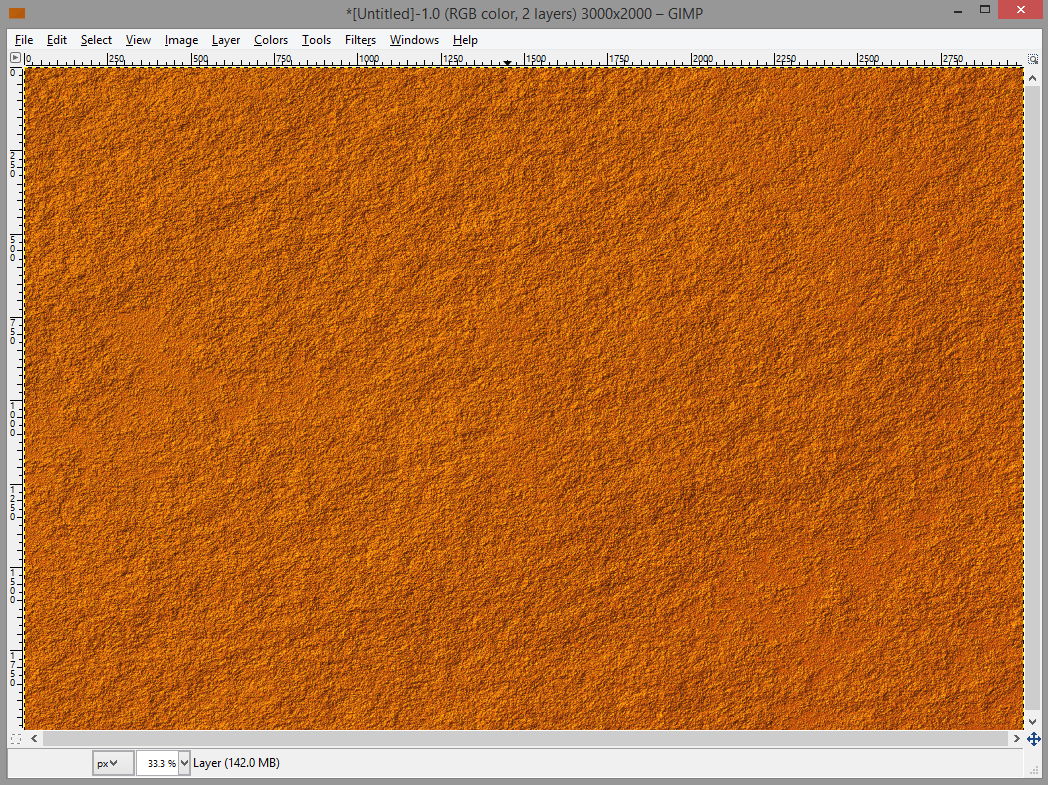
Step 01: Create a new image. For this example, I used 3000x2000 pixels.
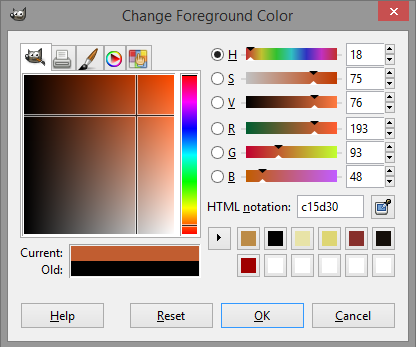
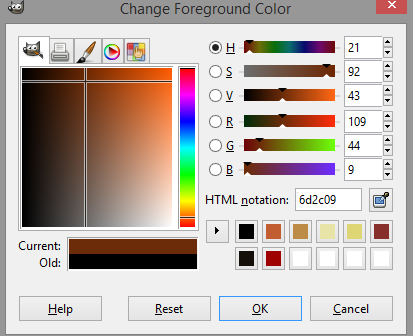
Step 02: Change the foreground color to #c15d30. This is a guidance number, you can choose any color you like, but this is the one I chose for my parchment.
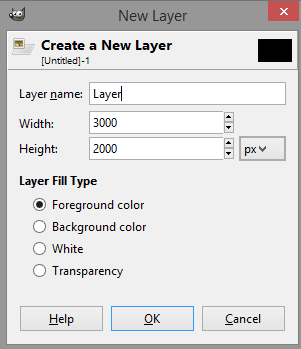
Step 03: Create a new layer and fill it with the foreground (FG) color.
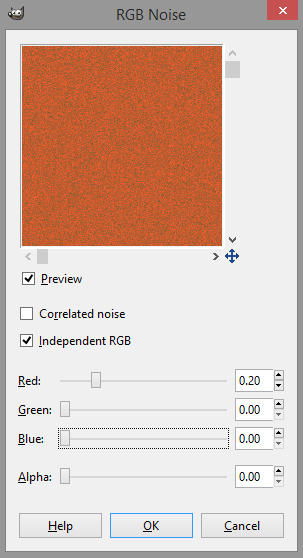
Step 04: Go to Filters -> Noise -> RGB Noise. Make sure Independent RGB is checked, and reduce the green and blue to 0.00, while keeping the Red at the standard 0.20. Click OK.
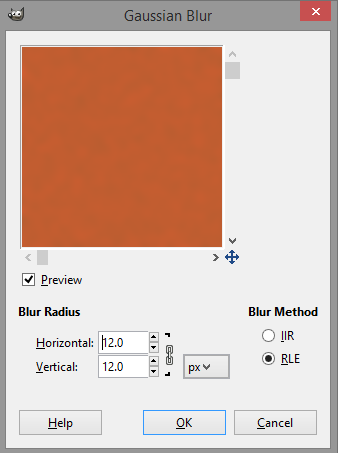
Step 05: Go to Filters -> Blur -> Gaussian Blur. Apply that with 12.0 on both Horizontal and Vertical settings.
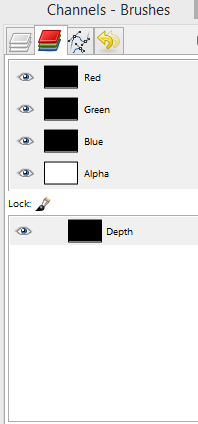
Step 06: Switch to the Channels tab (To the right of the Layers tab), right click and create a new layer named Depth. Change the Opacity on it to 100%.
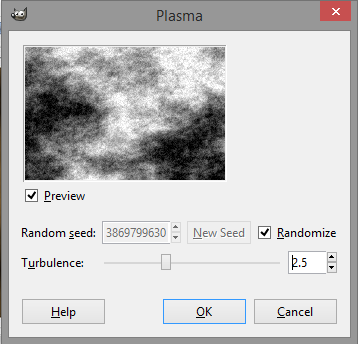
Step 07: Click on the Depth channel to activate it, then go to Filters -> Render -> Clouds -> Plasma. Check Randomize and change the turbulence to 2.5 as shown below. If you feel you would prefer a different turbulence setting, it is up to you to change it as you desire.
The result should look something like this:

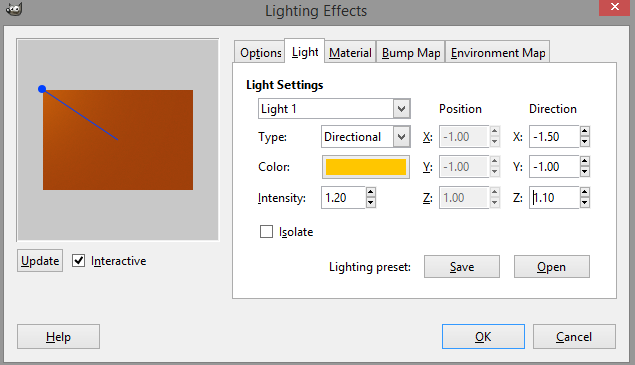
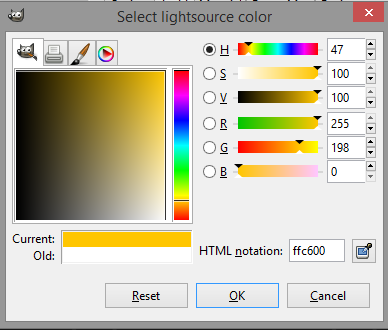
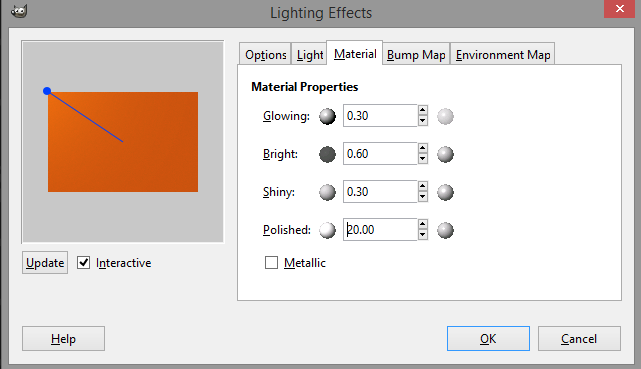
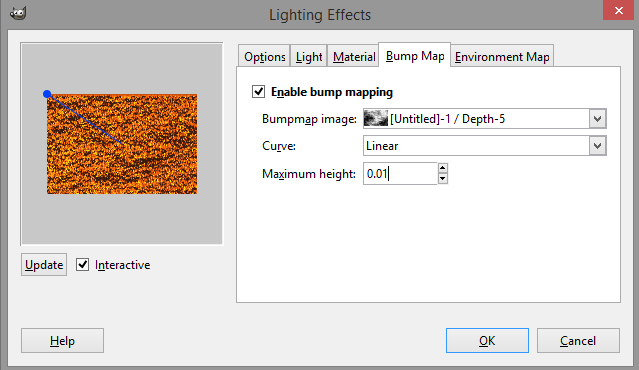
Step 08: Make the channel invisible by clicking the eye symbol on the left, then go to the layers tab and click on the orange layer to make it active. Go to Filter -> Light & Shadow -> Lighting Effect. Use the settings as shown in the images below.
The result should look something like this:
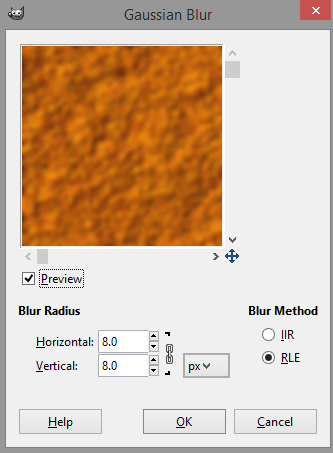
Step 09: Go to Filters -> Blur -> Gaussian Blur and apply 8.0 on both settings.
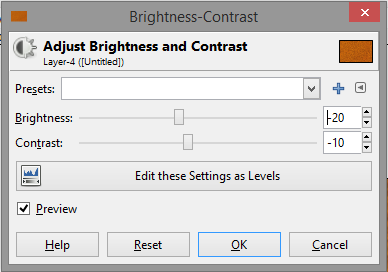
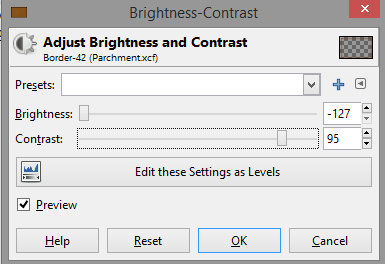
Step 10: Go to Colors -> Brightness-Contrast and change the Brightness to -20 and the Contrast to -10.
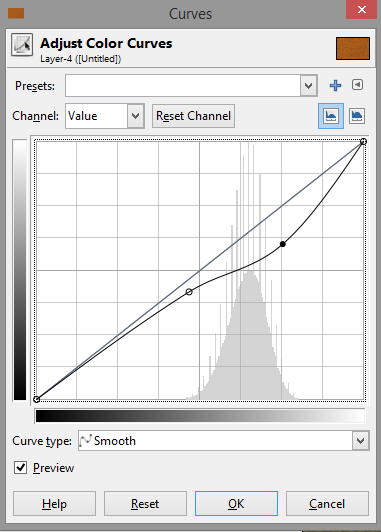
Step 11: Go to Colors -> Curves and change the Value channel to something approximately like in the picture below.
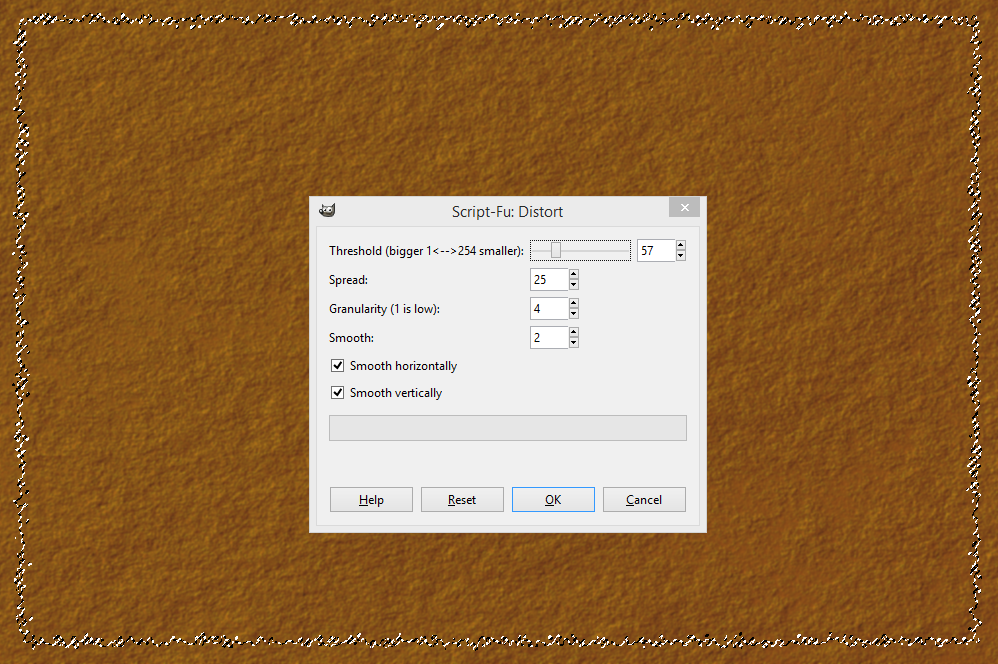
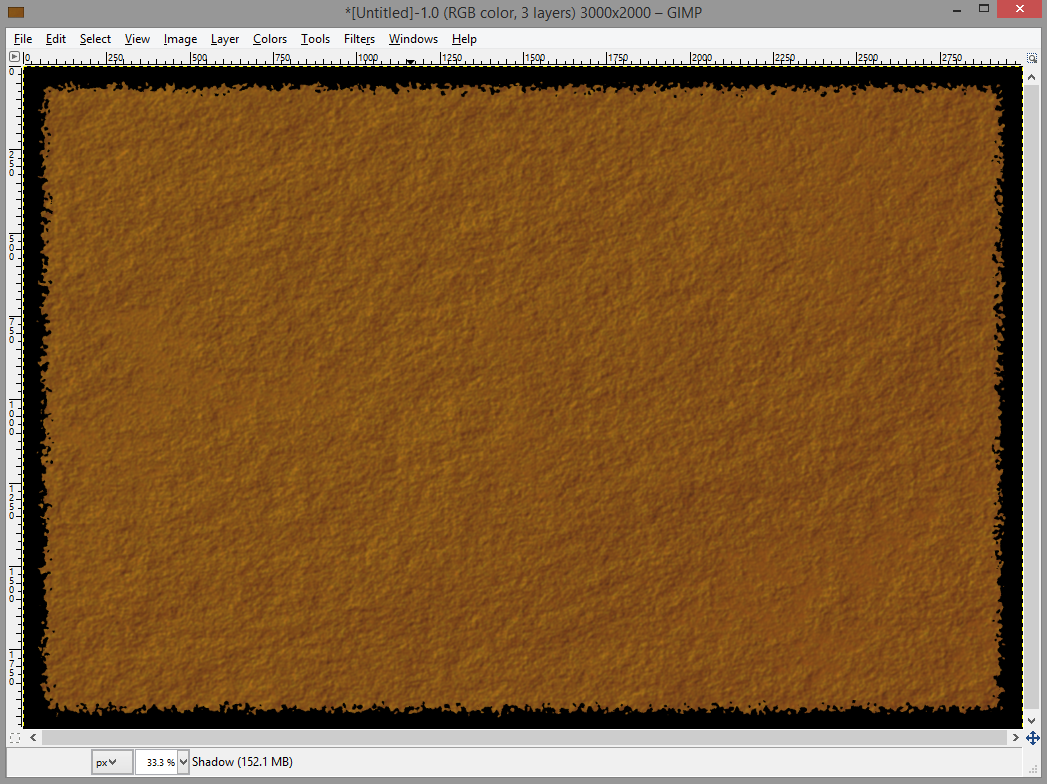
Step 12: Use the Rectangle Select tool, and make a selection for where you want the border of your parchment to be. Go to Select -> Invert, then apply Select -> Distort. Use the values in the picture below if you'd like a result equal to mine, but feel free to experiment. If you use something like my settings, your result will look like this:
Step 13: Change the foreground color back to black (#000000). Create a new layer called "Shadow" and fill it with the FG color black. Go to Select -> Invert, and press the DELETE button on your keyboard. Select -> Invert again. Your result will now look something like this:
Step 14: Create a new layer called "Border", change your foreground color to #6d2c09 or something alike. Fill the selection with the foreground color. The selection should be the outer border AROUND your parchment which is now black. If it isn't, Select -> Invert again.
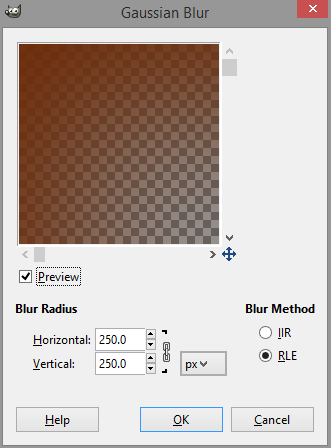
Step 15: With the "Border" layer active, apply Filters -> Gaussian Blur with the setting 250.0. If you want a larger amount of darkened parchment, apply a higher number. If you want a smaller amount, apply a lower number. Then go to the "Shadows" layer, and click Alpha to Selection, then invert the selection. Go back to the "Border" layer, and press DELETE to delete the unwanted parts around the parchment.
Step 16: With the parchment layer active, go to Colors -> Brightness-Contrast and apply the settings below.
Step 17: Go to File -> Open as Layers and open the blood texture you downloaded in a new layer you can call Blood.
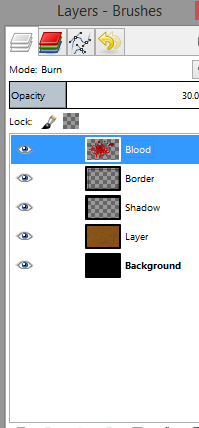
Step 18: Rescale and move around the blood texture to your liking. When you feel like it's in the right place, change the layer mode to either Multiply or Burn, whichever effect you like better. For mine, I used Burn. This is necessary to make sure the texture of your parchment shows through the blood texture!

Step 19: (OPTIONAL) If you would like to get a transparent background, merge the Border, Blood and the parchment layers by making sure they are above one another, right clicking on the higher one and choosing Merge Down. Then click on the eye symbols of the Shadow and the Background layers and you have your transparent texture.
I hope you enjoyed the tutorial! Feel free to modify and refine your texture further on your own. I'd love to see the results of people who made a texture with this!
Special thanks to the people of Gimpusers whose tutorial for parchment I leaned on. You can find that tutorial here: Gimpusers.com
If you have any questions, feel free to comment them!


This comment is currently awaiting admin approval, join now to view.