Hi, my name Alexey Arkhipov and i’m a 3D modeler at Kraken Games.
I will tell you how we develop battle arenas for Warside from a 3D modeler's point of view. Let me put this straight, this process is not a trivial task and is rather complicated from production perspective. However, let's not get too deep into details right now, I will tell you everything step by step.
Let's assume that game designer already figured out basic layout of battle arena, tested gameplay, discussed it with Warside team and got approval, and our concept artist Maxim or how we call him “2DMax” (our own inside joke) has made all the sketches.
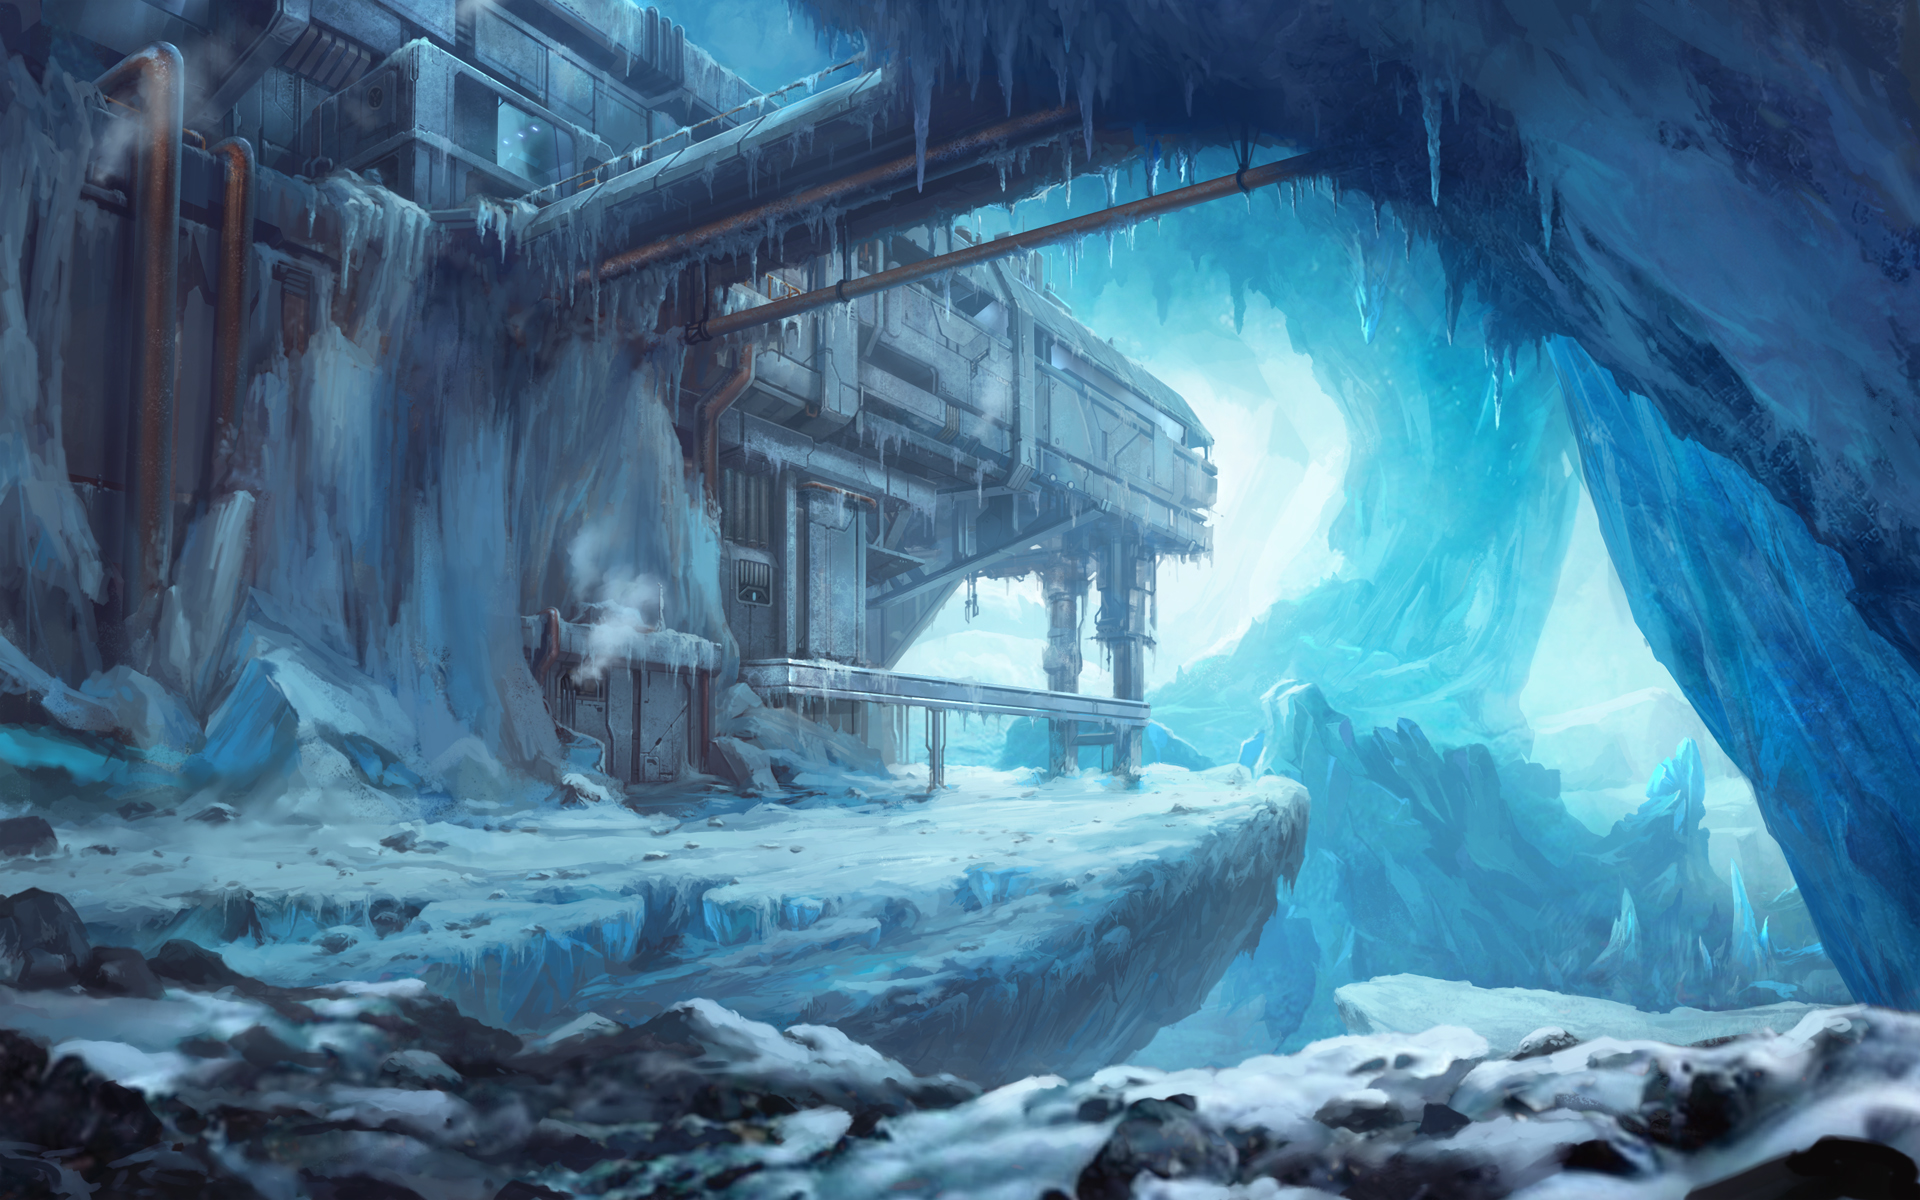
From that moment, a single person in office stands up and shouts: “level is ready for modeling”, and everybody start whispering “it began…”. With heavy steps of a valiant knight, sparkling in sunlight he, a 3D modeler, comes into the room. Just kidding :) Actually, everybody start to celebrate when Max draws sketches and then return to their workplaces with a sense of accomplishment. So, what do we do with those nice sketches? Sparkling in the lights of …, oh well… 3D modeler humbly starts. Several weeks or even month of hard work awaits him and if only it was him alone!
Yes, there are three of us! I work at the office and two my colleagues work as outsource. And each of us has his own tasks on level creation, let’s call it building!
So, let's speak about our responsibilities and areas of expertise:
-3D modeler/texture Alexey Egorov work with props and specific level textures. Props are all sort of objects on the level, terminals, crates, furniture – anything that can be placed on the level.
-3D modeler Dmitry Bezrukin creates basic shape of a level, all other work is based upon it. He also works on final and most technologically advanced part – “baking”, I will tell more about it later.
-So what do I do? Well, I walk into the room in shimmering armor with epic music on the background! Joke, again :) In general, I do all the stuff above as well as some other tasks, such as level lighting adjustments and texturing.
The process of level building or a pipeline looks like this:
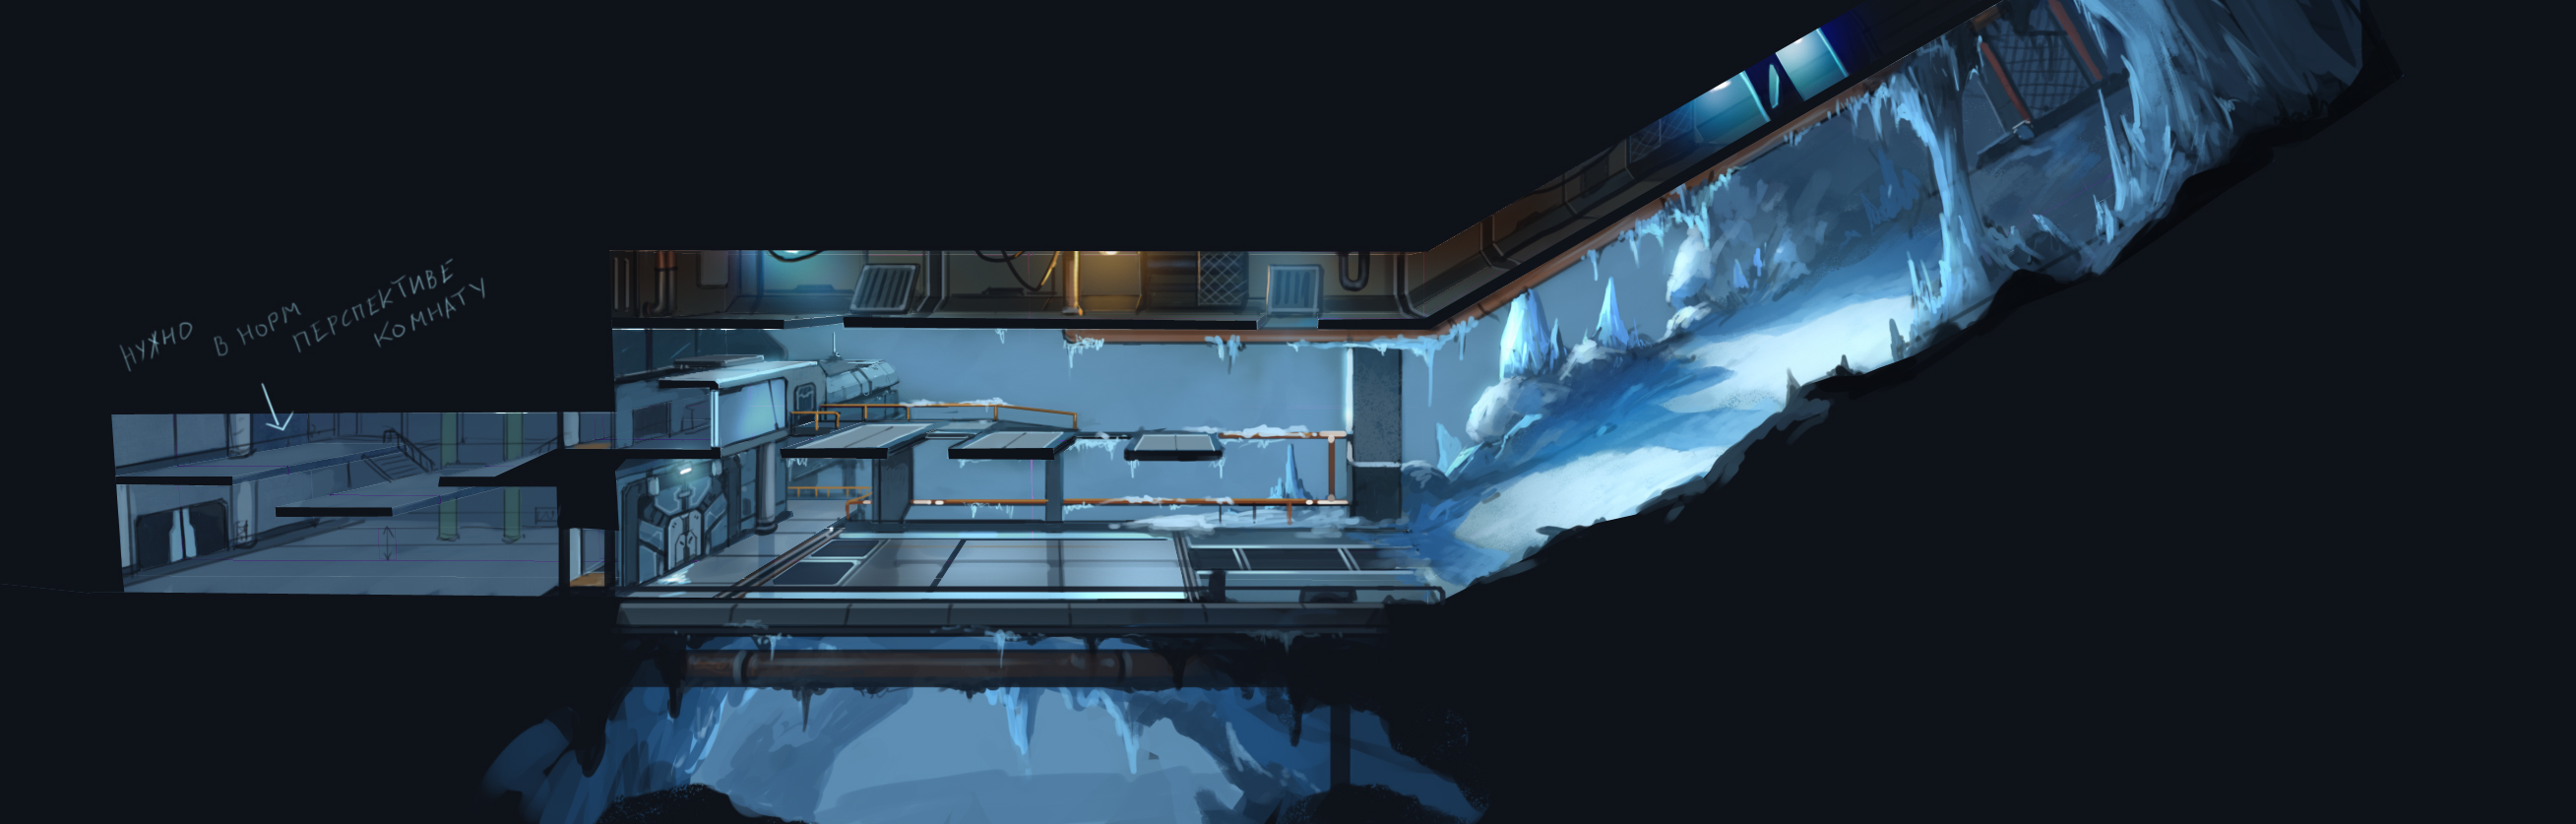
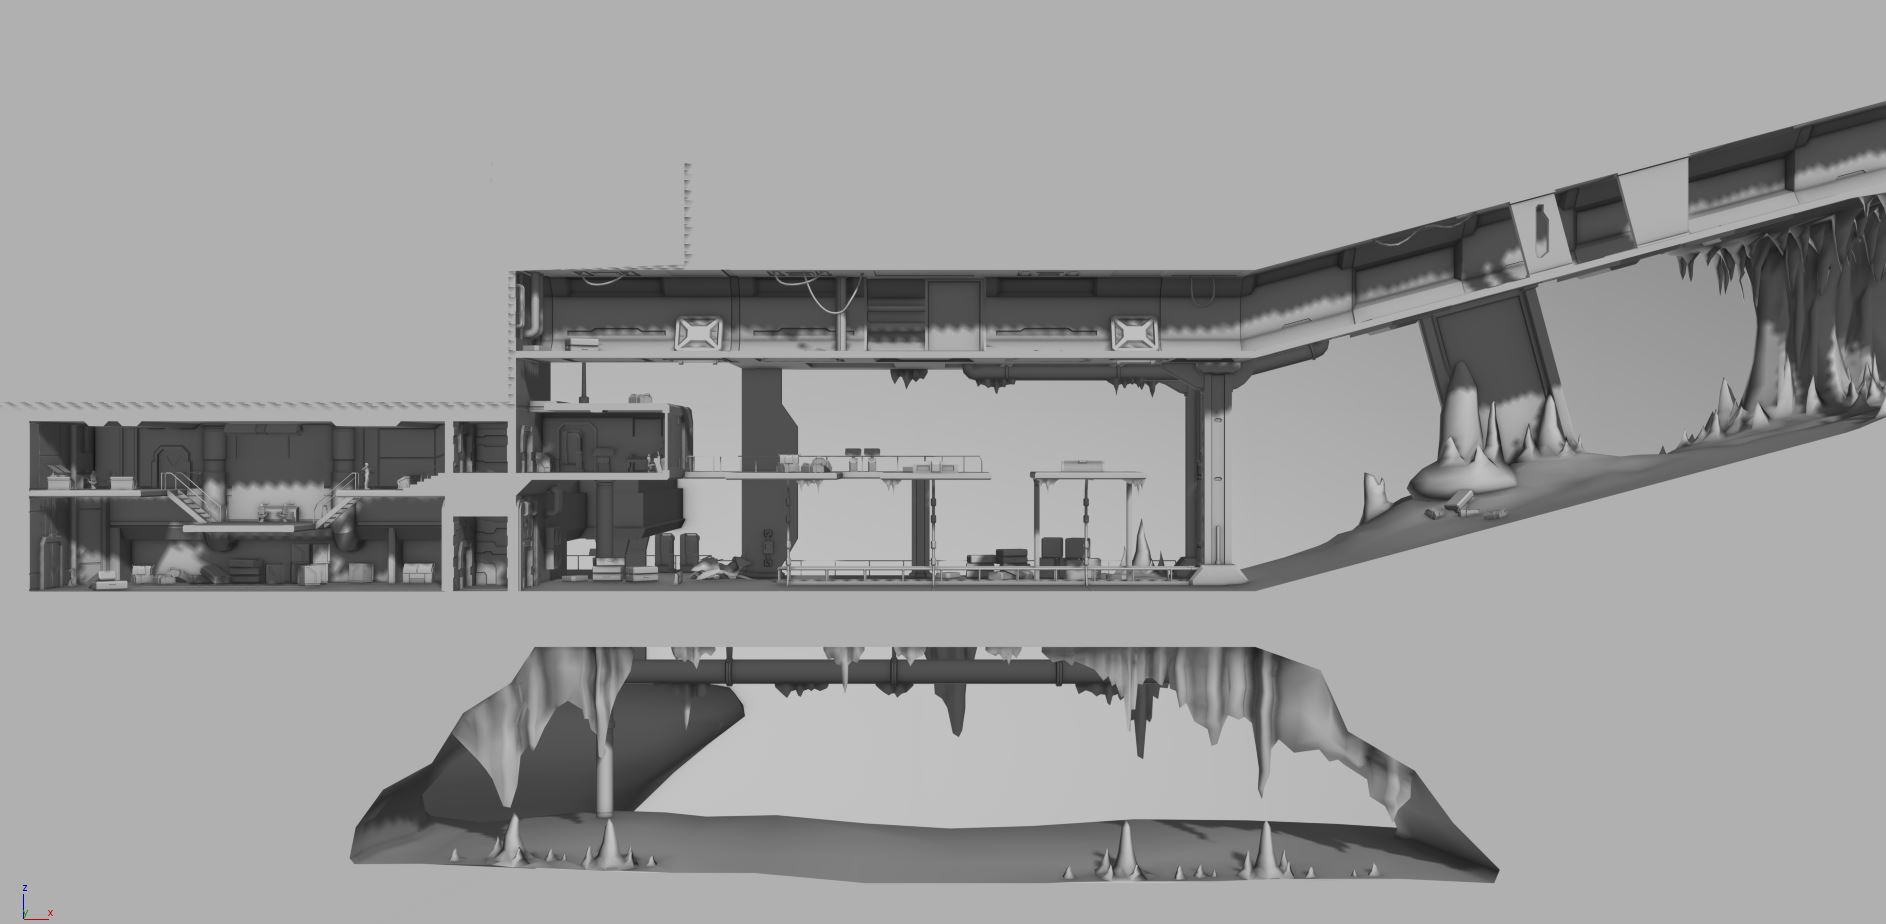
1) Level physics: this is base of a level. All movement and other interactions in the game utilize it. Dmitry makes it based on scheme from game designer. On this step, we also make final adjustment to level layout.
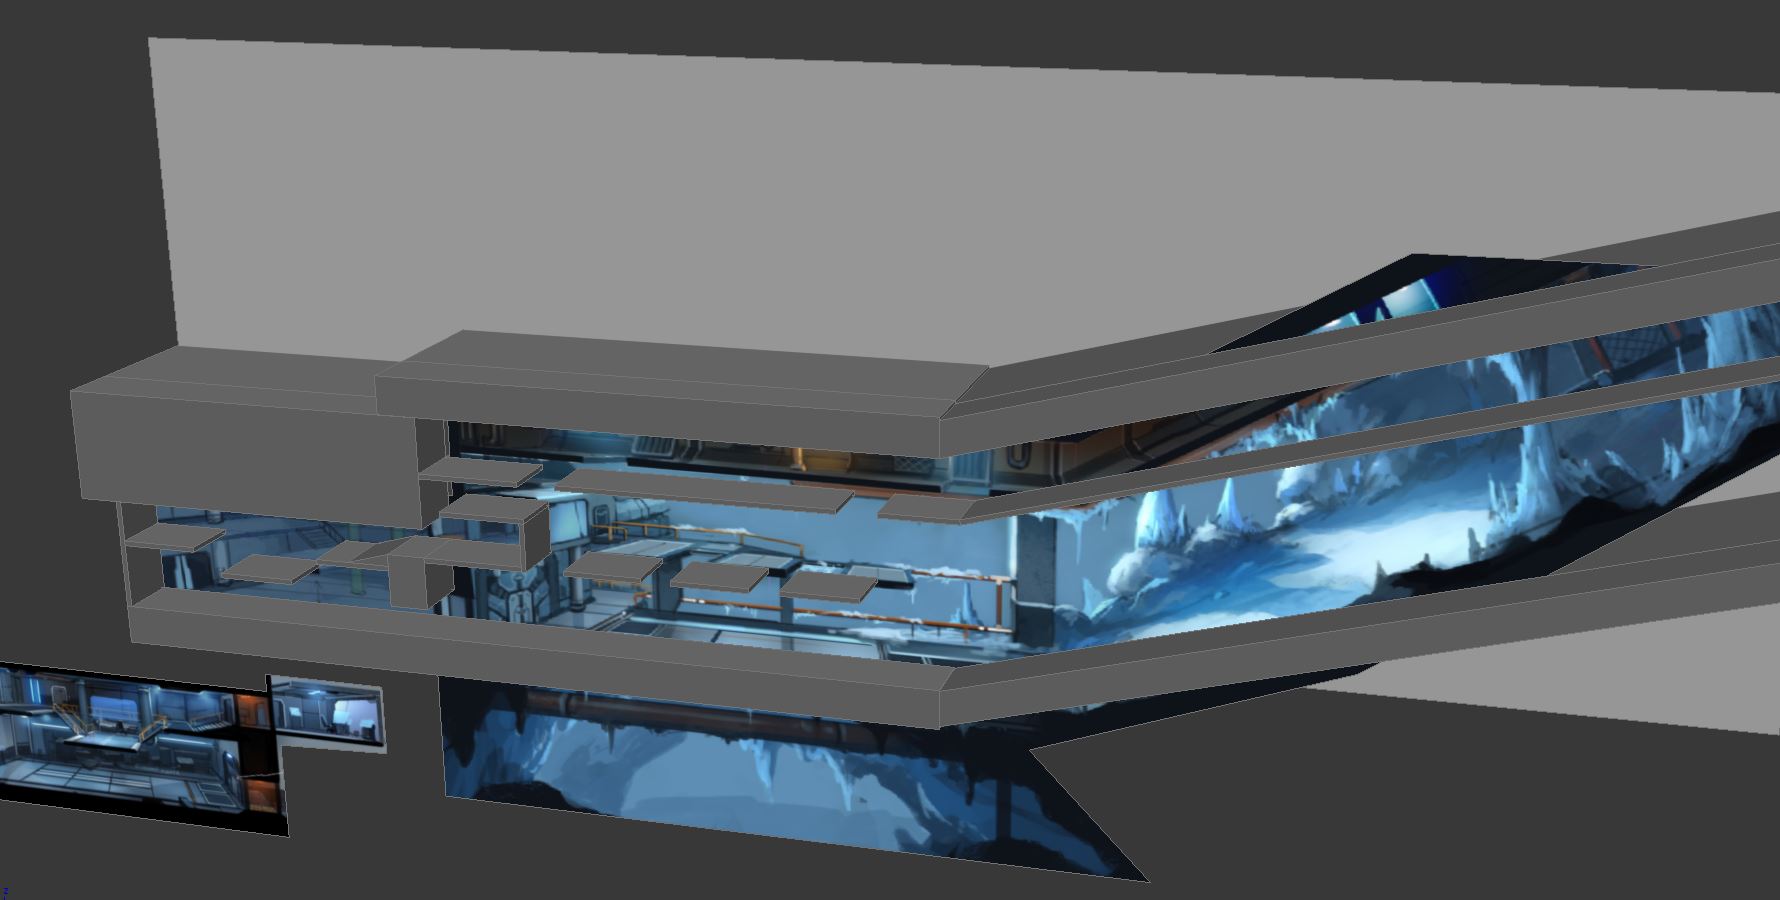
2) “Weight gaining”: Creation of major level forms and definition of objects proportions. It may seem easy to create objects using basic shapes, but in reality, most of the questions regarding level design appear on this step. Some of the decisions made by game designers and 2D artists might be reconsidered. Partly that’s what this step is made for, but there is another important thing. Creating right topology for level mesh. Effectiveness of modeling and texturing is based upon it. Most of this is made by Dmitry.
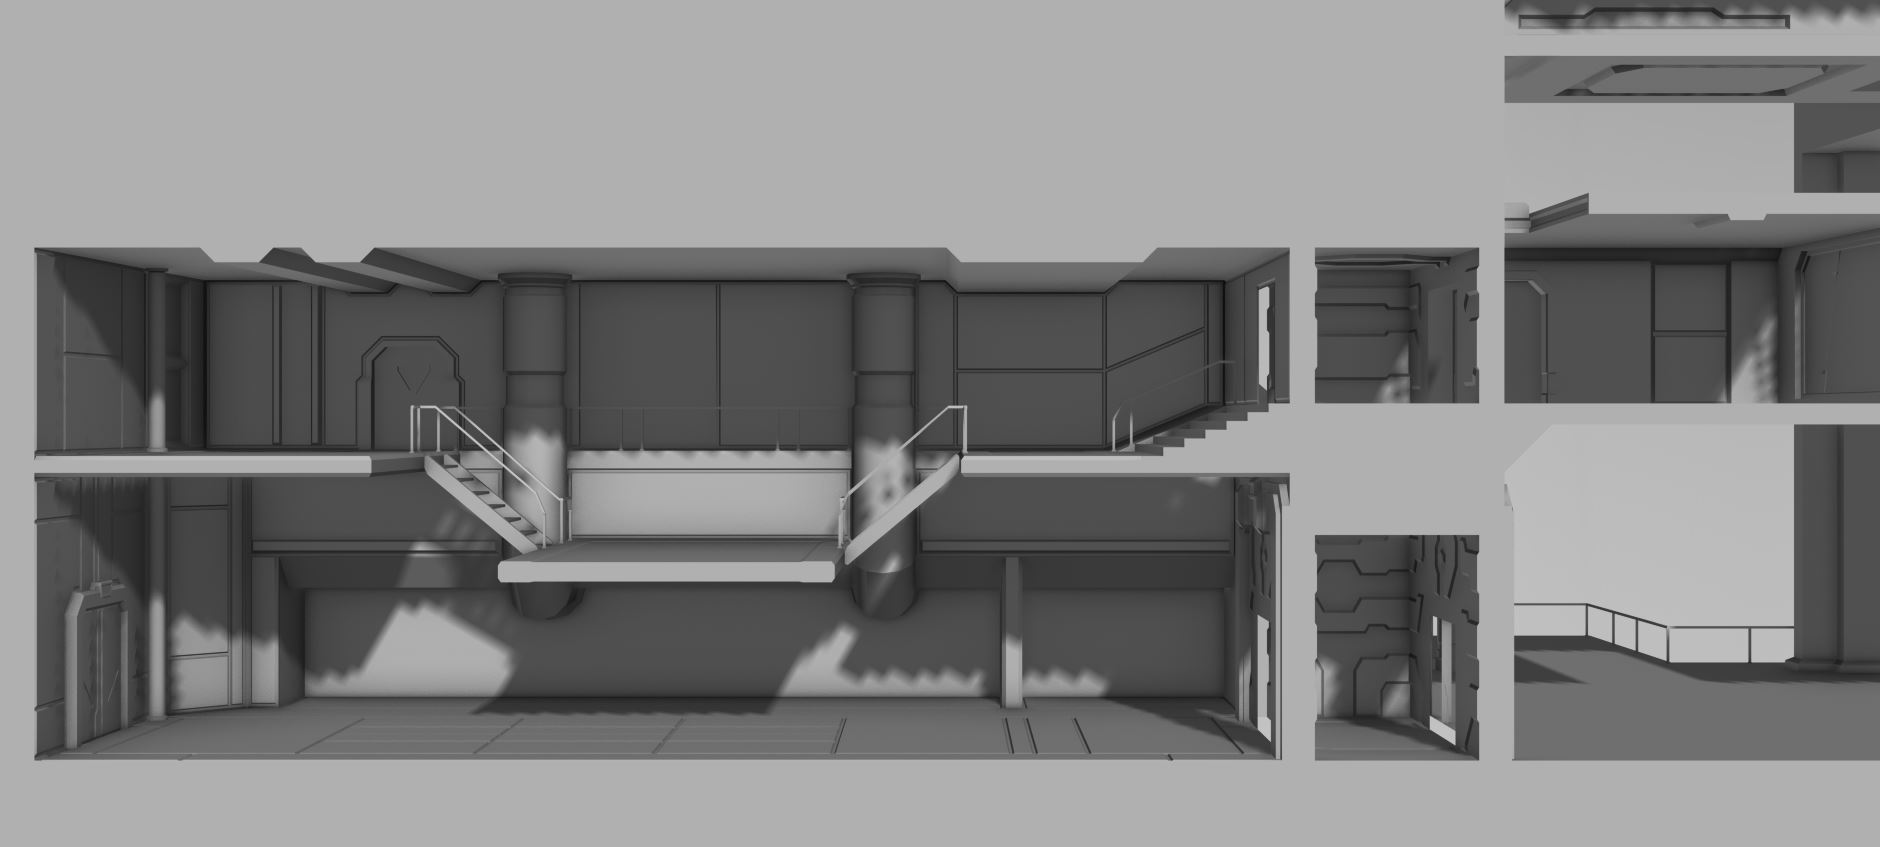
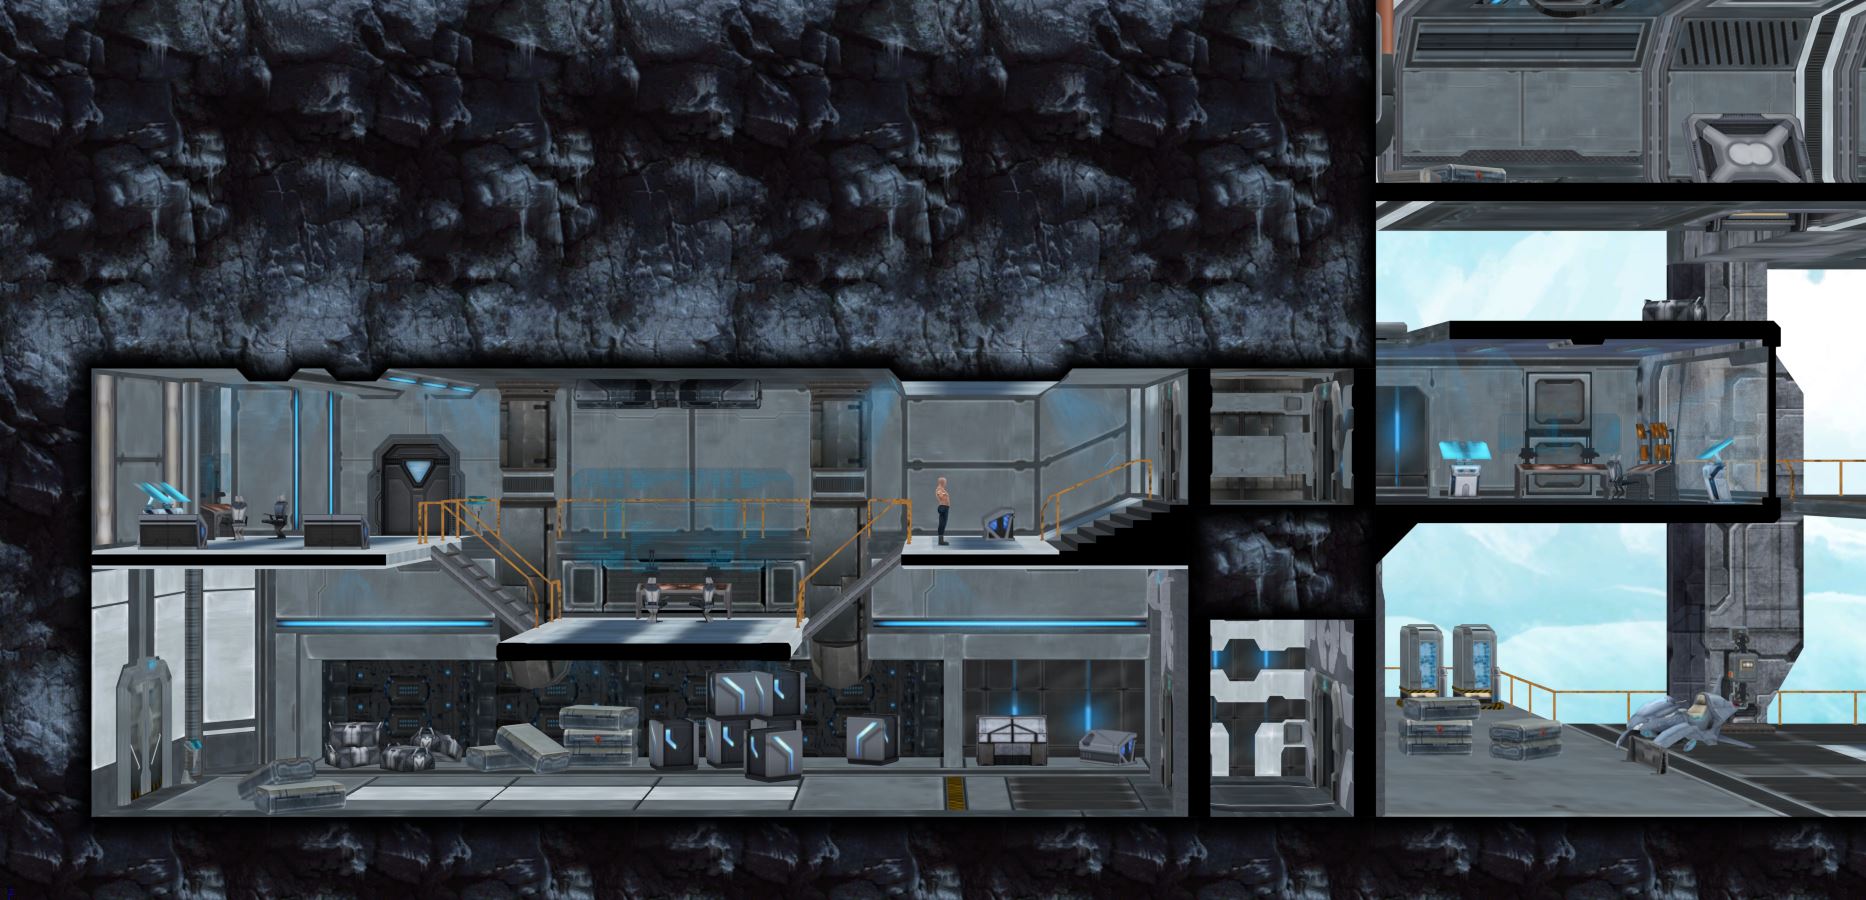
3) On this step we add details to geometry and place props, which are made by Aleksey, on the level. After we finish, everything looks cool – all grey, like it was made from concrete, but cool anyway! :)
4) Step “four” – everybody sit on chairs, back to back, stomp on the floor and mumble something like “not me, oh please, anyone but me”. The host takes foam sword and hits random person with it! After this, the chosen one exclaims “why me?!” and becomes a texturer for the level!
Jokes aside, on this step we start to texture the level, - create polygon unwraps for texture maps and draw the textures. We also try to finish all geometry before this step; otherwise, we will be forced to redo this step for parts of the level where geometry was changed.
5) Very important moment approaches “Pre-final judgement”, that means geometry and textures are ready! So we export it into the game for in-house testing.
At this moment everyone in a team has a chance to check the level in-game and tell what he thinks. And of course people start whispering to each other "that's not what I expected". Someone shouts “everything is wrong! Max drew it wrong way! Where are those valkiries with miniguns i told you about?!" "Who drew that wrong? Dare to say that again?" – another voice rises and chaos breaks out.
We are a small team, so everyone has his own opinion and a chance to voice it, - it's a pure luck we didn’t kill each other in the process. But shortly after things calm down, we gather all thoughts and make a list of improvements for the level. After they are implemented, we move to the next step.
6) Time to adjust lighting, - yet again it seems easy, - place some light sources here and there: in darker areas, where you need to spotlight something. But it's not that simple actually. First, you got to remember that light affects the space and you can ruin everything with bad lighting. Apart from shaping space, lighting is also useful for emphasis. You can alter atmosphere from passive to aggressive, add some tension or make area seem peaceful; depressing or positive. So our work is to balance between different settings (color, depth, sharpness, etc.) to make harmonic space. Basic mood is set by 2D artist Max on sketches and I try to copy this mood in game as close as possible and solve any composition issues on the way.
Here is an example of our level with lighting:
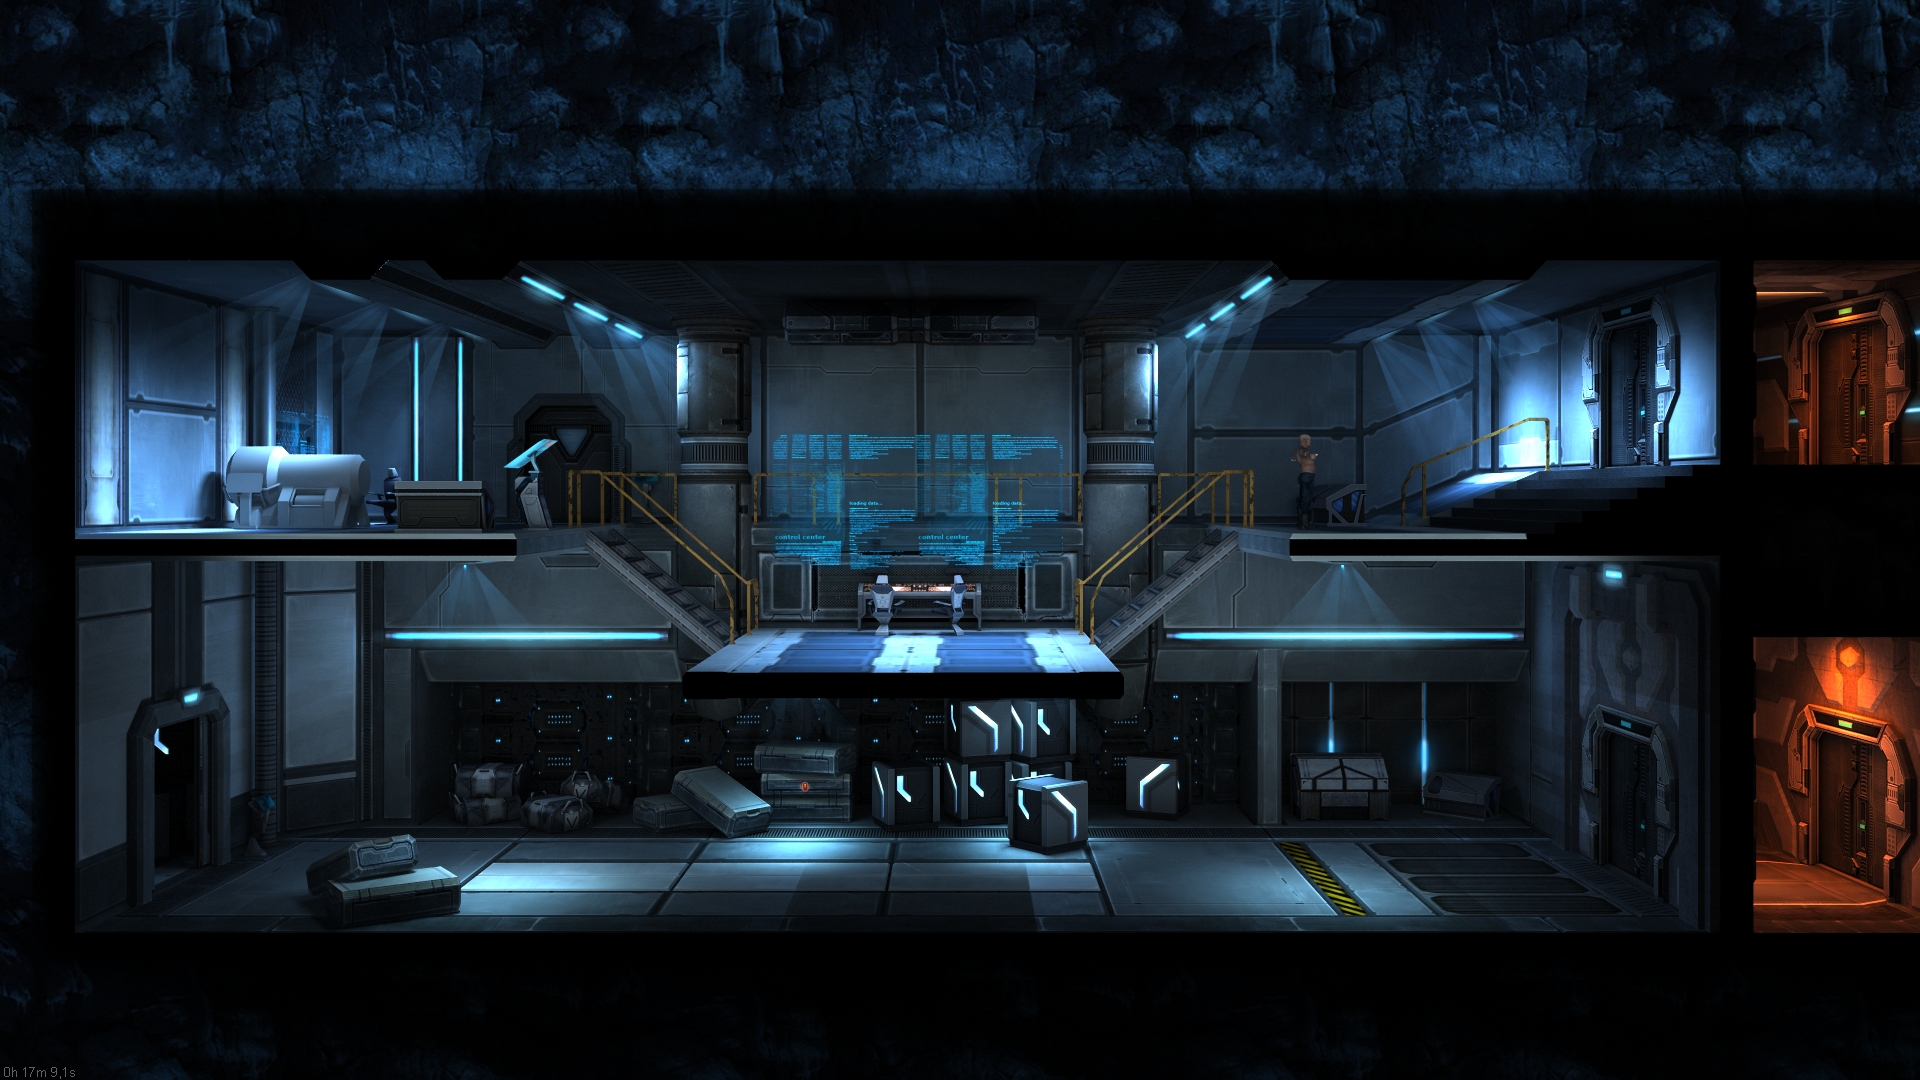

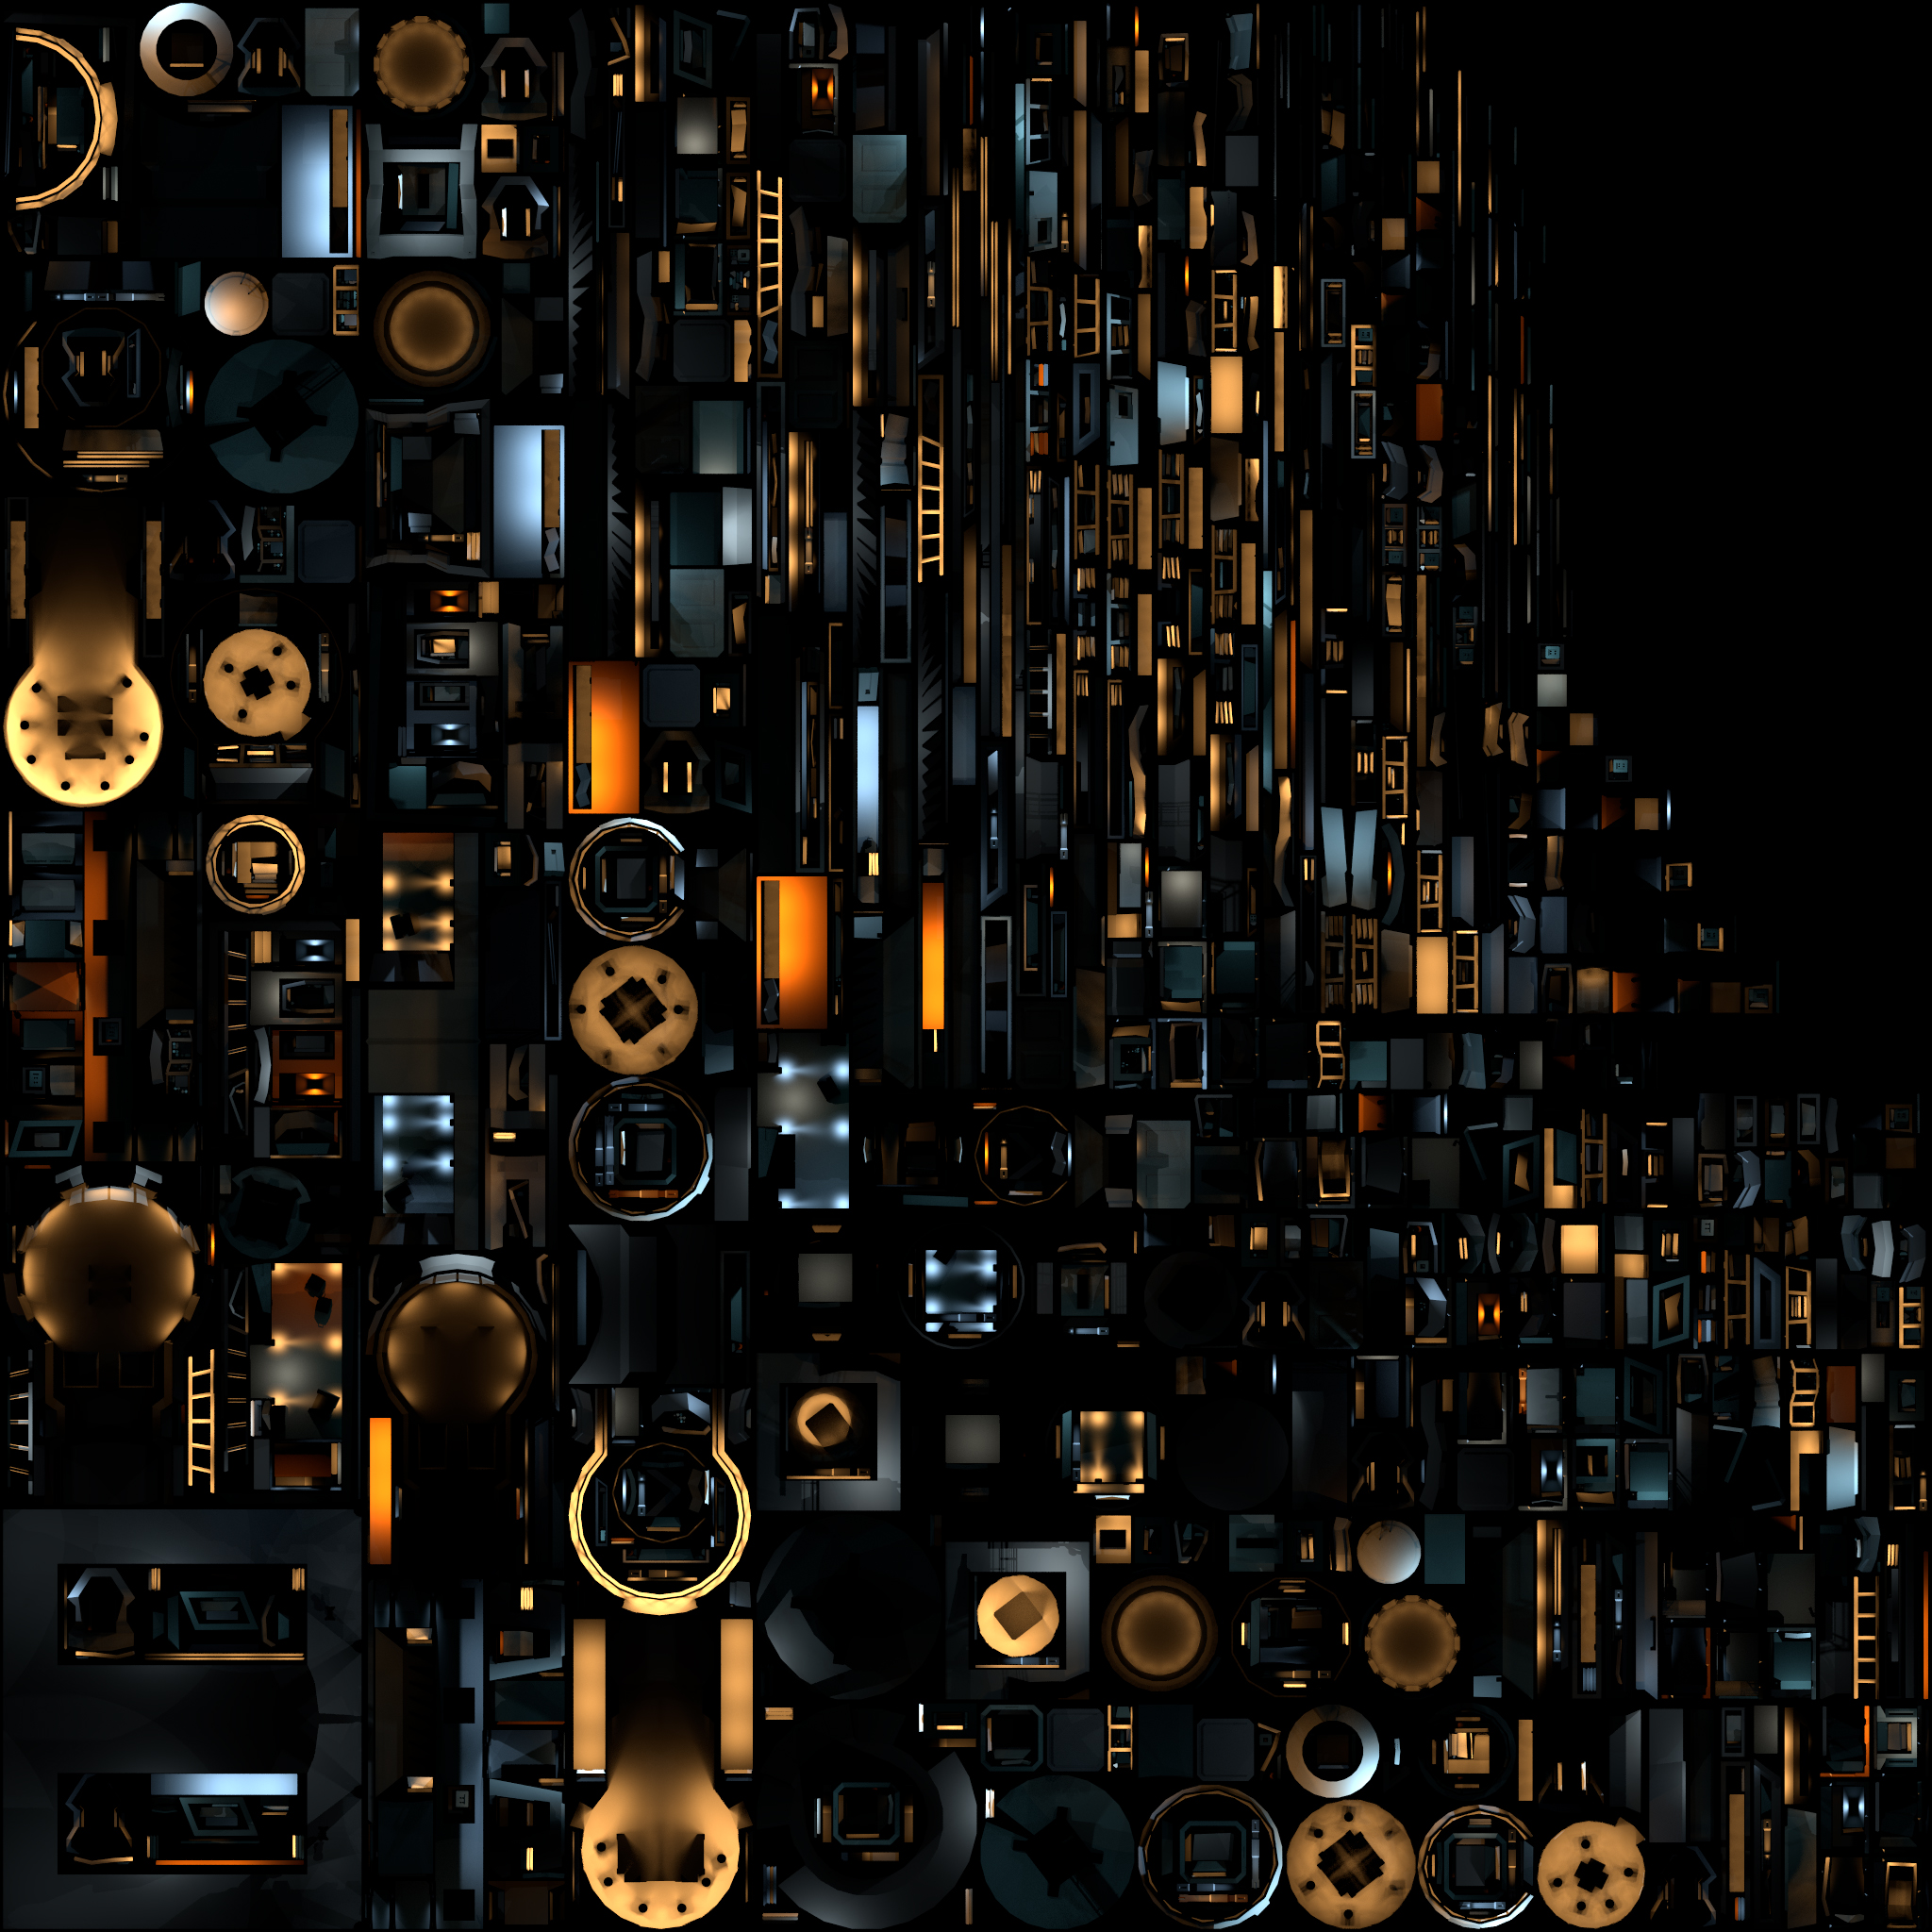
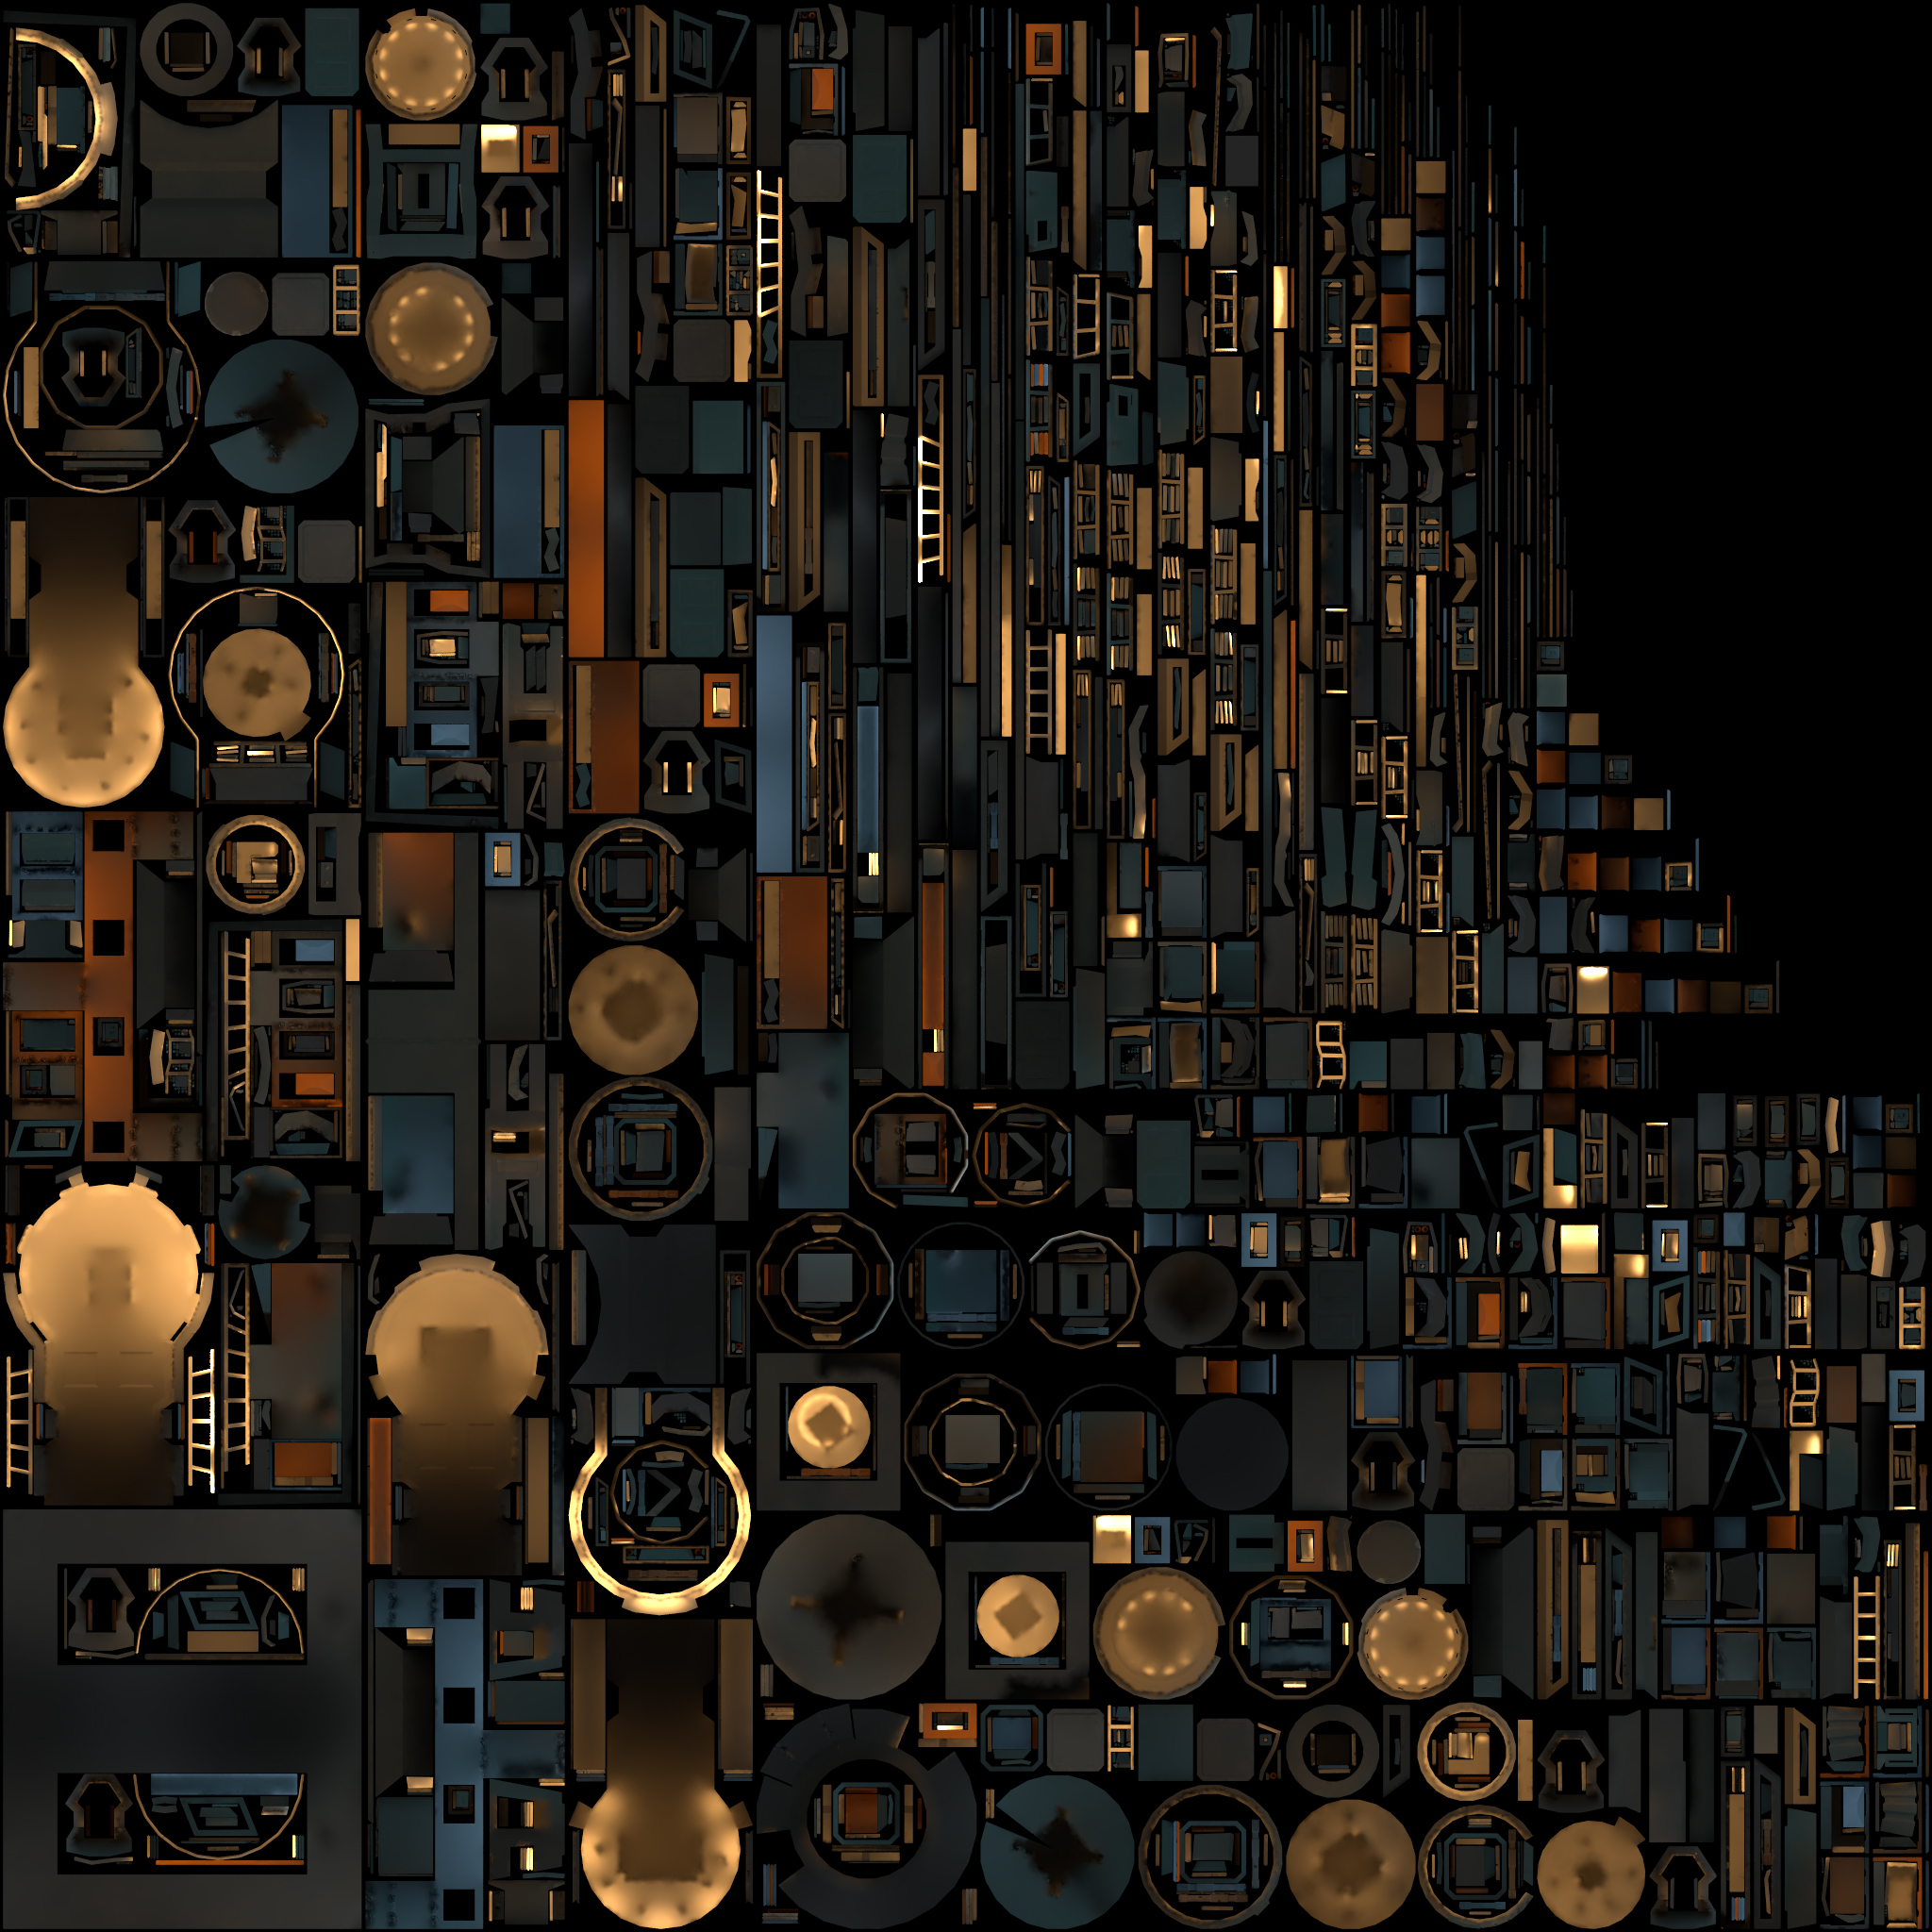
7) 3D engines have their own rules and restrictions, that limit my creativity! In case of static environment (which our level mostly is) we can avoid these limitations. Thing is, we use GI (global illumination) inside 3D modeling editor, so after lighting is set it needs to be transferred to the game engine. Of course we could just export light sources, but in that case we will lose some light properties and lighting reflection from GI – that’s not our way! We want to transfer physically accurate lighting to game. The only way to do it at the moment is to “bake” light into the texture, in our particular case we apply it through different channel composition.
So how exactly we do this? Pretty simple! We break scene with our level into particular groups of meshes and process light into textures (which is called lightmaps) . In the end we get two light maps, not usual light and shadow, but direct light and light reflection (global illuminations) for each group of meshes. Sometime this part is done by me, sometimes by Dmitri. Our favorite things to do on this step is to press “bake all” button and watch our small network of 4 pcs work hard for about 24 hours.
This example is taken from another level, because lighting for level above isn’t ready yet.
(Primary and secondary lighting)
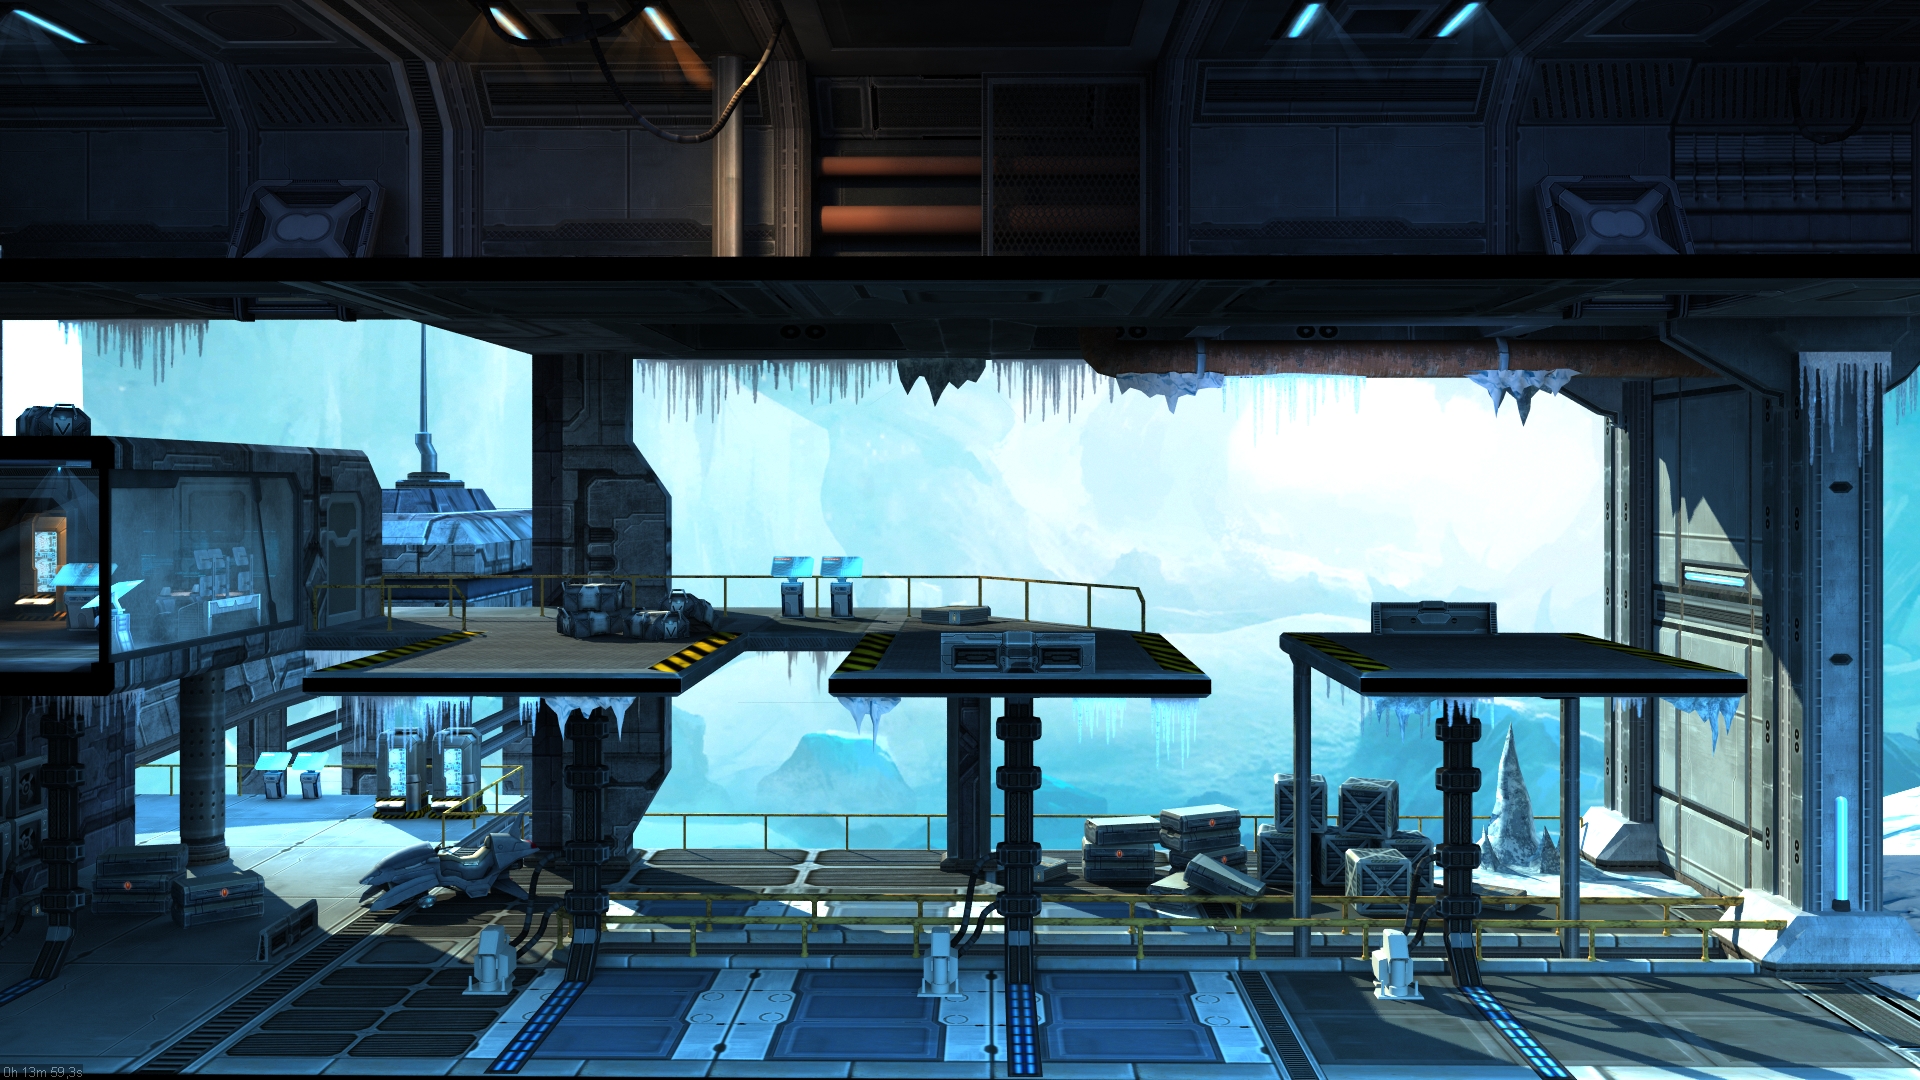
8) And that is not all! After baking we need to set up materials with lightmaps, debug the level, adjust ingame lighting, which used for dynamic objects and add atmospheric effects.
At the same time we place dynamic objects with animation.
Now that concludes our work with the level and we switch to another one. But before players will see this new arena, game designers need to script some events, place spawn points etc.
I wish you patience and let Yoda be with you!
P.S. Do you know how characters are made?


The concept art is really good and you've done a great job translating that into the levels.
wow those texture sheets are beautiful!
Look great!! Love the art.