DENIZEN: "Banshee" Art Breakdown
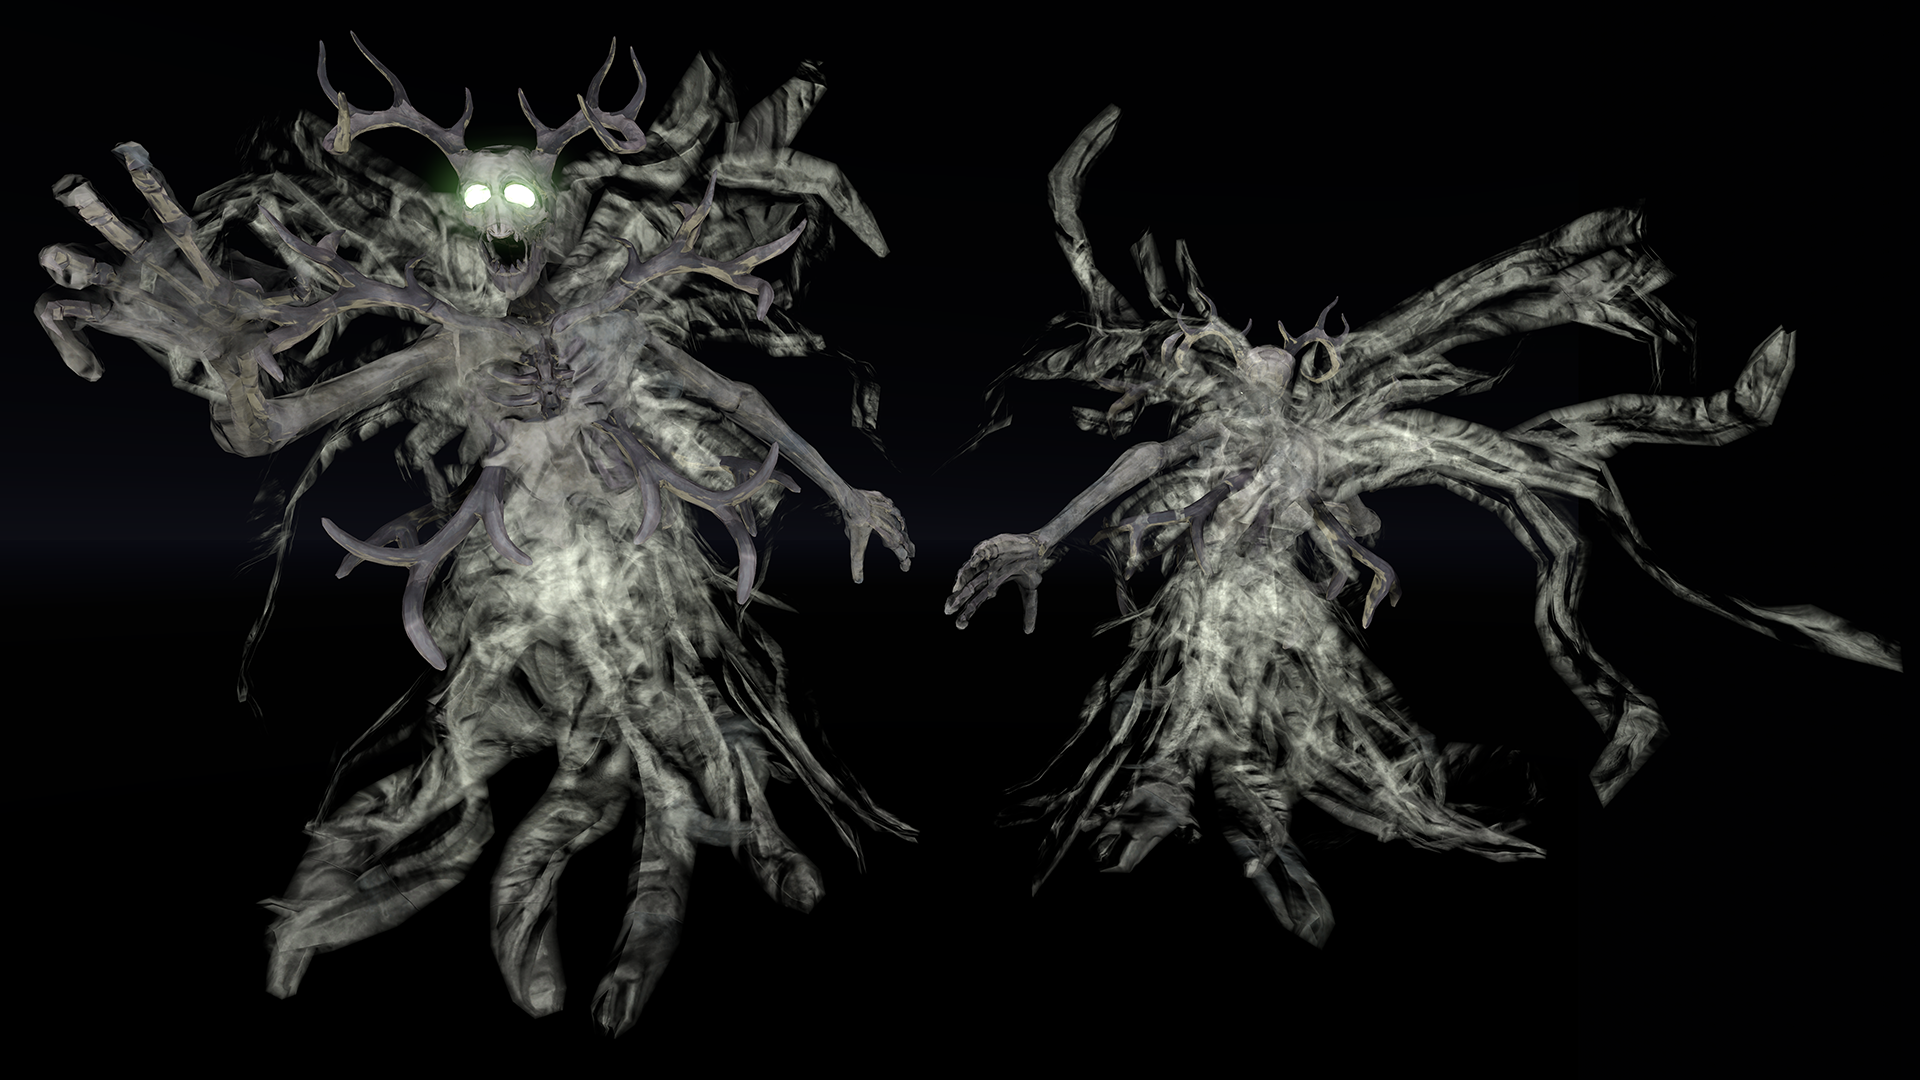
Hey guys, I'm Will from Skunkape. I thought I would share with you an overview of the process I used to create DENIZEN's "Banshee" (front and back view shown below).
Concept
The Banshee is a hostile forest spirit that floats and attacks the player from range with spells: a stream of small projectiles, a large projectile, and when the player is near enough a psychic shockwave attack. Banshees are common, especially in the swampy areas of the forest and can appear out of thin air. One of a Banshee's functions is to keep travellers who have been consumed by the swamp from rising out of the muck. These traits informed their visual design.
So here's what was involved with my end of the design process, 3D artwork.
Early Design Iteration / High Detail Mesh
Since I knew this character would be a bit humanoid (he's got arms and a head) I started with a default human model included with ZBrush. I don't always use it but when I'm making a character who's roughly humanoid this is the best way I've found to optimize my time. If you use Zbrush you can use the same ZTool to start your characters. It's probably in C://Program Files/Pixologic/Zbrush/ ZTools/NickZHumanMaleAverage.ztl. It's a very useful resource.
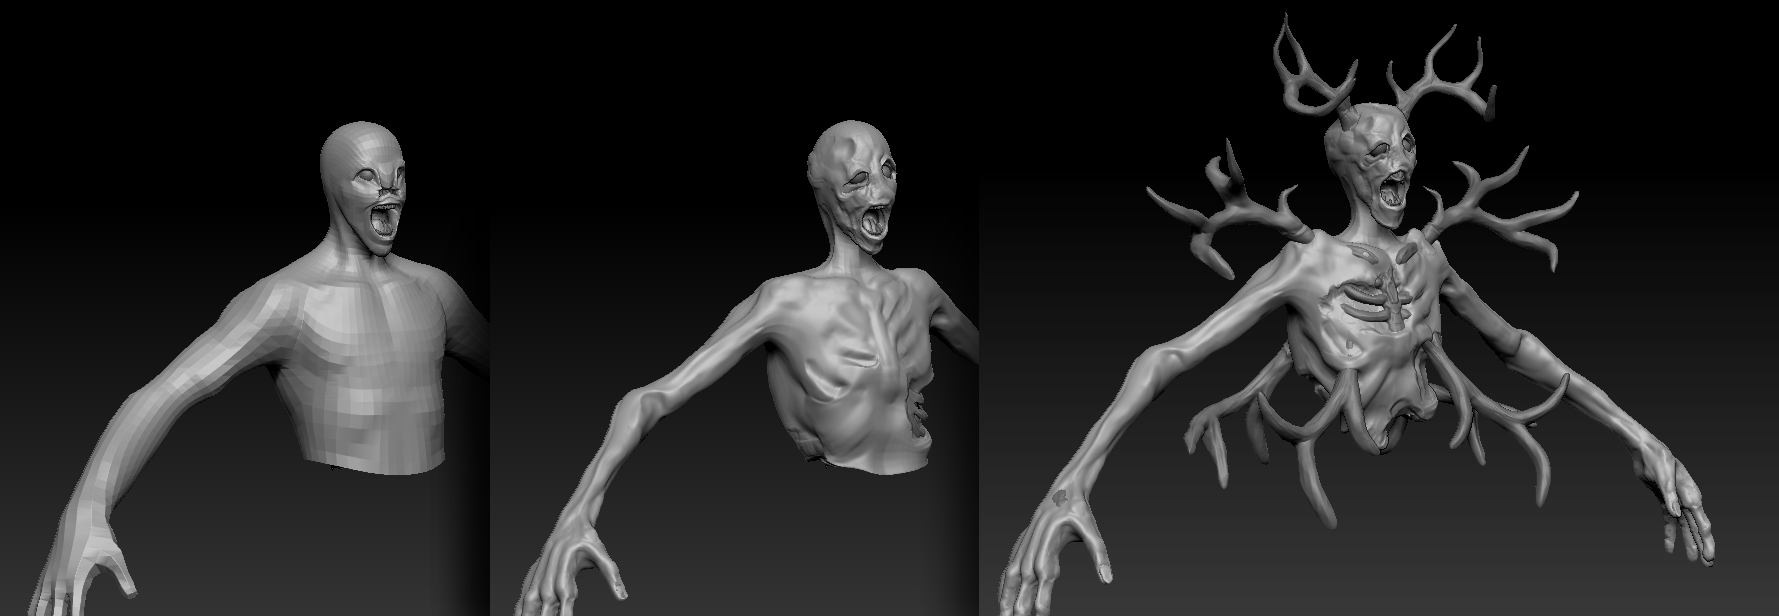
Once I opened up the ZTool I exported it as an .obj to take it into Softimage, where I quickly mangled it and removed his ears, nose and legs to make a starting point for our monstrous Banshee. The result is the far left panel of the image below.
Then I took this mess back into Zbrush and began to sculpt on it with Dynamesh. Dynamesh is great for working fast and creatively but has the downside of being unusable for game topology, which means the game mesh will have to be rebuilt later. I only use a few brushes, mostly "ClayBuildup", "Smooth", "Dam_Standard" and "Inflate". "Crumple" is also useful for adding detail at the end. After several hours of iteration I had results I was happy with, pictured in the far right panel.
The Banshee has bones protruding out of it's body. The starting point for the bones was another ZTool included with Zbrush in C://Program Files/Pixologic/Zbrush/ZTools/Ryan_Kingslien_Anatomy_Model. Since I use these two ZTools alot I took some time awhile back to match up thier scale and pose, which makes sculpting creatures with gory protruding bones quite easy. You can see the progress of the skull below. I used the same process, started with a human skull, Dynamesh and iterate with the same simple brushes, although this time the "SnakeHook" brush was very helpful for the horns. I also added horns coming out of the shoulders and the rib cage to create a more unique / grotesque shilloette.
Low Detail Mesh
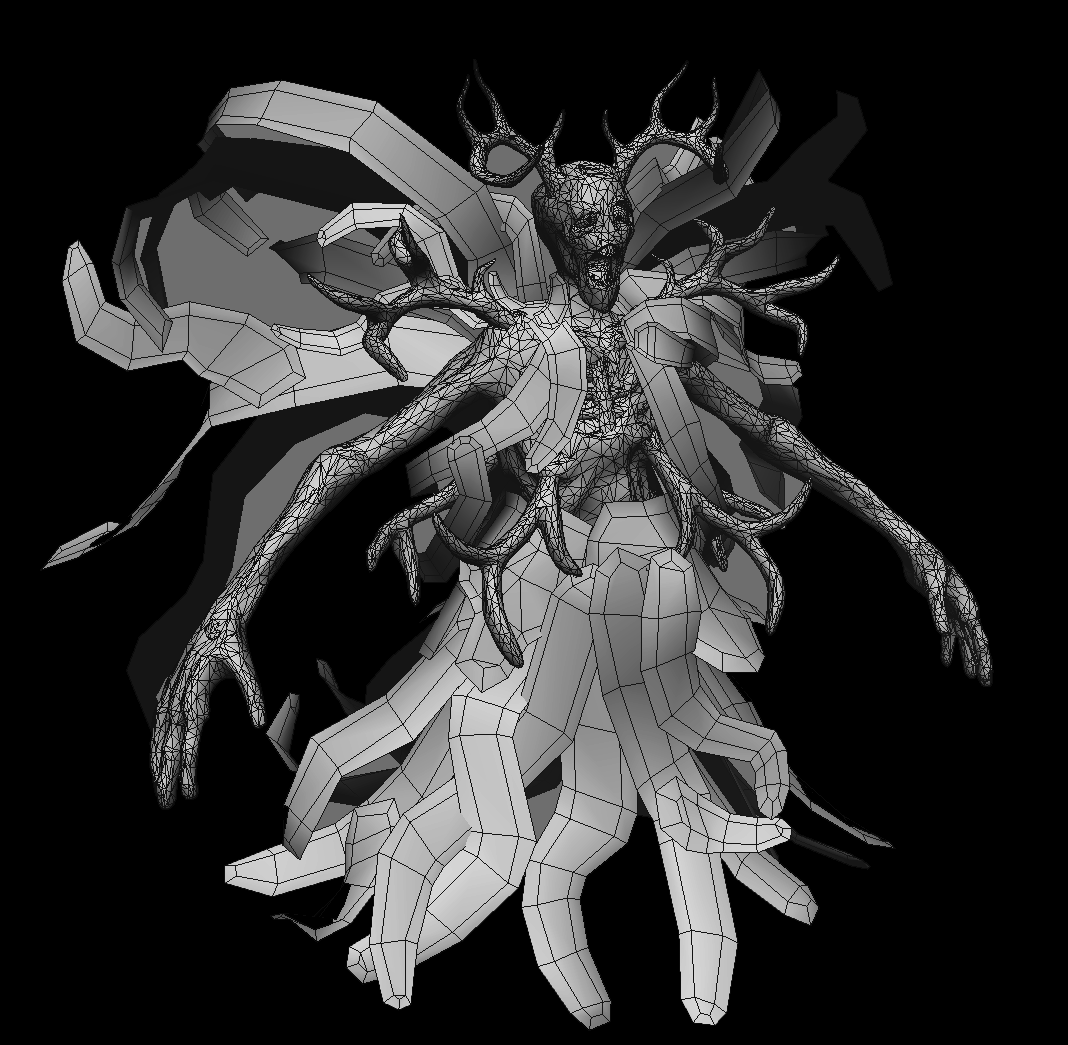
After the character's body sculpt was done I had to create a low detail version for use in the engine. I also wanted to add some whispy tendrils to give him a more engaging, demonic look. So I used "Decimation Master" to grab a rough low detail version of the mesh. Then back in Softimage I created the tendril geometry using simple tools like "Add Polygon" and "Duplicate/Extrude Single". When the tendrils were finished I started building from the mesh created by Decimation Master. The topology needed some cleaning to make it easier to animate and UV unwrap, nothing more complicated here then "Delete" and "Add Edge Tool". In hindsight I could have done a more thorough job of retopolgy, but my quick job is working fine.
UV Unwrap and Baking
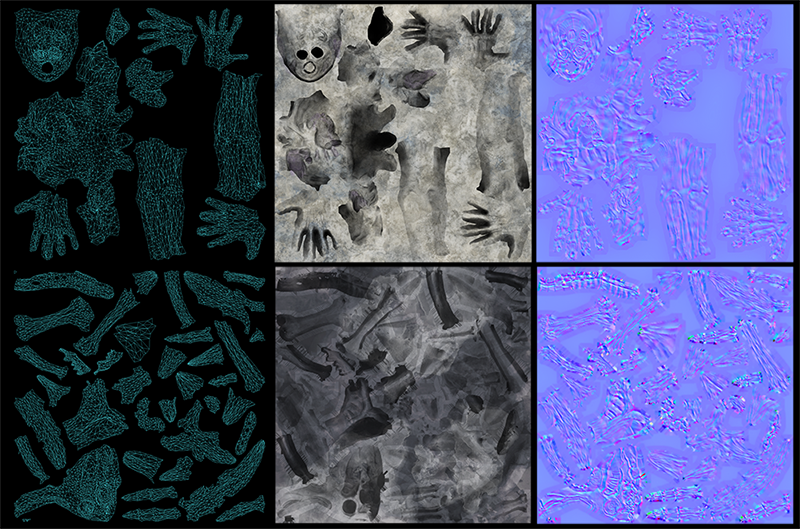
From my experience Headus UV Layout is the easiest and fastest way to create UV maps, it is very smart and can flatten meshes very fast and with minimal distortion, although it takes some getting used to. After the unwrapping of the body and horns was done I grabbed normal and ambient occlusion maps from the original Zbrush mesh using XNormal, which is another great tool and renders faster than anything.
Texturing
The ambient occlusion map is a good place to start for the final texture. I simply add grunge from photographs underneath using Photoshop. That's probably my favorite part of the process. For the normal map, I like to use this trick: duplicate the map to a new layer and set it's blend mode to "Overlay". This makes the shading from the map seem deeper. Combined with a mask created using a soft brush you can add some interesting enhancements to your normal maps.
So finally here in the image below you can see the maps for the Banshee's skin on top and horns at the bottom. The left panel is the UV layout, the middle is the color, and on the right is the normal map.
The reason they are seperated into two maps rather than one is because the skin uses a trasparent shader but the horns are opaque.
Animated Tendrils Visual Effect
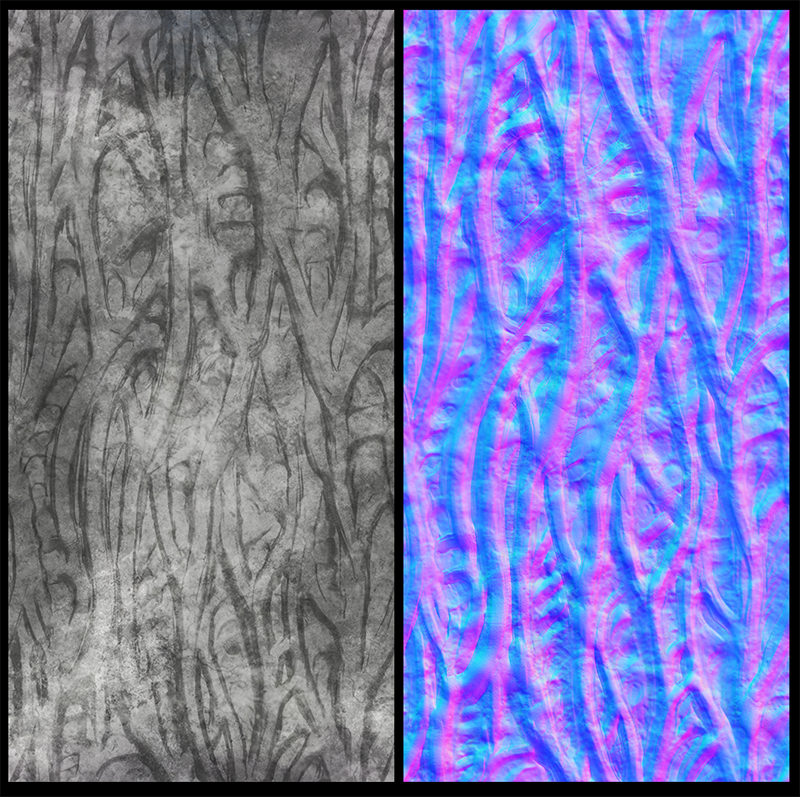
So far this is pretty much standard operating procedure for realtime rendering, but the tendrils are a bit more interesting. I wanted to give them some animated shader effects, and a kind of roiling, writhing look. So I started by making the below tiling texture set using ZBrush. In order to make sure all edges stitch up correctly I sculpted in the middle of a plane making sure not to disturb the edges. Then drop the plane to the 2.5D canvas. In 2.5D mode I could use the tilde (~) key and drag to offset with tiling, positioning the areas already sculpted at the corners of the canvas. Then I used the handy "MRGBZGrabber" tool to create a fast depthmap, grab a new plane and apply the depthmap to that. Now I have geometry with the edges detailed but the middle is flat, so I sculpt more on that. Then I just repeated this process until the whole plane was sculpted. Then I exported the mesh as .obj and took another normal and ambient occlusion render from XNormal. After adding some grime to the AO I had these 2 images:
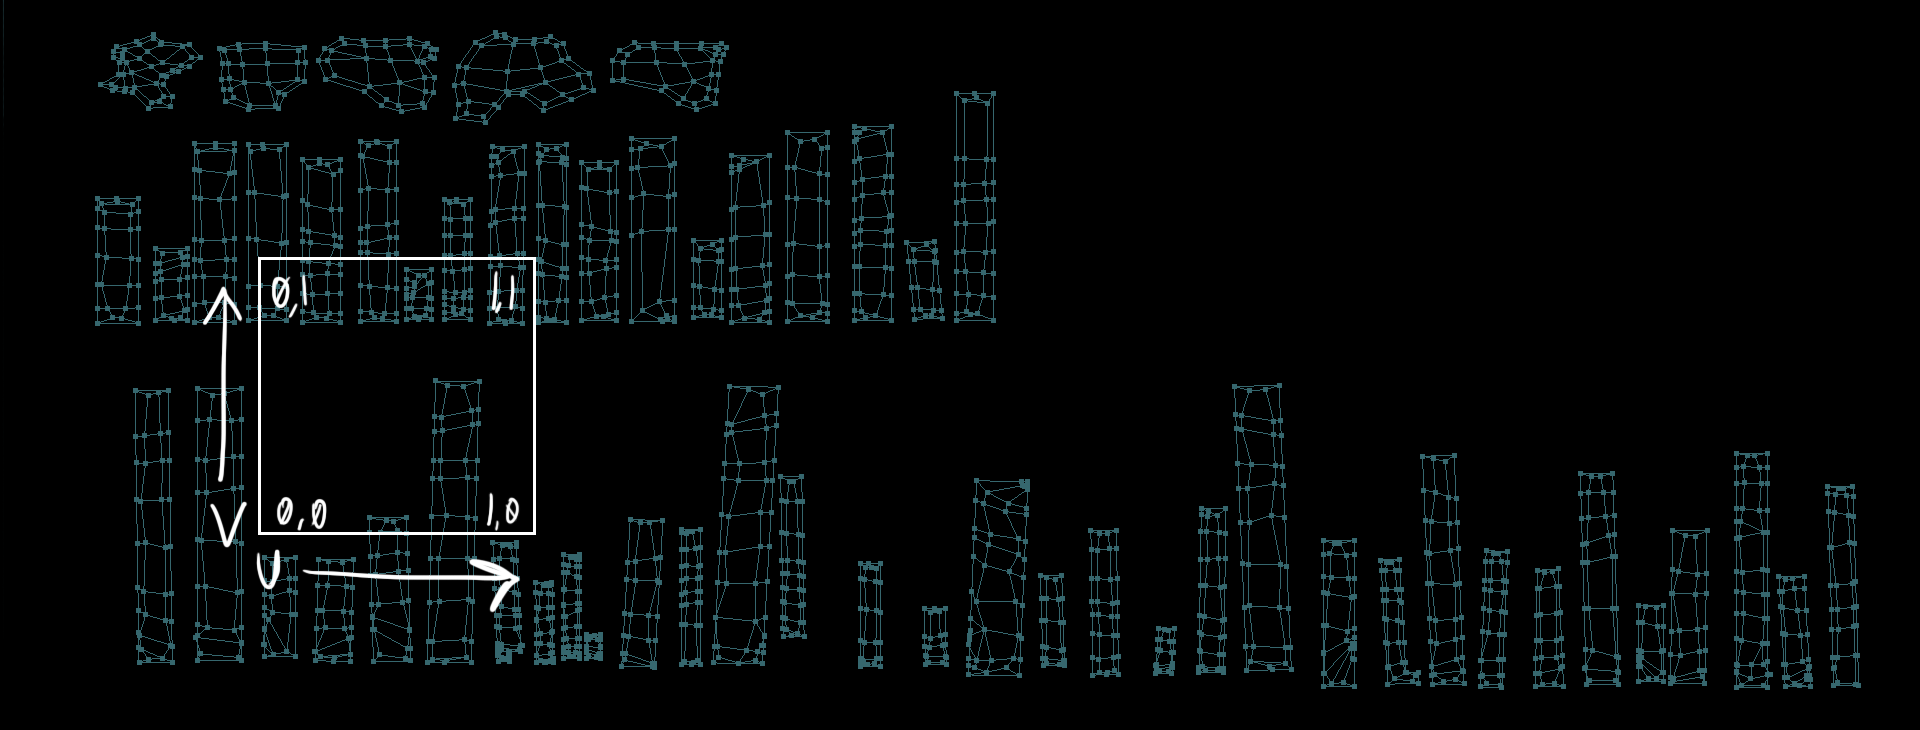
Since these maps are tileable the UVs get unwraped differently. Rather than fitting all the shells within the 0 to 1 coordinates, they are allowed to spill out. I also had to be mindful of their scale relative the the texture being used. The easiest way to get all the scale correct is to apply the texture or normalmap to the mesh in your 3D app and view the model in textured mode. That way you can edit the UVs and see the mapping in real time. Larger shells have better texture resolution, but more visible reapeating. Also important in this case is the shell's orientation. Because my final shader for the Banshee uses UV animation effects based on coordinate translation I had to be mindful of which way each tendril's shell was oriented so all the fog appears to flow in the same direction, out from the center. Anyway the resulting UVs in relation to the 0 to 1 coordinates look like this:
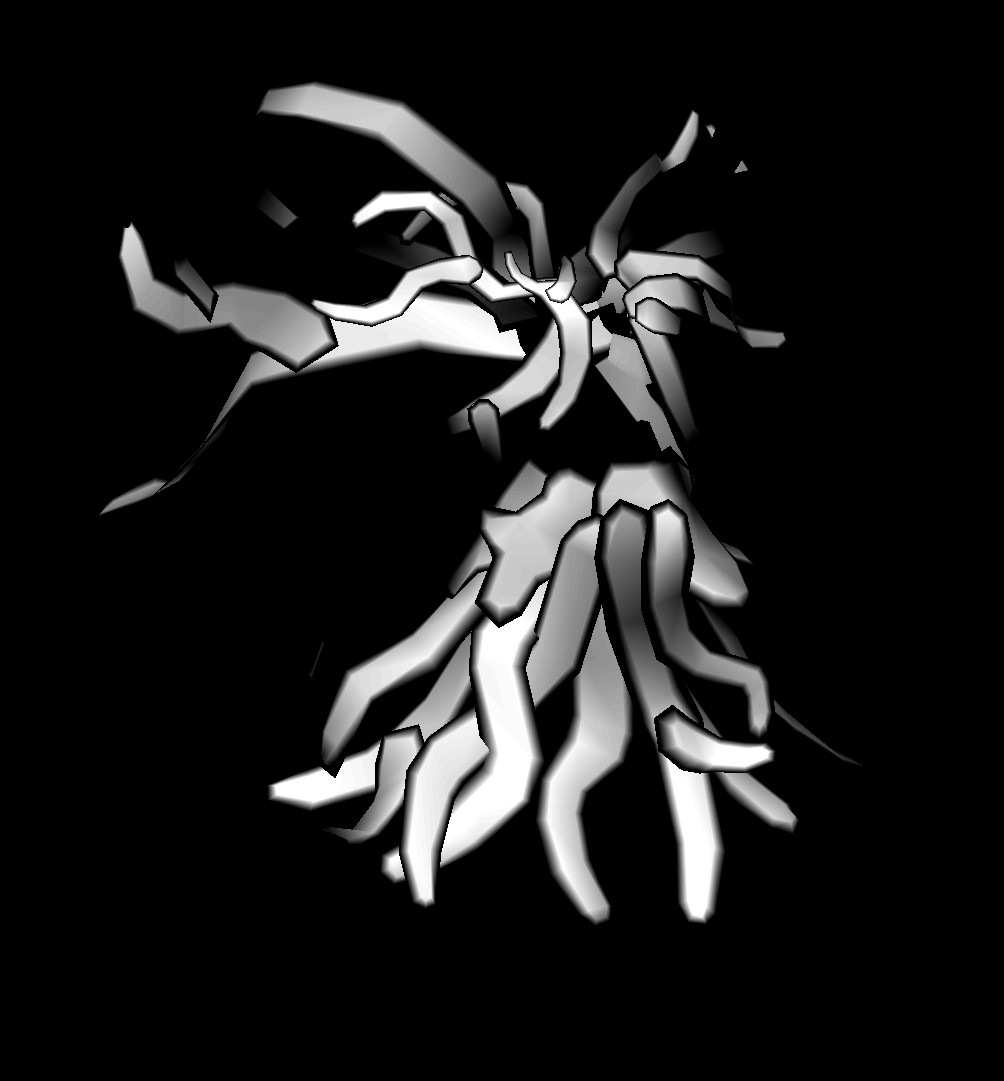
Now there is really only one more interesting thing to note about the Banshee's tendrils, and that is how the edges of the tendrils fade out. Each tendril has a vertex color property which my shader uses to fade the mesh out. You may have noticed how each tendril has a loop around the edge? That is so I can apply vertex color to mask out the edge with a nice gradient fade. Vertex color is a gradient between two vertices so the extra loop is necessary. In this case black is zero opacity, white is full opacity and grey is in between. Here is what the tendril's vertex color looks like:
Conclusion
So here's the final image again, to show how it all works together:
That's about it! I hope you enjoyed reading about realtime 3D art. If this is interesting to you or you would like to ask me a question about something that I didn't explain very well feel free to tweet me @sa_eenglish or message Skunkape Interactive here on IndieDB. Have a good one!
For further updates on DENIZEN and to be notified when playable builds are available, please subscribe to our mailing list!
