Tiles are one of the core elements that can help design a level. As an amateur game developer, without any background in pixel art and such, it took some time to reach an ok result.
For my last game, "Sand and Rust", I used different methods to design tiles. I will share here the simplest one. It has the advantage of being low efforts for an alright pixely result.
I don't pretend to be more than an amateur, this is for beginners.
Steps:
- 1-decide outline tone
- 2-choose your color palette
- 3-constitute your palette
- 4-choose a tile size
- 5-prepare a grid
- 6-add desired tiles
- 7-prepare background tiles
- 8-add smoothing layer
- 9-multiply size
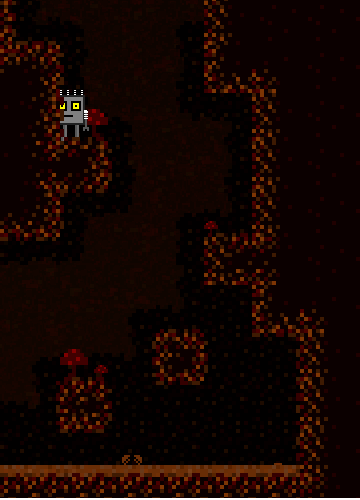
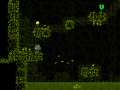
Let me start by showing end result:
Exemple1
Most of what you see was done with associating tiles:
Exemple2
I will walk through each step to easily achieve this kind of result.
Steps:
1- decide outline tone
Use light outline against dark background or dark outline against light background. If you want to emphasize where the walls and floor are, you need contrast.
2-choose your color palette
This step really depends on the kind of feel you want to give: warm, cold, natural, alien, urban, etc. I generally like to use 4 colors (5-6 at most). If you already drew a background, choose your palette accordingly.
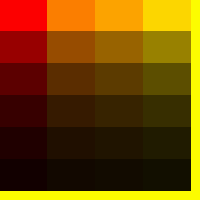
3- constitute your color palette
After choosing the colors, constitute your palette by preparing variations of those colors from light to dark
Exemple3
4-choose a tile size
In above project, I used 12X12 tiles that I multiply by 4 to achieve a pixelly result. For now, choose a small size that you will increase later.
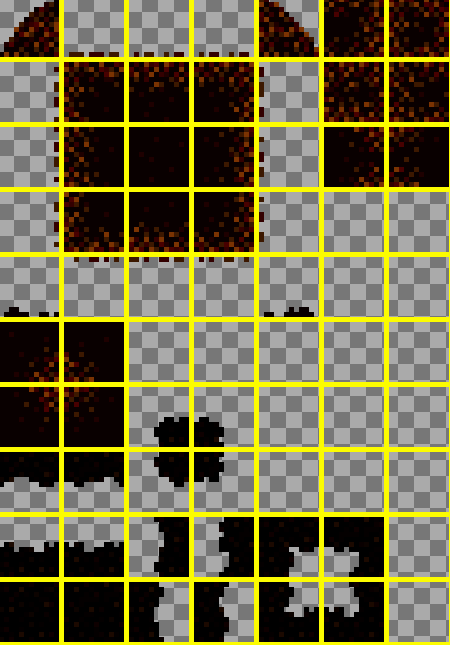
5-prepare a grid that will cover every angle and corner possible
The bare minimum you must do is a 3x3 square + a 2x2 square (exemples 4 and 5)
Fill your squares with the color of your choosing (very dark red in exemple). It will be better to create tiles simultaneously to obtain more consistency.
6-add desired colors one by one from lightest to darkest or vice-versa.
Exemples 4
Exemple 5
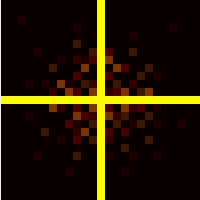
I started by randomly drawing light orange points in every tile. I repeated this process with other light colors of the palette. I then added some darker colors right next to earlier points, adding a little depth.
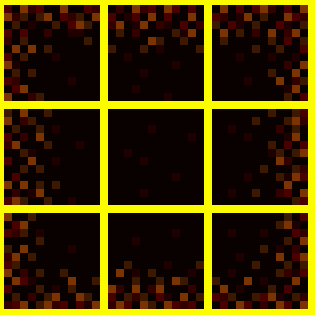
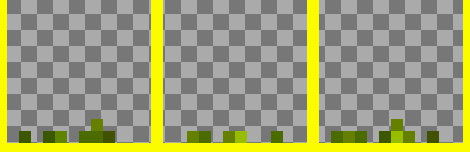
7-prepare background tiles
Tiles will often give a very raw result, all square and mario like. To soften this aspect, you can design some background tiles. They need to contrast a lot with your outline, and also with background. They are evident in exemple 6, and you will notice them too in exemple 1.
Exemple6
8-prepare grass-like or stone-like little layer
Like previous step, this will also smoothen the result, giving a more "natural" feel.
Exemple7
Exemple8

9- Multiply size
The more you multiply your image, the more pixely feeling.
Et voilà !

Pretty nice tutorial, good job!
I wish you had more step-by-step pictures tho.