This is an in-depth tutorial for newcomers to modding Airships. We are going to make a simple mod that adds a new kind of enemy to spawn in strategic mode, a peasant uprising. You need no graphical skills for this one.
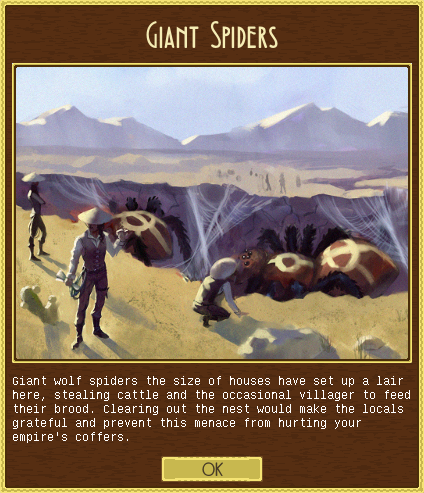
In Airships strategic mode, there are lairs on the map that are periodically occupied by monsters, pirates, and other menaces. These are referred to as "monster nests". The types of monster nests available are defined in the game data files, and you can add to them by creating a mod.
You can download the full mod from this tutorial here, for reference.
Finding your way around
To get started with modding, you first need to find two folders: the game install directory and the local AirshipsGame directory.
If you're using Steam, you can find the install directory by right-clicking on "Airships: Conquer the Skies" in your Steam library, choosing "Properties", going to the "Local Files" tab and clicking on "Browse Local Files...". If you're not using Steam, the install directory is wherever you put it.
The local AirshipsGame directory is where the game stores user data, such as ship designs, saves, and also mods.
- On Windows, it's at %APPDATA%\AirshipsGame.
- On Mac, it's at ~/Documents/AirshipsGame.
- On Linux, it's at ~/.airshipsgame.
(~ is your home directory.)
In the install directory, have a look into the "data" directory. This is where all the game data is stored: module types, armour types, sounds, images. Mods override and add to this information, and use the same file structure.
Each type of information is stored in its own sub-directory of "data". Module types are stored in ModuleType, types of crew (sailors, soldiers, grenadiers, spiders) in CrewType, and so on. Even types of birds flying around in the background are listed, in BirdType - so if you want to mod in a new kind of bird, you can do that.
Since we want to create a new monster nest, we're interested in the MonsterNestType directory. Inside is a file called "nests.json", which contains all the nest types that are in the game by default. Most data in Airships is in JSON format. You can probably pick up how it works by looking at it, but you can also read up on its details here.
We're going to look at the information in a nest type in detail in a bit, but for now, note that each JSON data file consists of a top-level list [] containing objects {}. Here, each object is a type of monster nest.
Setting up the mod
So let's start creating our peasant uprising mod. Go to the local AirshipsGame directory, into the "mods" directory, and create a new directory called "peasant_revolt".
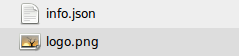
To make Airships recognize "peasant_revolt" as a mod, it needs to contain an info.json file. Create this file inside the mod directory, and put in the following text:
{
    "id": "peasant_revolt",
    "name": {
        "en": "Peasant Revolt"
    },
    "description": {
        "en": "Adds a new kind of nest, revolting peasants."
    }
}
Here's an explanation of each of the elements:
- id: Each mod has an ID that should be unique. The ID and directory name should be the same. If you want to make sure that mod IDs don't conflict, prefix your ID with your name, e.g "zarkonnen_peasant_revolt".
- name: The human-readable name for the mods screen and Steam workshop. Mods support multiple languages, but you can just stick to English here.
- description: The mod's detailed description that will be shown in the mods screen and in the Steam workshop.
Mod directory contents:

Once you've created that file, you can start up Airships, and the mod will be recognized and loaded in. It just doesn't do anything yet.
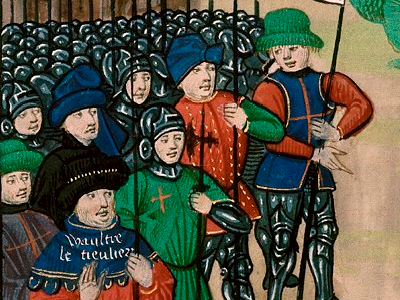
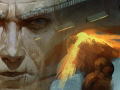
The other piece of information the mod needs is a logo image. I wrote at the top that this tutorial needs no graphical skills, so how are you going to get that image? Simple: steal from the great masters of the past, who lived in an age before perpetual copyright. A quick Wikipedia search for "peasant revolt" yields this page and this image from 1470, which we can use for the mod.
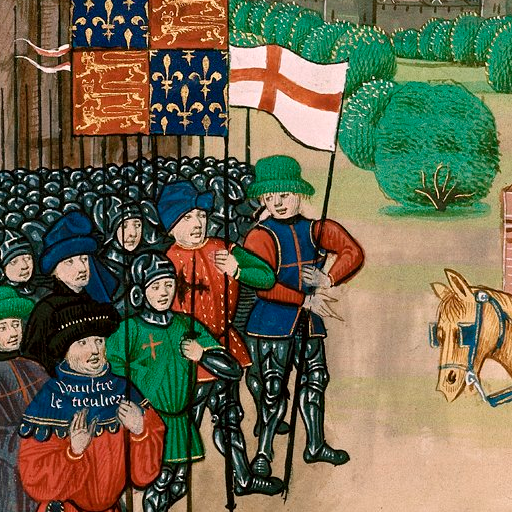
The logo image needs to be a 512x512 pixel PNG file. Open the image in an image editor (Paint will do), and crop out a 512x512 pixel area. Save it as "logo.png" in the mod directory.
Mod directory contents:
Ships and buildings
Now it's time to produce the actual content of the mod.
Let's start out by creating the ships and buildings for the peasants. This peasant revolt is going to have a small headquarters, barely more than a shack, and field some very small and low-tech ships.
To create those, we can use the in-game editor as normal. Create a HQ building, something like this:
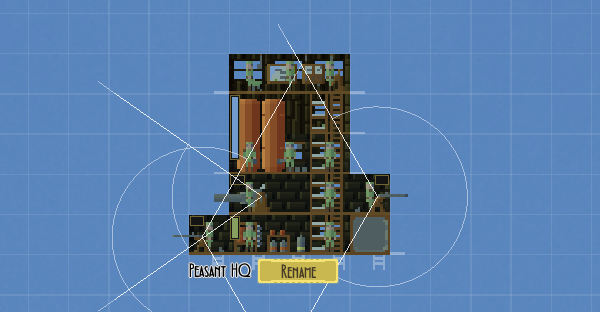
and save it as "Peasant HQ".
And then some very small and weak airships, like this:
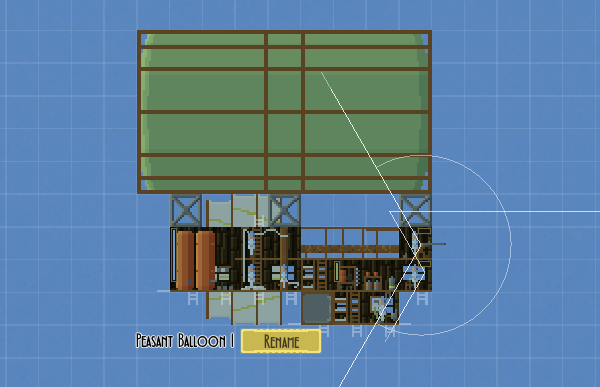
and save them as "Peasant Balloon I" and so on.
And maybe a marginally more powerful ship, "Peasant Flagship":

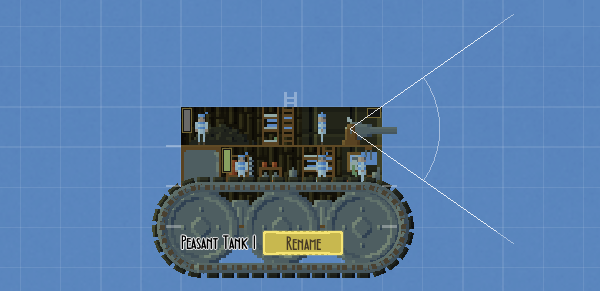
and some tanks, "Peasant Tank I", etc:
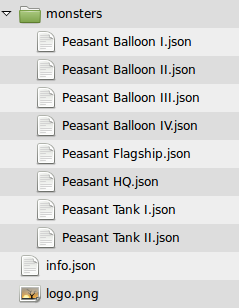
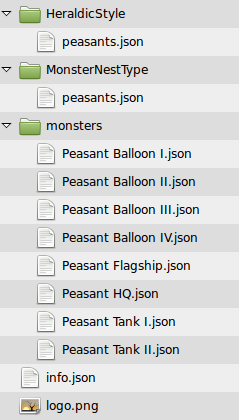
Now, go into the local AirshipsGame directory, into the "ships", "landships" and "buildings" subdirectories, find the saved constructions, and copy them all into a new directory in your mod called "monsters". This will allow the game to find them for use by the monster nest.
Mod directory contents:
The monster nest
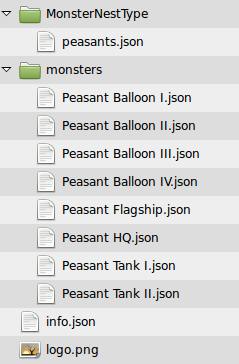
Now it's time to create the main piece of information in this mod: a new MonsterNestType. Create a "MonsterNestType" directory in your mod, and create a new file called peasants.json in it. Instead of typing out all the information for the monster nest, let's just copy-paste the one for brigands from the game data and adjust it. (The brigands nest entry is in "nests.json" in "MonsterNest" in the game data directory.)
Mod directory contents:
So to start out with, your file should look like this:
[
    {
        "name": "brigands",
        "heraldicStyle": "brigand",
        "spawnWeight": 20,
        "needsRoad": true,
        "income": 27,
        "mapImage": { "src": "ui", "x": 208, "y": 368, "w": 16, "h": 16 },
        "mapBackground": { "src": "ui", "x": 208, "y": 368, "w": 16, "h": 16 },
        "mapFleetImage": { "src": "ui", "x": 208, "y": 368, "w": 16, "h": 16 },
        "mapFleetBackground": { "src": "ui", "x": 208, "y": 368, "w": 16, "h": 16 },
        "baseConstructions": ["Brigand HQ", "Brigand Raider I"],
        "additionalConstructions": ["Brigand Raider I", "Brigand Raider II", "Brigand APC", "Brigand Balloon", "Brigand Mammoth"],
        "incomeModifierPercentage": -10,
        "homeFleet": ["Brigand HQ"],
        "minAttackFleetStrength": 300,
        "attackRadius": 400,
        "rewards": [
            {
                "name": "brigandsDefeated",
                "money": 200,
                "rep": 2
            }
        ]
    }
]
Note the enclosing square brackets: it's a list with one element, the "brigands" MonsterNestType. I will now go over each field and explain what it does, and how to adjust it for our peasants, then show the complete result of the adjustments.
- name: The name of this monster nest. Right now, this has the same name as the existing brigands monster nest, so any changes we make would override the brigands. For example, if we wanted to make brigands more likely to appear, we could change the spawnWeight to 50 and otherwise keep everything else the same. But we want to create a new type of nest, so we change the name to "peasantRevolt".
- heraldicStyle: This determines what coat of arms the monster nest will have. In the case of nonhuman monsters like dragons, this is irrelevant and can be left off. It's a reference to another data type, HeraldicStyle. We'll change it to "peasant", and create a peasant heraldic style in a bit.
- spawnWeight: How likely this type of nest is to appear. 20 is about normal, so we'll leave it at that.
- needsRoad: Some monster nest sites have roads leading to them, others don't. If the monster nest has ground units, it makes sense that it needs a road. Our peasants do, so we'll leave that at true. Dragons, for example, have this set to false.
- income: How much money the nest makes on its own accord. This needs to be balanced carefully. The maintenance cost of the nest's buildings and ships is subtracted from this, and the difference accumulates over time, letting the nest build more things. If this value is too low, the nest cannot grow, but if it's too high, it will grow too quickly and too large. Given our peasants are fairly weak opponents, let's reduce this to 20.
- mapImage: The image displayed on the strategic map for this nest. The information here means that the image comes from the "ui" spritesheet (ui.png in the "images" directory in the game data directory), and is the 16x16 rectangle at x = 208, y = 368 - which is an arm holding a scimitar. For our peasants, we want a different image, but for simplicity's sake, we'll grab one from the "ui" spritesheet as well, which has a whole lot of different 16x16 icons. Let's pick the rat icon - whoever is drawing your map doesn't think much of the peasants. Change x to 96 and y to 384.
- mapBackground: The background image for the map image. This is drawn first with the same colour as the map background before the mapImage is drawn in an ink colour. Here, we can just use the same image as above.
- mapFleetImage and mapFleetBackground: The image drawn for a moving fleet sent by this monster nest. Again, let's just use the same rat image as above.
- baseConstructions: The ships and buildings the monster nest starts out with. These names reference the ships and buildings you put into the "monsters" directory. So instead of a "Brigand HQ" and "Brigand Raider I", we want a "Peasant HQ" and "Peasant Balloon I". (Or whatever you called your constructions.)
- additionalConstructions: Once the nest has accumulated enough money to build a new thing, it will pick something from this list and build it. So this is where you put the names of all the ships and landships you made for the mod.
- incomeModifierPercentage: If this nest is within the land claimed by a city, how much it reduces the income of that city, in percent. Let's leave this at 10%.
- homeFleet: What constructions stay at home when the fleet goes out raiding? Well, in our case, obviously the Peasant HQ, because it's an immovable building.
- minAttackFleetStrength: The minimum value of the nest's fleet before it goes out raiding. The higher this is, the longer it will build up forces before attacking. Let's leave this at 300.
- attackRadius: How far away from the nest will its fleet travel to raid cities, in pixels. Let's leave that at 400 also.
- rewards: Once a monster nest has been defeated, the game picks one of a list of rewards for the player. With the brigand nest, the player finds a small stash of loot worth 200 gold. (There's also a reward of two reputation points, which currently don't do anything.) Quashing a revolt by angry, impoverished peasants is unlikely to yield any loot (or make you more popular), so let's rename the reward to "peasantRevoltDefeated" and take out the lines about money and reputation. Your reward is just that they stop bothering you, and that you no longer have that -10% income on your city.
So now your file should look something like this:
[
    {
        "name": "peasantRevolt",
        "heraldicStyle": "peasant",
        "spawnWeight": 20,
        "needsRoad": true,
        "income": 20,
        "mapImage": { "src": "ui", "x": 96, "y": 384, "w": 16, "h": 16 },
        "mapBackground": { "src": "ui", "x": 96, "y": 384, "w": 16, "h": 16 },
        "mapFleetImage": { "src": "ui", "x": 96, "y": 384, "w": 16, "h": 16 },
        "mapFleetBackground": { "src": "ui", "x": 96, "y": 384, "w": 16, "h": 16 },
        "baseConstructions": ["Peasant HQ", "Peasant Balloon I"],
        "additionalConstructions": ["Peasant Balloon I", "Peasant Balloon II", "Peasant Balloon III", "Peasant Balloon IV", "Peasant Flagship", "Peasant Tank I", "Peasant Tank II"],
        "incomeModifierPercentage": -10,
        "homeFleet": ["Peasant HQ"],
        "minAttackFleetStrength": 300,
        "attackRadius": 400,
        "rewards": [
            {
                "name": "peasantRevoltDefeated"
            }
        ]
    }
]
Heraldry
Next, we need to create that heraldic style we referenced. So create a HeraldicStyle directory in the mod and create a peasant.json file. Again, we'll use an existing entry and modify it, so if you go into styles.json in the HeraldicStyle directory in the game data directory, you can grab the heraldic style used by brigands as a base.
Mod directory contents:
Your file should now look like this:
[
    {
        "name": "brigand",
        "ruleOfTincture": false,
        "firstChargeShouldHaveBonus": false,
        "layouts": [
            "CHARGE",
            "THREE",
            "BORDURE"
        ],
        "charges": [
            "ARM_AND_SABRE",
            "SKULL",
            "BOAR",
            "WOLF",
            "RAT",
            "SUN",
            "SPIDER"
        ],
        "layoutTinctures": [
            "SANGUINE",
            "SABLE",
            "MURREY",
            "TENNE"
        ],
        "chargeTinctures": [
            "ARGENT",
            "OR",
            "SANGUINE",
            "SABLE",
            "VERT"
        ]
    }
]
And again, we'll go over each field and adjust it as needed.
- name: The name of the heraldic style. This needs to be "peasant" so that the reference from our new monster nest works correctly.
- ruleOfTincture: Whether the generated heraldry should obey the "Rule of Tincture". This is an important heraldic rule that states that "metals" - silver and gold - must not be next to other metals, and "colours" - like red, black, green - must not be next to other colours. Brigands don't care about this kind of thing, but our peasants are traditionalists, so let's set this to true.
- firstChargeShouldHaveBonus: Whether the first charge (symbol) in the generated coat of arms should be one that provides a bonus to cities. Since the brigands have no cities, this is irrelevant, and is hence turned off. We can leave it set to false for the peasants too.
- layouts: The heraldic layouts used. These vary from simple options like CHARGE (a symbol on a background) to complex ones like QUARTERLY, which is four different symbols arranged 2x2. You can see the names of layouts by looking through styles.json in the game data, and you can try out the layouts in the coat of arms editor when creating a new strategic game. Here, let's pick "CHARGE", "COUNTERCHARGED", "ON_BEND", "ON_BEND_SINISTER", and "SALTIRE", which are some fairly simple and strong choices.
- charges: The heraldic charges used. Charges are heraldic symbols. Again, you can see their official names by looking at styles.json and their appearance by trying them out in the editor. The brigands have pretty violent symbols. For our peasants, who are simple, traditional folk just out for some justice, we want different ones. Let's pick the following ones: "TOWER", "SCALES", "TREE", "SUN", "WOLF", "BOAR", "FLOWER", "CRESCENT", and "GOUTTE". (A goutte is a drop, like a tear drop or a drop of blood. Some of the official names of heraldic charges are in a weird antiquated quasi-French. Don't blame me, blame the centuries-old tradition of heraldry.)
- layoutTinctures and chargeTinctures: The tinctures (heraldic colours) that can be picked for the different elements of the coat of arms. You can specify different sets of tinctures for the symbols and for the rest of the arms. Again, the brigands are heavy on the red and black and brown. For our peasants, let's pick a slightly different colour scheme: "ARGENT", "OR", "BLEU_CELESTE", "GULES", "VERT", and "AZURE" for both layouts and charges. (That's silver, gold, sky blue, red, green and blue in heraldic quasi-French.) Note that because we turned on the Rule of Tincture, we must have both metals (silver and gold) and colours (sky blue, red, green, and blue) available, otherwise the game won't be able to make a coat of arms that uses those colours and satisfies the rule.
So now our newly created heraldic style looks like this:
[
    {
        "name": "peasant",
        "ruleOfTincture": true,
        "firstChargeShouldHaveBonus": false,
        "layouts": [
            "CHARGE",
            "COUNTERCHARGED",
            "ON_BEND",
            "ON_BEND_SINISTER",
            "SALTIRE"
        ],
        "charges": [
            "TOWER",
            "SCALES",
            "TREE",
            "SUN",
            "WOLF",
            "BOAR",
            "FLOWER",
            "CRESCENT",
            "GOUTTE"
        ],
        "layoutTinctures": [
            "ARGENT",
            "OR",
            "BLEU_CELESTE",
            "GULES",
            "VERT",
            "AZURE"
        ],
        "chargeTinctures": [
            "ARGENT",
            "OR",
            "BLEU_CELESTE",
            "GULES",
            "VERT",
            "AZURE"
        ]
    }
]
The idea with the different heraldic styles is to give each kind of opponent a different visual identity. Lots of skulls and black and red? Pirates or brigands. Things from work and nature in simple colours? Peasants.
Images and text
Now we're nearly done! There are two things remaining to complete the appearance of our revolting peasants: the image the player gets when clicking on the monster nest, and the text snippets about it.
First, the image. The game expects to find a 400x300 image of the same name as the monster nest type to illustrate the nest for the player. Let's again use the picture we used for the mod's title image, cutting out a suitable 400x300 area. Create an "images" directory in the mod and save the image as "peasantRevolt.png".
Finally, we need to create a file containing the text the mod uses. There's a gotcha here: in the game data, these files are in the "lang" directory, but in mods, they're in the "strings" directory. So create a "strings" directory with a file called "en.properties". This lets the game know that this is the file containing the extra English text for the mod. If you wanted to e.g add a French translation, you could also add a "fr.properties" file.
Properties files are text files that map the names of text snippets to the actual text. Each line starts with the name of a text snippet, followed by an equals sign, followed by the text snippet. The names of the snippets are automatically derived from the entries in the game. For the monster nest we created, we need the following snippets:
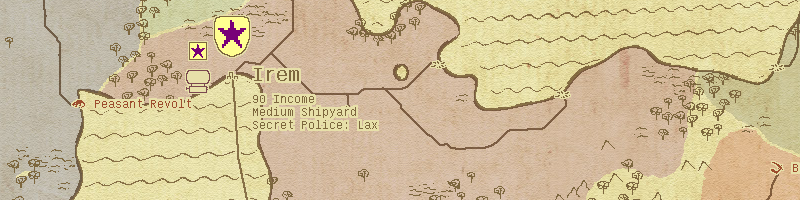
- peasantRevolt_displayName: The label of the monster nest on the map.
- peasantRevolt_occupation: The message shown when the monster nest first turns up.
- peasantRevolt_description: The detailed description the player gets when they click on the nest.
- x_defeats_peasantRevolt: The message shown when a player or AI defeats the monster nest.
- peasantRevoltDefeated: The message shown with the "peasantRevoltDefeated" reward. Each reward has a text snippet like this with the same name as the reward.
The finished file should look like this:
peasantRevolt_displayName=Peasant Revolt
peasantRevolt_occupation=The local peasantry is revolting.
peasantRevolt_description=The local peasants have become dissatisfied with their lives, and have organized into a militia.
x_defeats_peasantRevolt=The peasant revolt was defeated by {0}!
peasantRevoltDefeated=Your troops round up the peasant leaders and make an example of them, and send the rest back to their fields. Peace and quiet reigns once more. LetQUOTEs hope it stays that way.
The {0} is a substitution syntax. The {0} gets replaced with the name of the empire that defeated the nest. Some text snippets get information like this substituted in. You can look at en.properties in the "lang" directory to see what kind of text snippet gets substitutions. Note that there must not be spaces between the curly brackets and the number.
The file format does not properly support single quotes / apostrophes. Instead of using one, use QUOTE in all-caps.
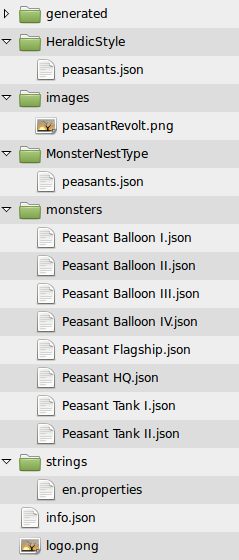
Testing and release
And now we're done! The entire mod directory structure should now look like this. The "generated" directory is automatically created by the game when it loads in the mod to store some extra information.
What remains is testing and fine-tuning.
You can start up the game again, and the mod should load in. If you create a new strategic game, the peasant nests can turn up. If you want to make sure that you can see some quickly, temporarily increase the spawnWeight in the MonsterNestType file to 1000, which means that almost all monster nests will be peasants. Just remember to reduce it back to 20.
If the mod fails to load, have a look at your files and check that they contain the same information as the examples. Check that the ships and buildings references in the monster nest are available in the "monsters" directory in the mod. A ship called "Peasant Balloon II" should have a "Peasant Balloon II.json" file. If you think that you made a mistake somewhere in your JSON, you can use JSONLint to check it through.
Once you are satisfied with the content and balance of your mod, you can upload it to Steam using the mods screen in-game, or export it as a single .amod file to import and share it on the forums.
This is only an introduction to modding. To figure out how to do more, have a look at the game data files and at other people's mods. I also made a short text tutorial on adding a weapon and an in-depth video one.
Try things out, experiment, and learn how to do cool new stuff. And if you have any questions, you can always contact me and I'll be happy to help. And if you found any part of this tutorial unclear or confusing, do also let me know, so I can improve it.


Very cool, thank you!