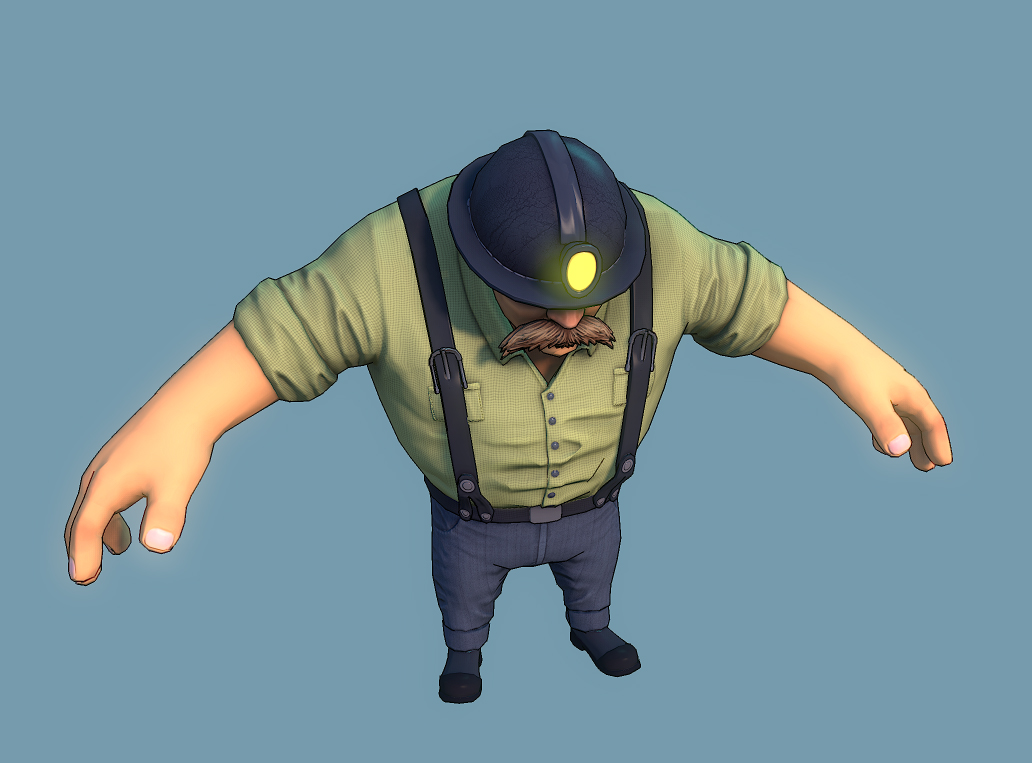
Concept
The character was designed with a design follows function mind set. He works in the Crystal Excavation Site where his only function is to mine crystals and unearth the statue hidden in the huge stalactite discovered during the work.
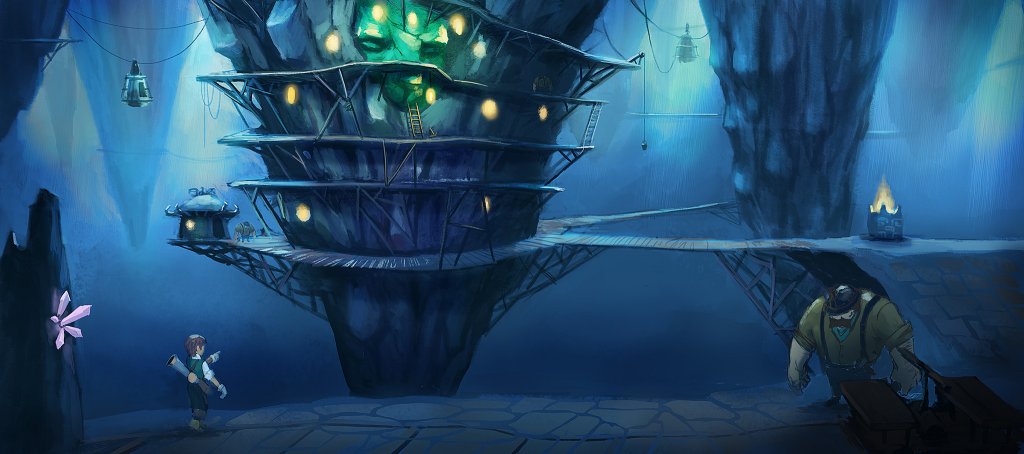
We figured he'd have to have a bulky upper body, tree trunk arms and small legs, seeing as how he doesn't use them a whole lot.
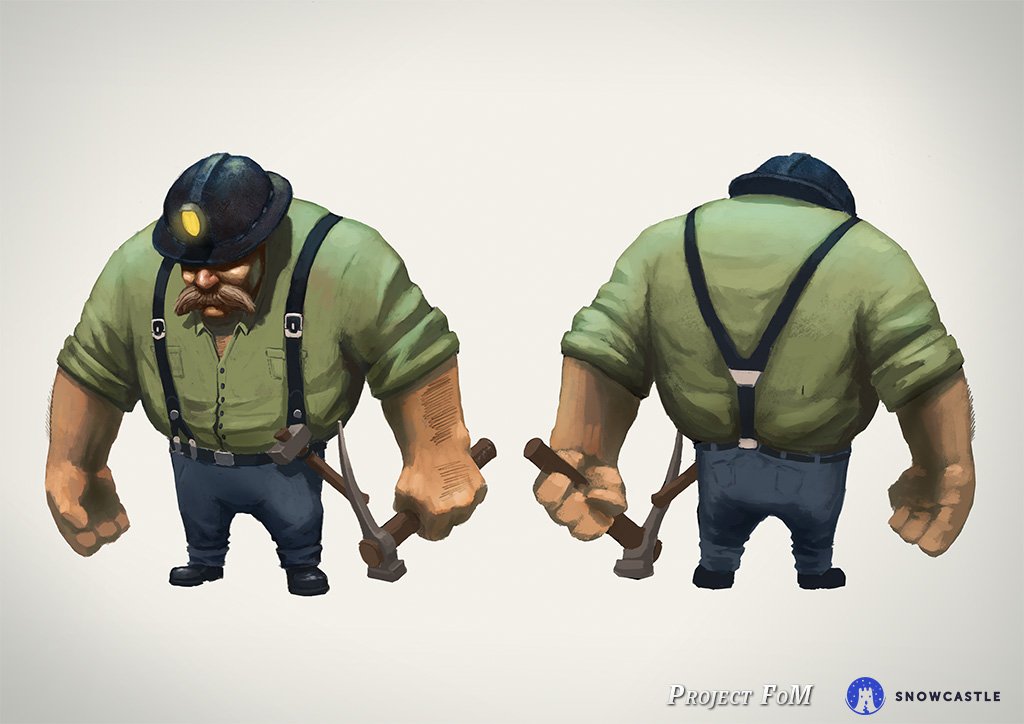
This guy is also the first NPC designed and made in 3D for Project FoM! We're pretty happy with him!
3D
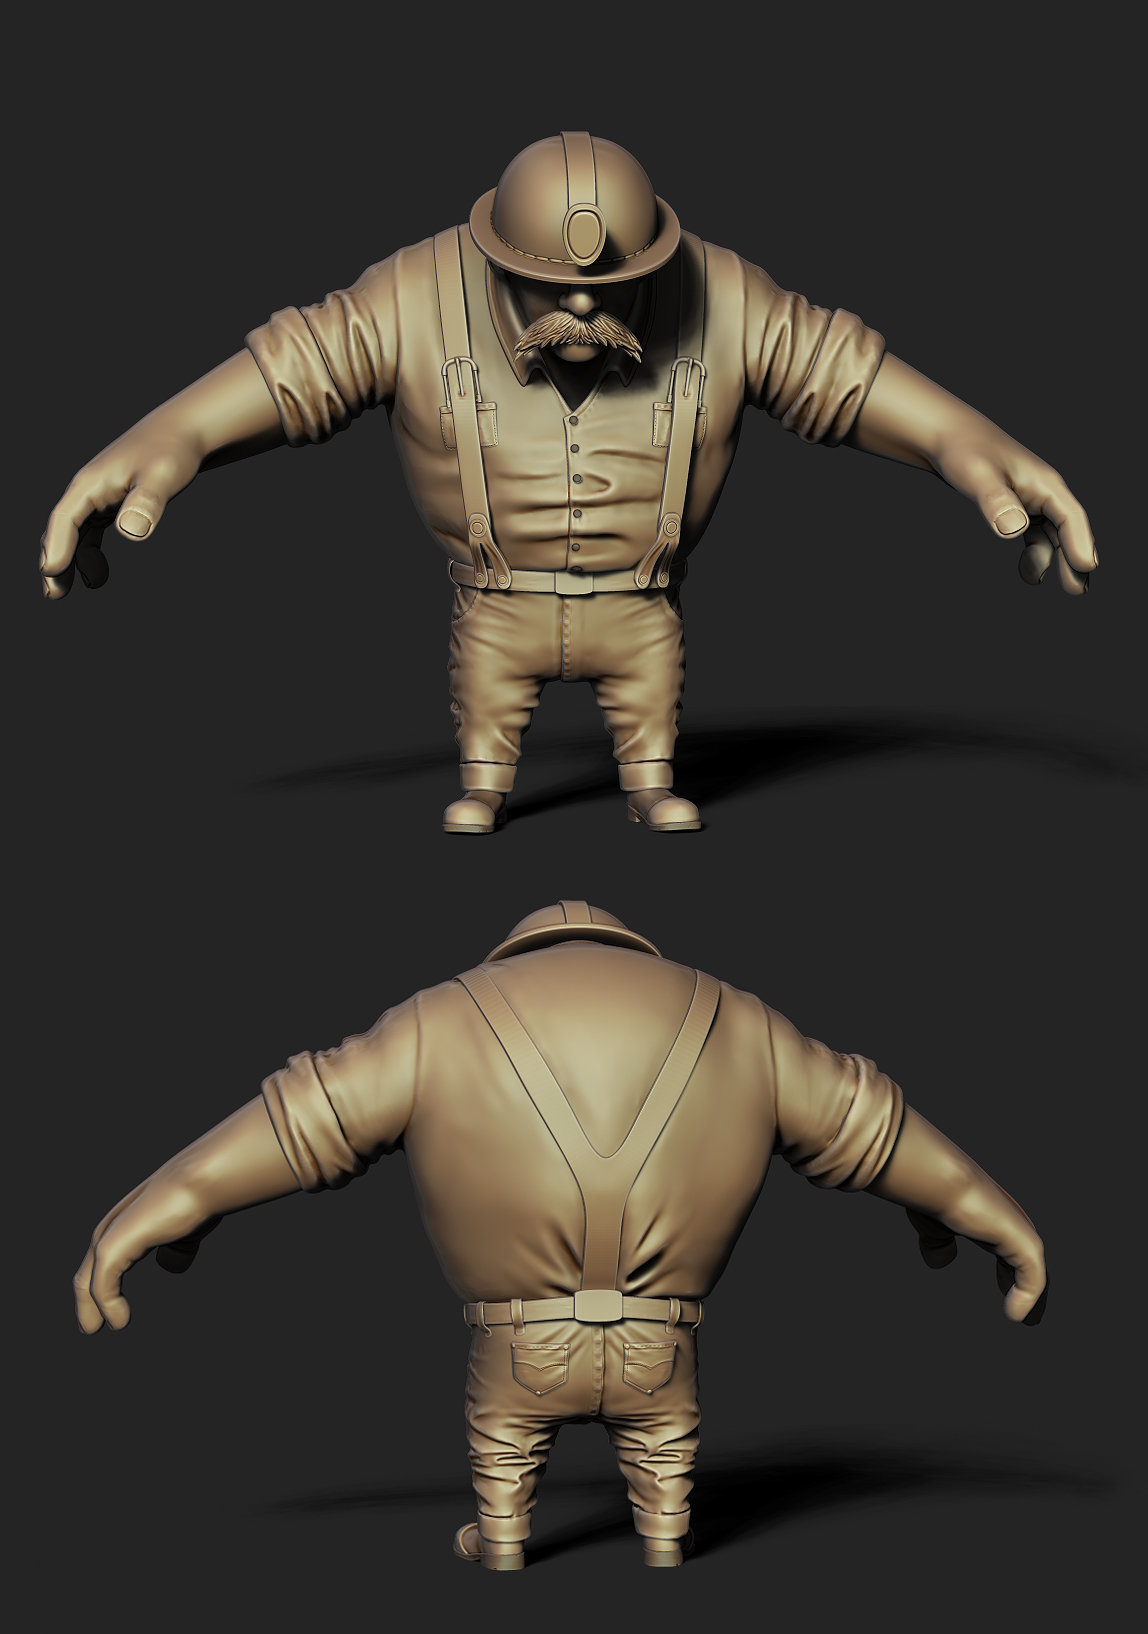
When doing characters like this, I always start in Zbrush. (High poly 3D sculpting package) I take a good look at the concept art, and try to visualize the model in my head. I go forth and block out the big shapes, concentrating on the silhouette first and foremost. After I got the basic shapes down, I start going into detail. I get to do all the little wrinkles and folds in the cloth, and the cool bulky anatomy. This isn't a hyper detailed character though, so I tend to spend a lot of my time just scaling, repositioning and tweaking proportions. Cause it's the silhouette and the proportions that make out the character.
High Poly Sculpt
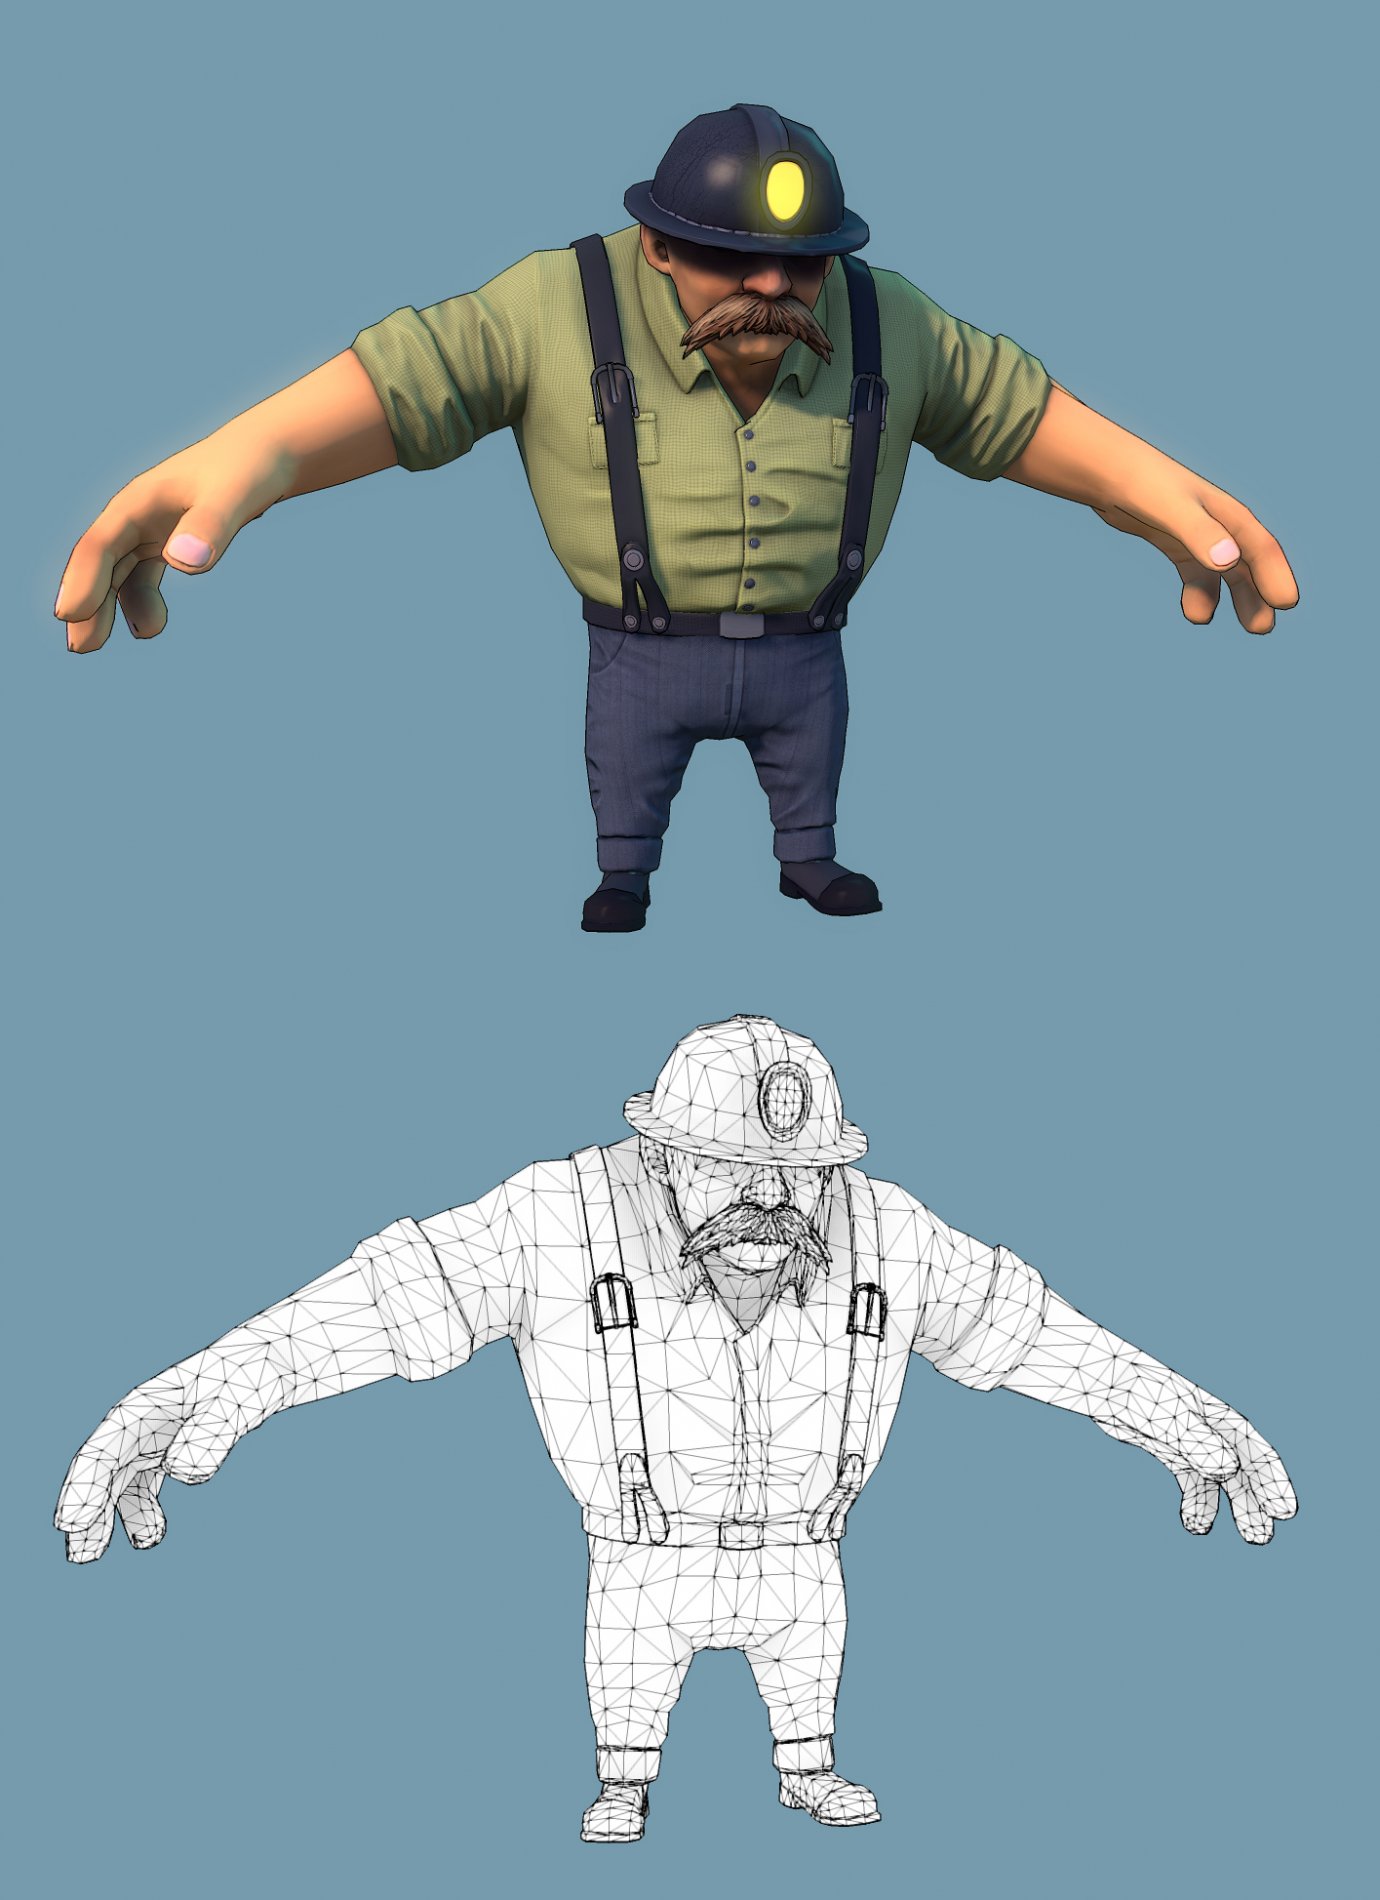
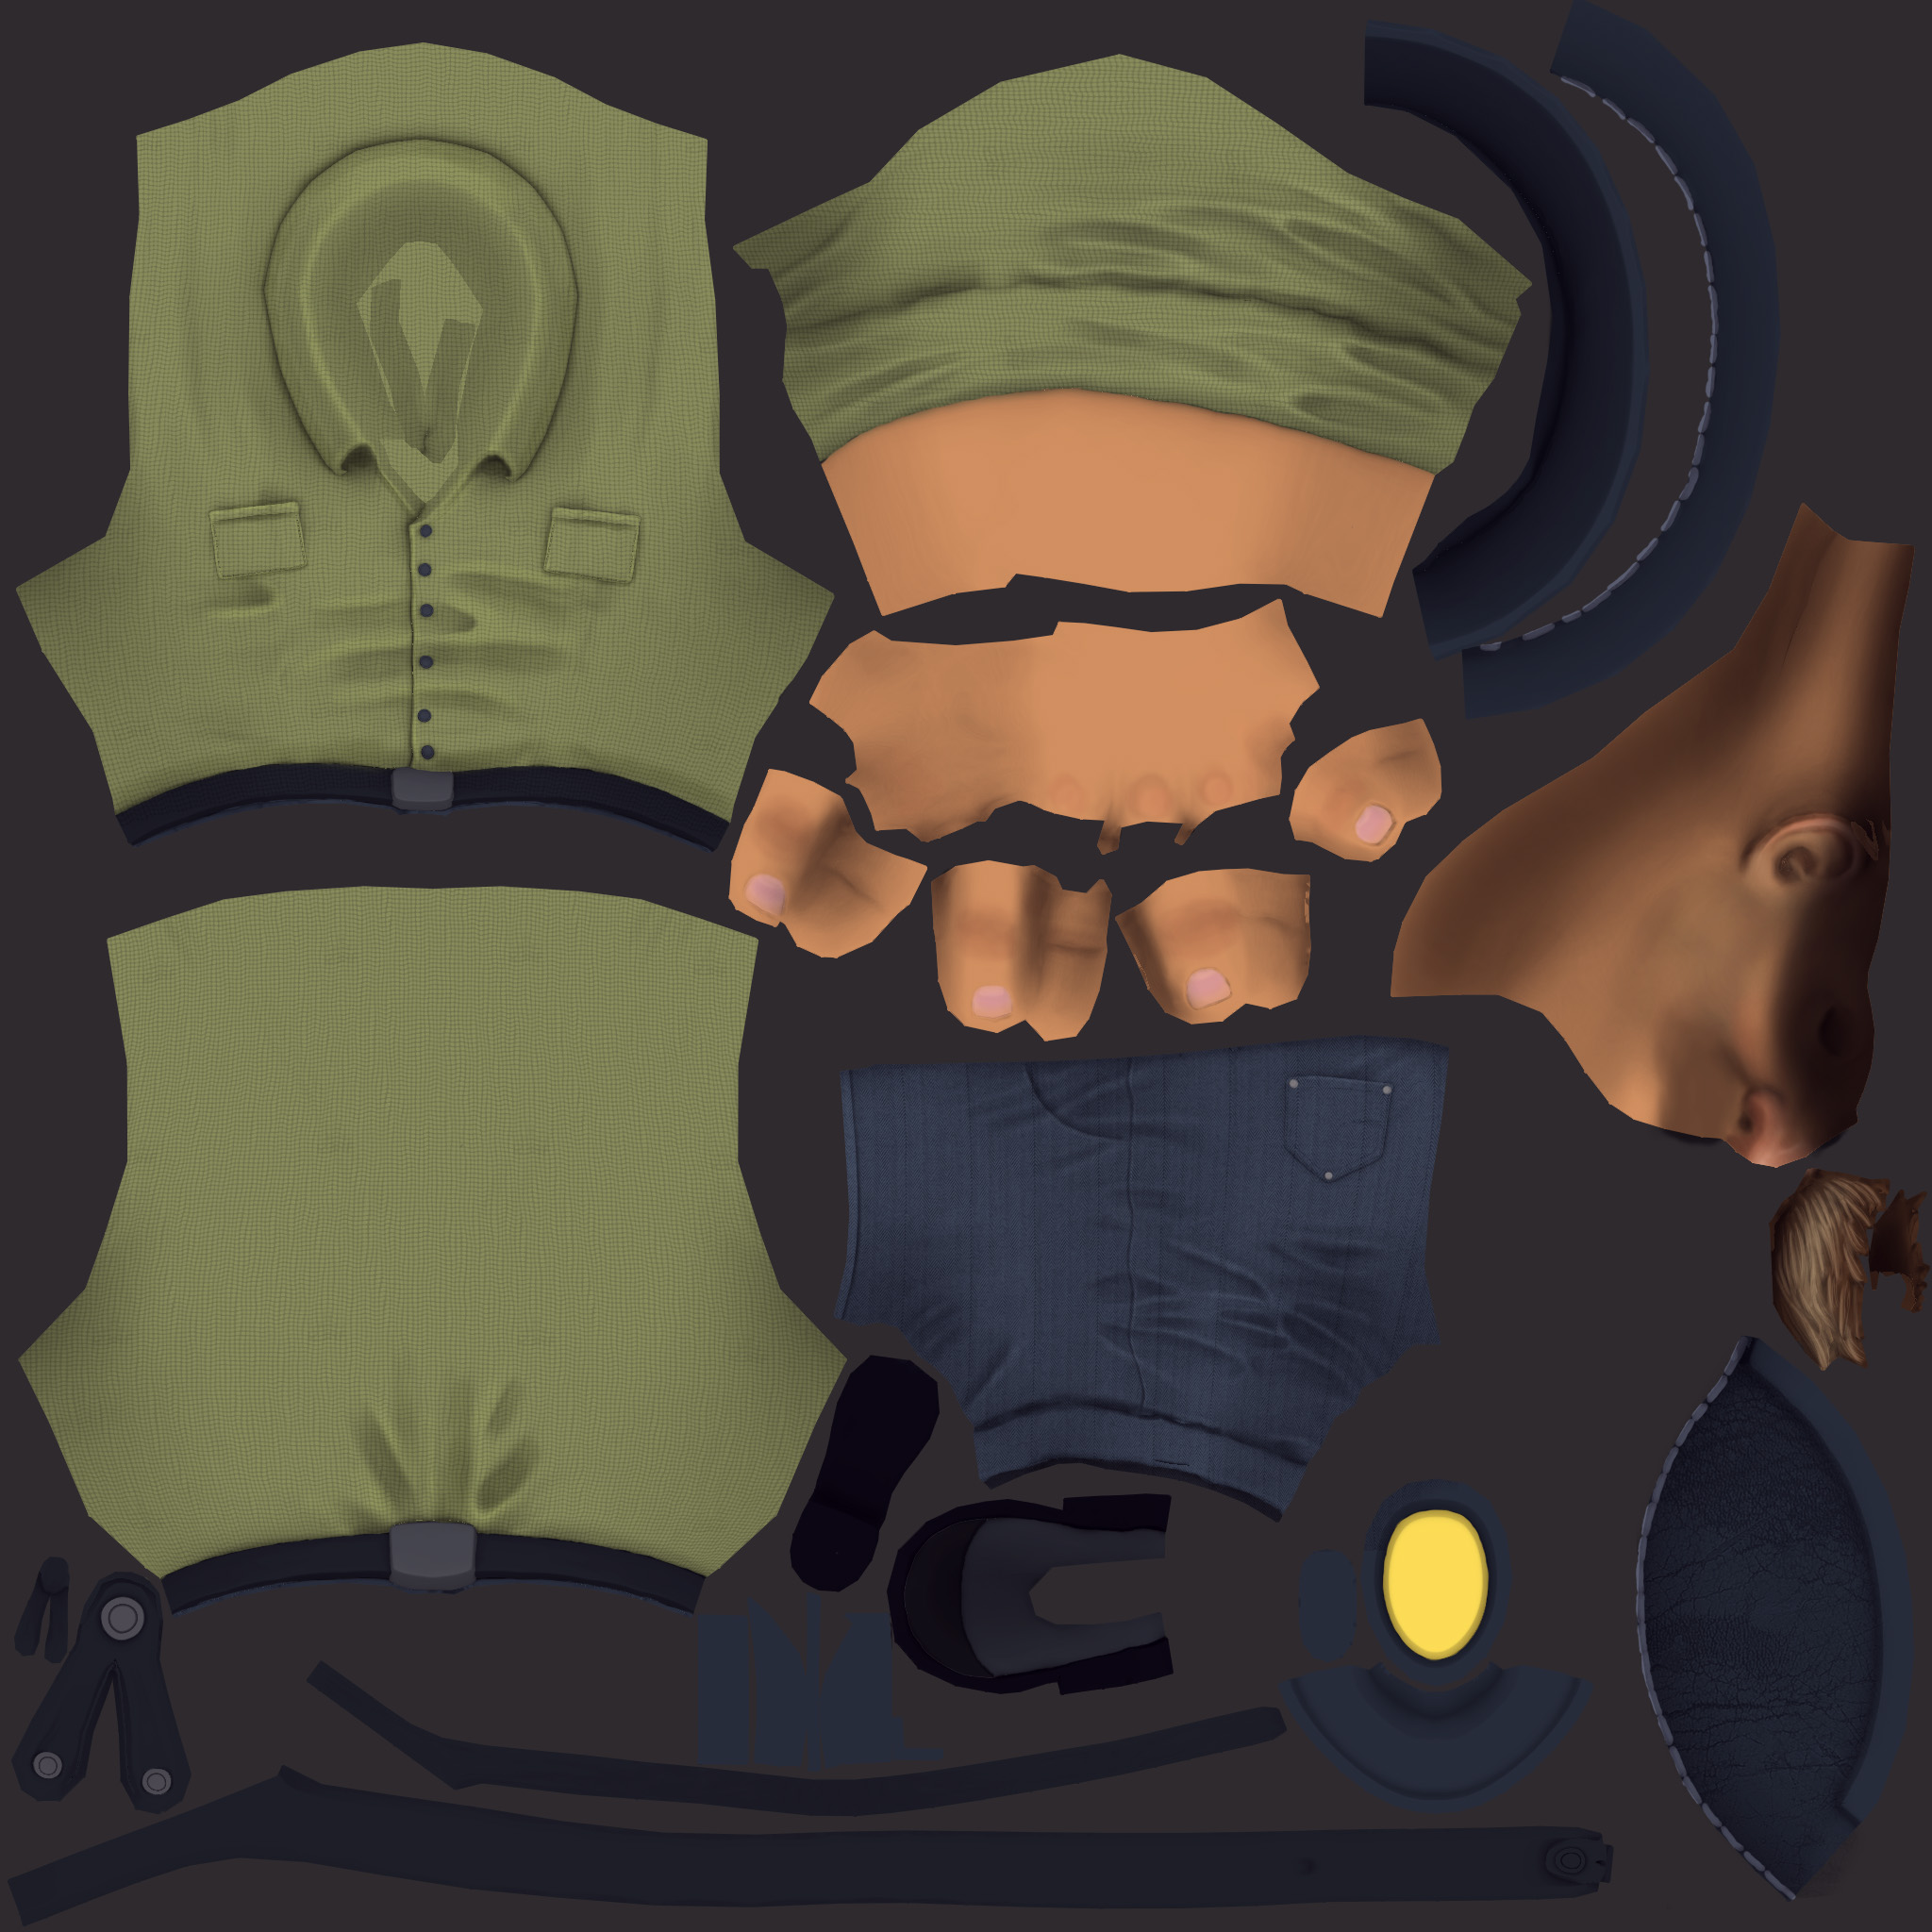
After the sculpture is done, it's time to make this bad boy into game res. I use Topogun for the retopology. Basically what retopology means is that I use the High poly as reference, and "draw" on top of it to create the new, lower res geometry. When the low res is finnished, I go into Maya to lay out the UVs. The UVs are esentially a 2D plane of the 3D geometry that is used for texture painting. When the low res model has uvs - It's time to bake. Not cakes, but high res geometry and light! That's right. I use a program called xnormal. What it basically does is it projects the high res detail onto the low res model. Using the Uvs as a canvas. That's how the normal map and the ambient occlusion map is created. I use these maps when painting color onto the charater. The Ambient occlusion gives a pretty subtle shadow that only eccentuates the details in the model. And this seems to work pretty well together with real time lighting. So the character has ambient occlusion baked into the texture map, and a normal map that simulates lightning and detail information as another map. Making the model looking more detailed than it really is.
Texture map
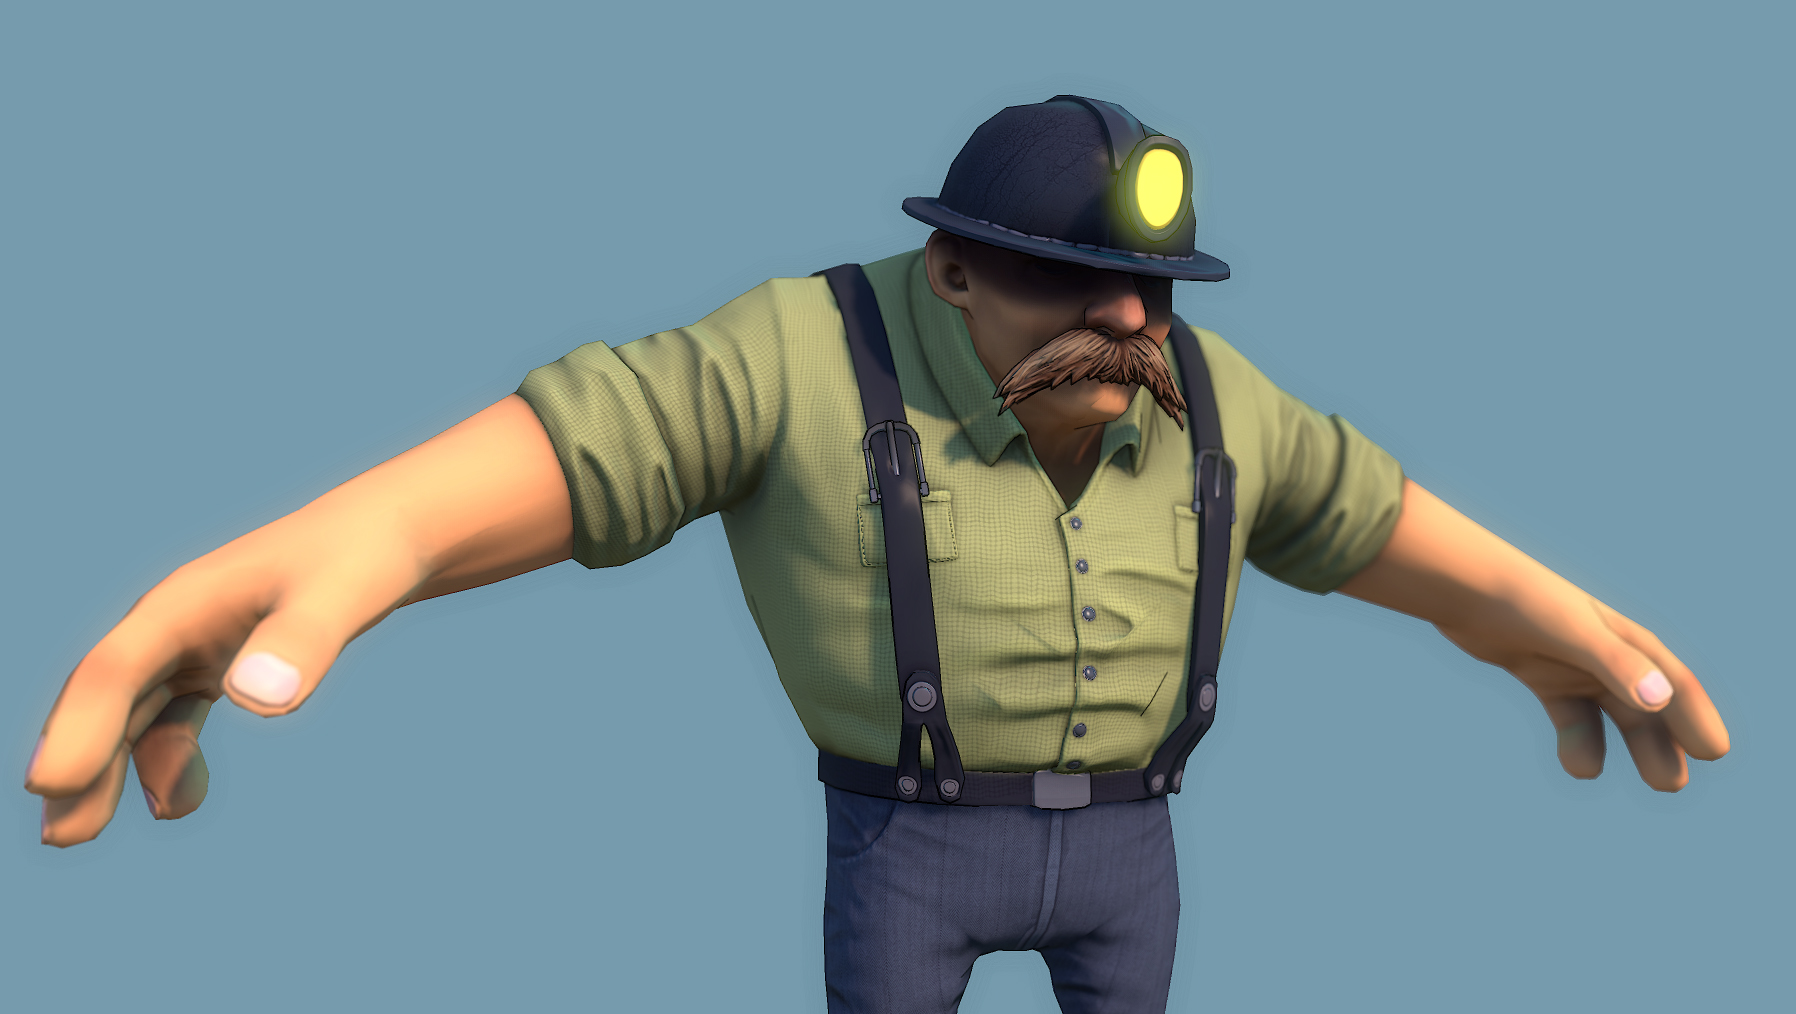
Final Model
You'll be seeing more of this guy when he gets his tools and is ready to move!


The character design looks great!! Love it!
Sweet! Glad you dig! We can't wait to have this guy animated!
It's really neat to see your workflow from concept to final in-game model! And all of it looks amazing! Great work so far! Just curious, but what does FoM stand for?
Yeah, we figured we like to see those kinds of posts ourselves, so we didn't want to do any worse.
FoM is just an acronym that stuck for the WIP title. We had a title earlier on we decided against. We're working on what to call the game.. haha.
Hey, thanks man! Glad you like it. :)
Nice character, good work!
Love it!
Wow that character looks amazing. Great job! I can't wait to him in motion. Thank you for showing the work flow.
I have a question though. Why would you want to bake the light into his texture? I'm assuming this character is going to be moving and animating in real time so wouldn't you want the light to be calculated in real time in unity?
Thanks! I'm glad you like it :)
And for your question; You're right. I do want the light to be calculated in real time. But the light I baked into the character is ambient occlusion. Maybe it's not right to call it light. Cause it's essentially just shadow. The Ambient occlusion gives a pretty subtle shadow that only eccentuates the details in the model. And this seems to work pretty well together with real time lighting. Maybe I should edit that into my post. Thanks!
Oh now I understand what you meant.
Very Cool!
I wish I could model like that :(
Amazing.
Thanks everyone! Appriciate it! :)
thanks for the quick tutorial. I'll have to try xnormal as I've been using Blender and having a hard time.
Your models are beautiful and cleverly designed. Great Work!
Thank you! Xnormal is so easy, try it out!