1. Prepare the main camera (usually Main Camera, the very first object created by default in your new project/scene), and switch off:
GUILayer
Flare Layer
Audio Listener
You can also disable Camera component, but it usually depends on the scene/level you created specially for the main menu, for example a map that is shown in the background of the main menu.
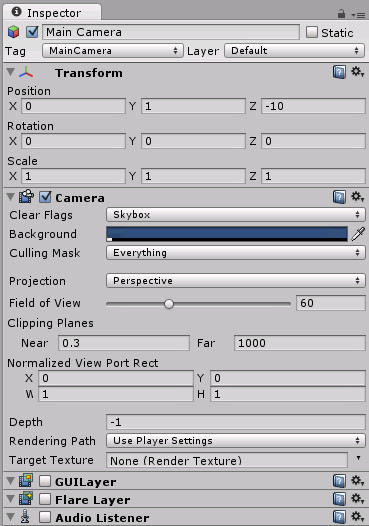
In CarEdu the Camera component of Main Camera was left enabled to preserve the blue background instead of the grey one with no camera on.
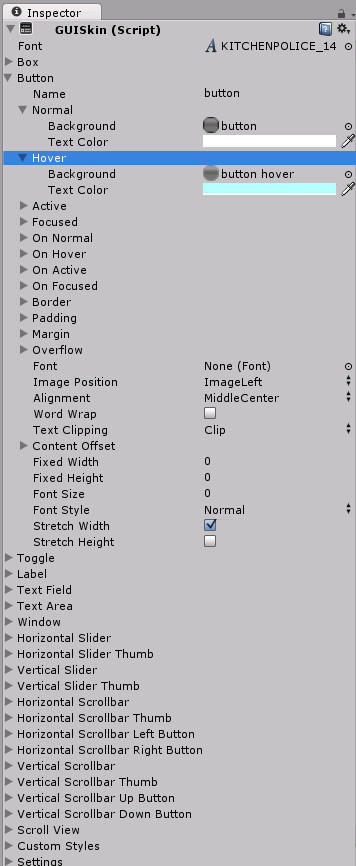
2. Now you can ready a GUI Skin by selecting Assets -> Create -> GUI Skin. Then selects its custom font (the topmost property Font) and set to your own.
Expand the Button menu, and its sections Normal and Hover, and change the default Text Color properties to your own ones.
3. You need to create a couple of scripts, namely MainMenuScript.js for the main menu and MapMenuScript.js for the level selection menu.
Below code for both of them, but note that these already contain GUI elements' declarations. They also contain comments preceded by // (two or more slashes, a sequence of /////// is used to denote a section).
MainMenuScript.js
var newSkin : GUISkin;
var logoTexture : Texture2D;

function theFirstMenu() {
		//layout start
		GUI.BeginGroup(Rect(Screen.width / 2 - 150, 50, 300, 200));

		//the menu background box
		GUI.Box(Rect(0, 0, 300, 200), "");

		//logo picture
		GUI.Label(Rect(15, 10, 300, 68), logoTexture);

		///////main menu buttons
		//game start button
		if(GUI.Button(Rect(55, 100, 180, 40), "Start game")) {
		var script = GetComponent("MainMenuScript");
		script.enabled = false;
		var script2 = GetComponent("MapMenuScript");
		script2.enabled = true;
		}
		//quit button
		if(GUI.Button(Rect(55, 150, 180, 40), "Quit")) {
		Application.Quit();
		}

		//layout end
		GUI.EndGroup();
}

function OnGUI () {
		//load GUI skin
		GUI.skin = newSkin;

		//execute theFirstMenu function
		theFirstMenu();
}
The first line:
var newSkin : GUISkin;
And the second line of OnGUI function:
GUI.skin = newSkin;
declare and assign a custom GUI Skin. The skin itself can be selected later on when editing the object it'll be attached to - you'll probably use the GUI skin asset you've created earlier.
The line below:
var logoTexture : Texture2D;
declares the logo picture that will be used in GUI label farther on:
GUI.Label(Rect(15, 10, 300, 68), logoTexture);
4. Now for the MapMenuScript.js code:
var newSkin : GUISkin;
var mapTexture : Texture2D;

function theMapMenu() {
		//layout start
		GUI.BeginGroup(Rect(Screen.width / 2 - 200, 50, 400, 300));

		//boxes
		GUI.Box(Rect(0, 0, 400, 300), "");
		GUI.Box(Rect(96, 20, 200, 200), "");
		GUI.Box(Rect(96, 222, 200, 20), "Coastside Level");

		//map preview/icon
		GUI.Label(Rect(100, 20, 198, 198), mapTexture);

		//buttons
		if(GUI.Button(Rect(15, 250, 180, 40), "start level")) {
		Application.LoadLevel(1);
		}
		if(GUI.Button(Rect(205, 250, 180, 40), "go back")) {
		var script = GetComponent("MainMenuScript");
		script.enabled = true;
		var script2 = GetComponent("MapMenuScript");
		script2.enabled = false;
		}

		//layout end
		GUI.EndGroup();
}

function OnGUI () {
		//load GUI skin
		GUI.skin = newSkin;

		//execute theMapMenu function
		theMapMenu();
}
As before, lines
var newSkin : GUISkin;
GUI.skin = newSkin;
assign the proper skin to the menus.
And the line below:
var mapTexture : Texture2D;
creates space for a single mapTexture picture. (Just a template for CarEdu, since it doesn't have 2 levels, so the level selection menu will be quite shortened and limited.)
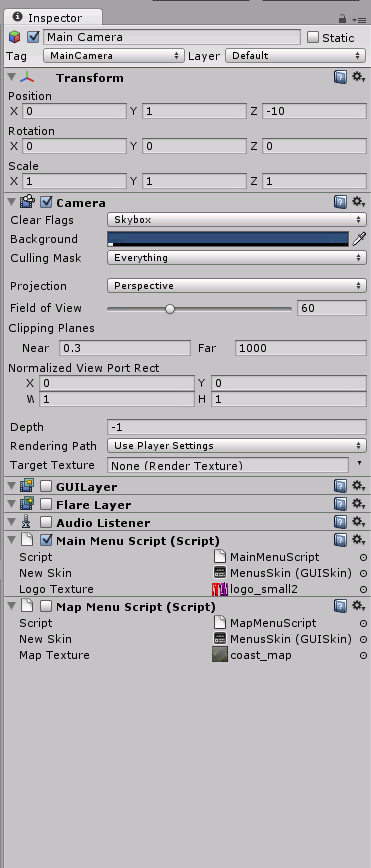
5. Attach these two scripts, MainMenuScript.js and MapMenuScript.js to the Main Camera object (by dragging the scripts onto the Main Camera object). Notice that Map Menu Script should be disabled by default.
Now you can set New Skin properties, choose your GUI skin name you defined earlier.
In CarEdu MenusSkin GUI skin was created and assigned to both of the scripts.
And also you can specify textures/pictures:
Logo Texture, in CarEdu, it's a 300x68 picture (PNG) with the transparent background. (/Logos and banners/logo_small2.png)
Map Texture, in CarEdu, it's a 198x198 picture (PNG). (/Map thumbnails/coast_map.png)
All's done.


How is the actual level you want to begin associated with the start level button?
never mind i got it! :)
How do you link it?
i don't, how do i link the level to the script?
don't worry
This comment is currently awaiting admin approval, join now to view.
This comment is currently awaiting admin approval, join now to view.
This comment is currently awaiting admin approval, join now to view.
This comment is currently awaiting admin approval, join now to view.
This comment is currently awaiting admin approval, join now to view.
This comment is currently awaiting admin approval, join now to view.
This comment is currently awaiting admin approval, join now to view.