I started with a sphere, I then downloaded a model from here to test animation, I then made my own to avoid copyright issues. I hated it, so my wife drew some concept art for a new one, which I screwed up modelling. I’ve just modeled the latest one, to the right in the picture above.
It will most likely get replaced again, if I can afford it, but the important thing is the underlying system.
The plan with character customization in Software Inc. has always been to have a simple model and then change the textures. This has worked pretty badly, especially for hair. I ended up having a mesh for each gender, and the female mesh had hair and skirt permanently attached. But reading an update from Parkitect, I got inspired. I wanted to try implementing the same system, i.e. separate meshes for the lower part, the top part and the head.

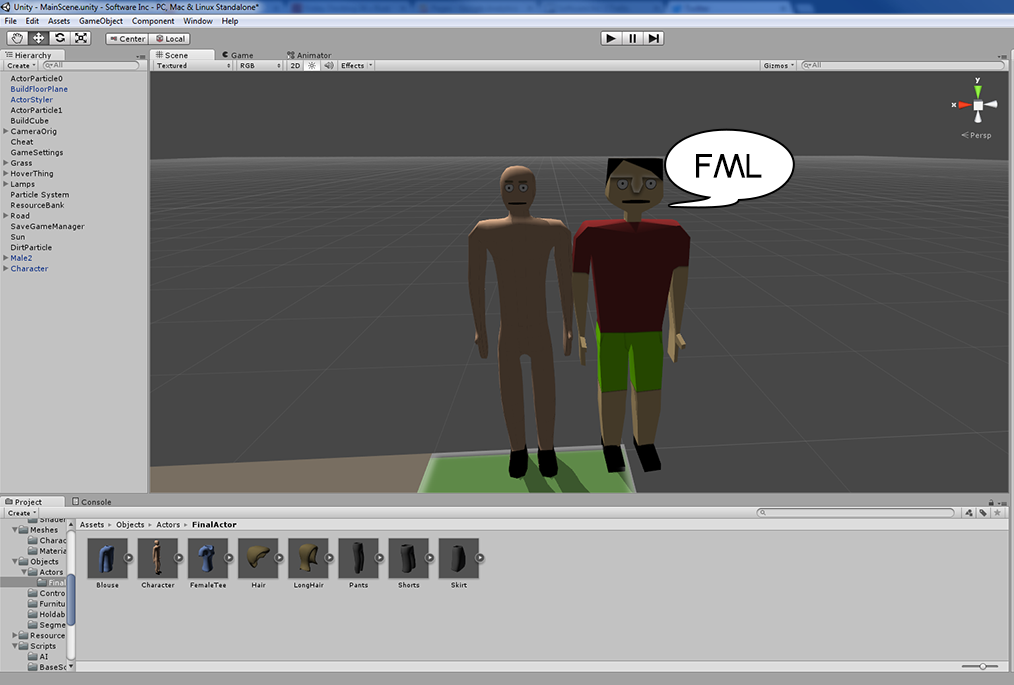
I started testing how to control two meshes using one skeleton. I made one parent skeleton, containing all animations, but no polygons. Each mesh I added to the final mesh then made its bones children of the parent skeleton’s equivalent bones, forcing them to animate. This worked perfectly. And the script is simple: Foreach of my bones, set the parent transformation to a bone in the parent skeleton, which has the same name, and reset position and orientation. It is very important to always use the same base skeleton when rigging each sub-part though, the transformations need to be identical.
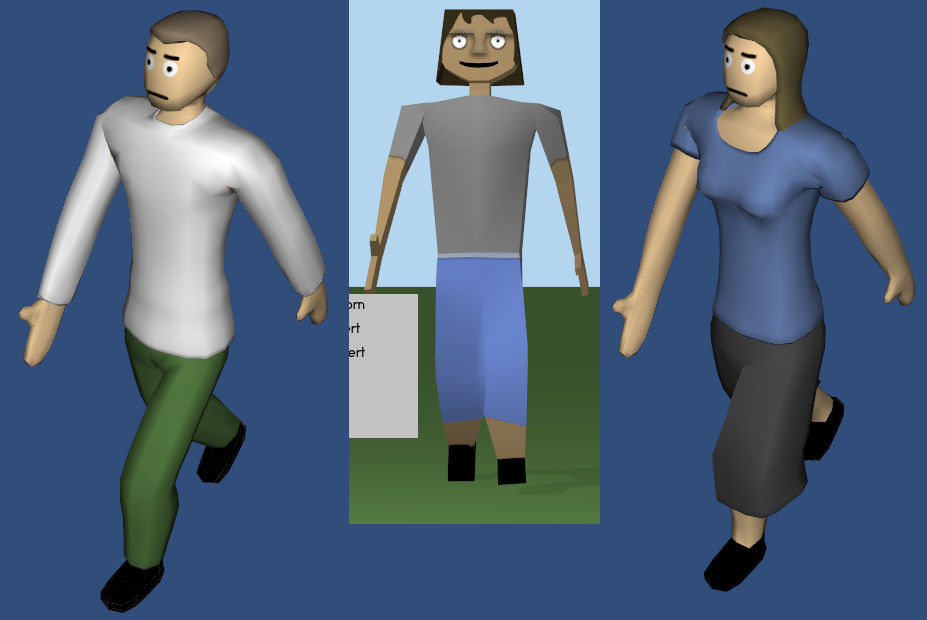
After some trial and error, I figured the best way to go about this, was to have a base human mesh, which is unisex, and then stick clothes to its skeleton. This works really well, as you can see in the first draft, in the picture above. (Please disregard the fact that I am obviously an amateur 3D-modeler)
I then proceeded to rewrite all customization code. It wasn’t that hard, since after adding the “add clothes mesh to my skeleton” functionality, I just had to replace “Texture” with “Mesh” here and there. Sadly, the previous model has now been replaced, just as the demo has been released (you can try the demo here), so it never really saw the light of day.

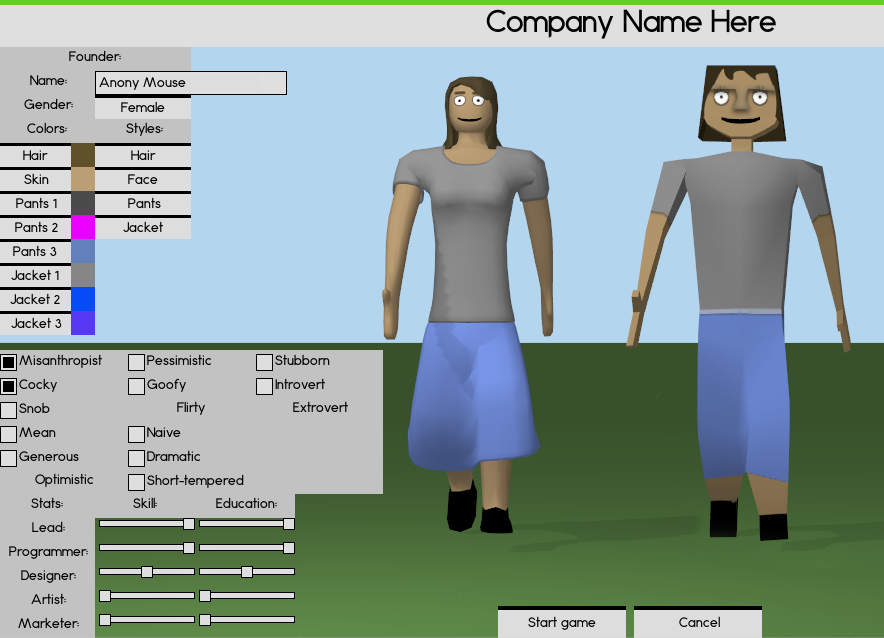
You can see a comparison of an old screenshot of the customization screen and then recreated with the new model in the picture above.


