Unlike the Xbox 360 version of Genix, The PC edition allows us to give more game for your buck. With the release of the latest patch came a small piece of software that is designed solely for creating your own levels for the game for purpose of sharing and loading them to extend game play adding more challenge and fun.
Getting Started
Before we start make sure you have a copy of Genix installed on your computer, then apply the v1.6 patch found in the downloads section for this game (of click here).
It is important to note that this patch is only for the full version of the game, and applying it to the demo will result in an unstable installation.
Creating The Geometry
Building It
When developing the level editor we decided against adding modelling functionality because there are far better programs for doing this out there, so instead before we boot up the editor we need to create the geometry for our level with a 3D design program. For this tutorial I recommend Blender as it's free, and for simplicity purposes it will be the only one demonstrated in this tutorial.
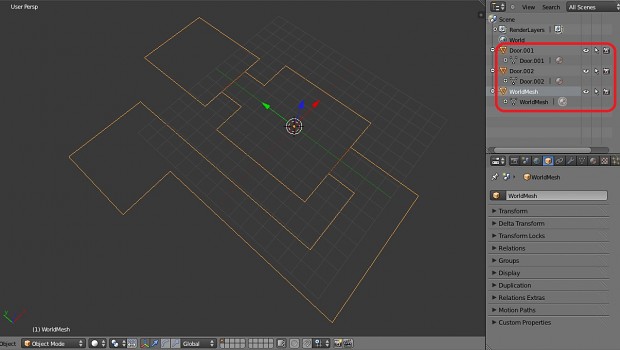
Notice that in the image the mesh that has been created has absolutely no faces, and that names of objects and their inner meshes are important. WorldMesh describes the mesh in which you should put walls of the map as collision detection is applied to only this mesh. And for the two doors in the level I have named them Door.001 and Door.002 . (note: if you wanted the doors to have keys, you'd use Key.***). Lastly the inner mesh should be named the same as the object, you can always ensure this is done by checking the scene graph to the top right of the screen.
Exporting It
Once we have finished with our mesh, we need to export it as a WaveFront OBJ file, Genix does not require a lot of the information the OBJ format usually contains, so we need to strip out a few things like materials and UV's. So before you export, make sure you use the following settings:
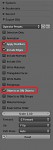
I recommend also adding this as a pre-set by clicking the + sign next to "Operator Pre-set's" at the top of the Export OBJ panel so you don't need to refer to this image every time.
Building The Map
Now that we have our OBJ file, it's time to boot up "Genix Editor.exe" which should be inside the folder in which Genix was installed. When you boot it goto the File menu and select 'New...'.
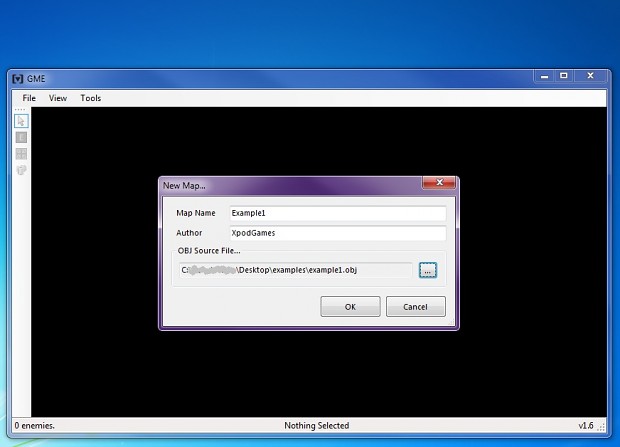
In the dialogue that appears enter a name for your map and also put an author name in so people know who made the map. Before you click OK make sure to also select the OBJ file that we created. GME uses the geometry from the OBJ file work out where things go, and to build a custom structure for the geometry suited for displaying in Genix.
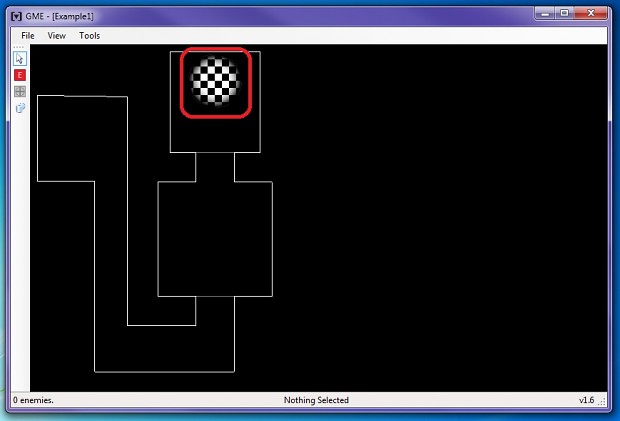
After pressing OK, you should see the geometry that we saw a minute ago in Blender (except instead just in 2D). GME is fairly WYSWIG (what you see is what you get) so dragging and dropping plays a big part here, as we want the finish point to be in the last room, I simply dragged it to the position I wanted. If the size of the finish point is a bit small or a bit too big, then right click on the finish point and you'll be able to resize it (metal note; right click on things to edit).
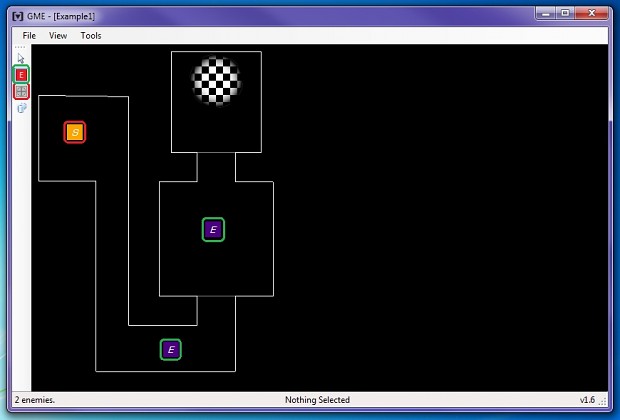
Now lets place some entities, first note that you must ALWAYS add a spawn point lol, not doing so will cause the map to simply not load so it's good practice to remember to do that first. Creating entities is simple, click on one of the types on the tool bar left of the window. There is a type for enemies, spawn points and pick up's.
Next I placed two baddies into the level, a QuadBot in the first corridor, and a ClawFish within the centre room of the map. Notice that in the bottom left of the window gives you a running count of how many enemies you have placed, this is important because once you start to get up to around 100 on a not so new computer, you'll find the AI can be a bit cruel on the frame rate (also sanity note, place enemies inside the level, there is no AI written to stop an enemy wandering off into oblivion lol).
Once you have placed a spawn point and a few baddies in there, lets save the map as a GMF file, and boot up Genix!
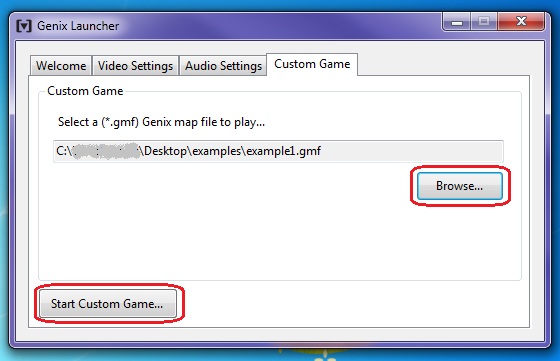
Assuming you have booted the launcher, you'll find a new tab (as long as the patch has been applied correctly) named 'Custom Game'. Click on it, click on the browse button and locate the GMF file that you just saved.
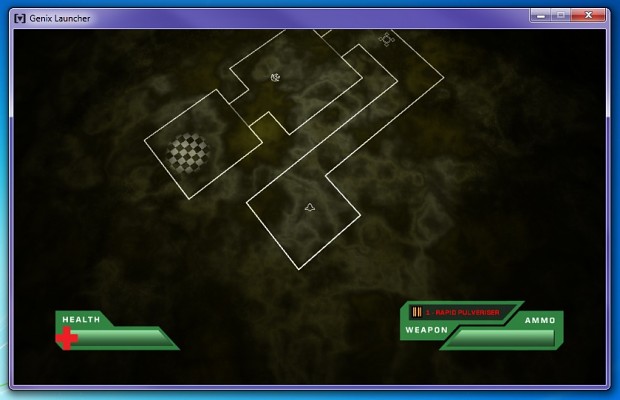
Once you've found it, simply click on 'Start Custom game...' and voila the map you created should load for you to play!
Conclusion
I realise that this is not the most detailed tutorial at the moment, instead the purpose was to give you a bish bash bosh no frills introduction into the subject of creating levels for Genix. As you can see it's possible within just a few minutes to have something resembling a playable map, and I sincerely hope that after reading this you'll feel confident enough to give it a go yourself. And if you are particularly happy with one that you create, that you perhaps share you special creation with us here at indiedb.
Thank you for reading, hope to see what you guys come up with, and have a great time map designing!
Aimee
Lead Dev