This article will cover the interaction tool that we use to build Fragments of Him. This tool has seen several iterations before arriving at its current state. When we started building Fragments of Him, one of the questions we asked was "How can we easily implement content and gameplay without writing a lot of custom code". Back then, the answer was pretty simple. We write a custom interaction tool.
How it worked
When we first started, all we needed was a simple way to trigger dialogue from either a click or walking through an area. That wasn't very difficult, and a simple script with a couple of variables would do the trick. Then we figured that we needed to play object animations, character animations, play audio, enable the next interaction, apply and drive a player feedback outline, force a player to move out of the way for the character animation and more. As you can probably see, this became quite chaotic rather quickly. After patching in all these features to the tool we started with our tool ended up looking like this:
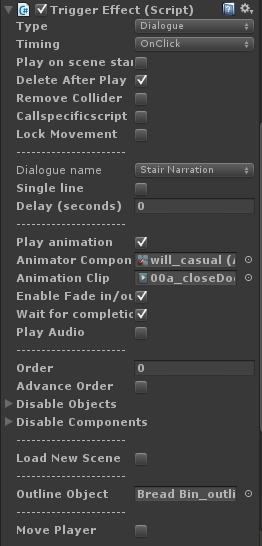
Creating interactions in the editor.
Not only did it look very messy, it would require quite a bit of overhead in thinking of all the little quirks in the tool to implement an interaction. In more complex cases, we needed to trigger multiple animations, with several pieces of audio, play the accompanying dialogue audio and then indicate what interaction is next. Instead of trying to fix the tool we had, we opted to create a new version instead. This new version should be faster to use and be more dynamic.
Designing a Modular System
One of the things that became clear when developing this new system is that it should be modular in its use. If we need to trigger 40 things after a single click, that should not be a problem. The new system would have a single script (the base) that would keep track of all the modules of that interaction. In addition to that it should trigger the functions of all the individual modules. Each of the modules can then have its own systems for playing and deleting, allowing for an easier way to create, maintain and clean up modules. Here's roughly how I planned it out:
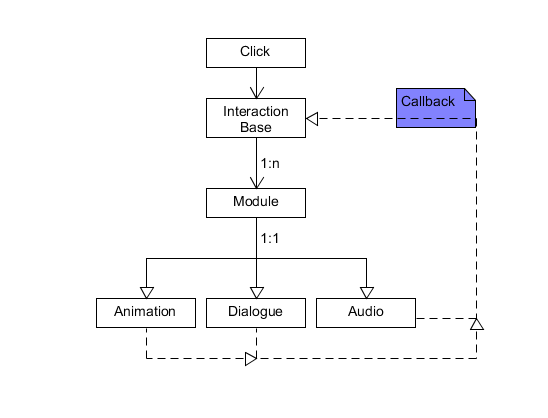
modular interaction editor design.
That seemed fairly simple and formed the starting point. We developed a couple of the basic modules to test out the callback system and gave it a whirl. While testing, we still used the inspector to drag in all the scripts and variables. While this isn't too bad of a solution, it doesn't give us any overview of the entire system. We figured that developing an interface around the new interaction editor would give us the overview we wanted.
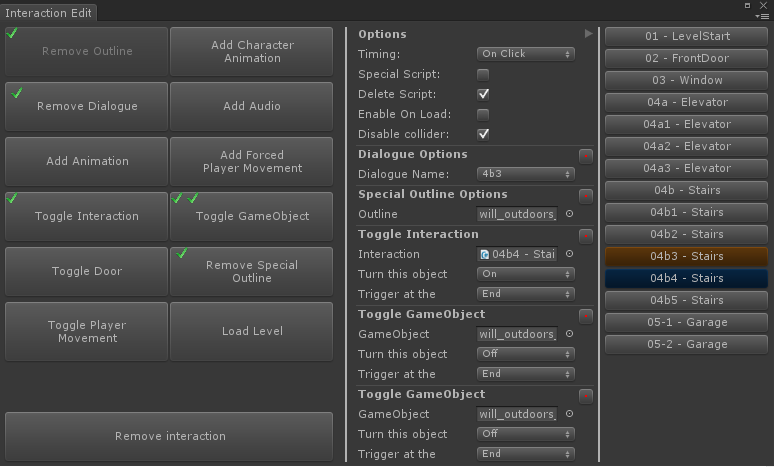
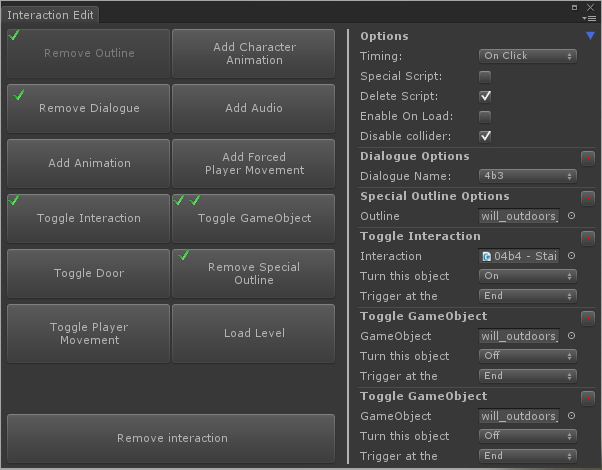 Interaction Editor. All possible modules are on the left, currently added modules & parameters on the right.
The above screenshot is how the tool currently looks. Whenever we need to add a new module, all we have to do is add a button once it's completed (and make sure the parameters show up properly) and it's good to go. When an interaction is created, this is how it will show up in the scene:
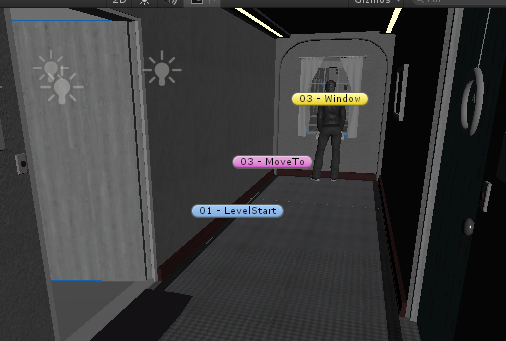
Interactions as shown in the scene view
To indicate where all these interactions take place we use the Unity's colored icons. This makes it easy to identify where an interaction takes place. Additionally, it also makes it easier to find an interaction when looking for one in the scene. Sometimes we would forget to add an icon to an interaction and that could get confusing pretty quickly. Not only do we now automatically add an icon when creating an interaction, we also create and update a list that keeps track of all the interactions in the scene. To modify an interaction before this new tool, we had to find the interaction in the scene hierarchy or click on the icon in the scene if we thought of adding it. That turned out to be very frustrating and inefficient when trying to quickly check multiple interactions in a scene. The solution to this was to add a list to the interaction editor that keeps track of all the interactions in a scene. The currently selected interaction is coloured brown, the interactions that will enable after completing the interaction are marked as blue.
 Modular interaction editor with all of the scene interactions
Results
With our first (old) interaction tool, we spent a couple of days trying to get all the interactions in the first scenes (while adding features in meantime). This resulted into a lot of workarounds that were needed to get around limitations. The new system took a week (give or take) to build, and instead of spending a day to put in interactions, we can now do the same amount of implementation in roughly 2 hours.
If you have any questions or remarks, don't hesitate to get in touch with me via Twitter. Don't forget to follow SassyBot on Twitter and Facebook either!