While ExtroForge is first and foremost, a beautifully rendered game using traditional 3D mesh models to represent the terrain, players, creatures and buildings- we wanted player constructions to be unbounded by what elements we could pre-create for the game.
Early prototypes used mesh blocks that the player could create and connect to build all sorts of structures, large and small. Having our game engine track and manage each of these individual game objects would have worked on a small scale - but not in the multiplayer, massive world, massive construction game that we envisioned.

Our new (current) voxel engine is instead a kind of hybrid solution that reduces the game engine load by combining voxels into discrete mesh chunks in a sparse array - but does not use any special voxel rendering techniques like volume rendering/rasterization.

The current ExtroForge play area as about 4096x2048x4096 meters. When a player chooses to place a voxel building block (1 square meter) in the game, its home ‘chunk’ is determined for it. A chunk represents 4096 individual blocks (16X16X16 at the moment).
As a player decides to add a new block to the world, first we determine which ‘chunk’ it will reside in (based on it’s coordinates in world space). If that chunk does not yet exist in our collection of world chunks, we instantiate it. This ‘lazy’ initialization ensures that we don’t manage, track or update more objects in the game than we absolutely need to. This chunk consists of an internal data structure that represents the block types of the 4096 possible blocks that reside within it. We use some bitwise logic to help track certain key elements in order to make future calculations faster (like whether this block ‘touches’ the ground or not).
While the ‘chunk’ might seem like an abstract data storage mechanism, each chunk also represents a single mesh object of its own. As blocks are added to (or removed from) a chunk, its single mesh is updated (faces/triangles are recalculated) dynamically - along with its mesh collider that allows it to interact with the physical world. Internal (unseen) mesh ‘faces’ are removed so that we reduce rendering calculation time.

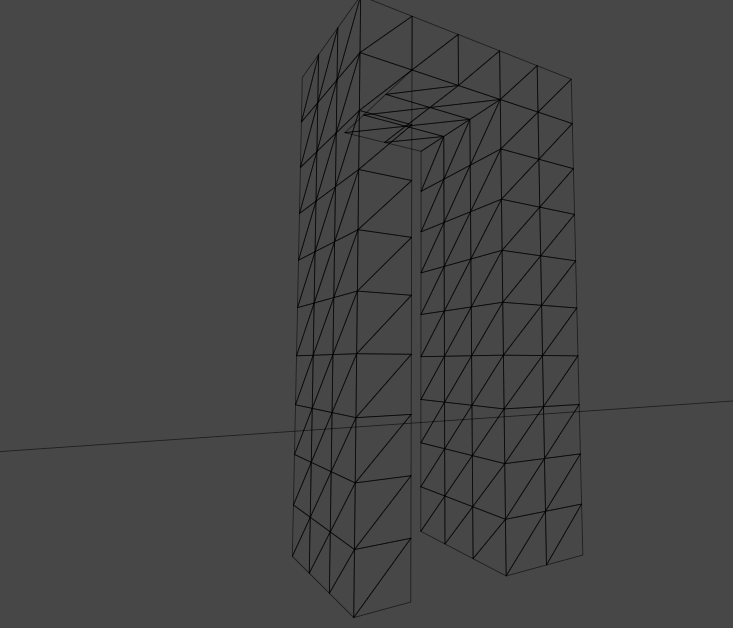
One of the things we decided early on was that we didn’t want the removal (or destruction) of blocks to result in ‘floating’ block islands with no visible means of support. While the chunk objects have colliders associated with them, they do not implement any real physics interaction (gravity/force). What we implemented was a check on every block removal. Essentially we do a flood-fill type search on all blocks surrounding the block being removed. If that block does not connect to the ground, we remove it from the voxel chunk representation and in its place, we instantiate a real-world block with physics properties (like gravity) that then cause it to fall to the ground. The logic is recursive so that removing a single block could result in huge sections of walls/structures falling to the ground.
In addition, we added some rudimentary ‘stickiness’ logic so that each islanded block that needs to fall has a ‘chance’ of being stuck to a neighbor, so that structures don’t collapse as a cascade of individual blocks - but instead of large chunks of building.

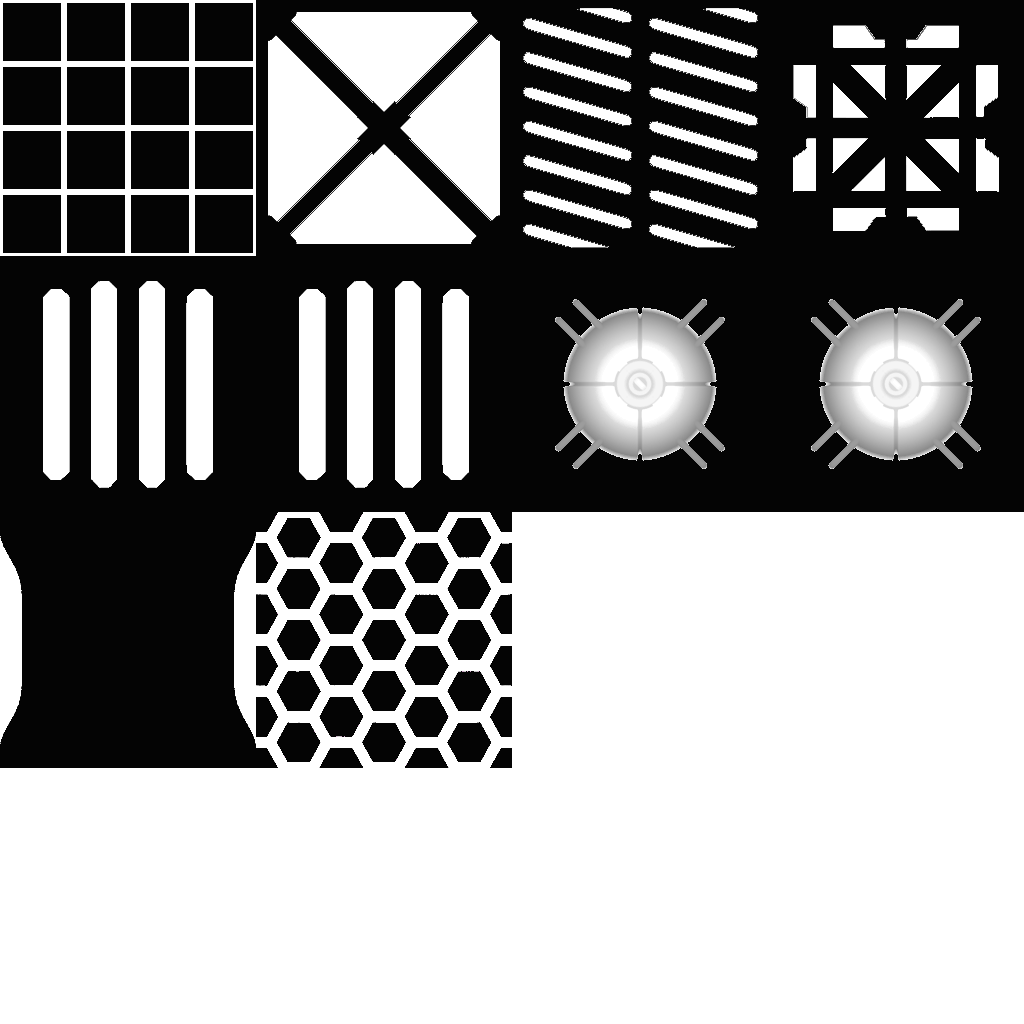
Another key element of our voxel construction world was the actual texturing of the blocks. In the example below, we have 10 different block types represented by 10 different unique textures - each texture combined into a single PNG atlas image.
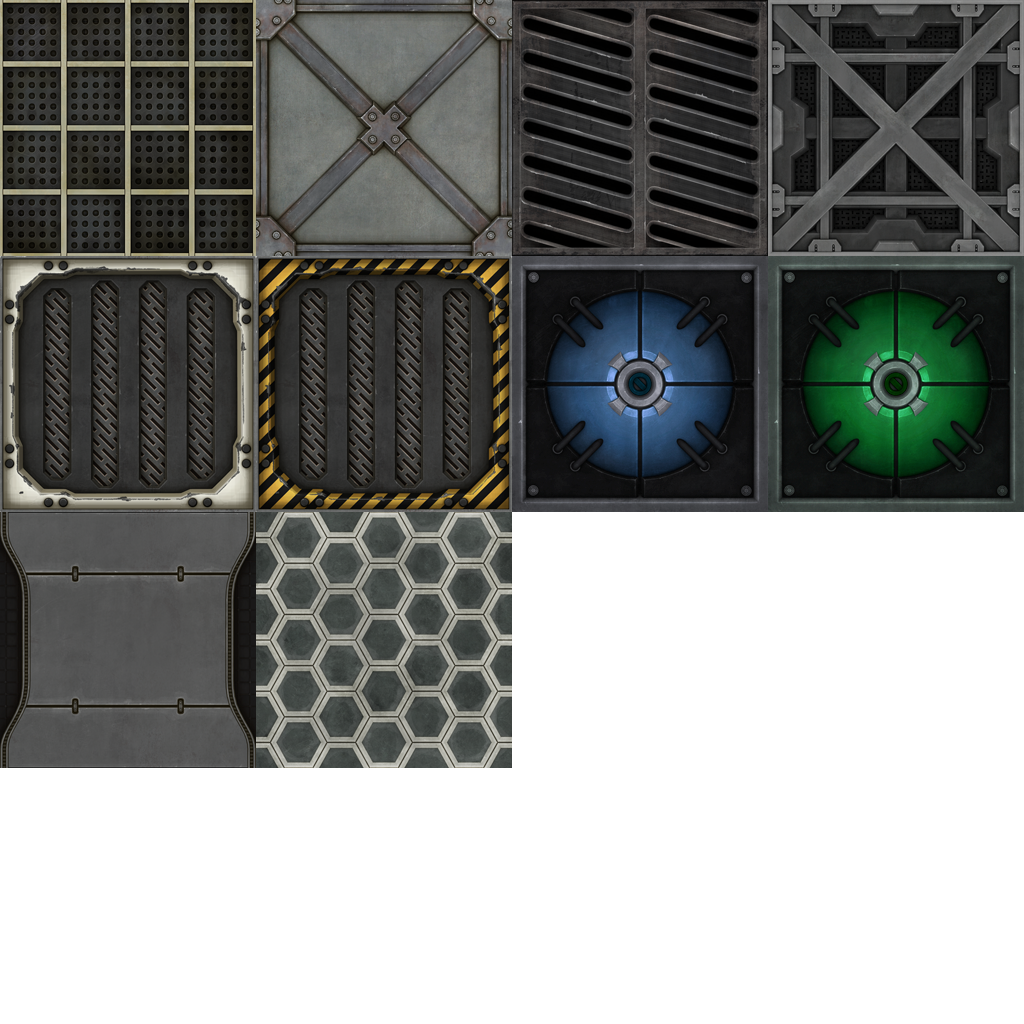
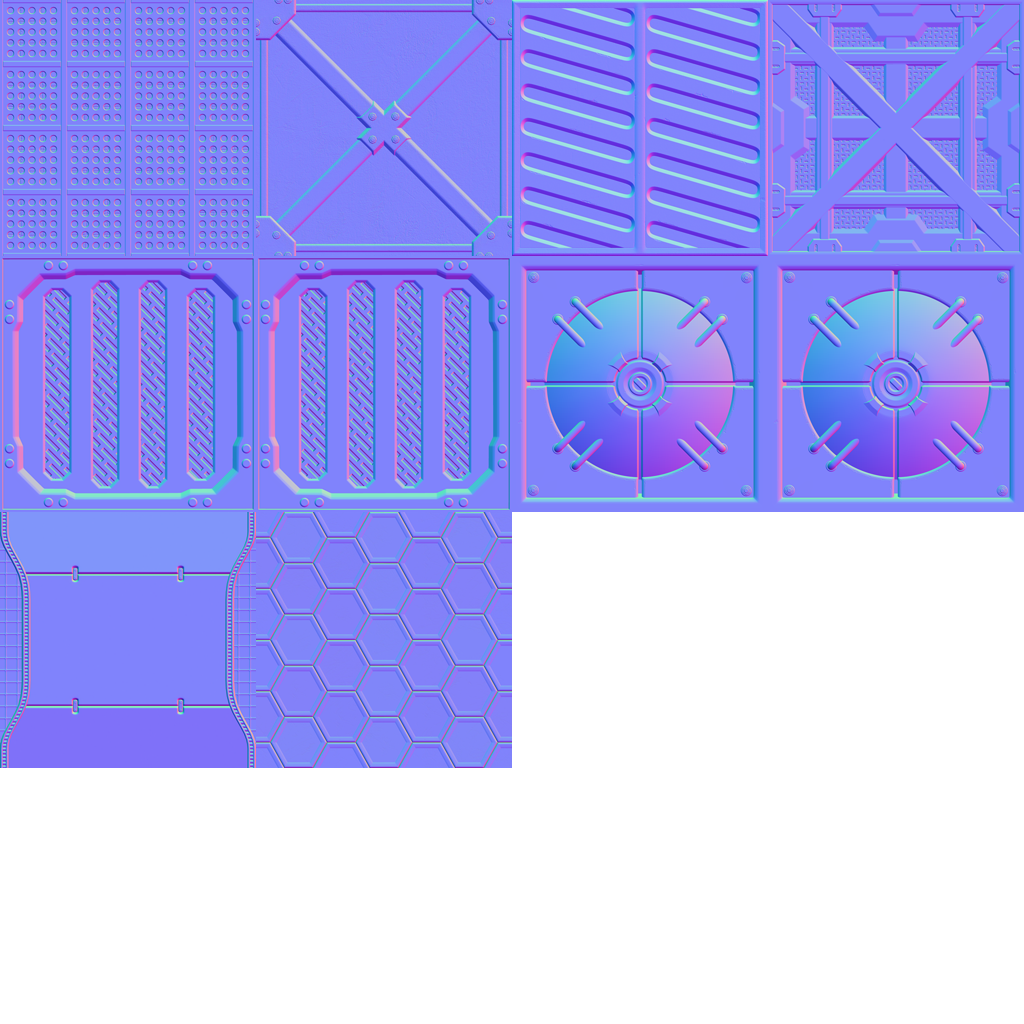
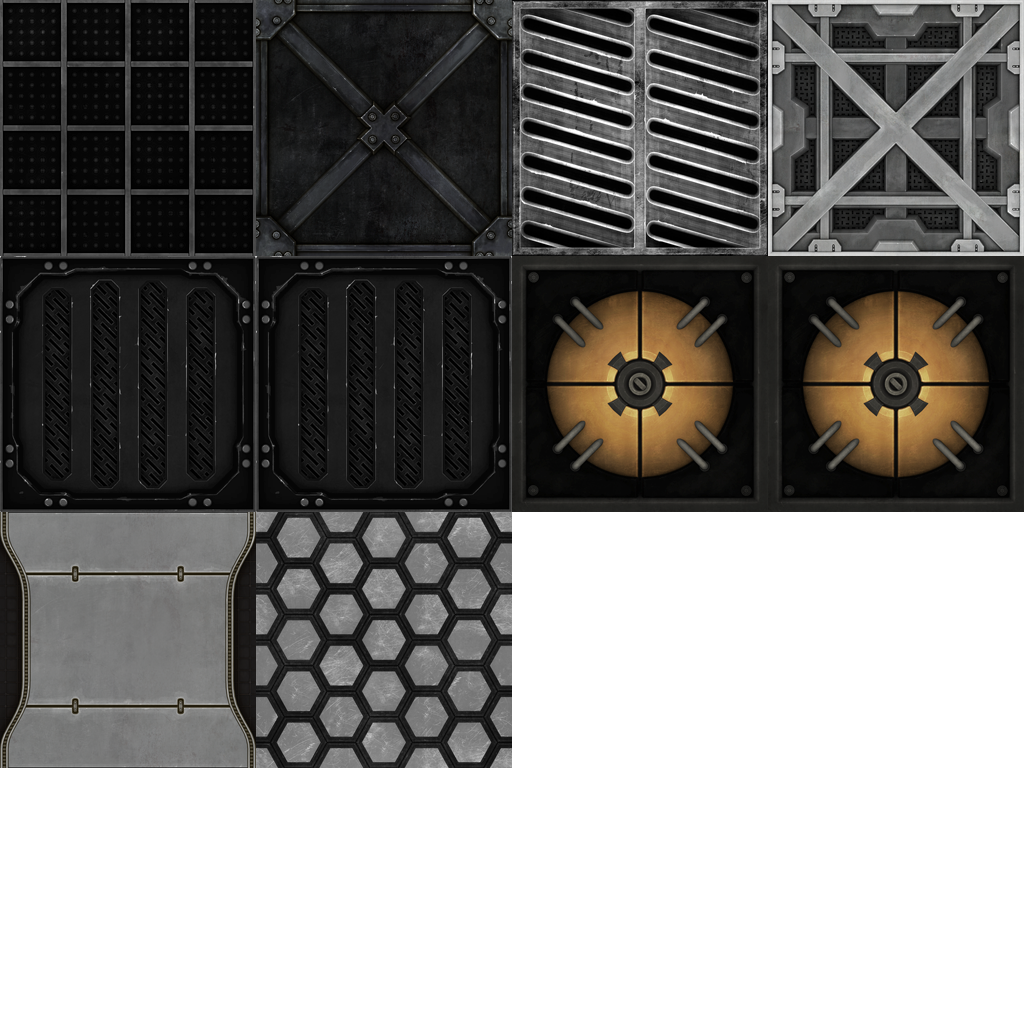
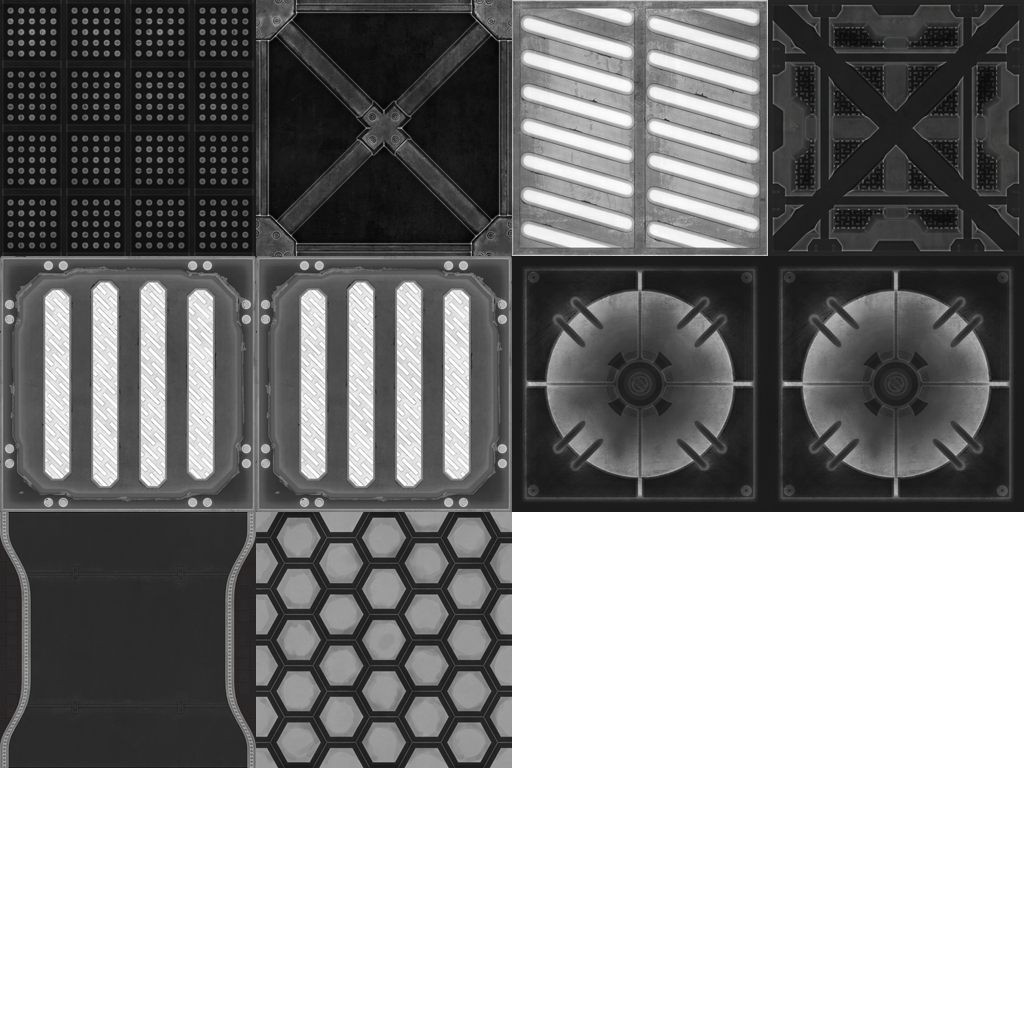
As each block is added to the chunk, the 3d model uv coordinates are set to the appropriate coordinates in the combined texture. We wrote a custom shader to allow us to use the same logic for normal mapping, specular and gloss attributes.

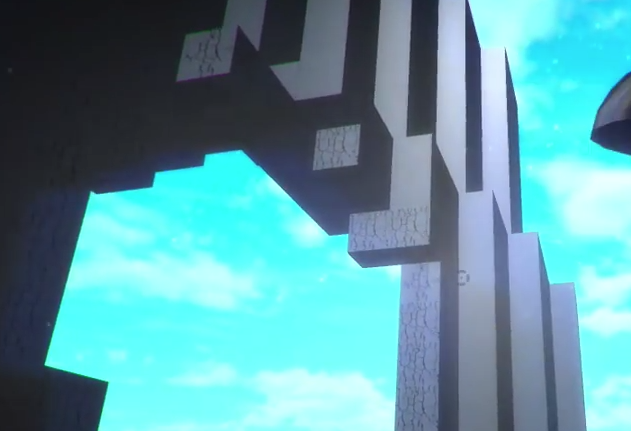
One of the final key aspects that we had to deal with was block damage. Originally we tweaked our custom shader to apply a ‘decal’ texture representing cracks. More cracks meant more damage. It looked sorta like this:
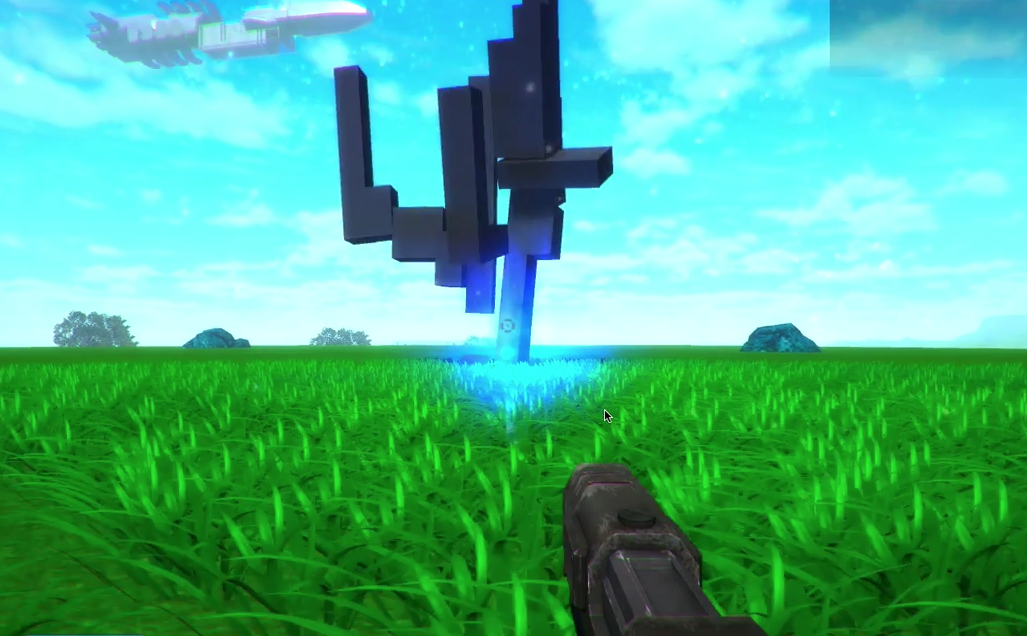
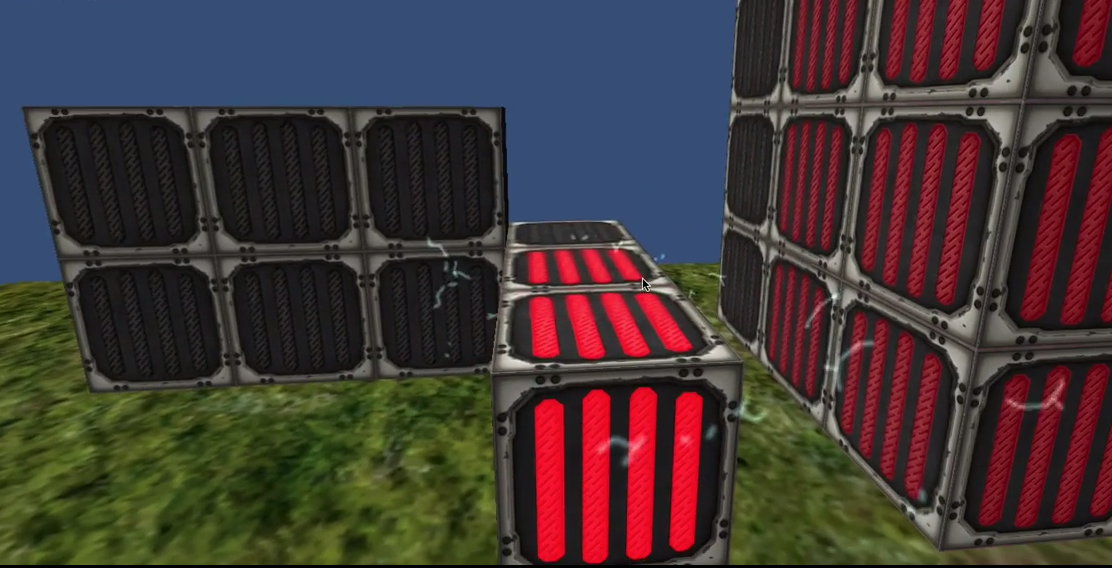
We determined we could do better. We decided that we could combine another aspect of the block construction attributes - that of ‘solidification’. The original idea is that freshly placed blocks wouldn’t be as ‘strong’ as blocks that had ample time to ‘set’. This was originally denoted by a color shift from a blueish color (fresh) that would eventually fade as the blocks solidified. Instead we decided that block ‘strength’ would be denoted by it’s temperature.
When blocks are freshly placed, they are glowing hot red (and very weak). As they cool down, the red color fades and they grow in strength until they reach maturity (currently, about 30 seconds). When blocks take damage, they ‘heat up’ ...building up a red glow - until they burst apart at a threshold temperature.
In order to implement this, we again had to turn to custom shader logic so that we could offload the color change into the shader itself (and not have to manage/update in our main game loop). The shader would handle the shifting of the color from the current temperature as the block cooled. If a block’s temperature was adjusted externally (by damage from a projectile or explosion), the new temperature would be passed to the shader by use of the uv2 coordinates of the chunk mesh and the shader would take over from there - applying an emission effect (again using another atlas texture for emissions)
Technical details were a little trickier - we needed an easein/easeout formula/algorithm to take time as an input and temperature as an output. We also needed to have the same algorithm on our game engine side and on the vertex shader. On the game engine side we needed it to be able to determine what the current temperature was based on last update and when damage is applied. On the shader side, we need to apply emission settings based on current time compared to time when block was at it's highest temperature. So most traditional easein/easeout algorithms (to cool the blocks as per our decision) use conditional (if) statements. Conditionals are a performance bottleneck for shaders. … However, we were lucky enough to run across a Bezier curve formula that doesn't require them:
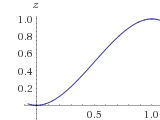
z=(t^2)(3-2t). It produces a nice S curve representing easein/easeout.
With large spherical AOE explosions, it is neat to see the different ‘damage’ (represented by temperature/color)

Stay tuned for part 2 - Collision Damage and Vehicle Rotation!
Interested in learning more about ExtroForge? Visit our website or follow us on Facebook and Twitter.