The following tutorial features the basic workflow that we used for creating and rendering characters for our debut title Elementalist.
Before we dive into this tutorial I would like to point out that this tutorial is not about the design of the character but instead focuses more on the rendering of character art in Photoshop. The entire image was made in Photoshop CS4 but almost any Photoshop version will work as I only use the basic round brush. I am also by no means an expert when it comes to art. I still have a ton of stuff to learn but I believe we can all learn stuff from each other.
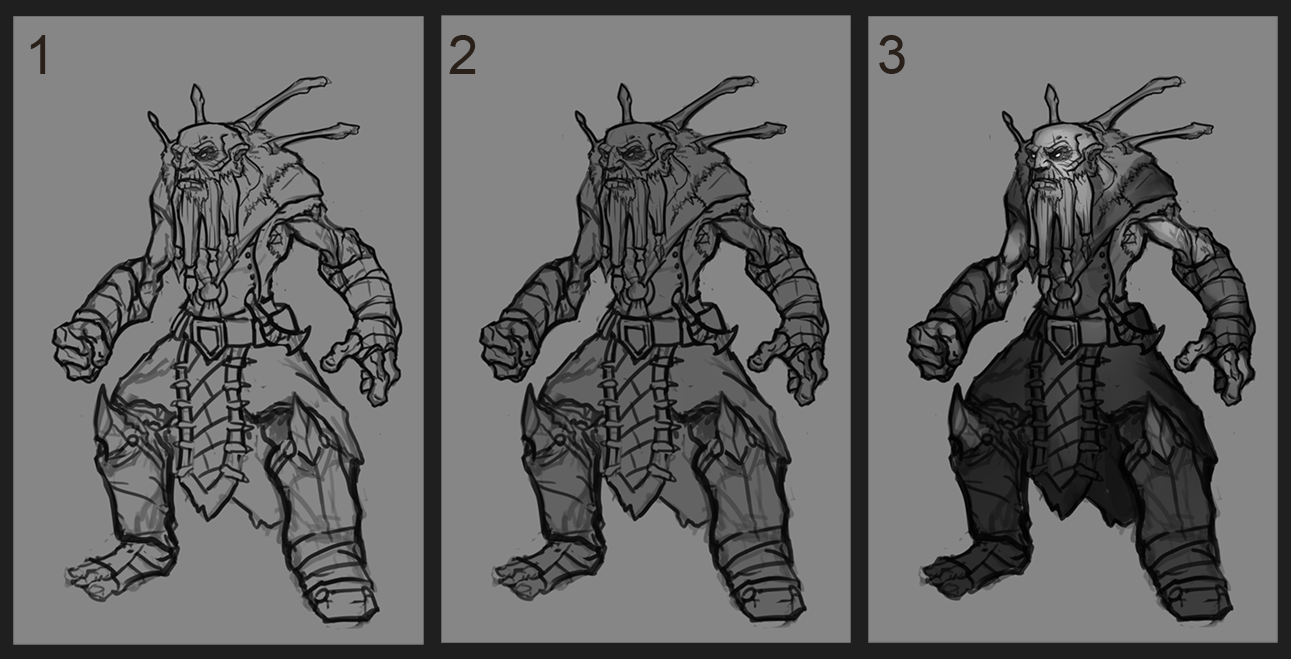
1: I start out with a very loose sketch (on a separate layer). Only the gesture of the character basically. After that I turn down the opacity to about 30% and create another layer on top where I sketch out some of the details of the character.
2: Now I merge the two sketch layers and create another layer beneath it. This will be my fill layer where I mask out the character. This will serve later on as a clipping mask. I use a regular grey for this as this tutorial is also about turning a value painting to color.
3: I slap on some basic values for our dwarf keeping in mind what kind of material everything is and making sure the values are nicely distributed. Use light vs dark area's to make things pop more. The white skin creates a nice contrast with the dark leather wraps for instance.
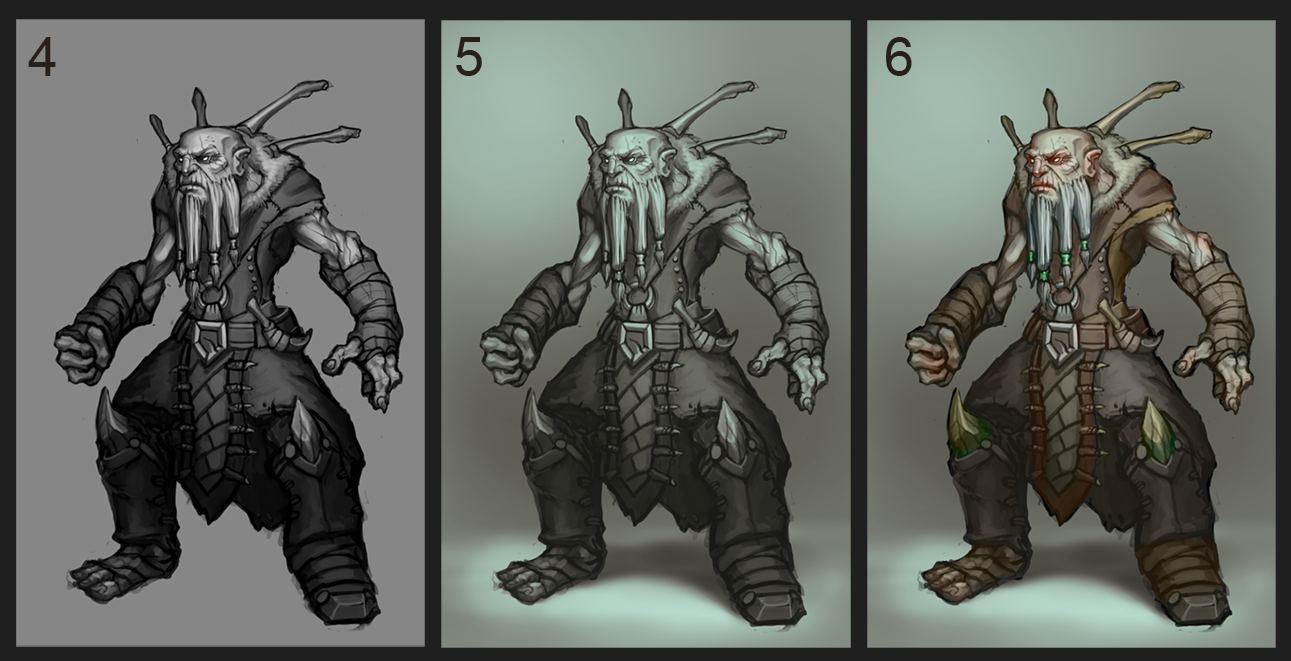
4: Now comes a scary part. Merge down all your layers (except the background layer) because we are now going to paint on top of our line work and getting rid of our sketch. We also up the contrast on certain area's and make sure all of our values are correct. Note the gradation from dark to light going from bottom to top of the character. This leads the eyes to the head of the character.
5: I created a little background so that our dwarf doesn't look like he is floating. The colors you see now come from a gradient map which I added as an adjustment layer on top of our value painting. This serves as a nice start when you begin with colors. Protip: you can clip adjustment layers on the layer beneath using alt+ctrl+g. I clip the gradient map to our value painting so only my character gets colored.
6: I now add another layer on top this adjustment layer and clip it again. This will be my color layer. Set the blending mode of this layer to color and start slapping colors on there. If your value's are sort of correct it will work as another really nice basis. But do not rely on this method for final coloring. Your colors easily get washed out using only a color layer. Therefore we are going to do another scary thing!
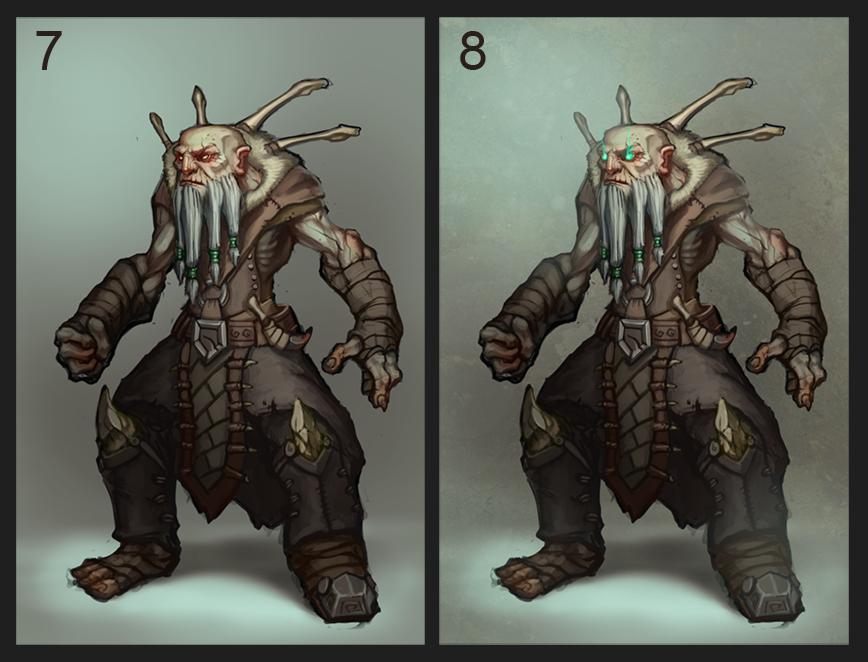
7: Yes that's right lets merge it all down again (once again, except for the background). I now start painting out the details in full color. Making sure my colors don't feel washed out and keeping the look and feel we had with the sketch as much as possible.
8: For our game we didn't really need character backgrounds but I created them nonetheless as you never now what kind of promotional art you will need when you start marketing your game. So here I added final details and adjusted the colors here and there using the color balance (ctrl+b). I also added some little fog. But yeah, that's about it. This guy is now ready to be put in our 2d game!
Keep in mind that drawing well simply comes down to practice. If you practice every day for a few years you will become very good at it. Hopefully you liked this sneak peak in our virtual kitchen and if you have any questions or want more details you can always mail us.


Great tutorial and cool artpiece there! I always struggle with bringing color to my concepts, because I often feel like the value painting gives me enough information, so I stop there. But how much nicer does it look in color; it adds a new dimension to the drawing!
In (6), when you chose the gradient, do you go with the most important color first (which is probably the skin, since all focus goes to the head and bright areas), or do you use the predominant material color (which is probably brown, because most of the dwarf is earth-color?
I can't really tell what you did first there, but I remember using the gradient method myself with some earlier concepts. I just forgot how to do it properly, because I do too much black and white.
Hey thanks man. When I pick colors for my gradient map I usually pick colors that I feel fit the mood of the character. For instance with this dwarf I went with very eerie colors, cyan and dark green. Almost sick looking. I use this as a base for all the colors that I use on top of it.
In the end it depends on what you personal preference is. Sometimes I use the gradient map but not every time. Sometimes I also skip the whole value painting and start directly in color hehe.
Awesome write up, thank you for sharing that! :) You should do a little tutorial video for each step, that would be exceptional.